
01Who this is for
- Marketing managers who oversee several brand pages can group them to avoid repetitive account selection.
- Small business owners handling both Facebook and Instagram profiles can keep those accounts together for faster posting.
- Agencies managing client accounts across platforms can organize each client’s profiles into separate groups.
02Social Groups, explained
Social Groups are a feature inside the Social Planner that aggregates linked social accounts into a single selectable item. When you create a post, the group appears in the account selector, allowing you to publish the same content to every account in that group with one click. Groups are listed under the account dropdown and can be edited or removed at any time.
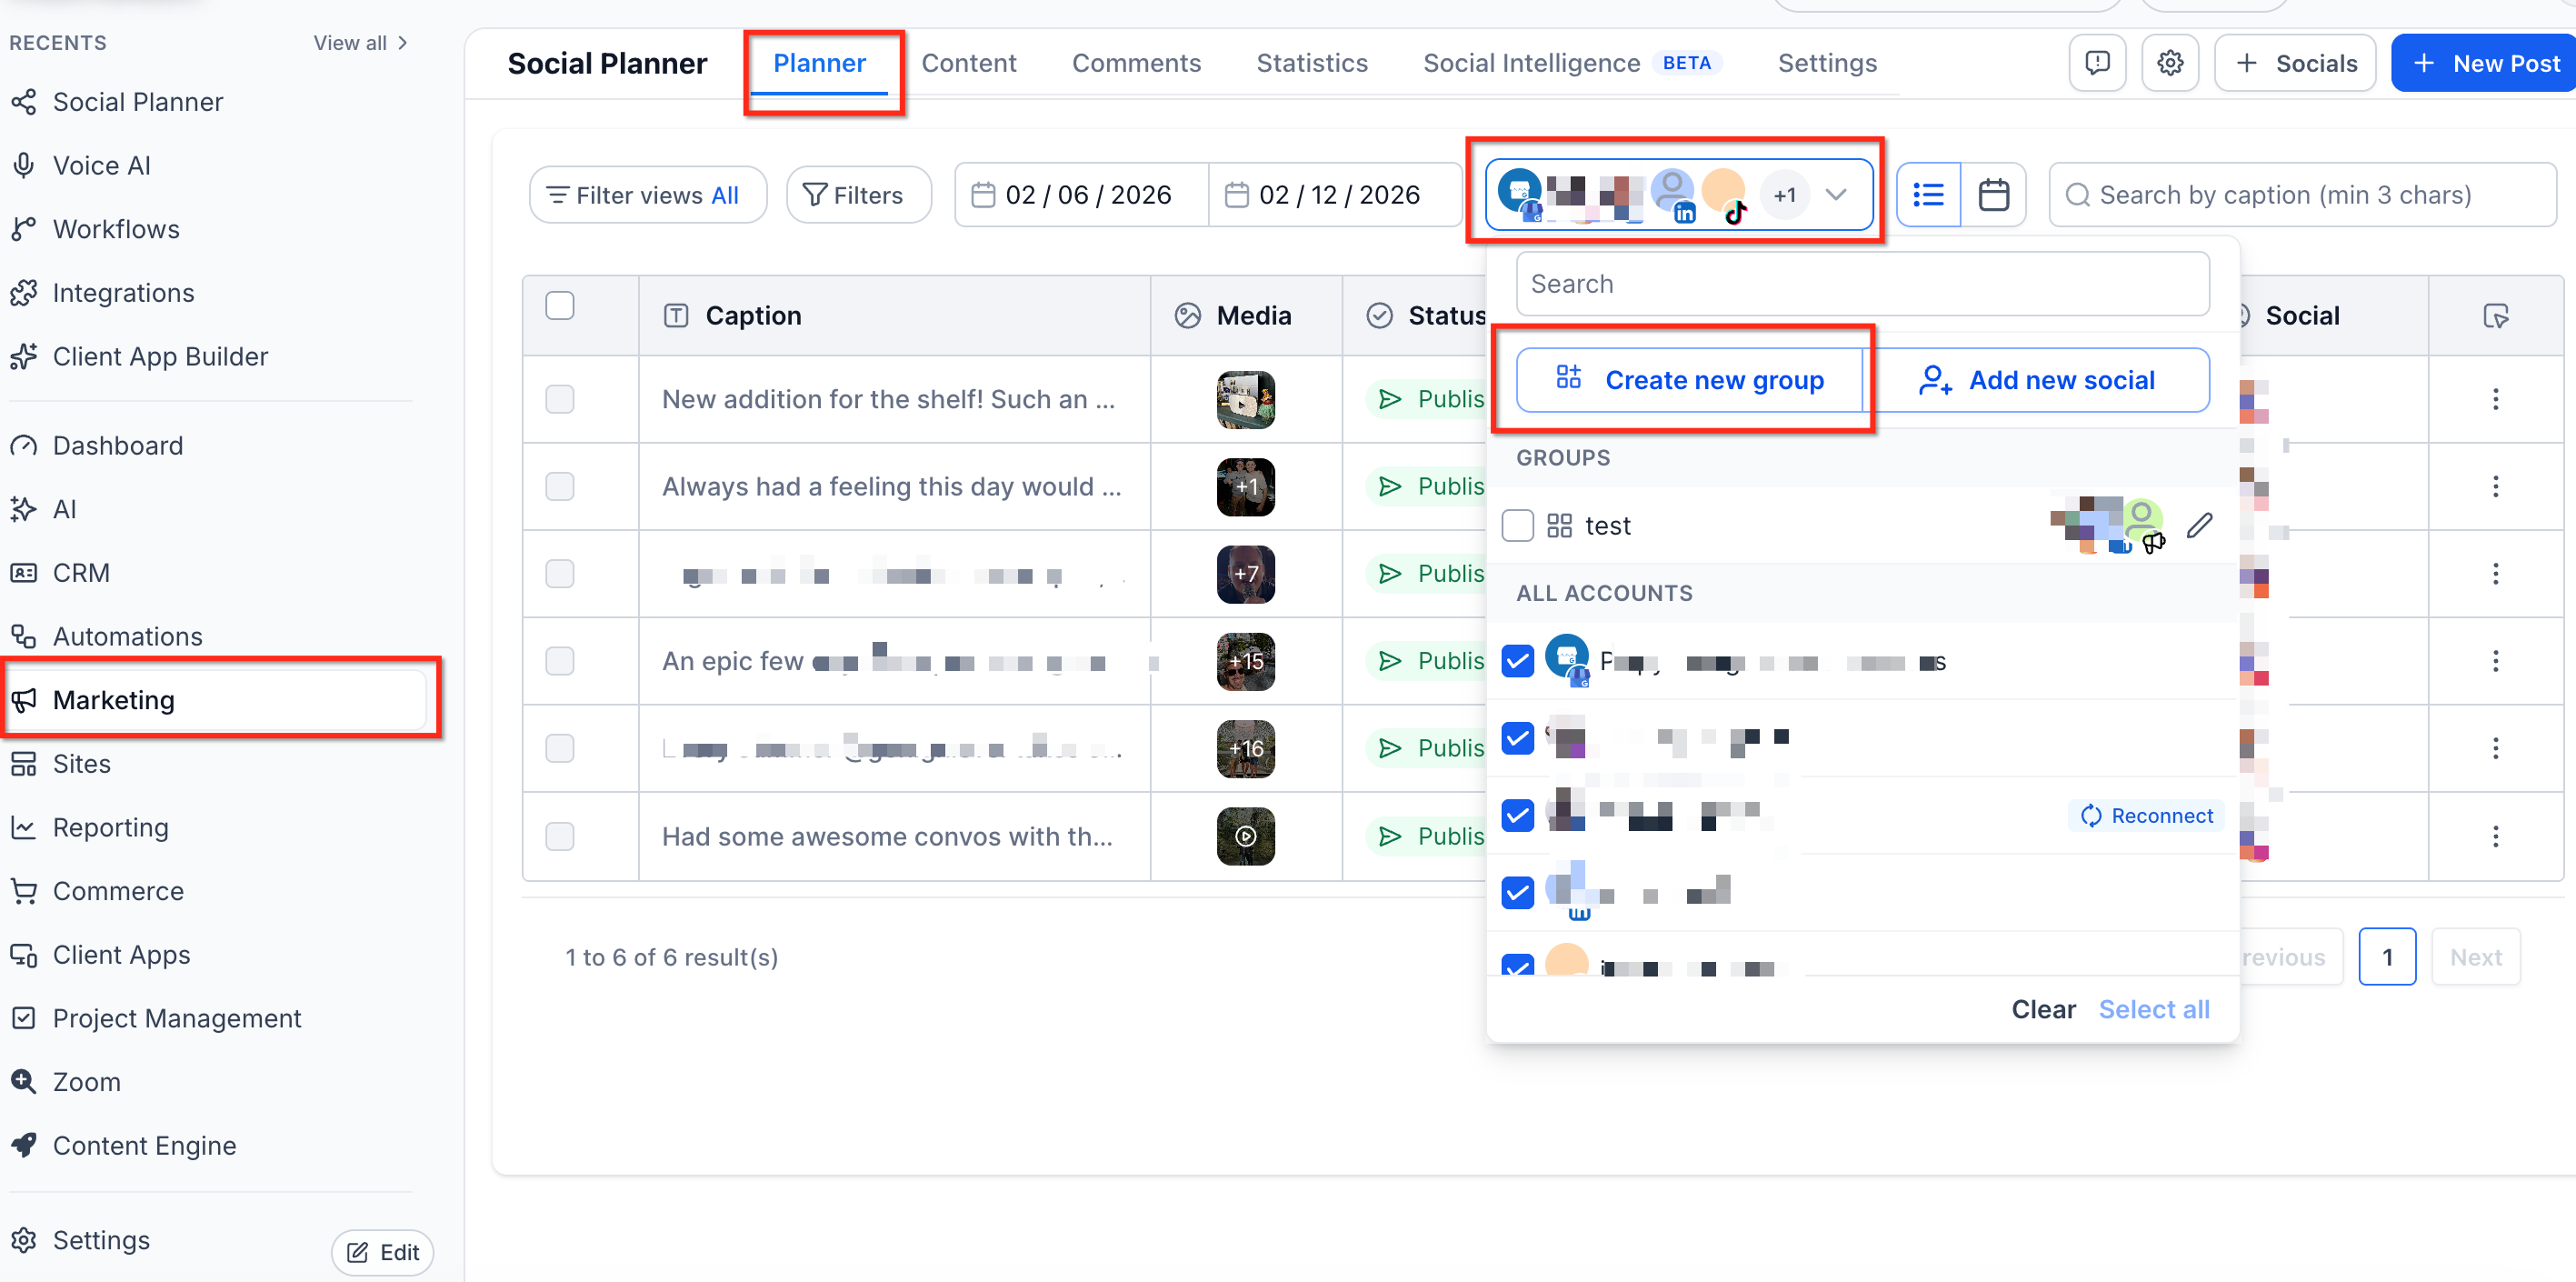
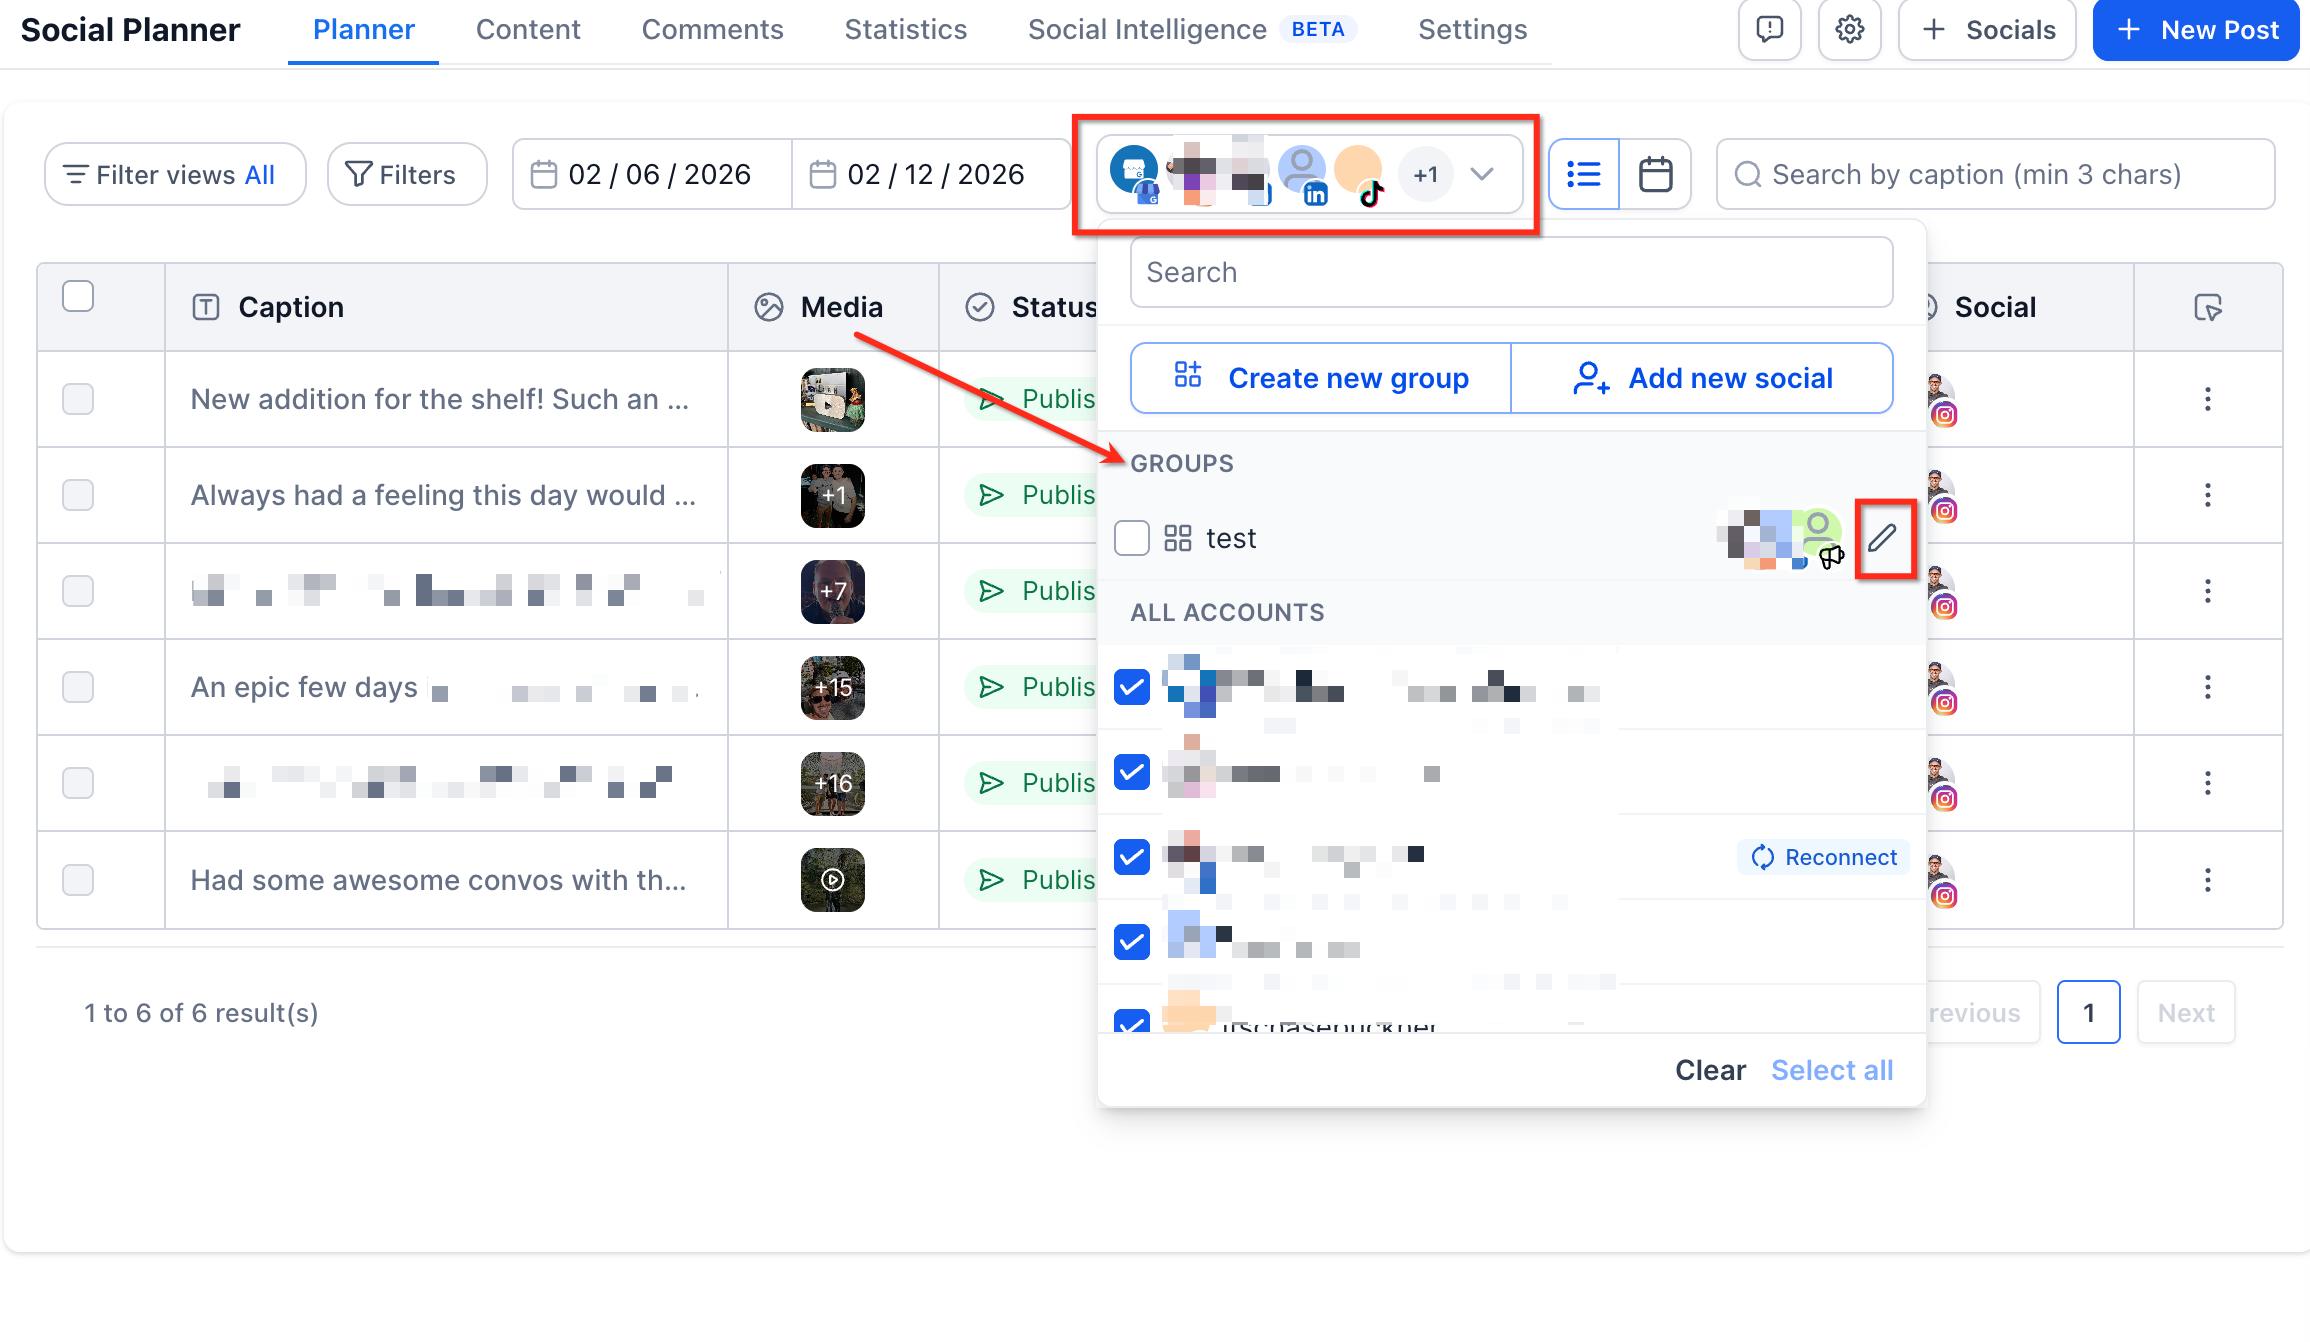
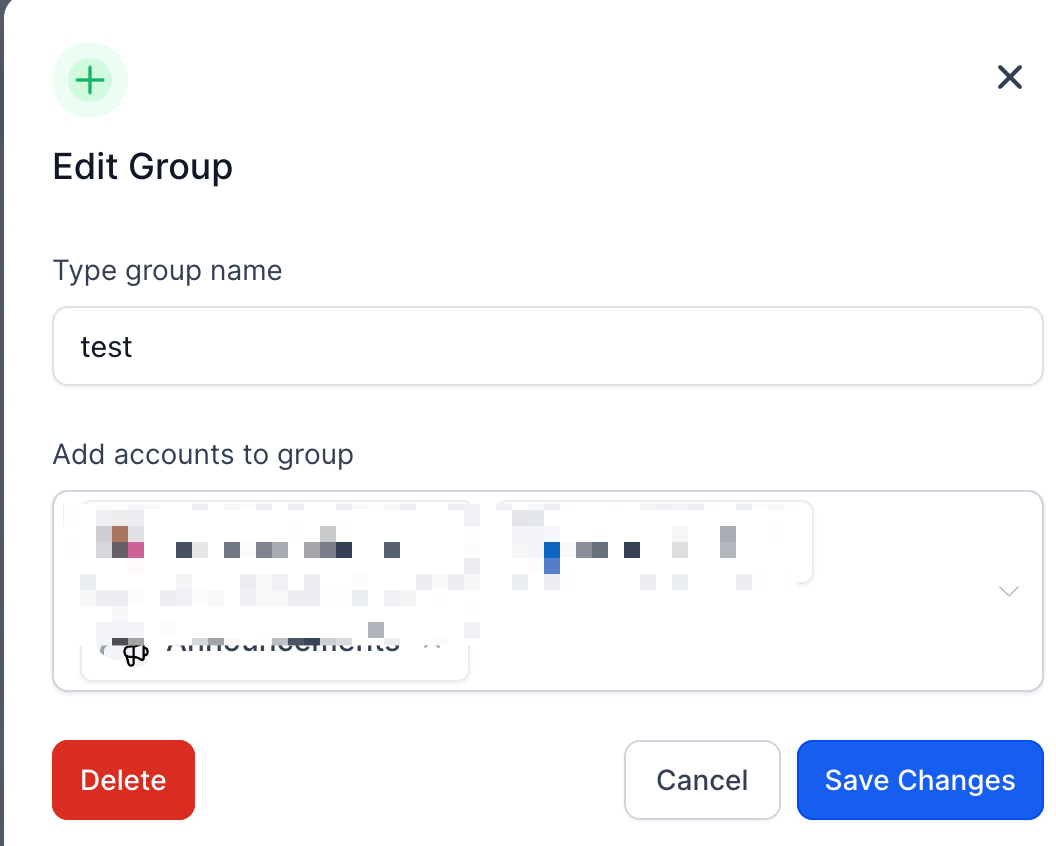
The feature lives under the Marketing section. From the Planner view you can open the social account dropdown, create new groups, and later choose a group while composing a new post. Editing a group is done by opening the same dropdown, clicking the pencil icon next to the group, and adjusting its name or member accounts.
03How businesses use Social Groups
- Digital marketing agency. The agency creates a group for each client that contains all of the client’s Facebook and Instagram pages. When scheduling a campaign, they select the client’s group in the post editor, which adds every client profile automatically.
- Retail store with multiple locations. The store builds a group that combines all location specific Facebook pages. The manager then drafts a promotional post and picks the group, ensuring the offer appears on every store’s page right away.
- Event organizer. The organizer forms a group with the event's Facebook page, Instagram account, and LinkedIn business page. While creating an announcement, they select the group to push the same message across all channels.
04Before you start
- Social media accounts must be connected to the HighLevel Social Planner before creating a group.
05How to set up and use Social Groups in HighLevel
Create a social group
- Open Marketing > Social Planner > Planner.
- Open the social account dropdown and choose Create new group.
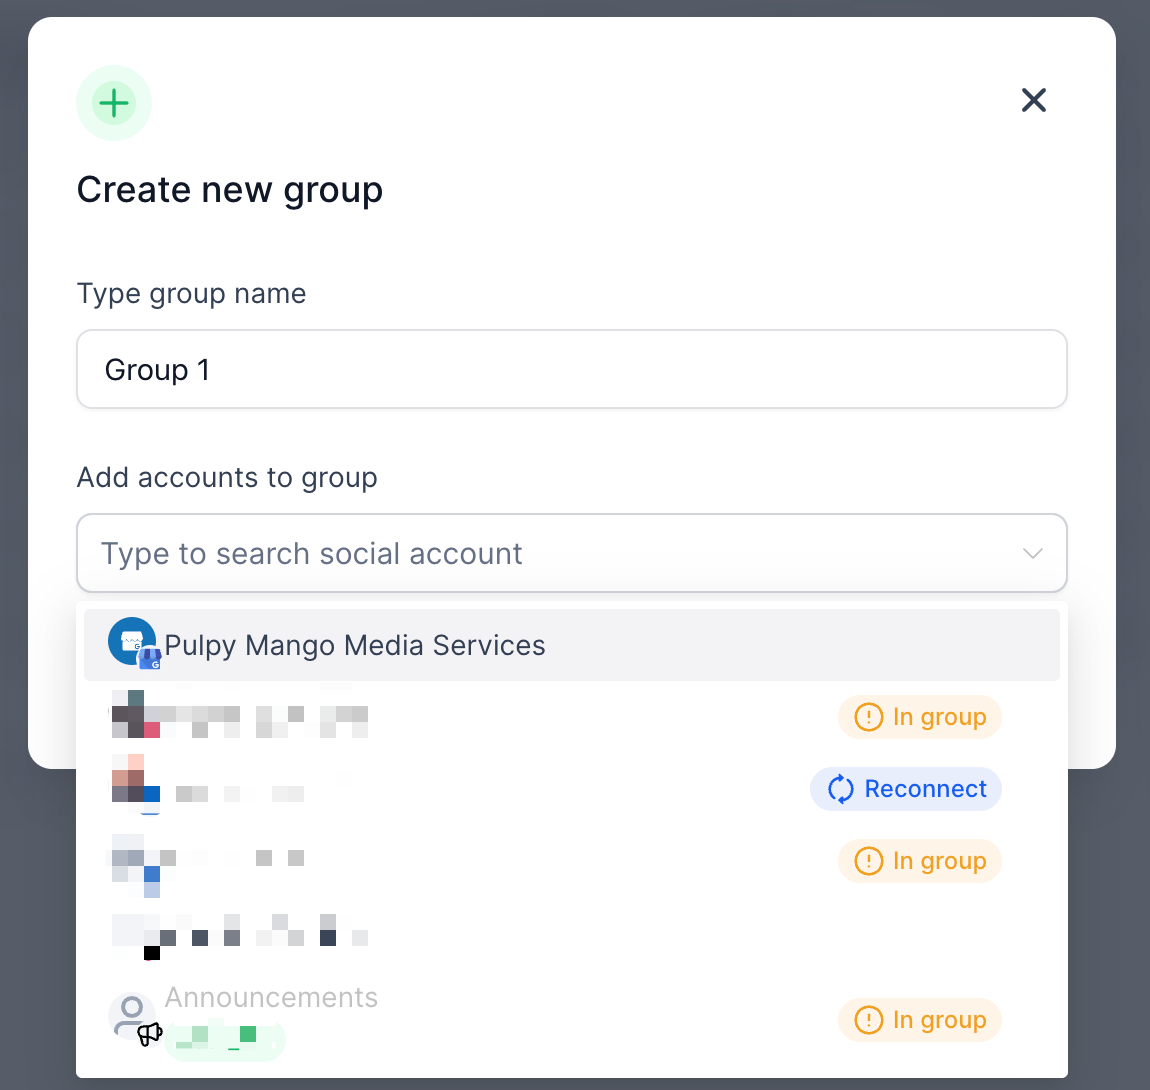
- Type a name for the group in the provided field.
- Select the social profiles you want to add under Add accounts to group.
- Press Create to store the new group.
Use a social group when creating a post
- Navigate to Marketing > Social Planner.
- Click + New Post and then Create New Post.
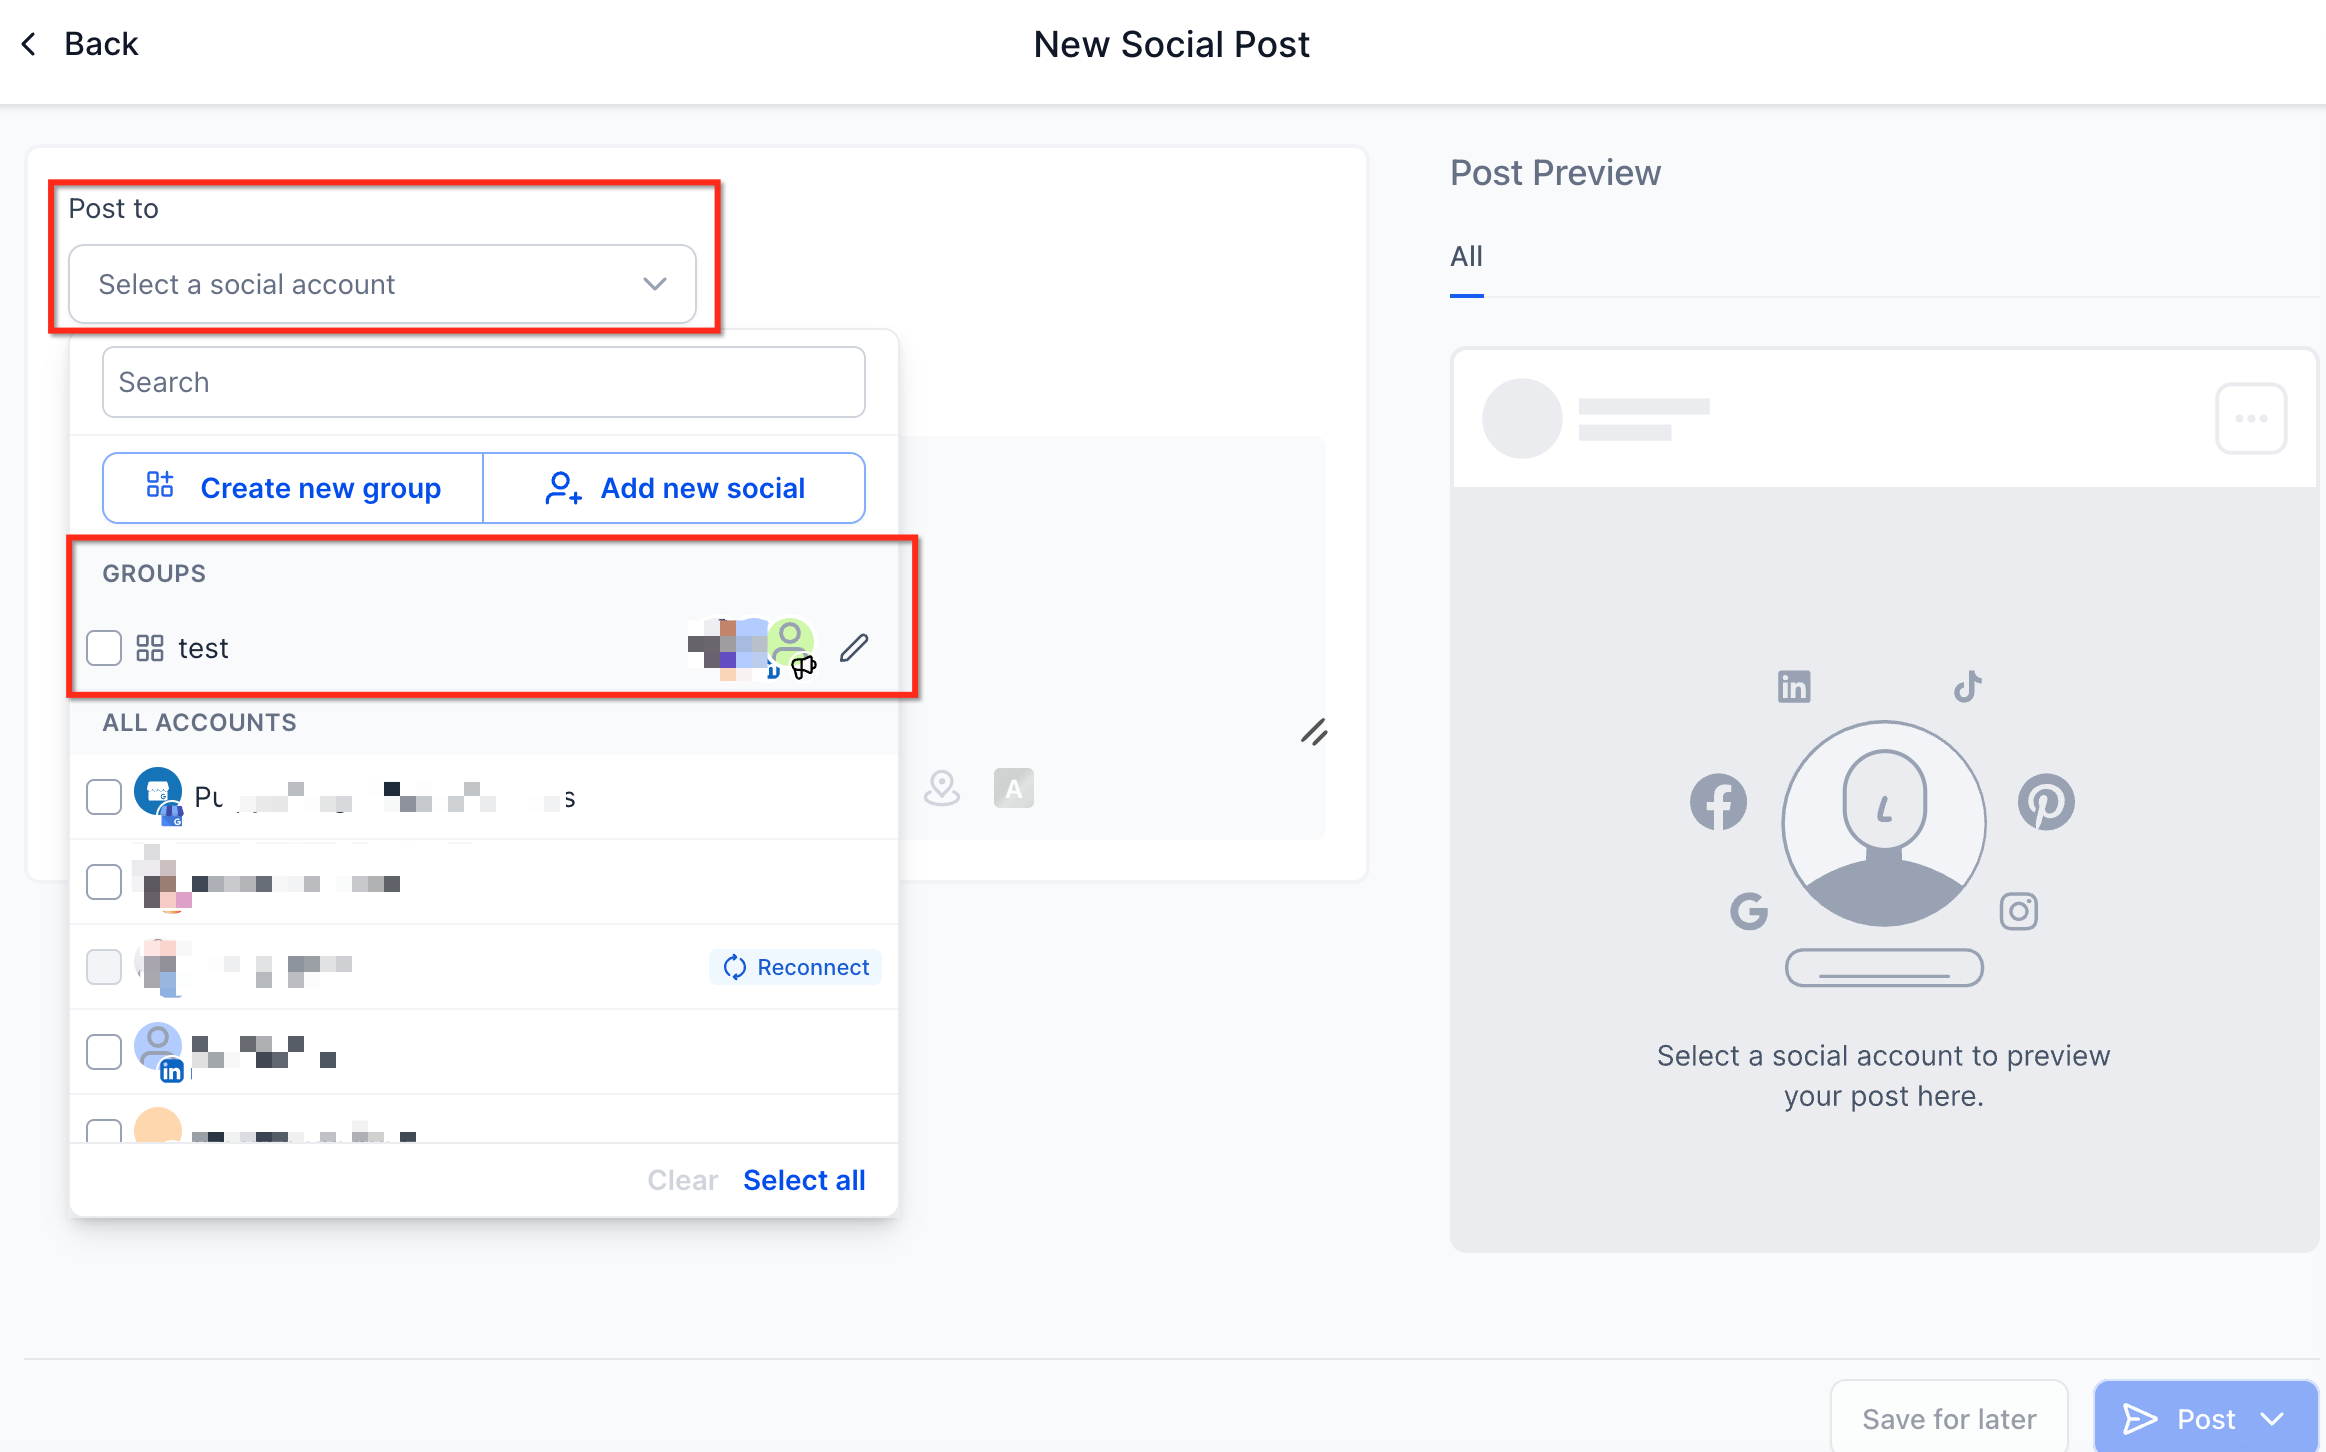
- Open the Select a social account dropdown under Post to.
- Find Groups and check the box next to the desired group.
- Enter the post content and choose to publish or schedule.
Edit or delete a social group
- Go to Social Planner > Planner and open the social account dropdown.
- Under Groups, click the pencil icon beside the group you want to change.
- In the Edit Group window, modify the name or adjust the accounts included.
- Click Save Changes to apply edits, or click Delete to remove the group.
06What it looks like in HighLevel
07Things to know before you rely on it
- Groups can only contain accounts that are already connected to Social Planner.
- You may combine profiles from different supported platforms within a single group.
08If something goes wrong
- A social account in the group becomes disconnected.. Reconnect the affected account in Social Planner before attempting to publish.
09How it connects to the rest of HighLevel
- How to connect Facebook pages to Social Planner Connect Facebook
- HighLevel Instagram connection options Connect Instagram
- Link LinkedIn profiles and pages to Social Planner Connect LinkedIn
Michael's take

Squeezing the same set of accounts into a group can feel risky if you forget one of them is no longer active. That slip could halt a campaign or cause a missed post, so double check that each profile stays connected before you count on the group.