
01Who this is for
- Founders of SaaS businesses who need a single place to store branding details and reuse them across emails and landing pages.
- Marketing managers at fitness clubs who want to personalize outreach without re typing member information for each campaign.
02Custom Values, explained
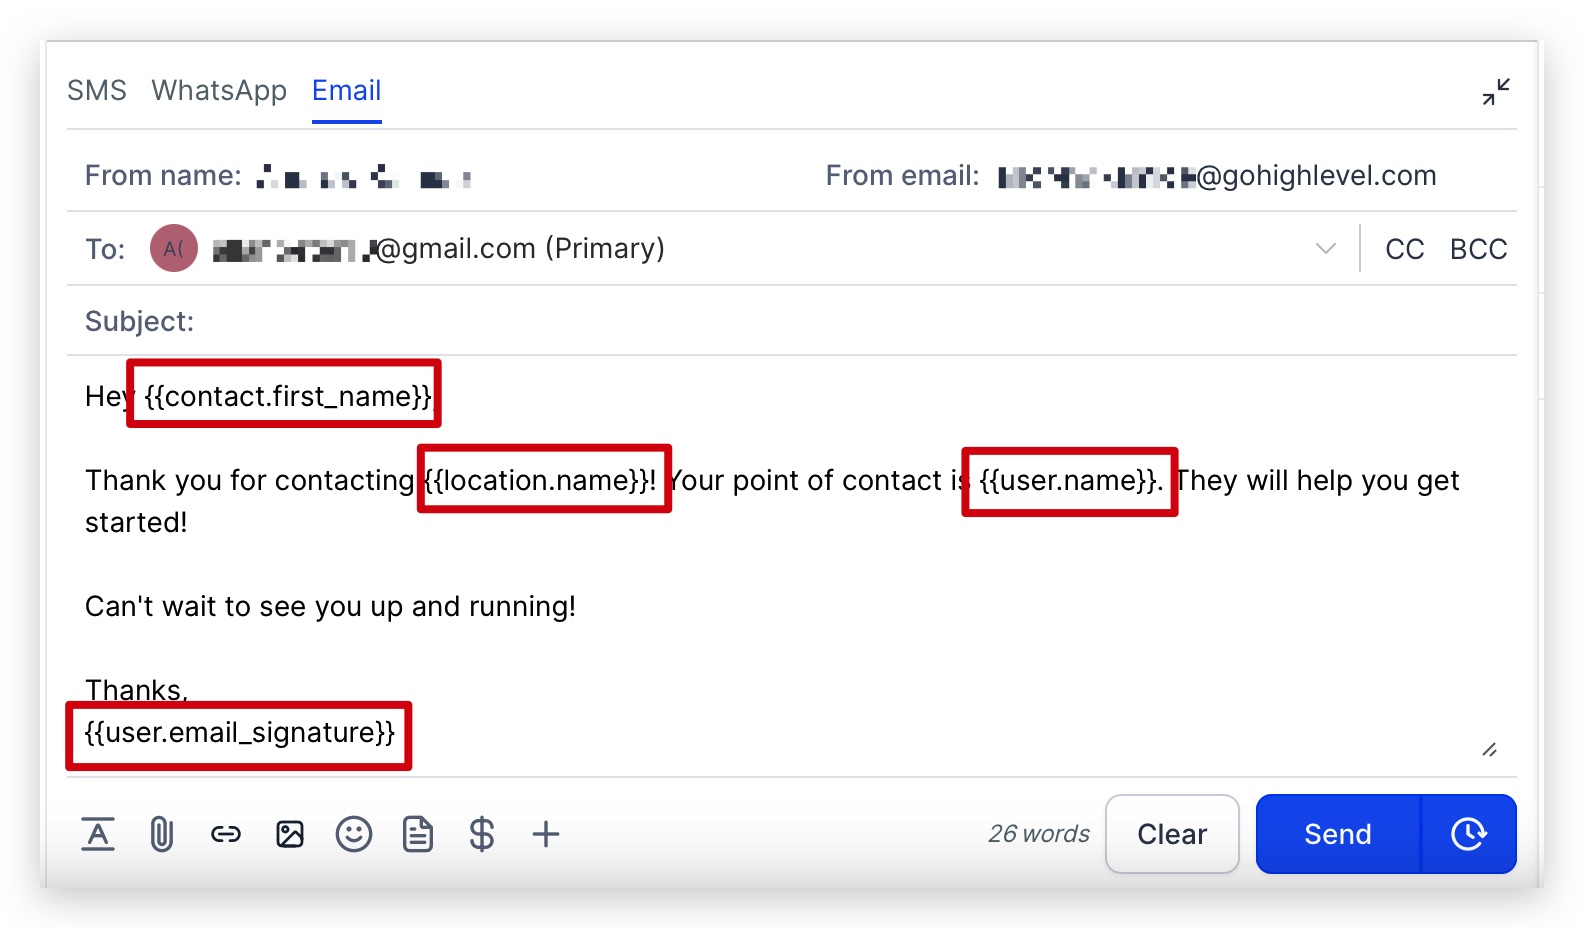
Custom values let you store a piece of information once and reference it anywhere in the platform. The stored data can be a contact attribute, a static string, a color code or any value you define. When a custom value is inserted into a message or workflow, the platform replaces the placeholder with the current value at send time.
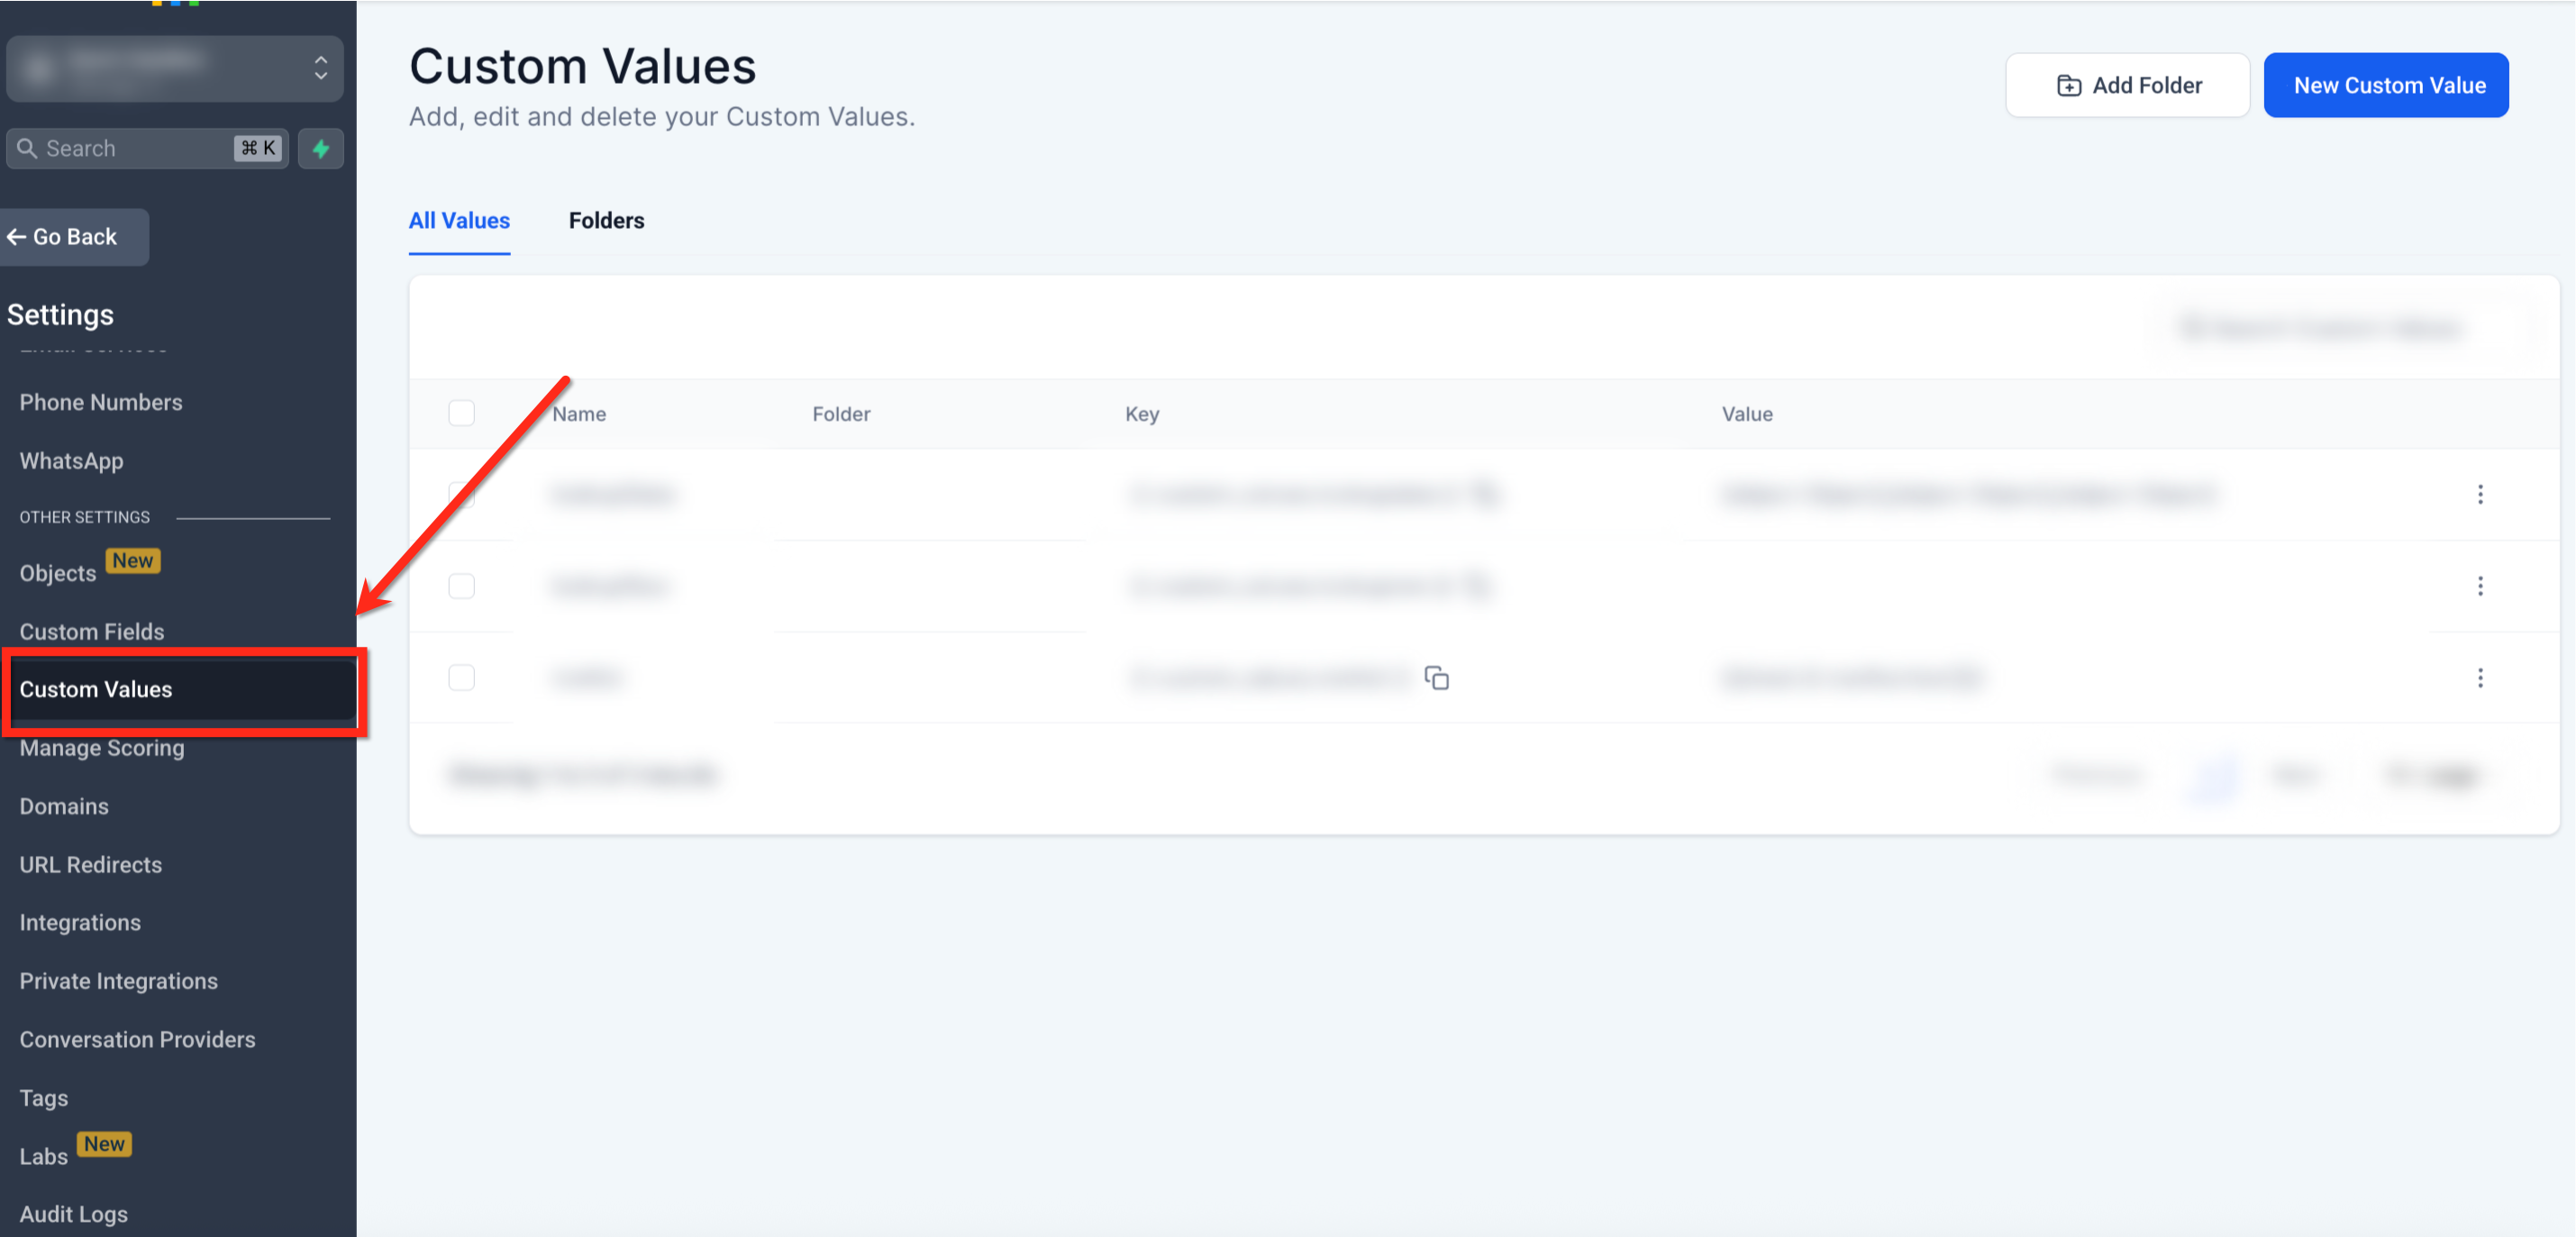
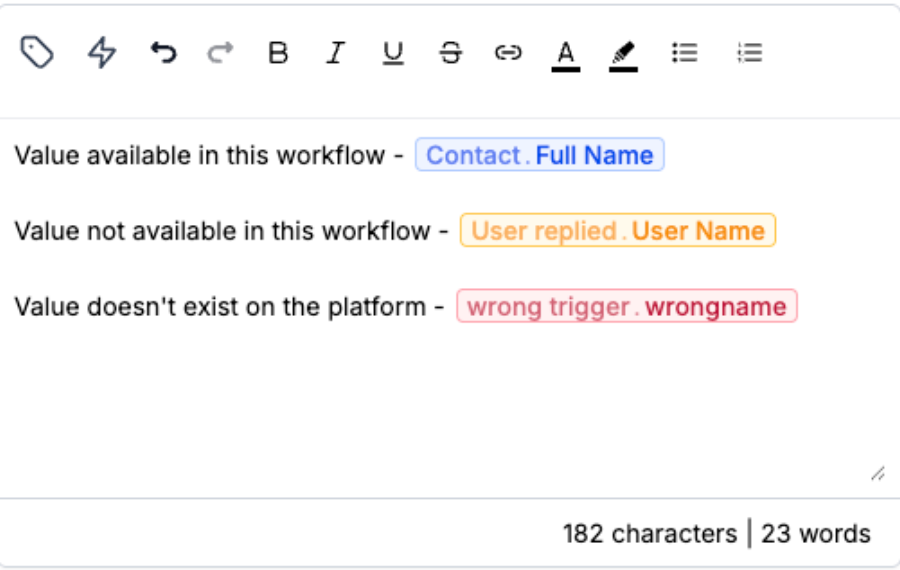
The feature lives in each subaccount under Settings > Custom Values. From there you can add new entries, organize them into folders, and edit or delete existing ones. In workflows, dynamic values appear as colored chips that indicate whether the current workflow supplies the data.
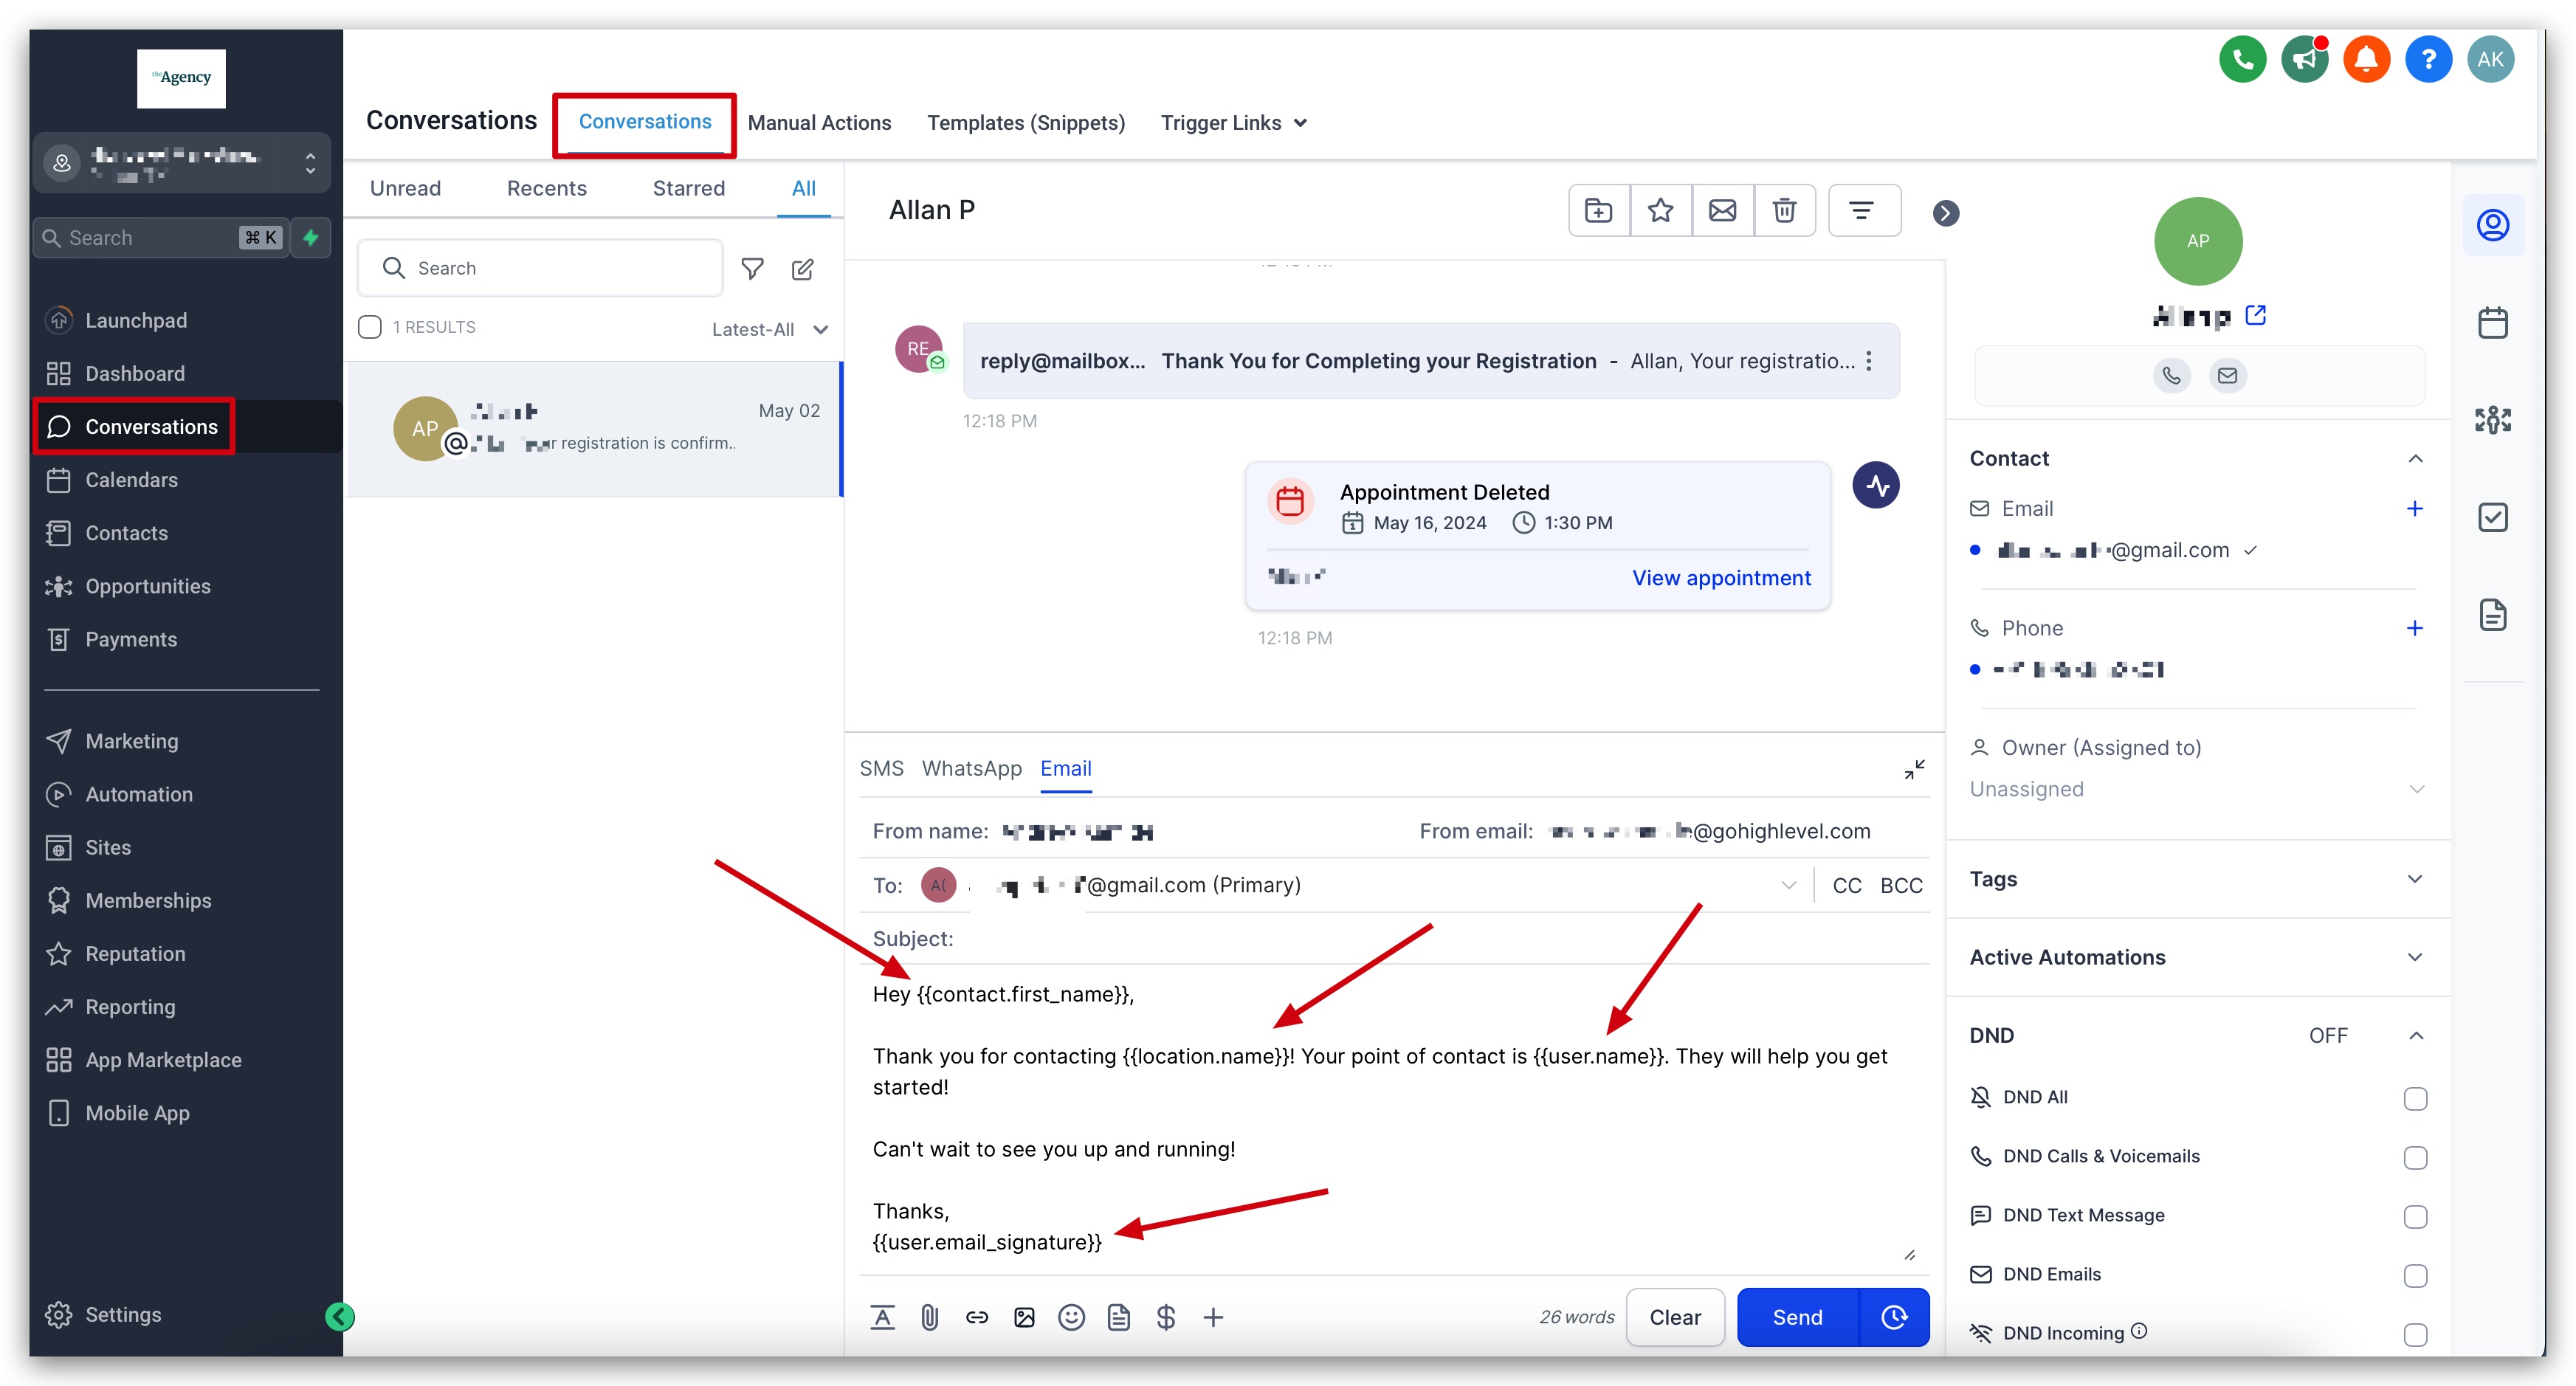
Custom values are available in Conversations, Automations, Websites & Funnels, Email Campaigns, and the Social Planner. They can also be used in URL trigger links and in color inputs for email templates.
03How businesses use Custom Values
- Fitness club. Create a custom value for each member’s preferred workout type. Insert the placeholder into email templates and SMS messages so each communication automatically mentions the correct activity.
- Real estate agency. Define a custom value for the agency’s brand phone number. Add the placeholder to all contact forms and funnel pages so the number updates everywhere when it changes.
- Ecommerce store. Store a discount code as a custom value. Use the token in order confirmation emails and abandoned cart messages to ensure the code is consistent across all messages.
04How to set up and use Custom Values in HighLevel
Create a new custom value
- From the subaccount dashboard click Settings in the left navigation.
- Select Custom Values from the list of settings options.
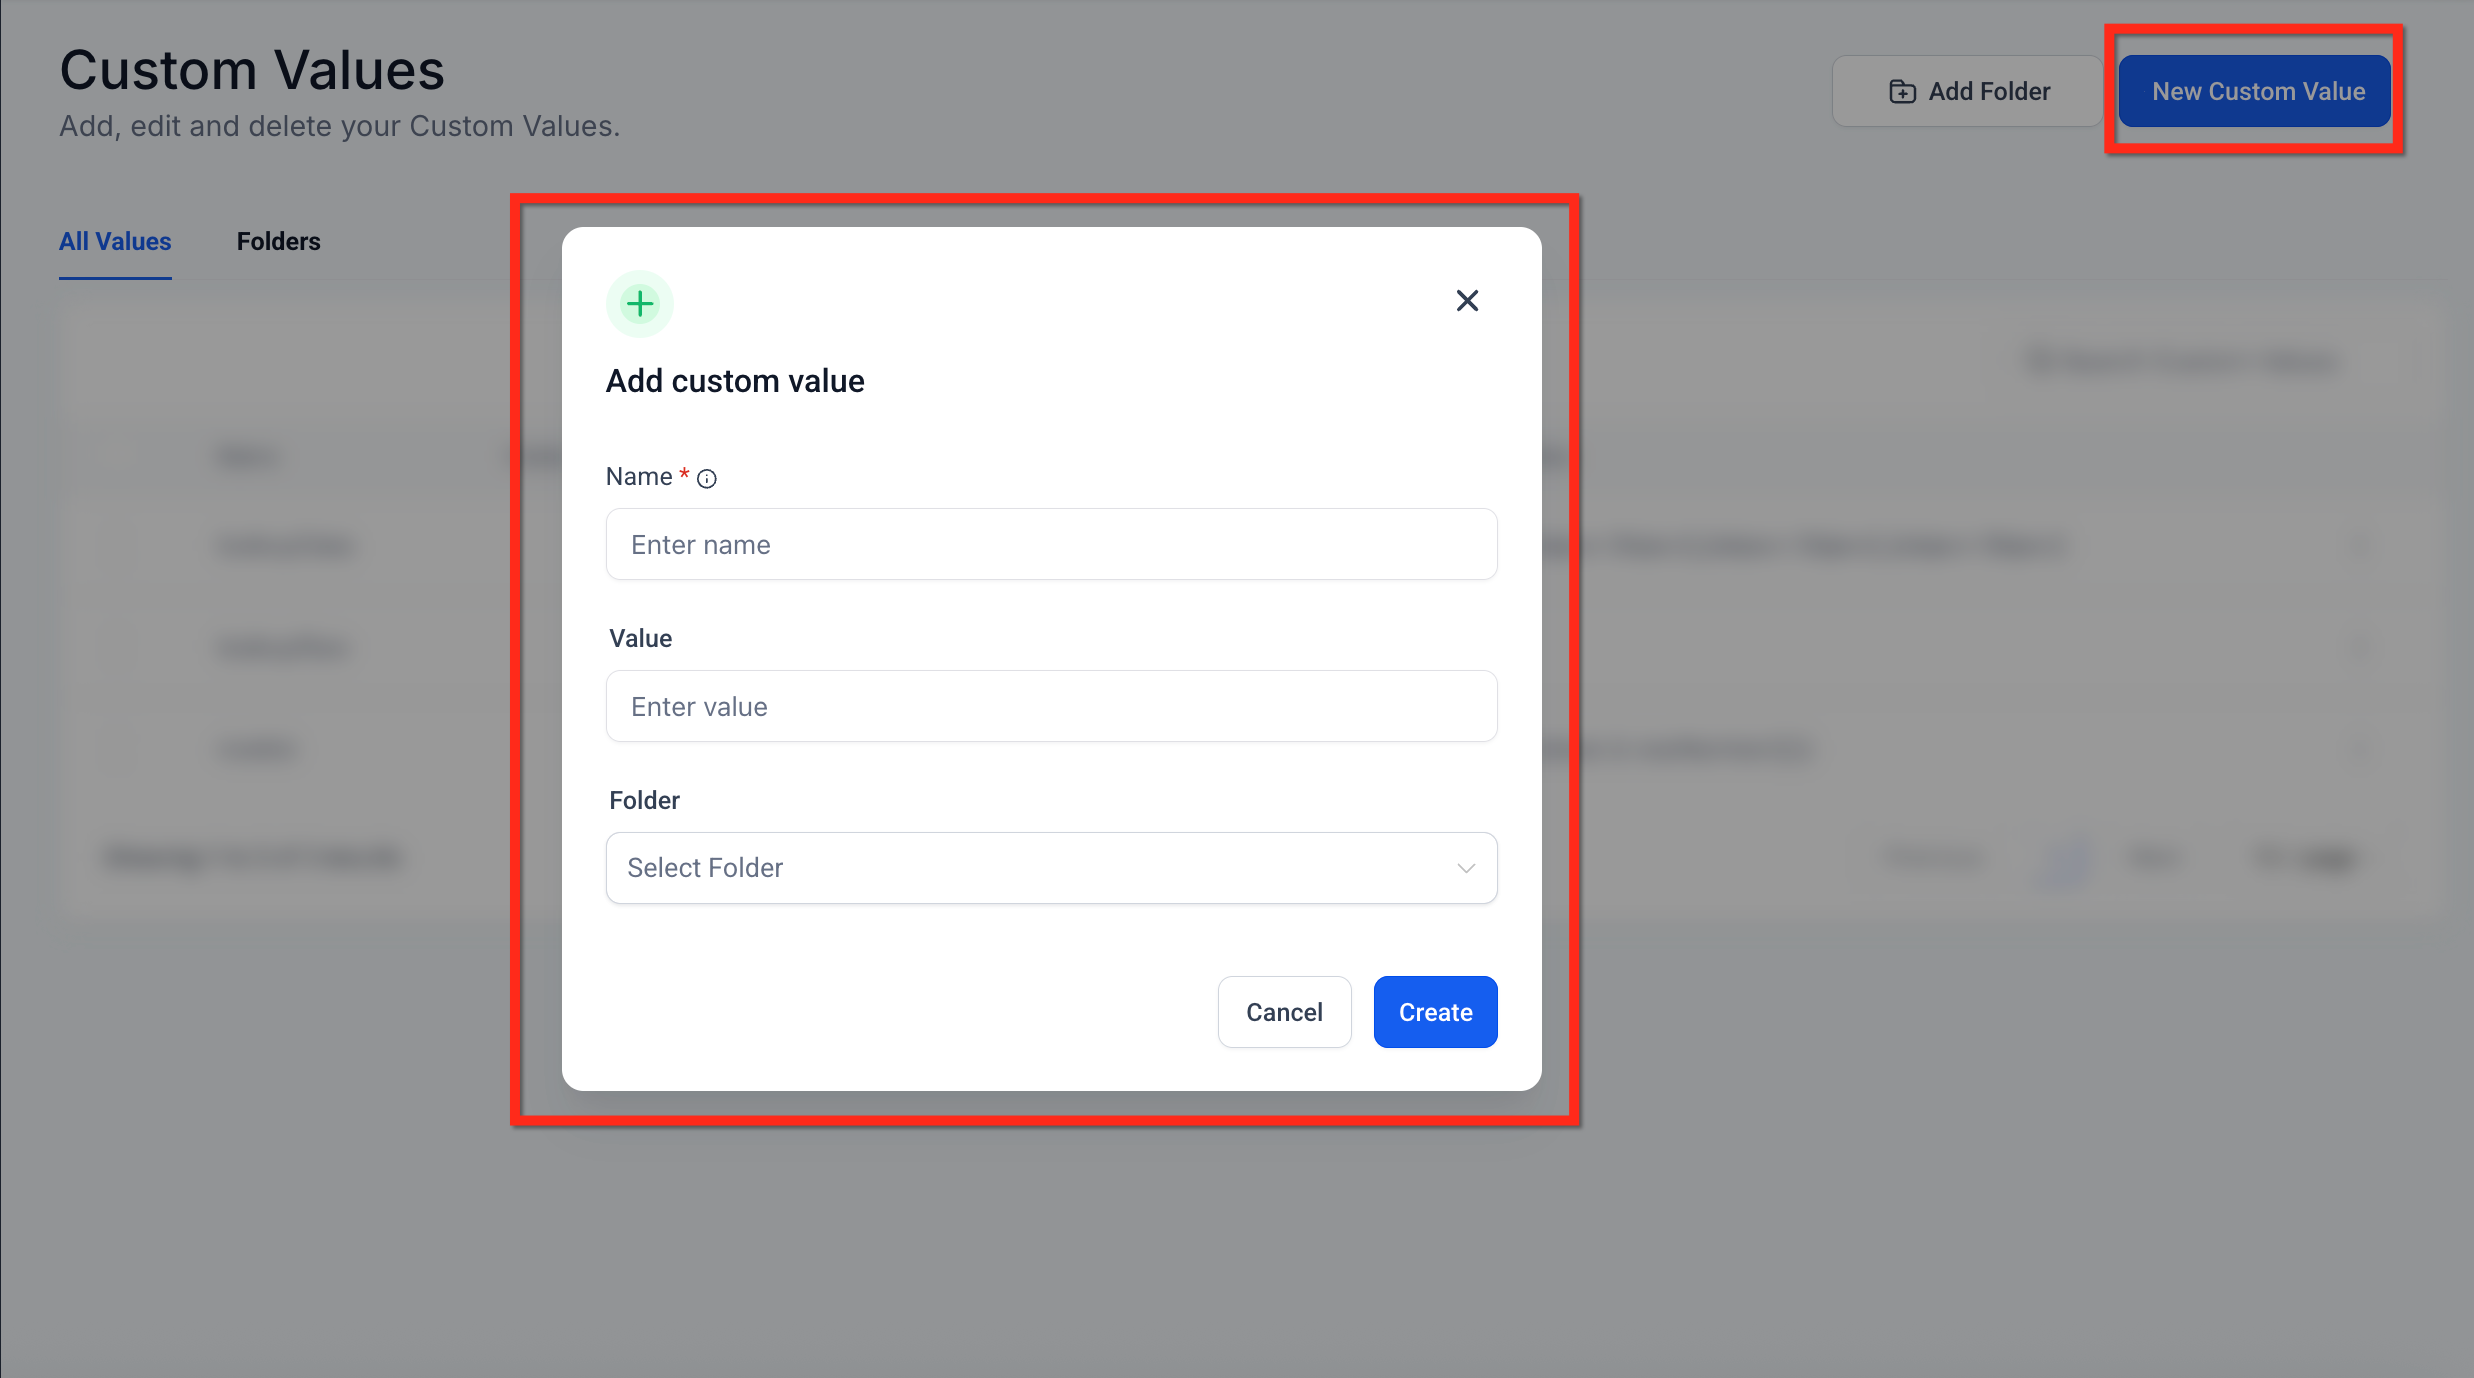
- Click the blue + Add Custom Value button.
- Enter a name, the desired value, choose a folder, and click Save.
Edit or delete a custom value
- Find the custom value you want to change in the list.
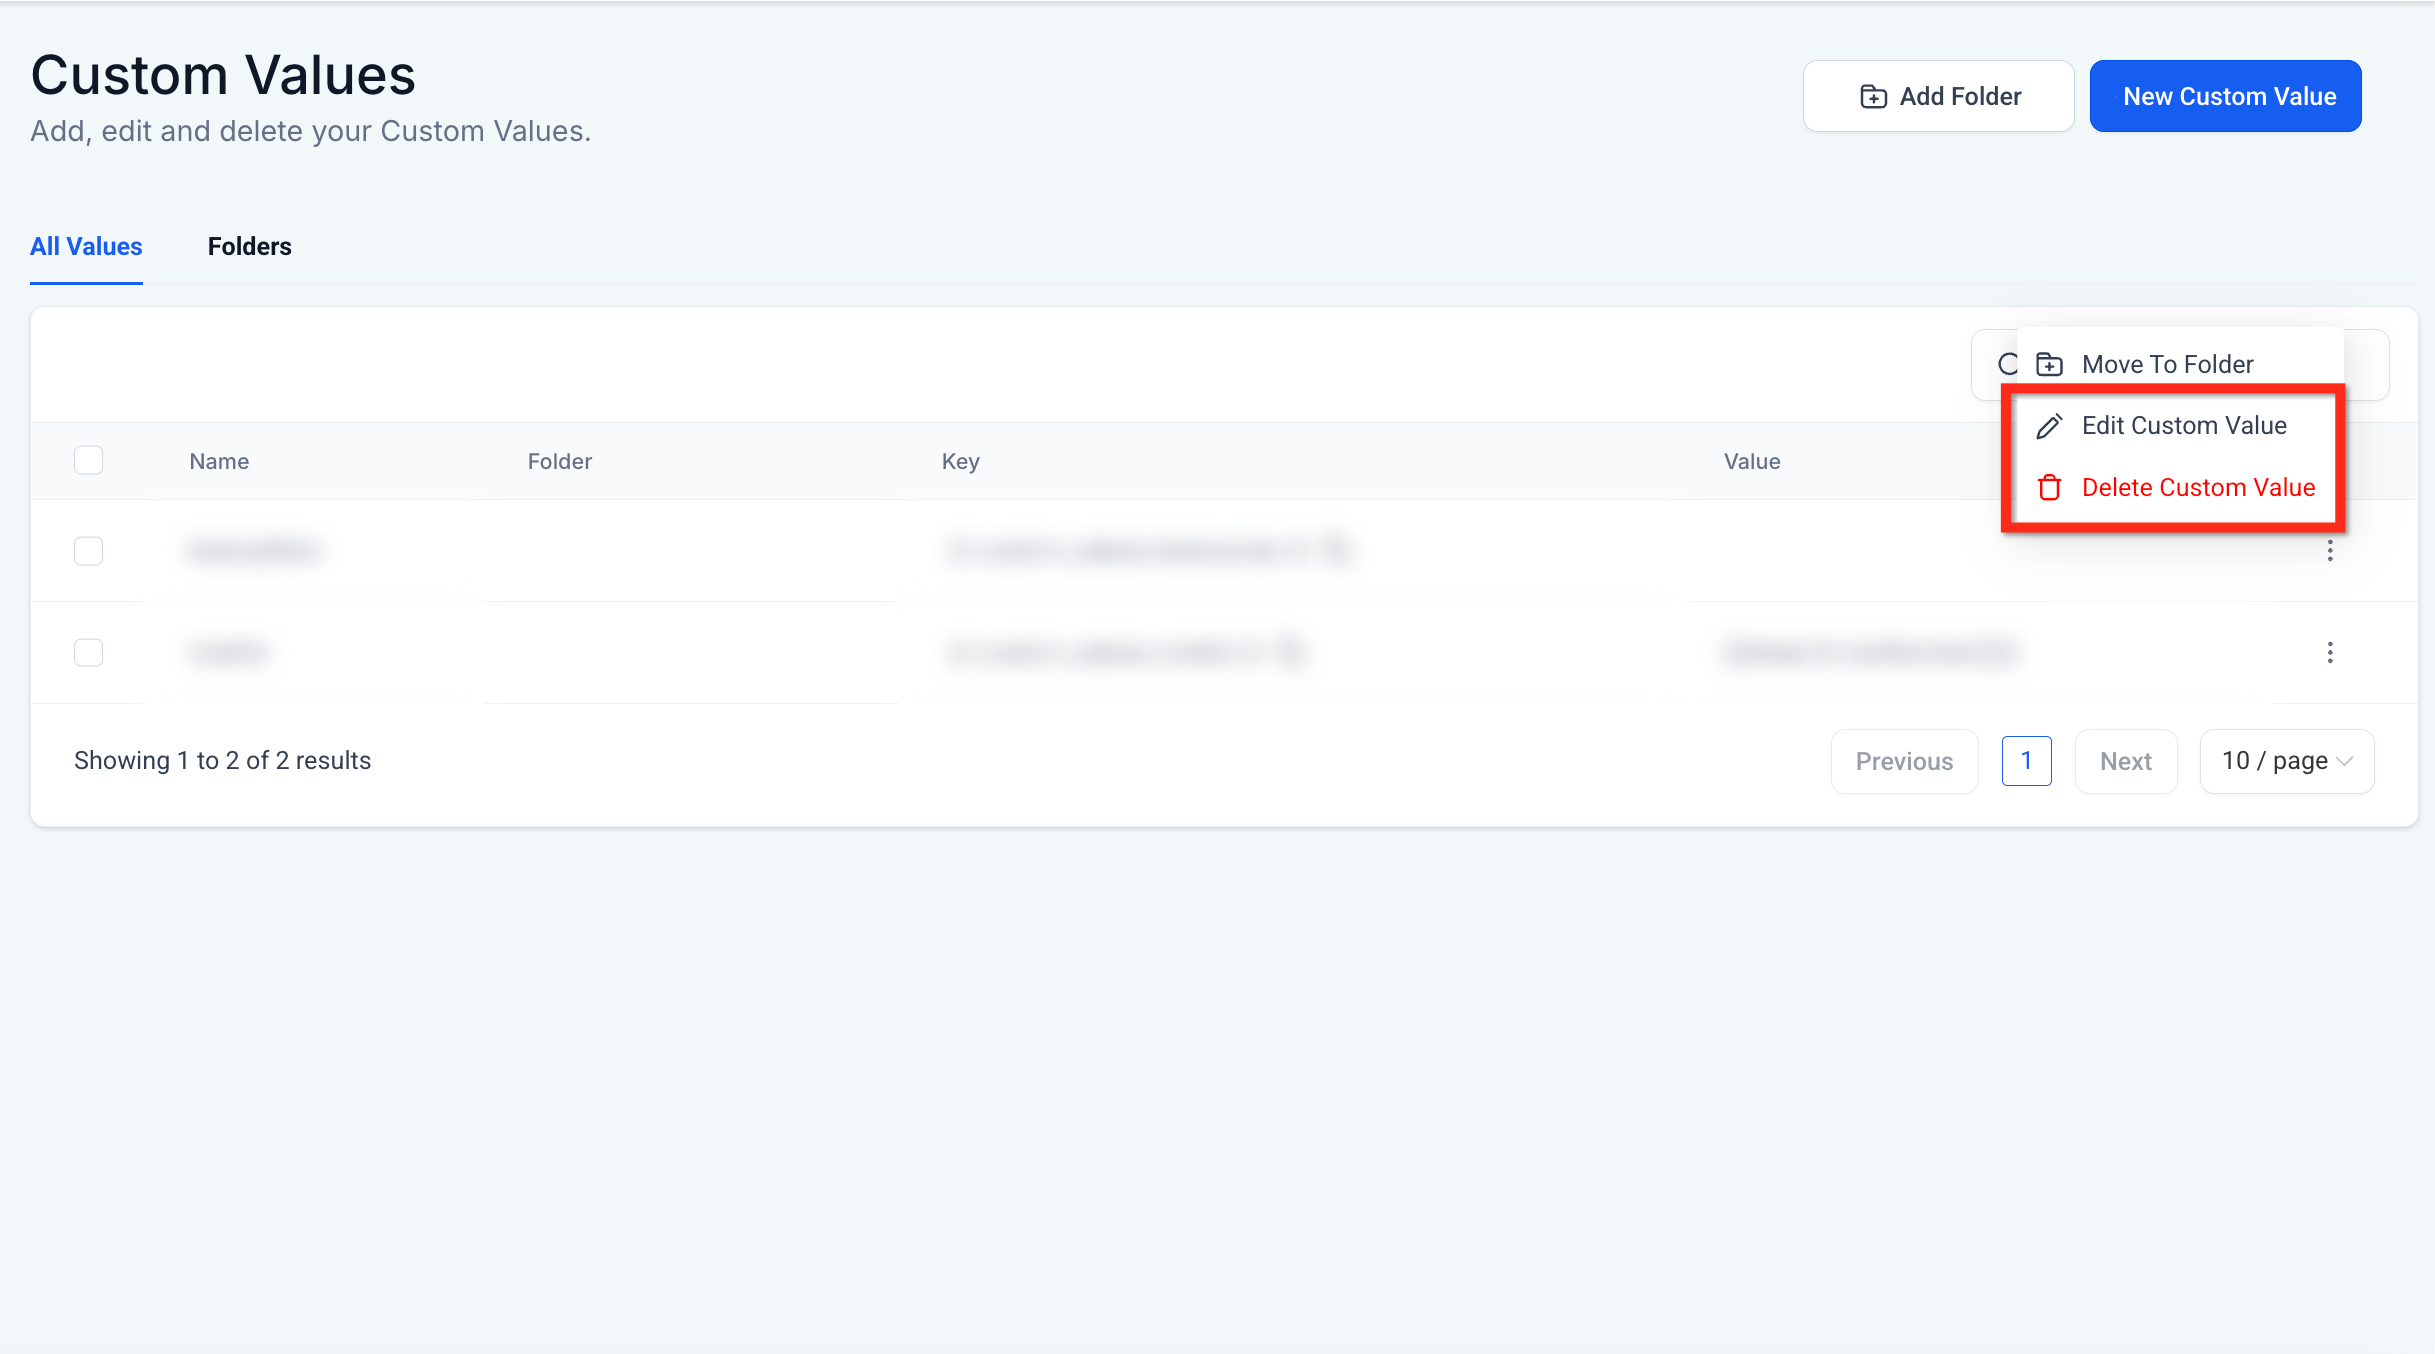
- Click the three dots icon (⋮) next to the entry.
- Choose Edit Custom Value to modify or Delete Custom Value to remove it.
05What it looks like in HighLevel
06Settings that matter
- Custom Values. Opens the interface where you can add, edit, delete and organize custom placeholders for reuse across the platform.
- + Add Custom Value button. Opens a form to define a new placeholder name, its content and the folder where it will be stored.
- Edit Custom Value. Allows you to change the name, value or folder of an existing placeholder.
- Delete Custom Value. Removes the selected placeholder permanently from the subaccount.
07Things to know before you rely on it
- In workflow text fields, blue chips show values supplied by the current workflow.
- Yellow chips indicate a value exists but is not supplied; they act as a warning but do not stop saving or publishing.
- Red chips mean the value does not exist in HighLevel; check for typos or replace it with a recognized placeholder.
- Spaces inside dynamic value handlebars are ignored, so {{ attribution.first.url }} and {{attribution.first.url}} are treated the same.
08How it connects to the rest of HighLevel
- Learn how custom fields differ from custom values. Custom fields guide
- Explore other Logic & Fulfillment features that work with custom values. All Logic & Fulfillment features
- Review pricing plans if you need access to subaccount settings. HighLevel pricing
Michael's take

Custom Values can feel like a double edged sword. If a token is mistyped or the workflow doesn’t provide the needed data, you’ll end up with blank fields or mismatched content, which can look sloppy to your audience.
When used correctly, they let you turn a single template into many personalized messages with virtually no extra work. I would lean heavily on them for any repeatable communication that includes names, dates or account numbers.