
01Who this is for
- Community owners who want to provide members a comfortable viewing option for low light environments.
- Members who need the ability to choose their preferred appearance without affecting other users.
02Dark mode, explained
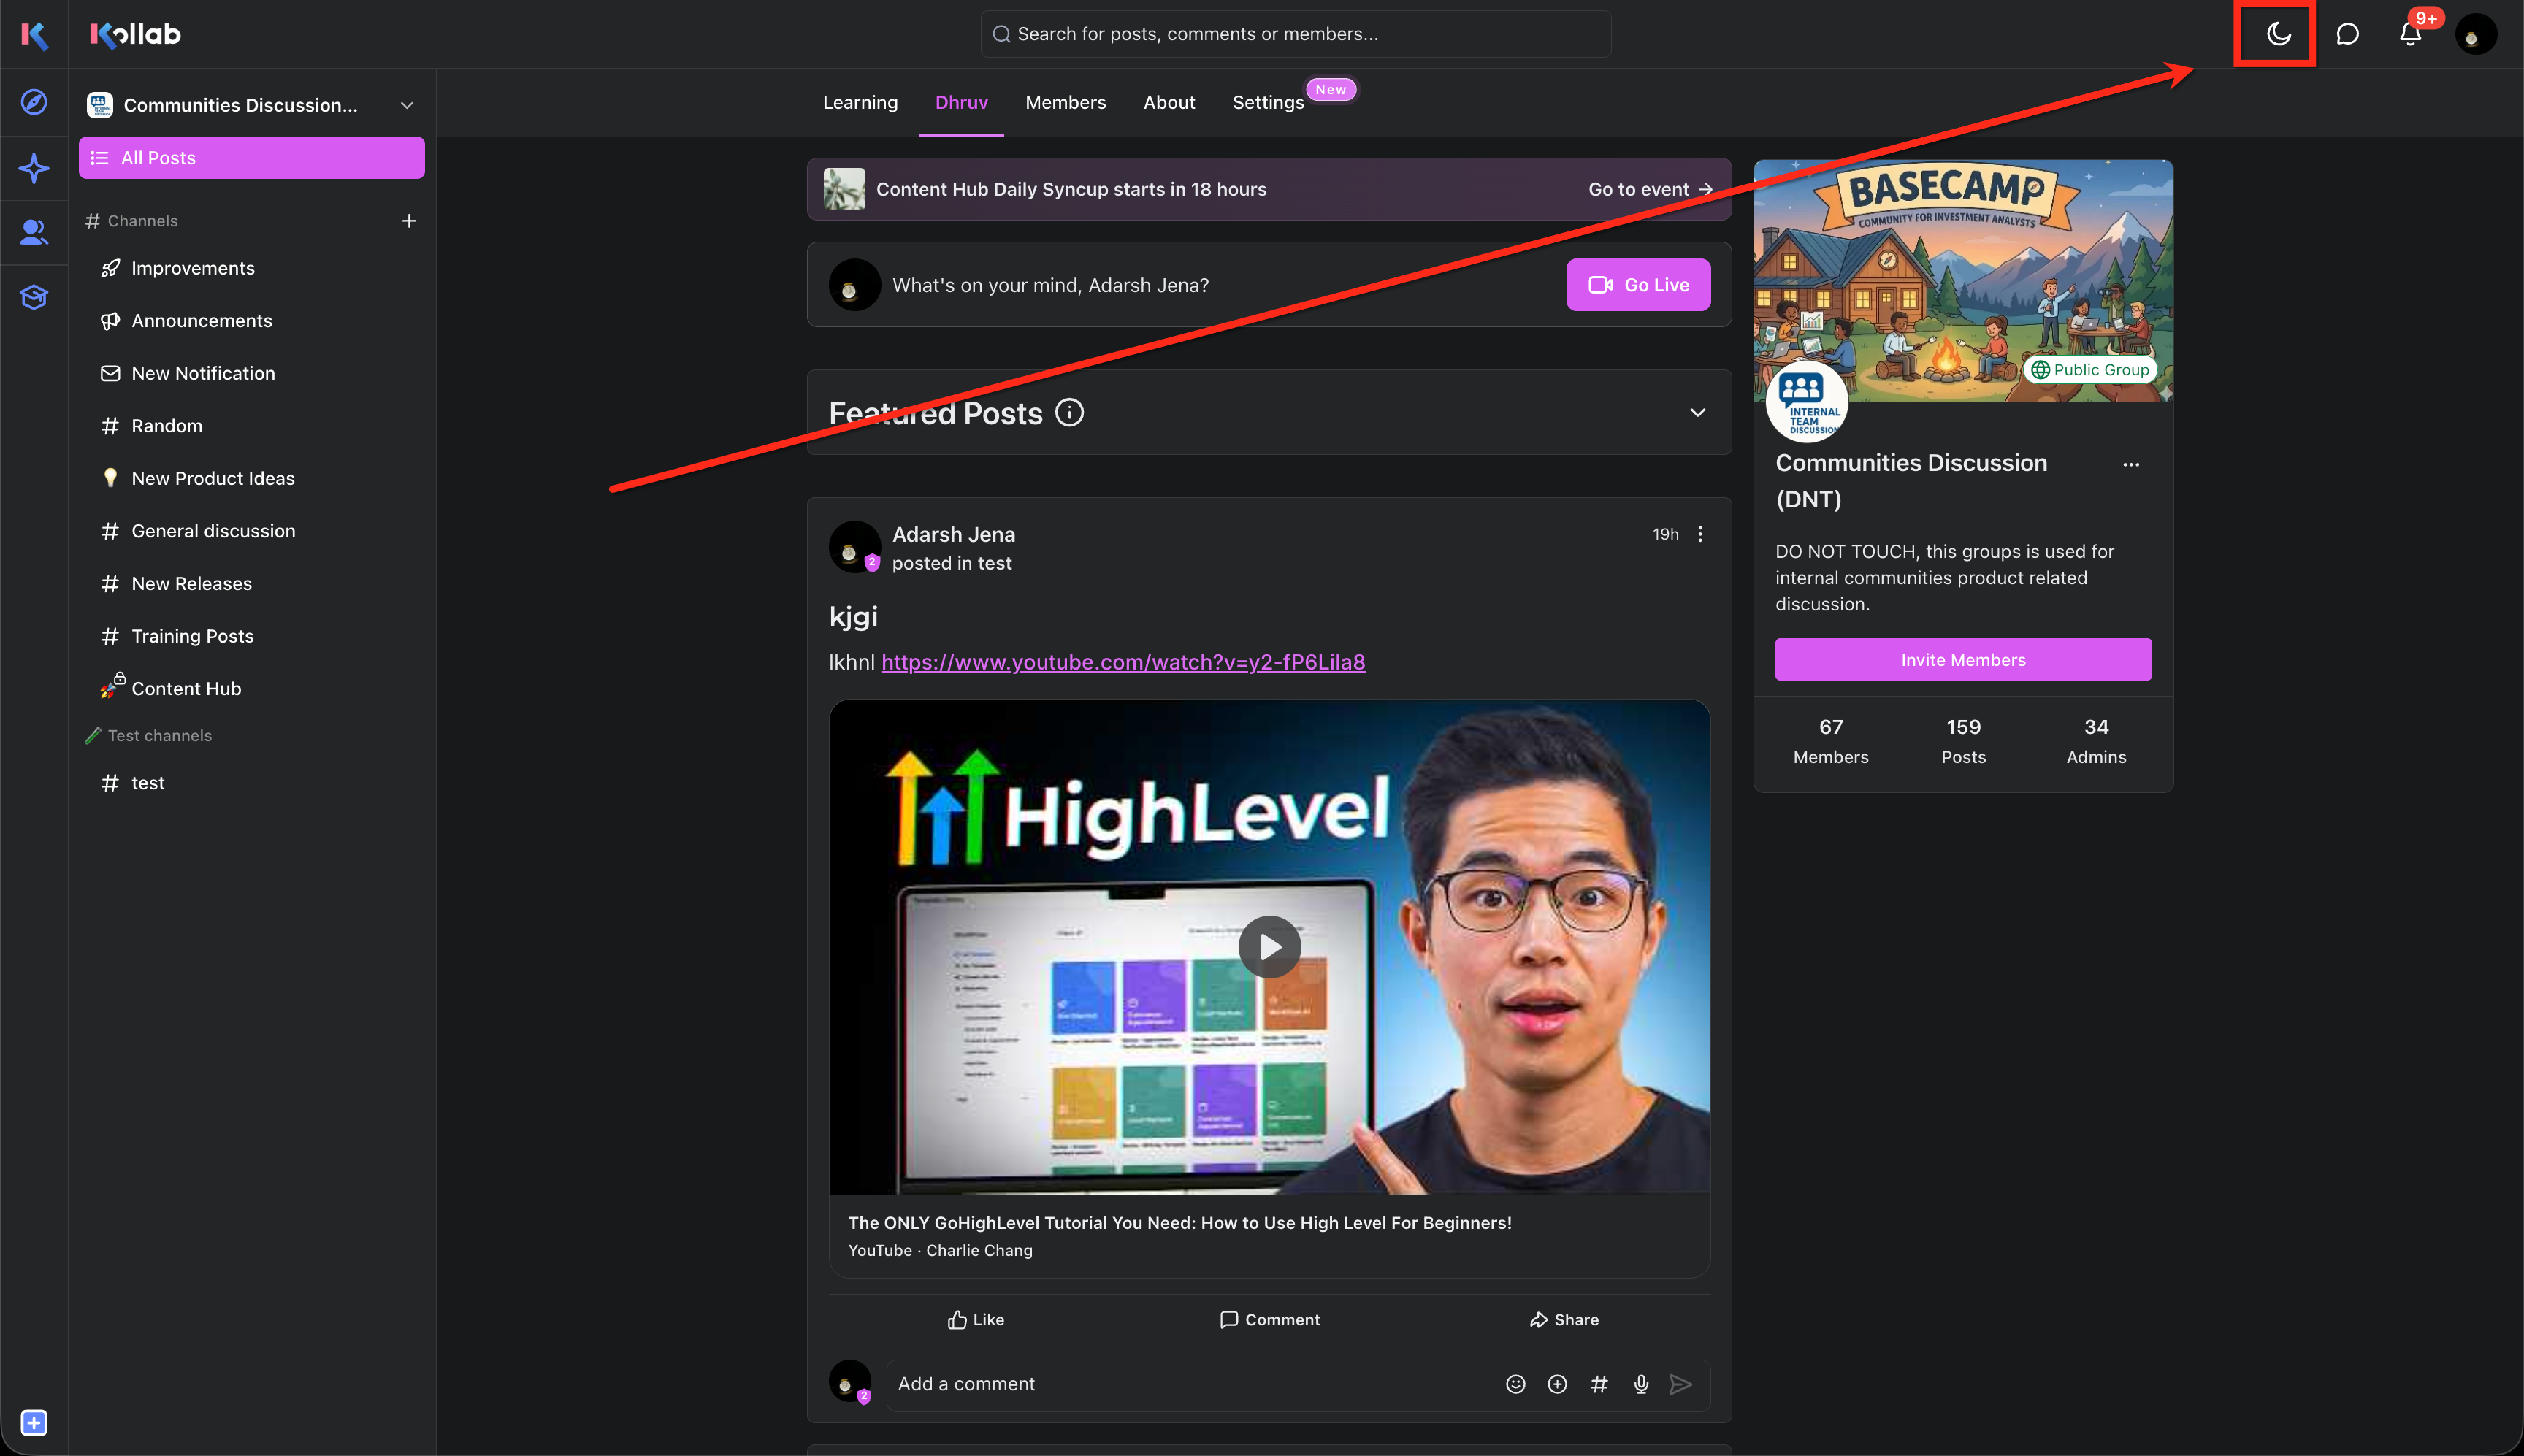
Dark Mode replaces the normal light interface with darker colors on supported GoKollab web pages, including Communities, Courses, discovery, onboarding, and account areas. The switch changes backgrounds, text, forms, menus and controls while leaving uploaded media unchanged. A member’s choice is stored and restored after page reloads and when navigating most supported sections. Members access the toggle from the top navigation bar. Community owners edit the palettes through the community Settings under the Appearance tab, where they can choose Light or Dark mode, pick a theme, preview the result and save their changes.
03How businesses use dark mode
- Online tutoring service. Tutors let students pick Dark Mode from the top bar for evening study sessions. The platform keeps the selection as students move between lessons, quizzes and live sessions, providing a consistent look.
- Fitness membership community. The community owner opens Appearance settings, selects the Dark color mode, chooses a darker theme and saves it. Members who enable Dark Mode will see the brand colors adapted to the new palette.
- Digital art workshop group. Artists who prefer low light browsing can switch to Dark Mode using the navigation toggle. Their preference stays active while they explore course modules, assignments and discussion boards.
04The numbers and rules that matter
- Dark Mode gives GoKollab members a darker web interface across Communities, Courses, and other supported areas.
05How to set up and use dark mode in HighLevel
Enable Dark Mode as a member
- Open GoKollab in a web browser and navigate to any community.
- Locate the appearance switcher in the top navigation bar.
- Select the option labeled Dark Mode.
- Continue using the platform; the system remembers the choice across reloads and most pages.
- Return to the switcher whenever you want to switch back to Light Mode.
Configure a Dark palette as a community owner
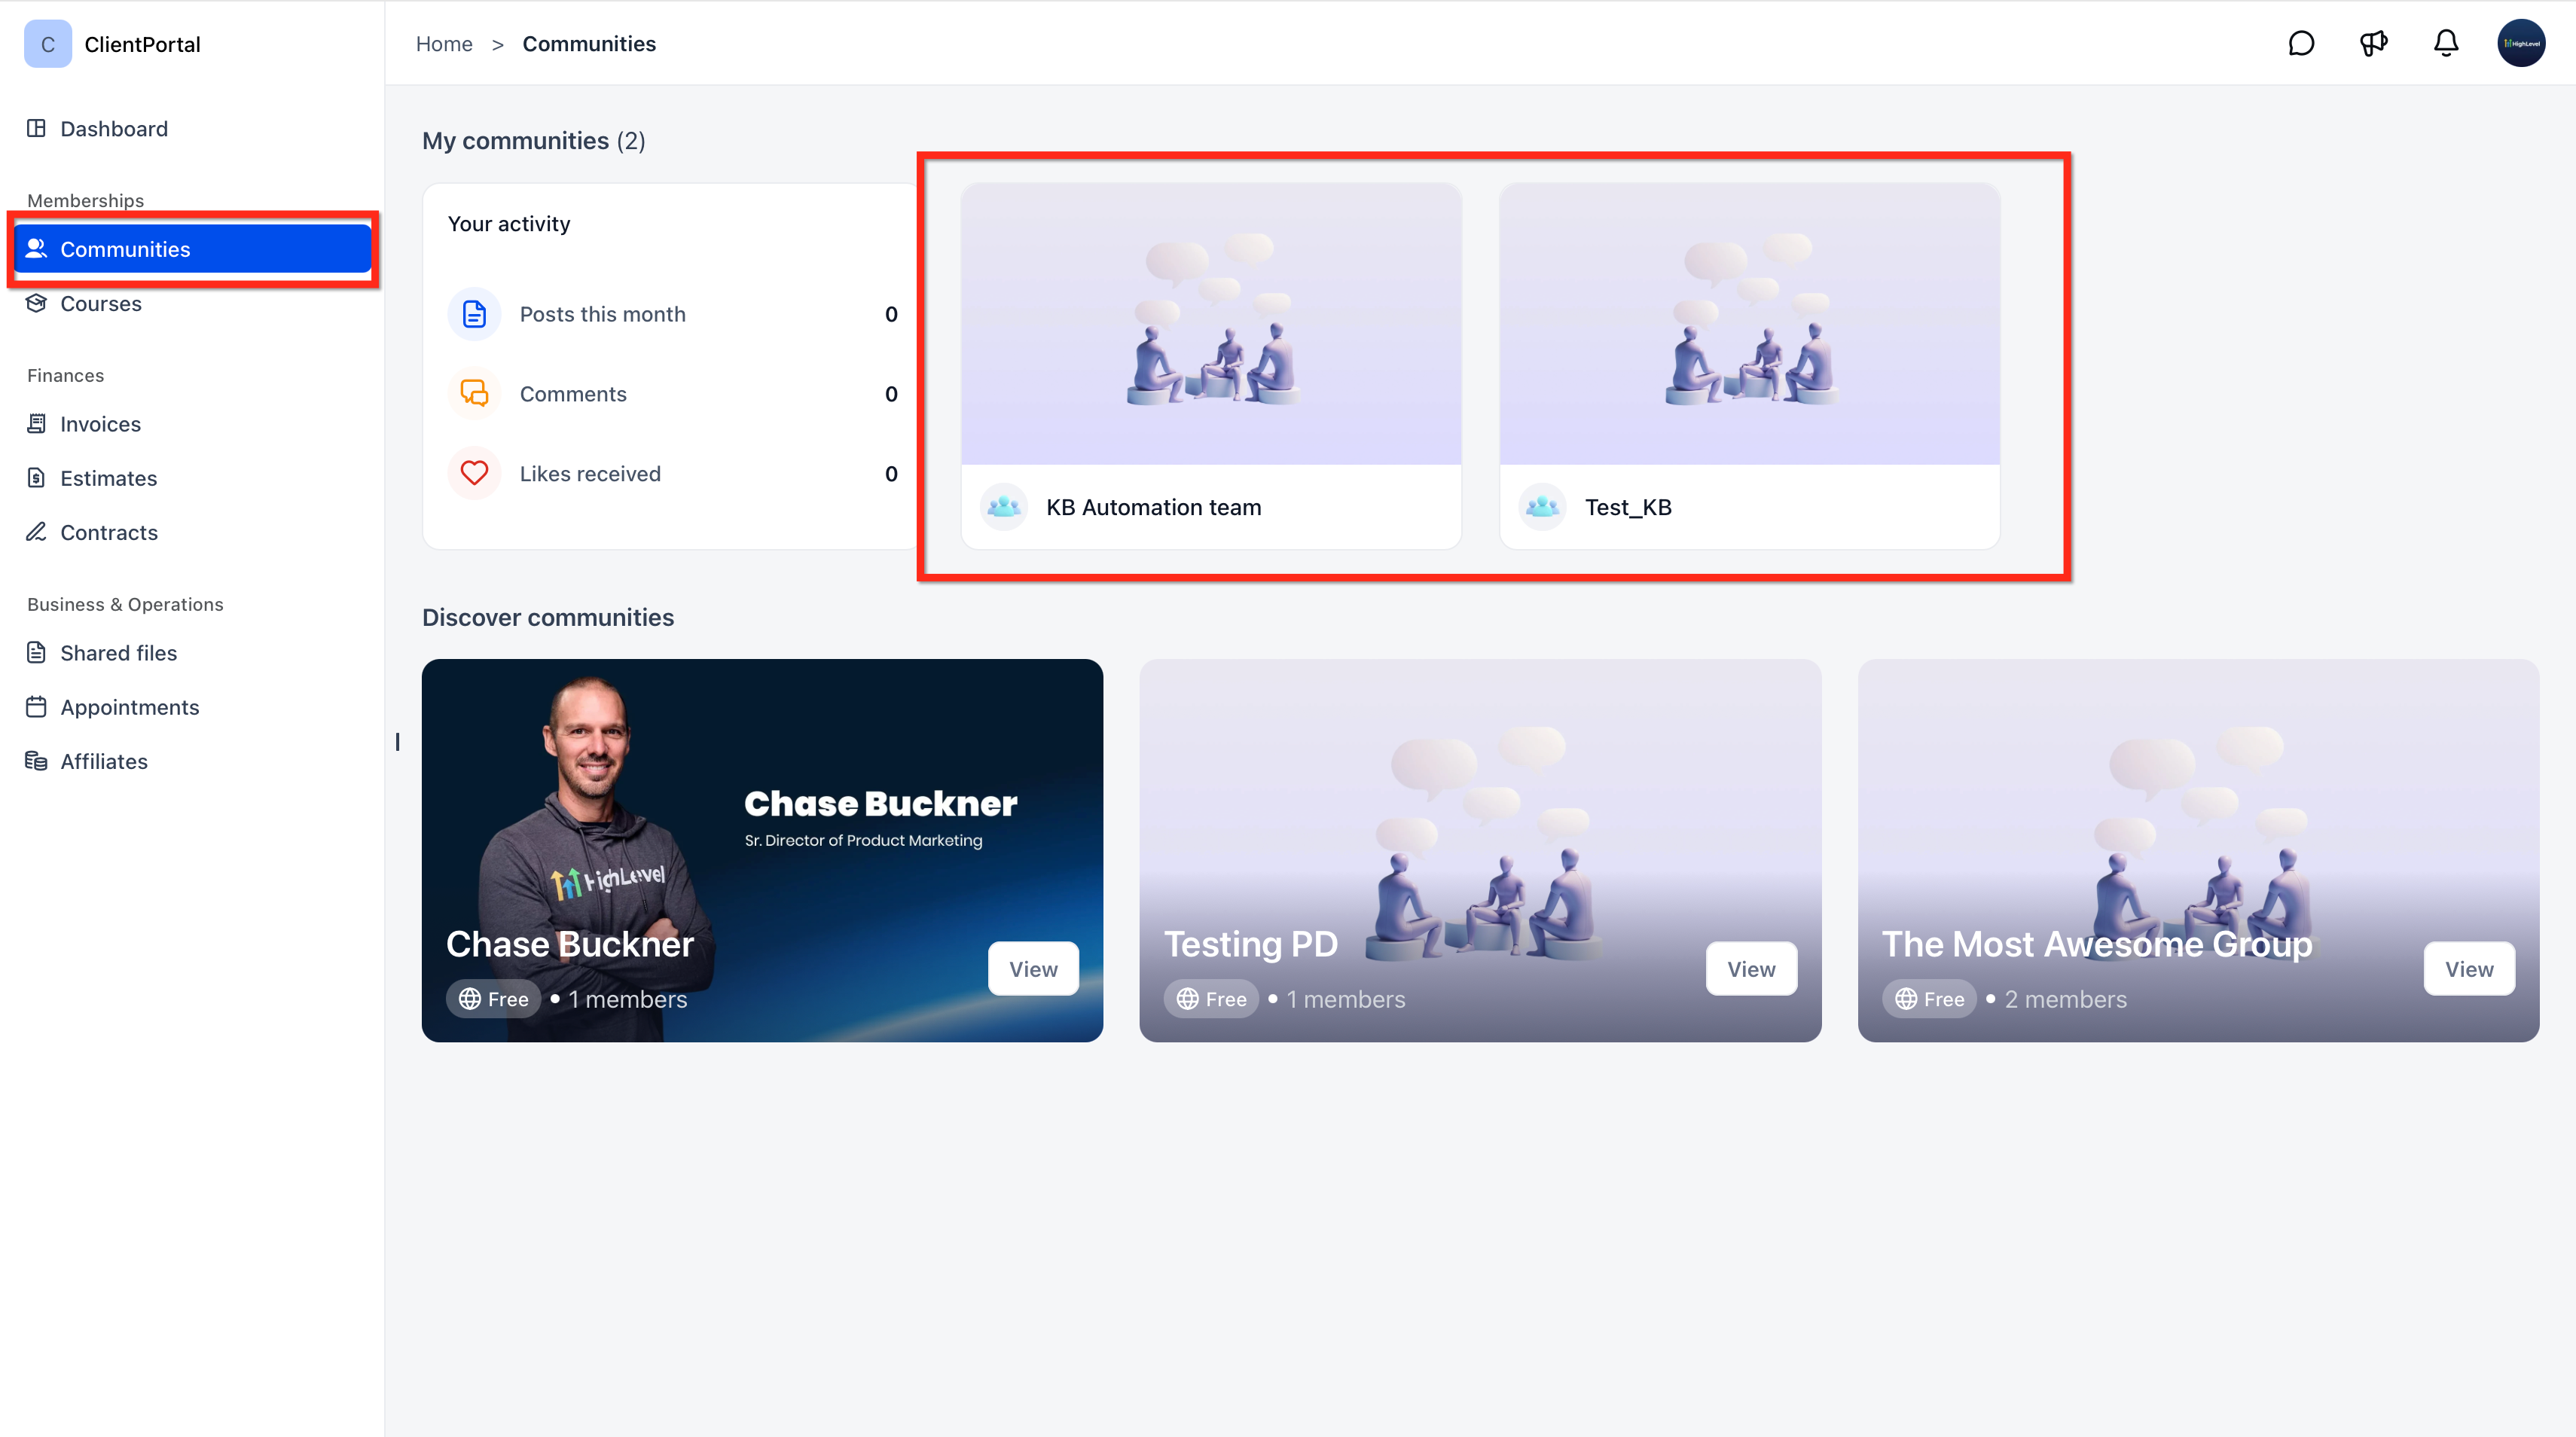
- Enter the community you wish to edit.
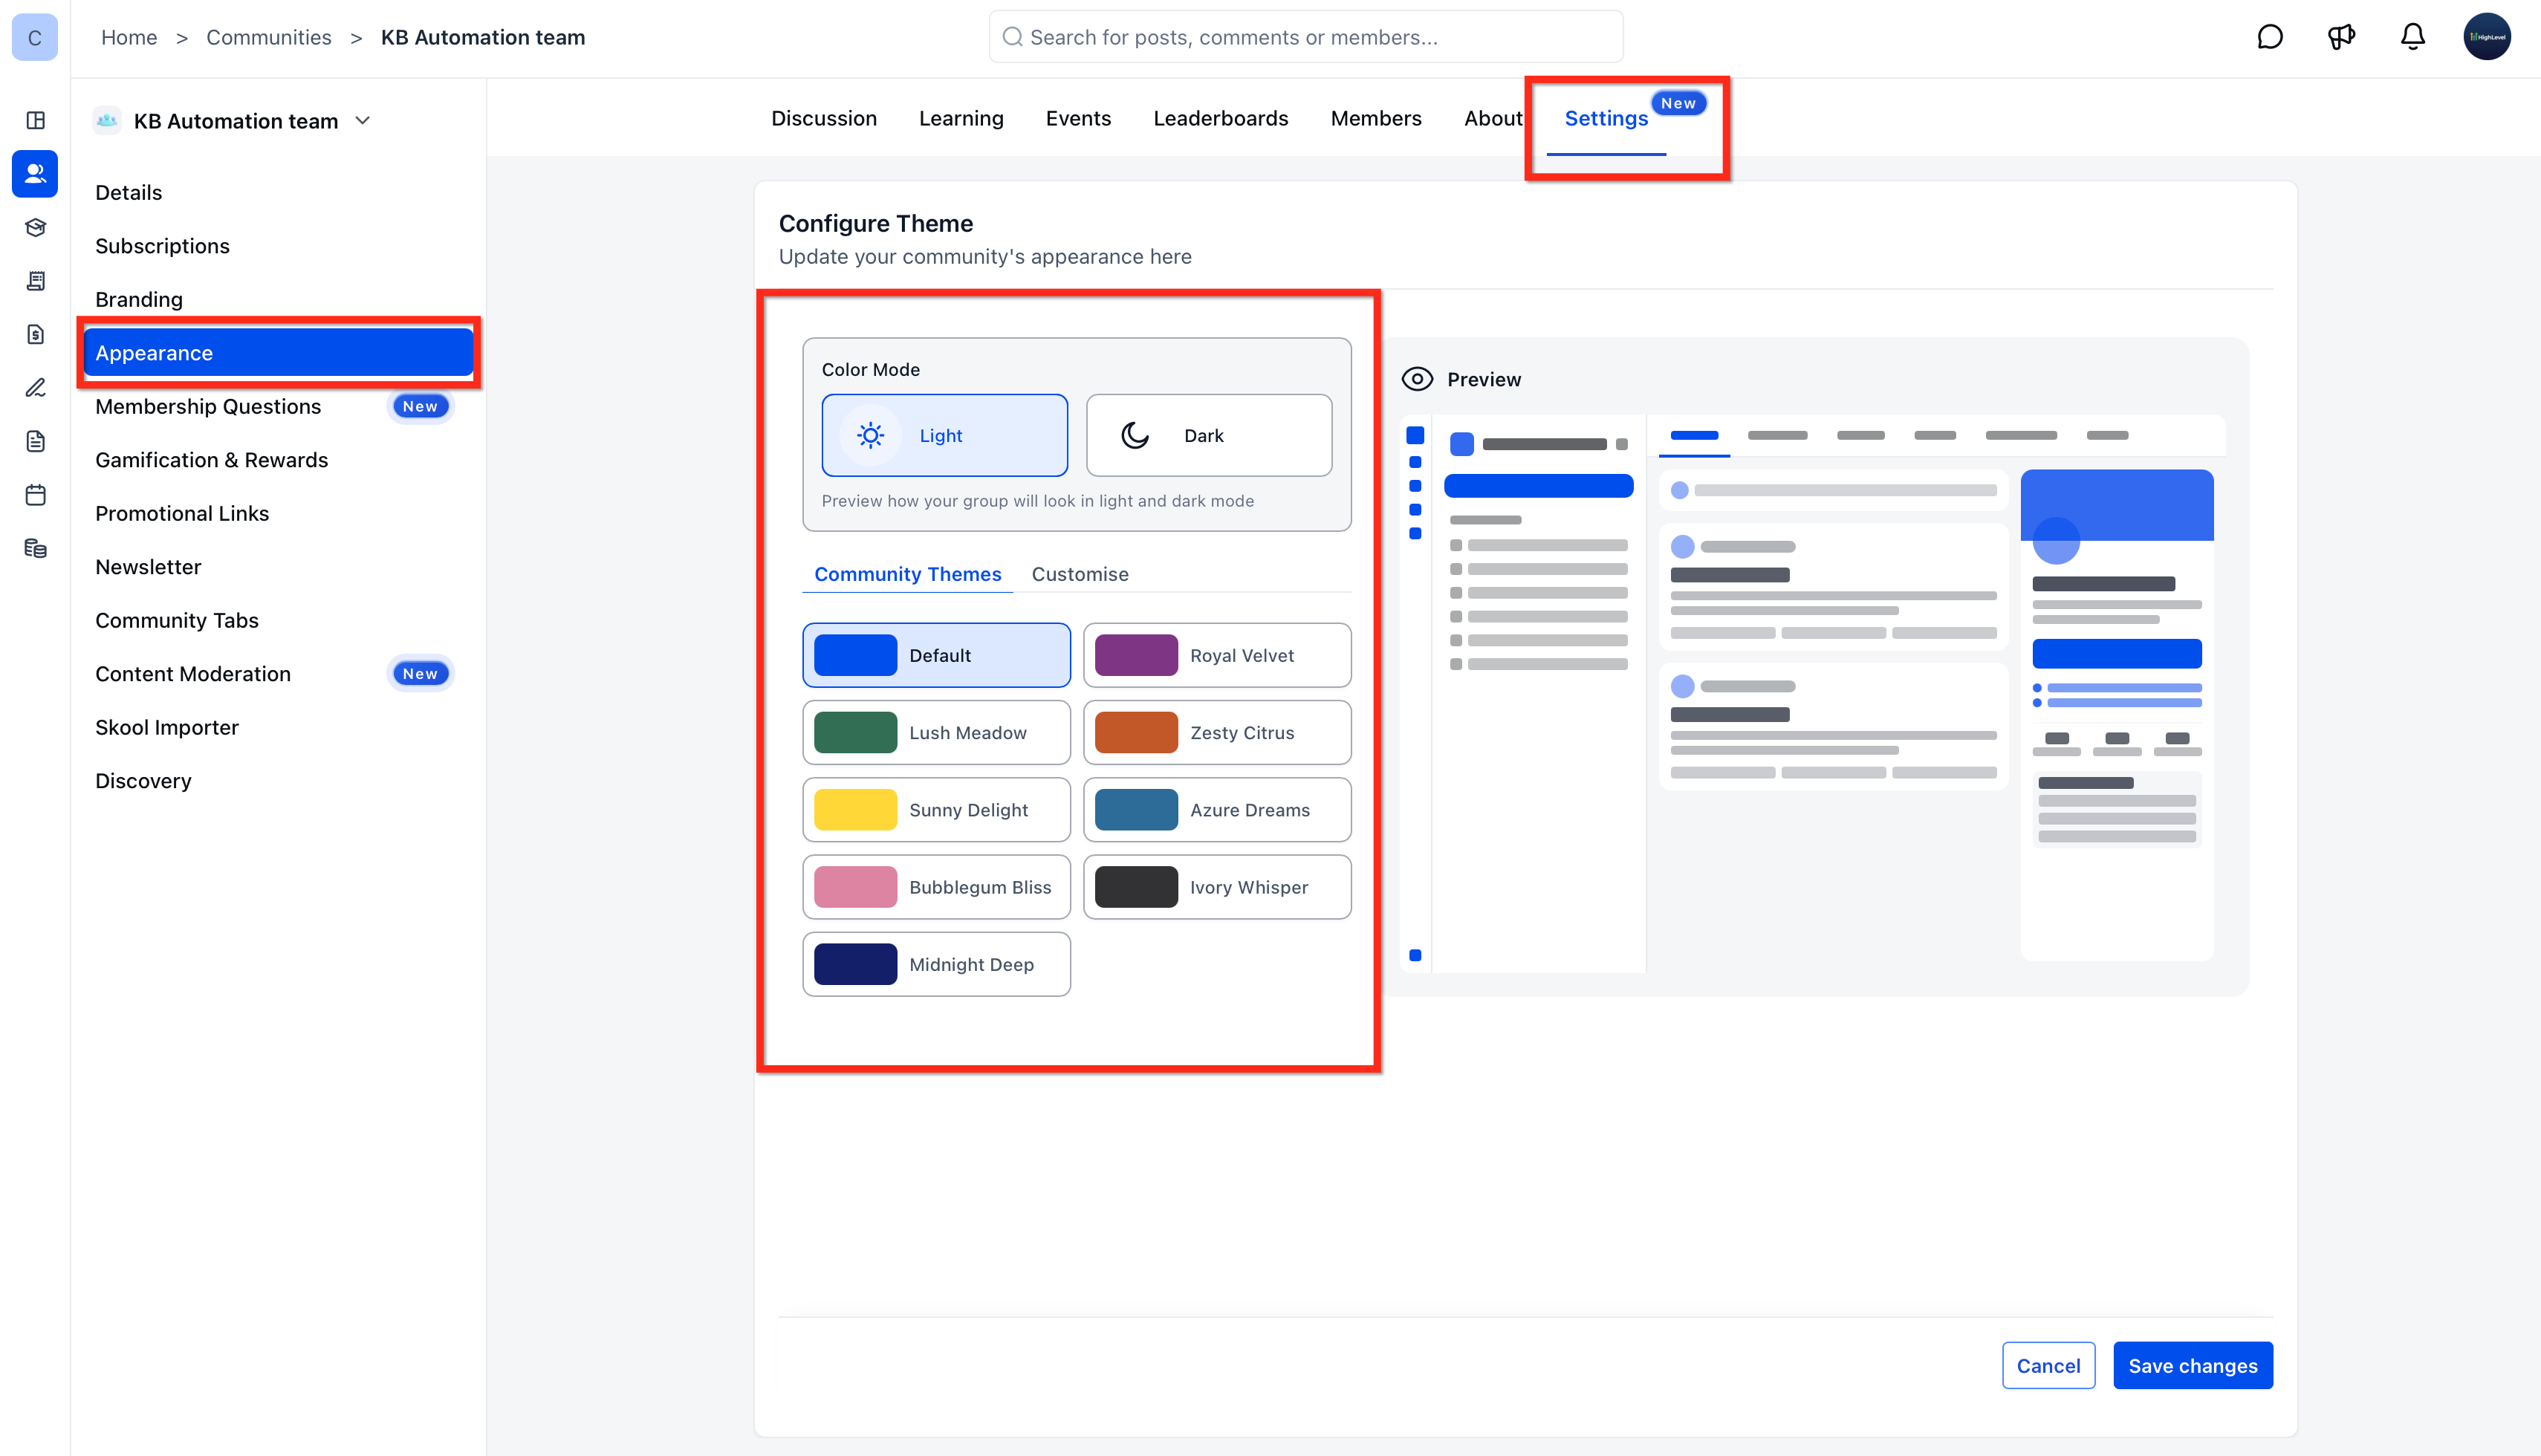
- Go to Settings and select Appearance.
- Under Color Mode, choose Light or Dark for the palette you are editing.
- Pick a Community Theme or adjust the available customization controls.
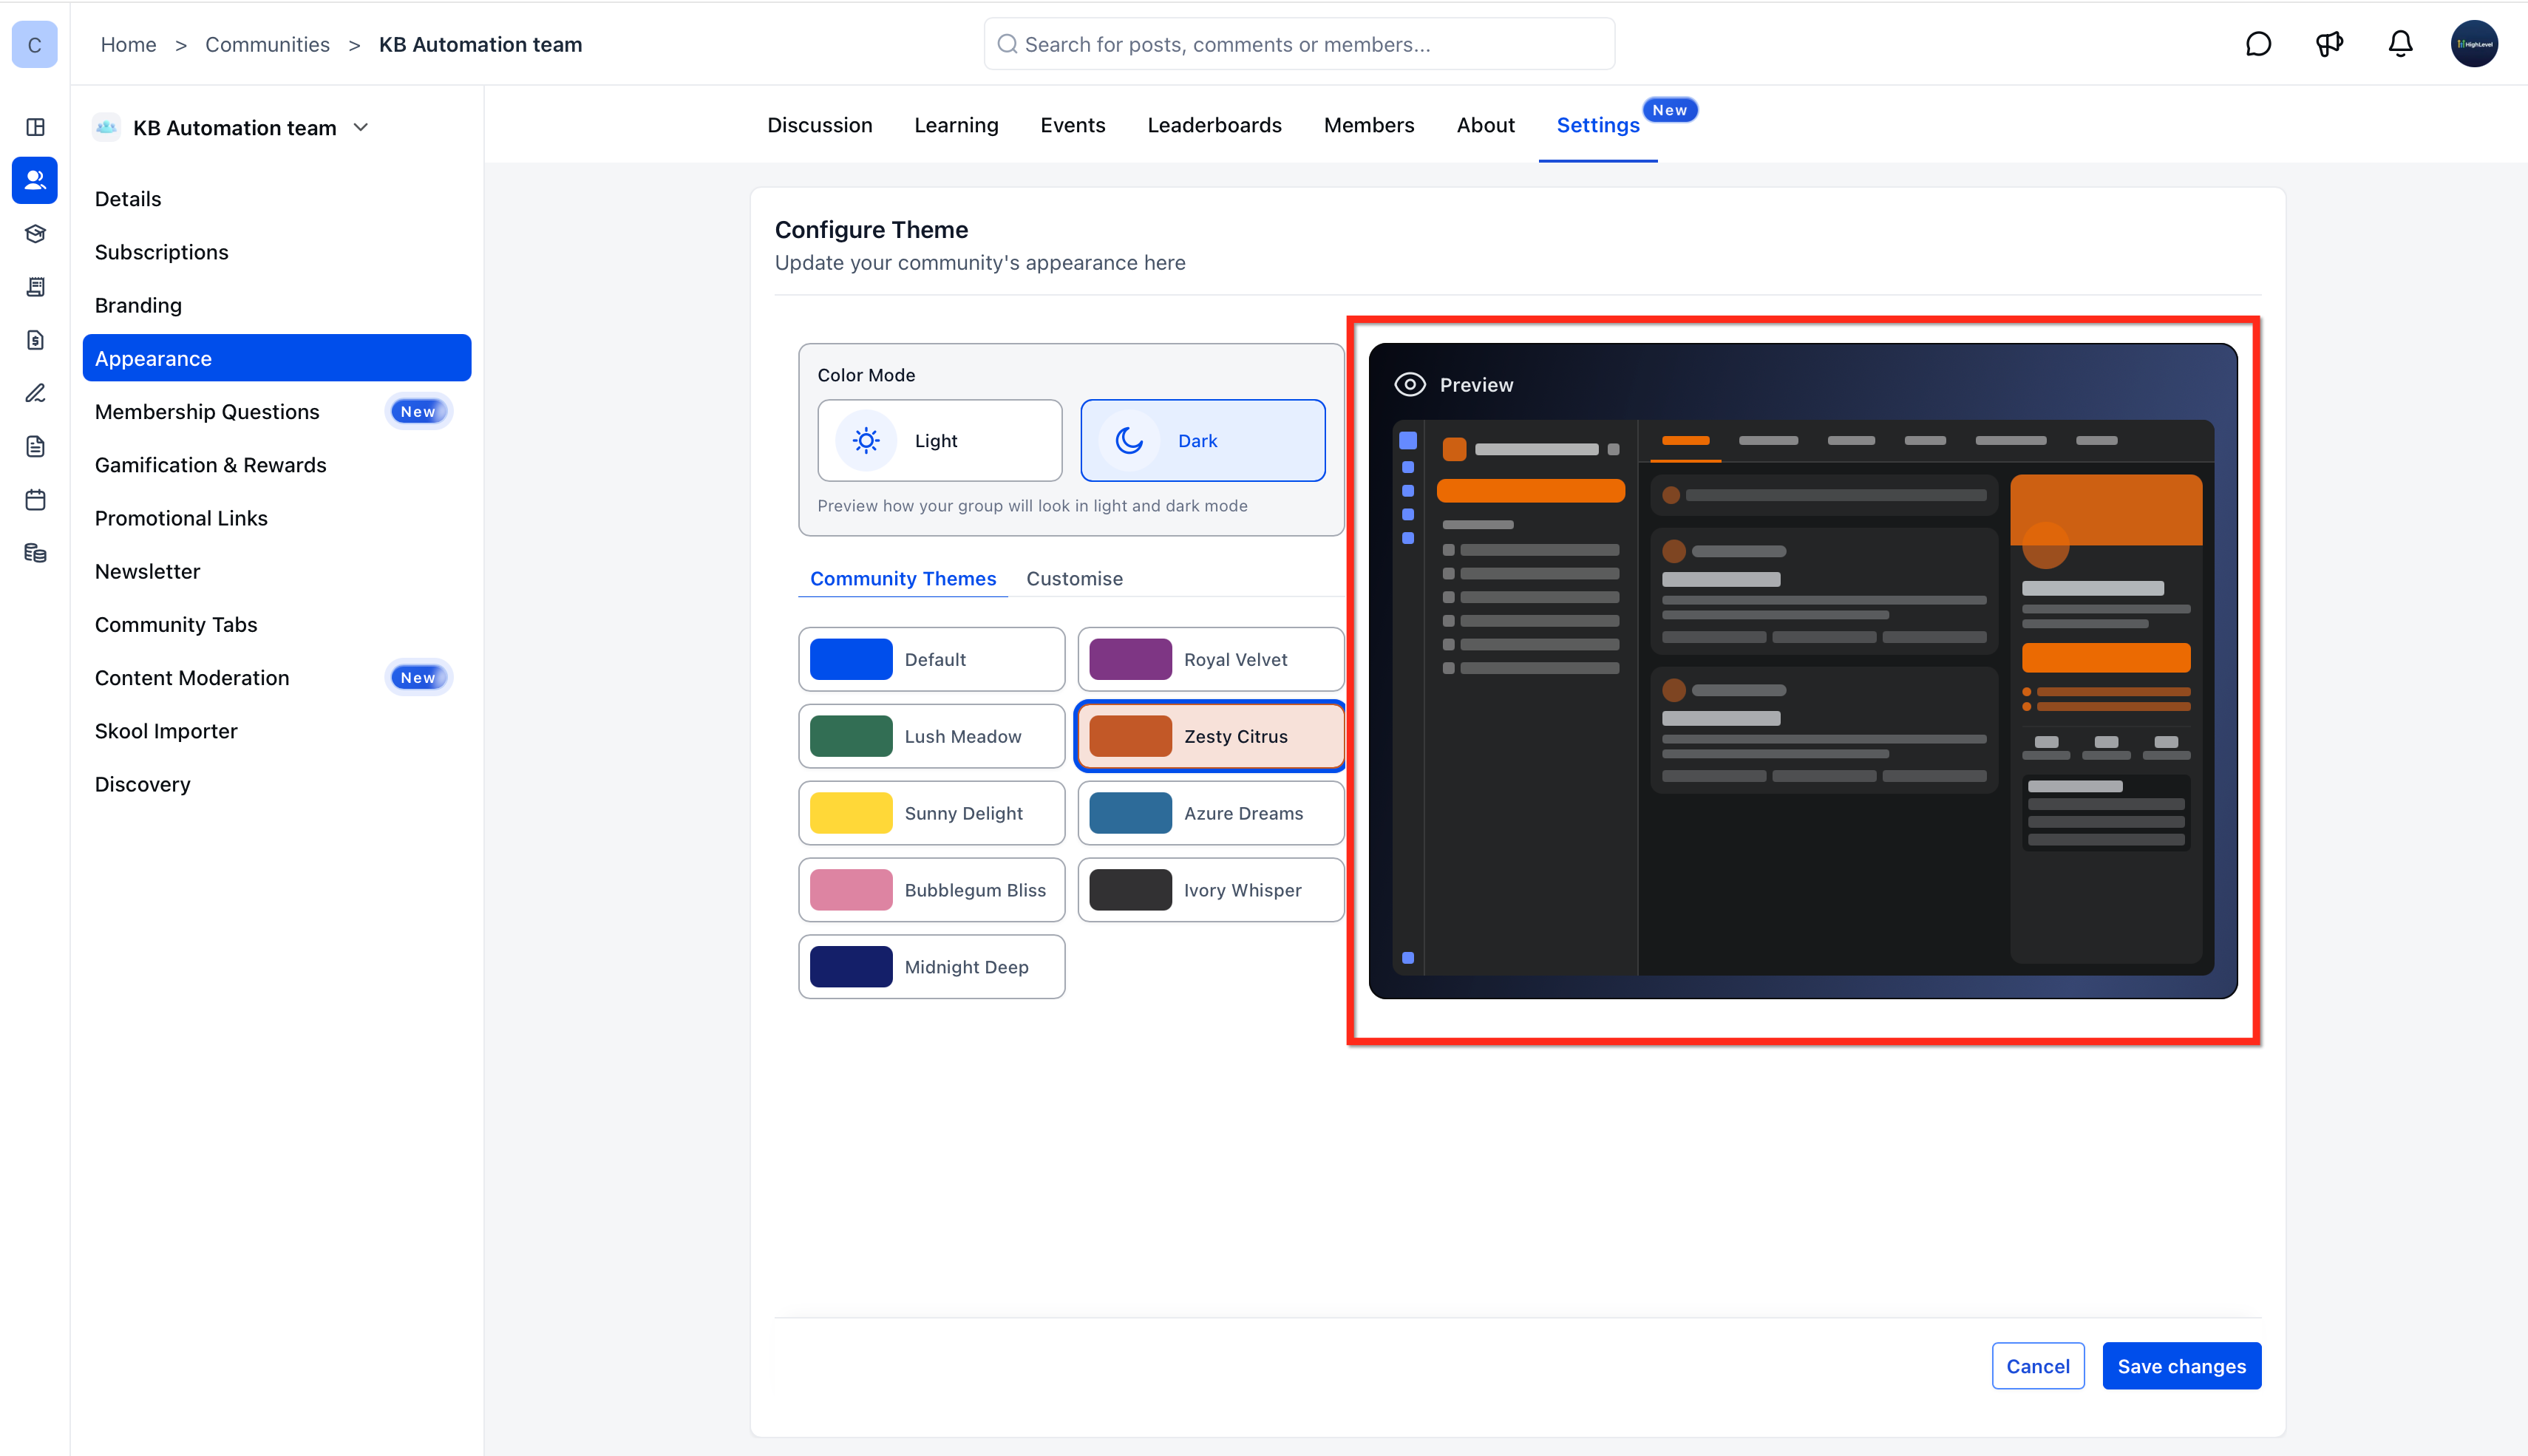
- Examine the Preview to see how the appearance will render.
- Repeat the steps for the opposite color mode to maintain separate branding.
- Click Save changes to apply the new palette.
06What it looks like in HighLevel
07Settings that matter
- Color Mode. Determines whether you are editing the Light or Dark color palette for the community.
- Community Theme. Applies a set of visual styles to the selected color mode.
- Appearance. The section in community Settings where brand colors and themes are managed for Light and Dark modes.
08Things to know before you rely on it
- Dark Mode works only on the web version of GoKollab; mobile experiences do not have the toggle.
- The selected appearance may not stay applied when navigating inside GoKollab Studio.
- Uploaded images and videos keep their original colors; only interface elements are recolored.
- Existing communities remain functional without any required changes to support Dark Mode.
09If something goes wrong
- Appearance sometimes changes when moving through Studio. Understand that preference persistence is not complete in Studio; the mode may revert during navigation.
- Community looks incorrect only in Dark Mode. Check any custom CSS that targets Light or Dark mode and adjust the styles as needed.
10How it connects to the rest of HighLevel
- Manage your communities and courses with GoKollab Studio GoKollab Studio
- Pin your favorite groups for quick access Pin groups
- View all GoKollab features in one place All GoKollab features
Michael's take

I’d start by toggling the switch in the top navigation to see how the interface feels. For owners, I’d open Settings > Appearance, set a distinct dark palette, preview it, and then save. Test a few pages to confirm the preference sticks before rolling it out to the whole community.