
01Who this is for
- Ecommerce Founders can align site copy with their brand voice, ensuring consistency across the shopping experience.
- Marketing agencies managing client stores can quickly adapt language for different locales, improving relevance for each audience.
- Product managers can adjust checkout labels to reduce confusion and streamline the buying process.
02Text customization, explained
The Text Customisation feature gathers every piece of text that appears in an ecommerce store, labels, headings, button copy, and messages, into a single location. This makes it easy to replace generic wording with brand specific language or translate content for new markets.
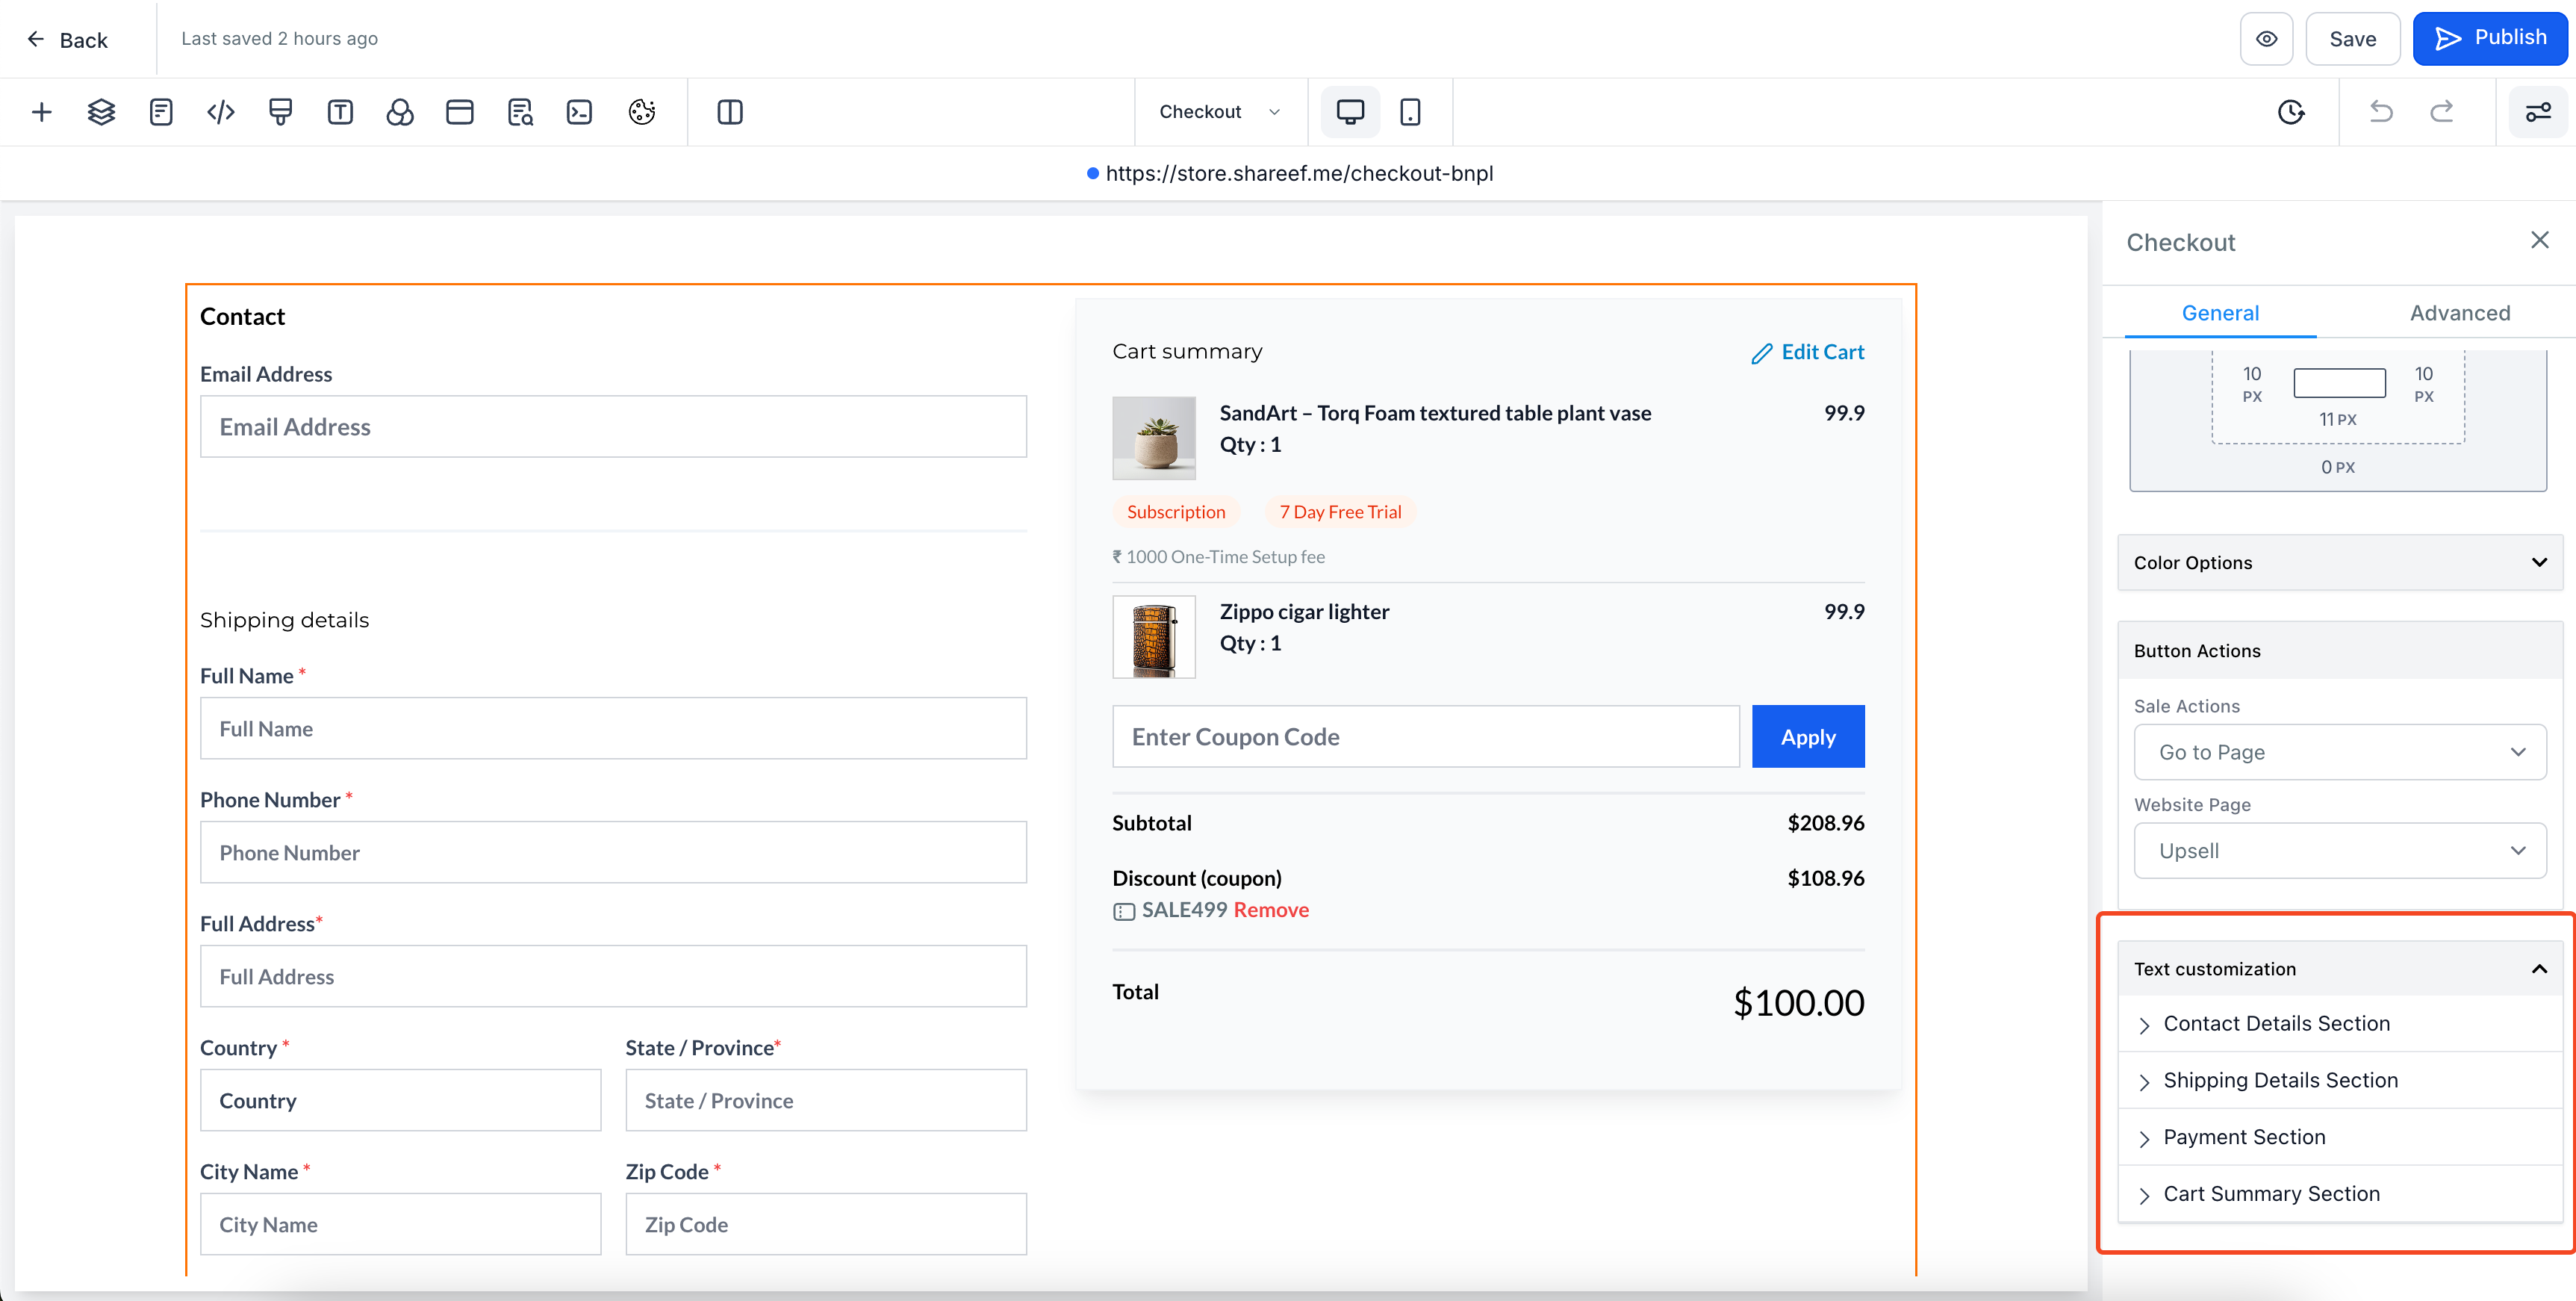
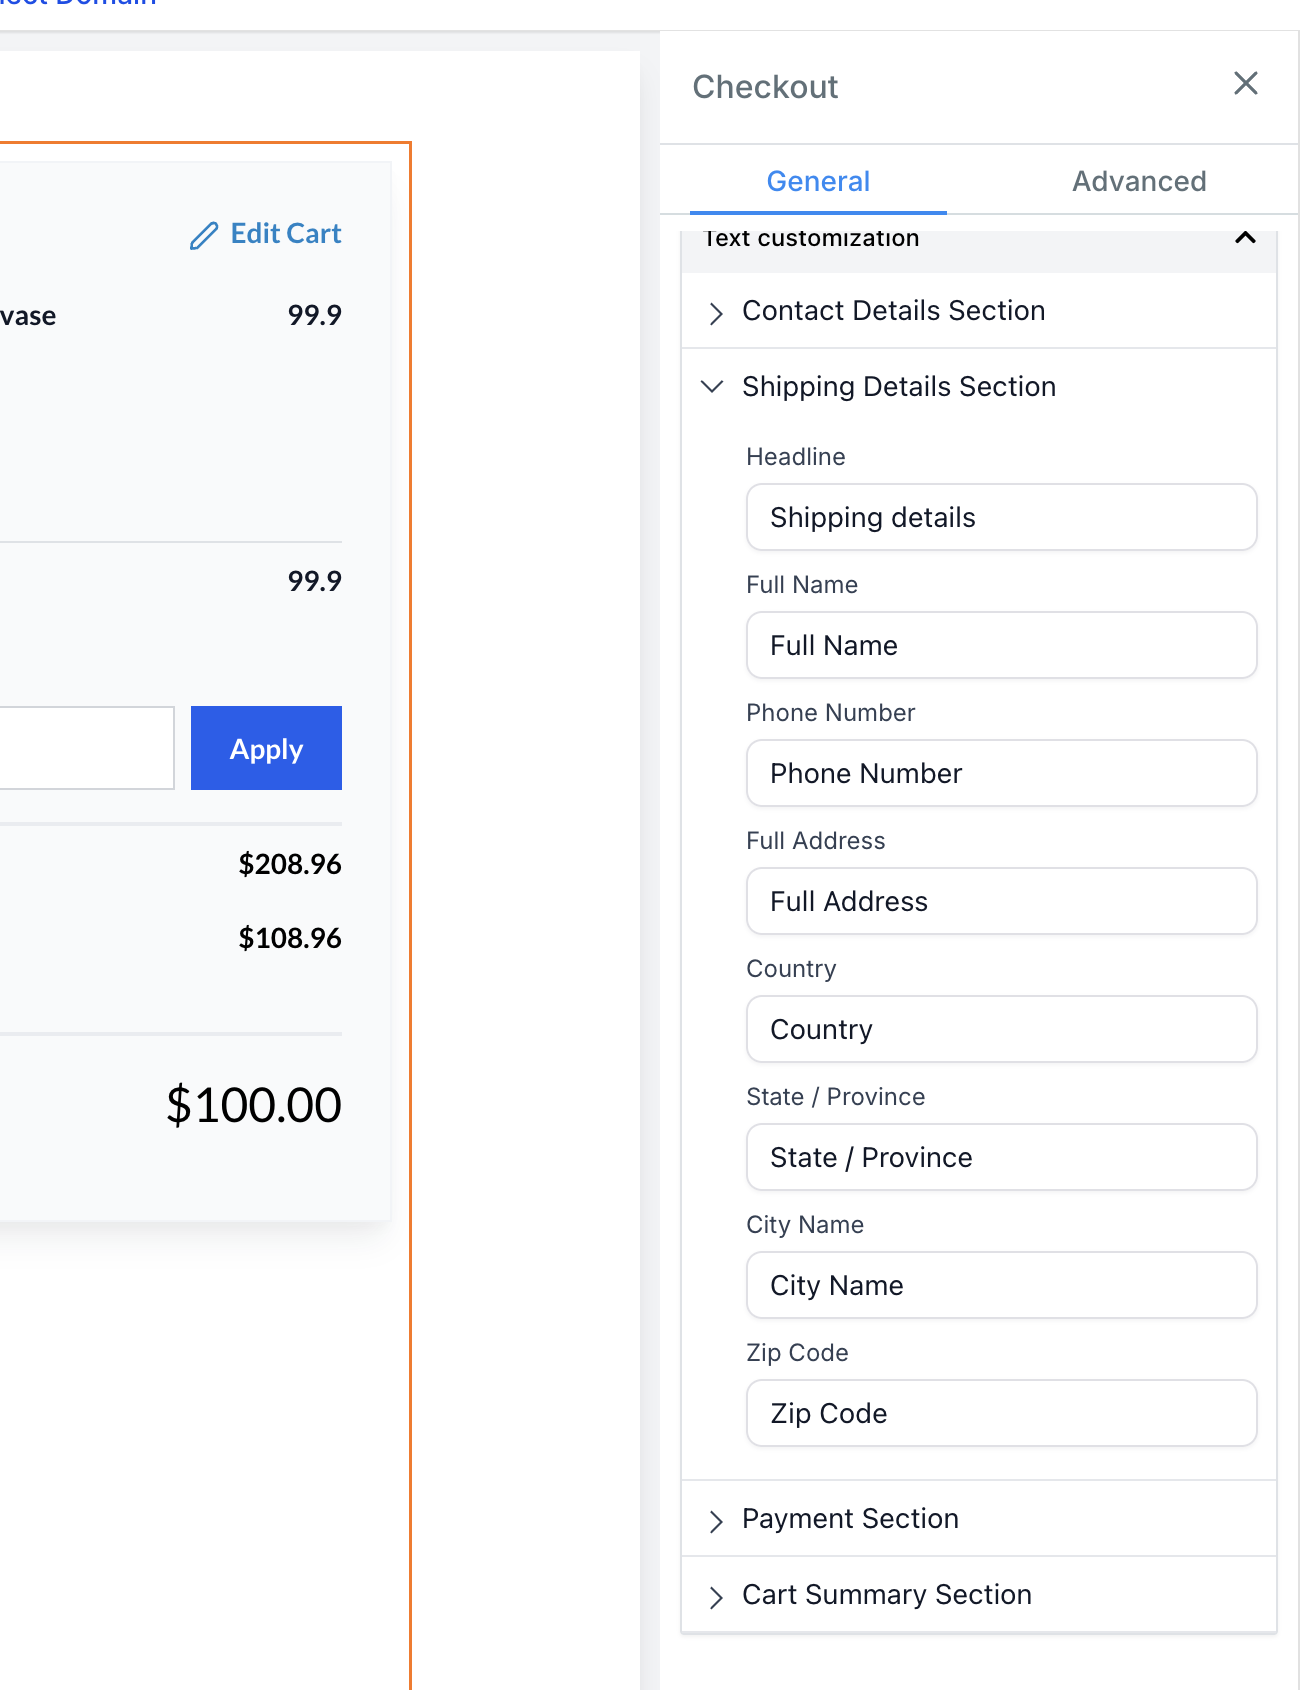
The settings live in the General tab of the Store Builder. After selecting a store element, scroll to the bottom of the General pane to find the Text Customisation section. Within it, sub sections group text for parts such as Shipping Details or the Payment Section, letting you edit each piece before saving and publishing the store.
03How businesses use text customization
- Boutique clothing retailer. The owner updates the "Add to Cart" button label to "Buy Now" and changes the upsell heading to match the store’s tone. They edit these fields in the Text Customisation area and publish, so customers see the new wording right away.
- Specialty food ecommerce site. The business translates shipping detail text into Spanish using the sub section for Shipping Details. The modified copy appears for Spanish speaking shoppers while the rest of the store remains unchanged.
- Online course provider. The provider customizes the checkout section headings to reflect their educational brand language. By editing the relevant text fields in the Text Customisation section, the checkout page displays the new headings after publishing.
04The numbers and rules that matter
- Existing customization options (Button Options, Form Options) have been moved to the Text Customization section, and the previous options will no longer be available or needed.
05How to set up and use text customization in HighLevel
Customize store text
- Open the Store Builder and select the element you want to edit.
- In the Settings tab on the right, choose the General section.
- Scroll to the bottom of the General pane to reach the Text Customisation area.
- Pick the appropriate sub section and edit the desired labels, headings, or messages.
- Save your changes and click Publish to apply them.
06What it looks like in HighLevel
07Settings that matter
- Text Customisation. Controls all editable copy for the store, including labels, headings, and messages for product lists, detail pages, upsells, shipping and payment sections.
08Things to know before you rely on it
- Some text elements, such as error messages or empty result states, may not show in the builder preview but can still be edited.
- Previous Button Options and Form Options have been moved; the old settings are no longer available.
- All text settings are now located only in the Text Customisation section of the General settings.
09How it connects to the rest of HighLevel
- Learn how to create the store pages where text customization will be applied. Set up a HighLevel ecommerce store
- Add downloadable files to products, which also use the Text Customisation area for label edits. Product delivery setup
- Review plan options that include access to the Text Customisation feature. HighLevel pricing and plans
Michael's take

Having control over the exact wording can be valuable when brand voice is important. If the default wording already meets your needs, the benefit may be limited.