
01Who this is for
- Course creators who need a visual way to acknowledge lesson completion and keep learners motivated.
- Community managers looking to reward member milestones with branded icons that can be shared on social media.
02Badges, explained
Badges are customizable digital icons built inside the Certificate Builder. They can be created from a blank canvas or a pre made template, then styled with text, shapes, images, and dynamic contact values. Once saved, a badge can be emailed directly to a learner or downloaded as a high resolution PNG.
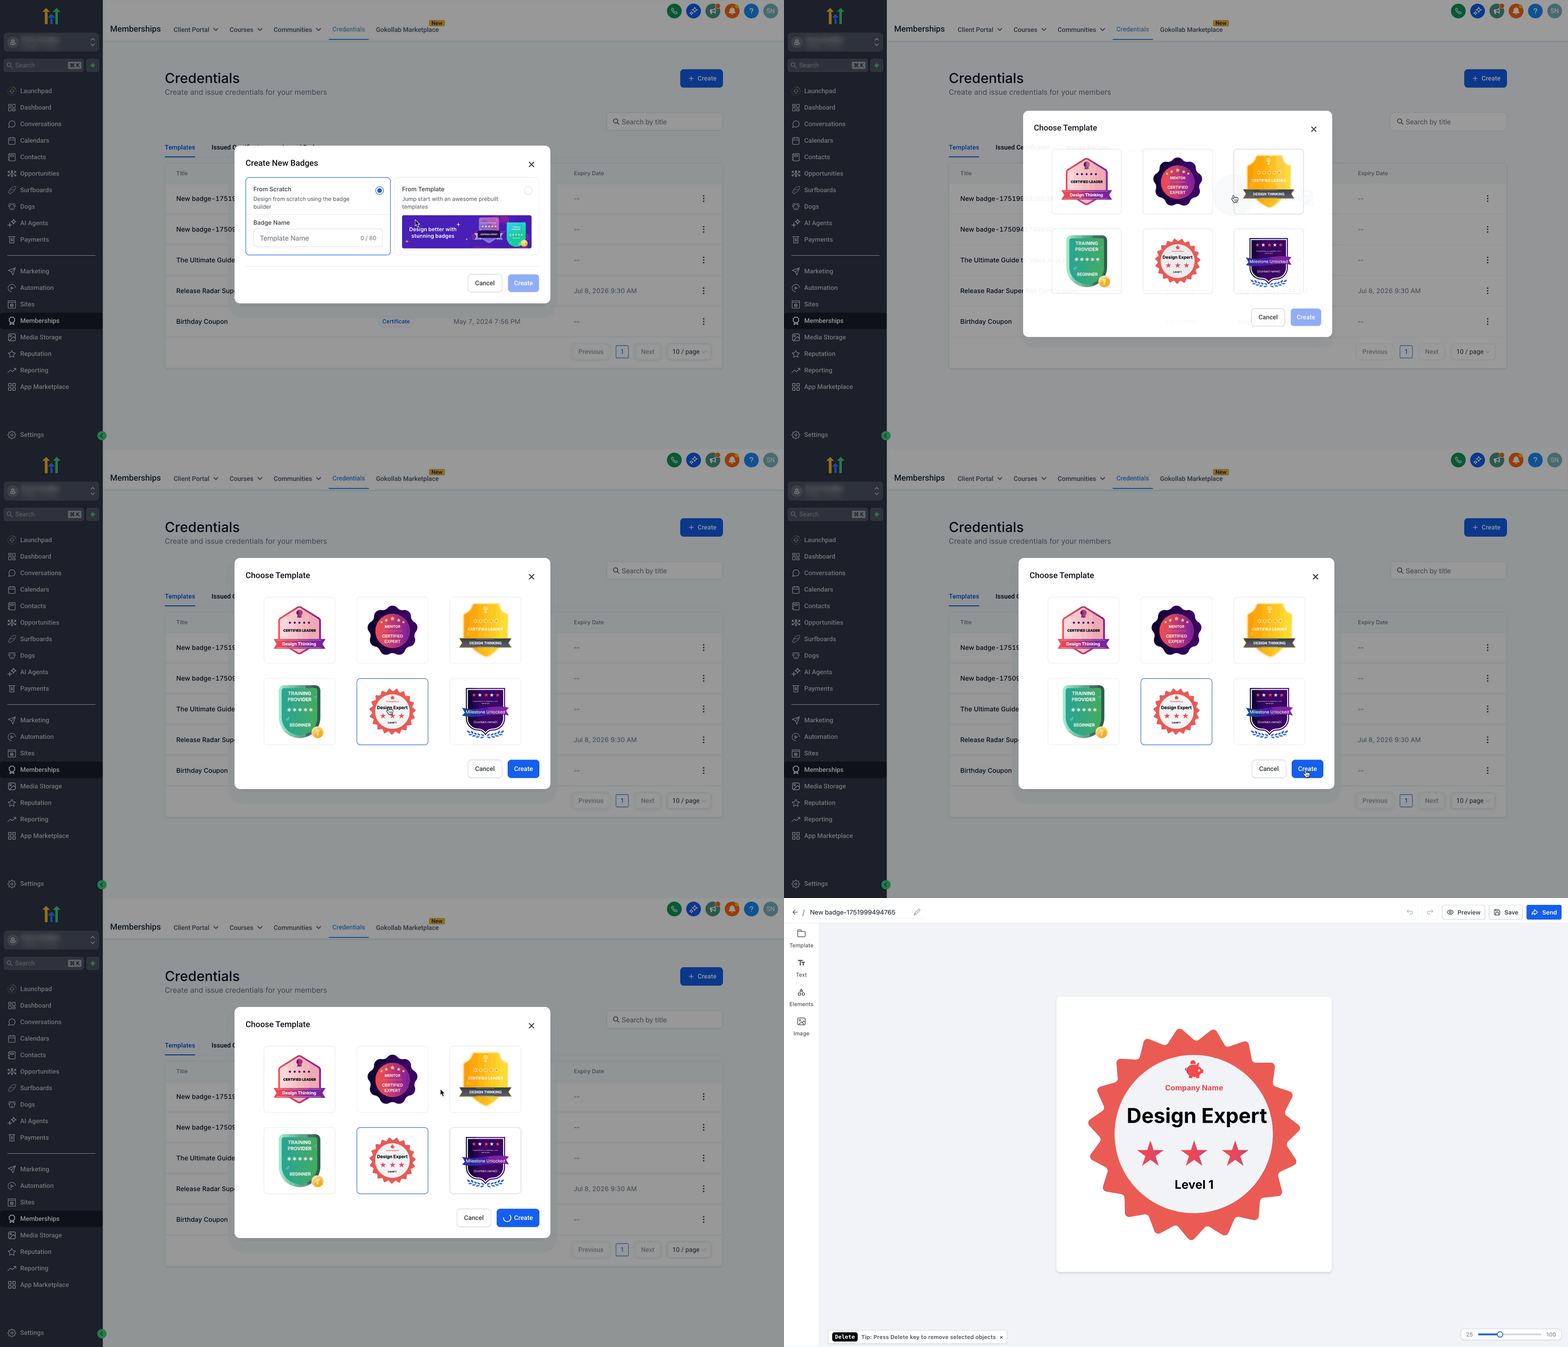
The badge editor lives under Memberships > Credentials. After clicking + Create and selecting Create Badge, the design canvas offers a toolbar that auto hides while moving or rotating elements. Text can be added, styled, and linked to dynamic tags. Design elements such as lines, shapes, ribbons, and icons are available, each with fill, stroke, border, radius, and opacity controls. Images can be uploaded from the media library or linked via URL.
After design, the badge can be previewed, saved, and sent via the Send button. The email step lets you add an instructor name, select recipients, choose or edit an email template, preview the message, and finally confirm and send. Auto Save records changes every 60 seconds.
03How businesses use badges
- Online course platform. Create a badge for each course module, add the learner’s name with dynamic tags, and email the badge when the module is completed. The badge can be downloaded from the email and shared on social media.
- Fitness coaching program. Design a branded badge for reaching a specific workout milestone, embed the member’s full name, and send the badge automatically after the milestone is logged. Recipients receive the badge as an image attachment they can display.
- Professional certification body. Build a badge for skill certification, incorporate the certificate holder’s company name, and issue the badge via email after a passing assessment. The badge can be saved in high resolution format for inclusion in portfolios.
04The numbers and rules that matter
- AutoSave saves badge projects every 60 seconds.
- There are no limits. Create as many badges as you need.
05Before you start
- Log into your HighLevel subaccount.
- Navigate to the Memberships section.
06How to set up and use badges in HighLevel
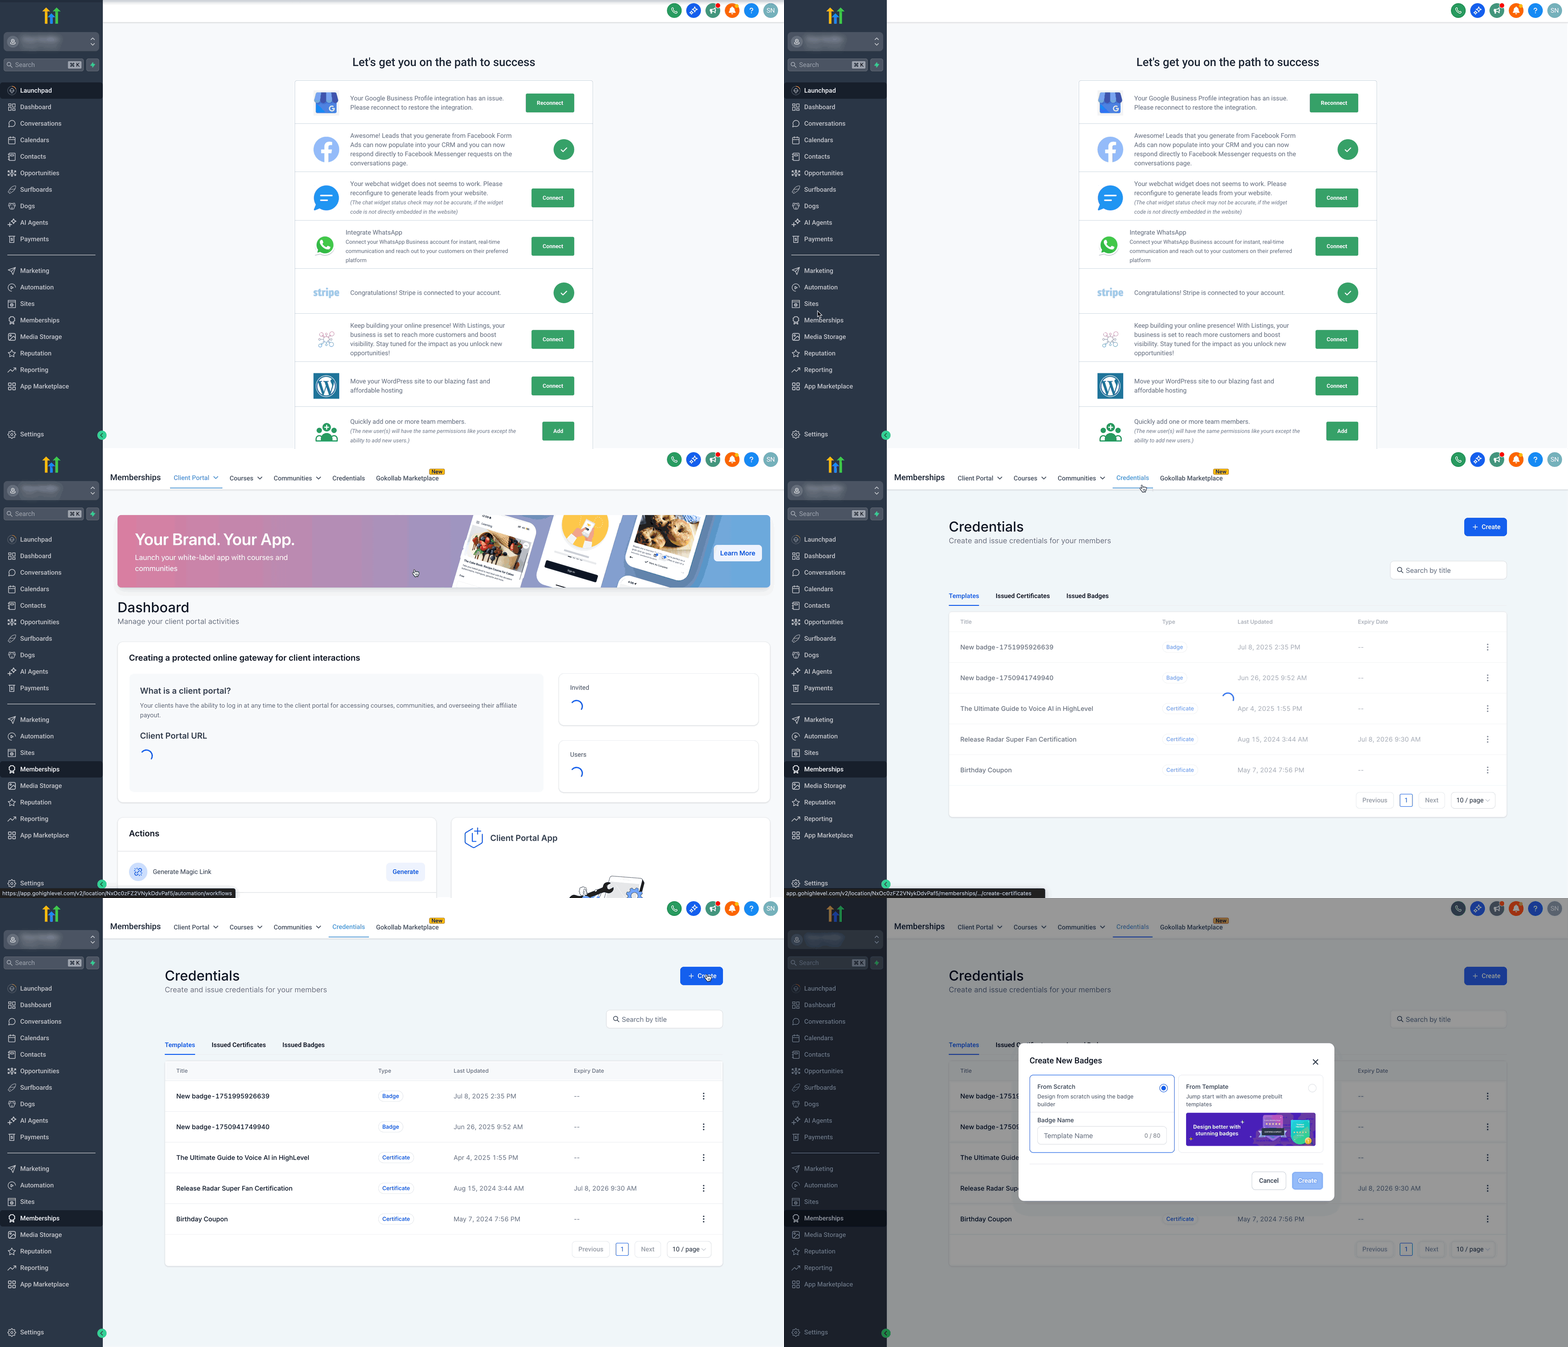
Access the certificate builder
- Log into your HighLevel subaccount.
- Click Memberships from the left hand menu.
- Select the Credentials tab.
- Click the + Create button in the top right corner.
- Choose Create Badge from the dropdown.
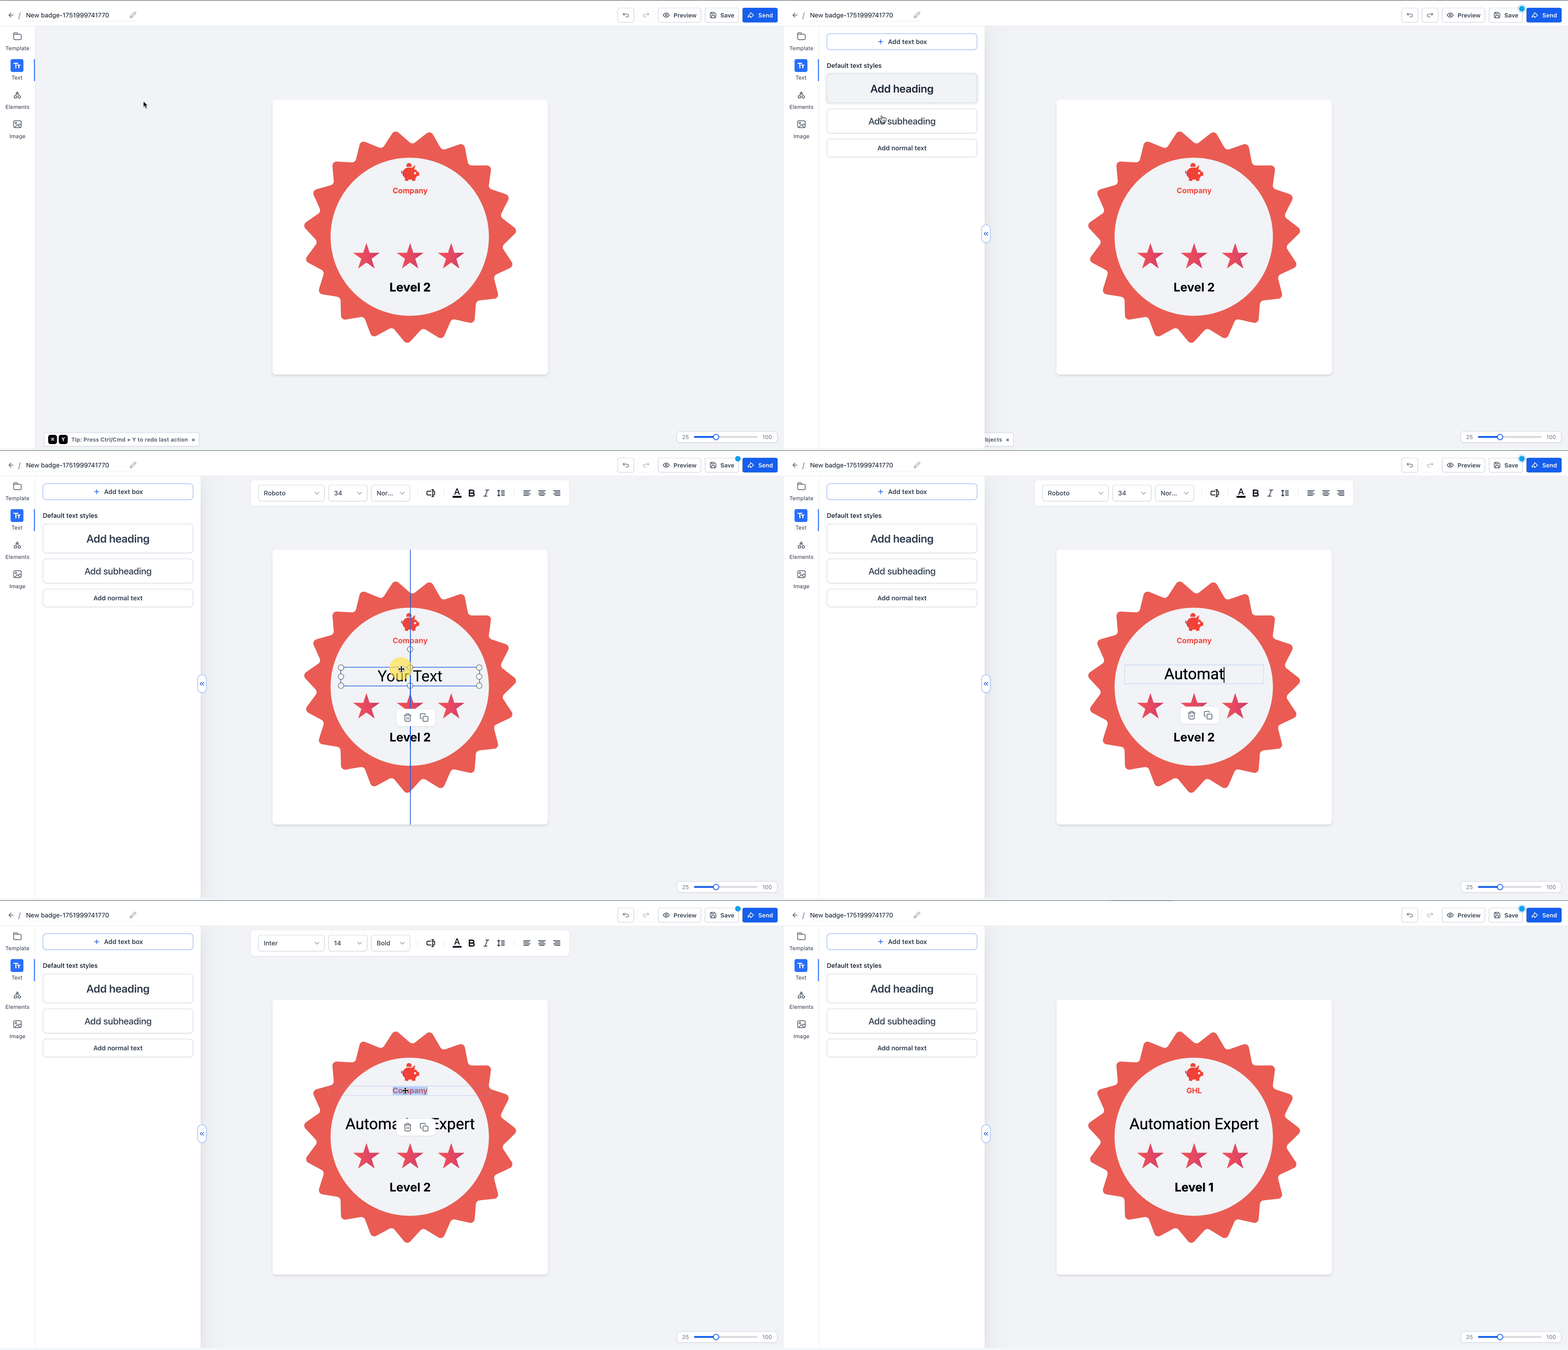
Customize the badge design
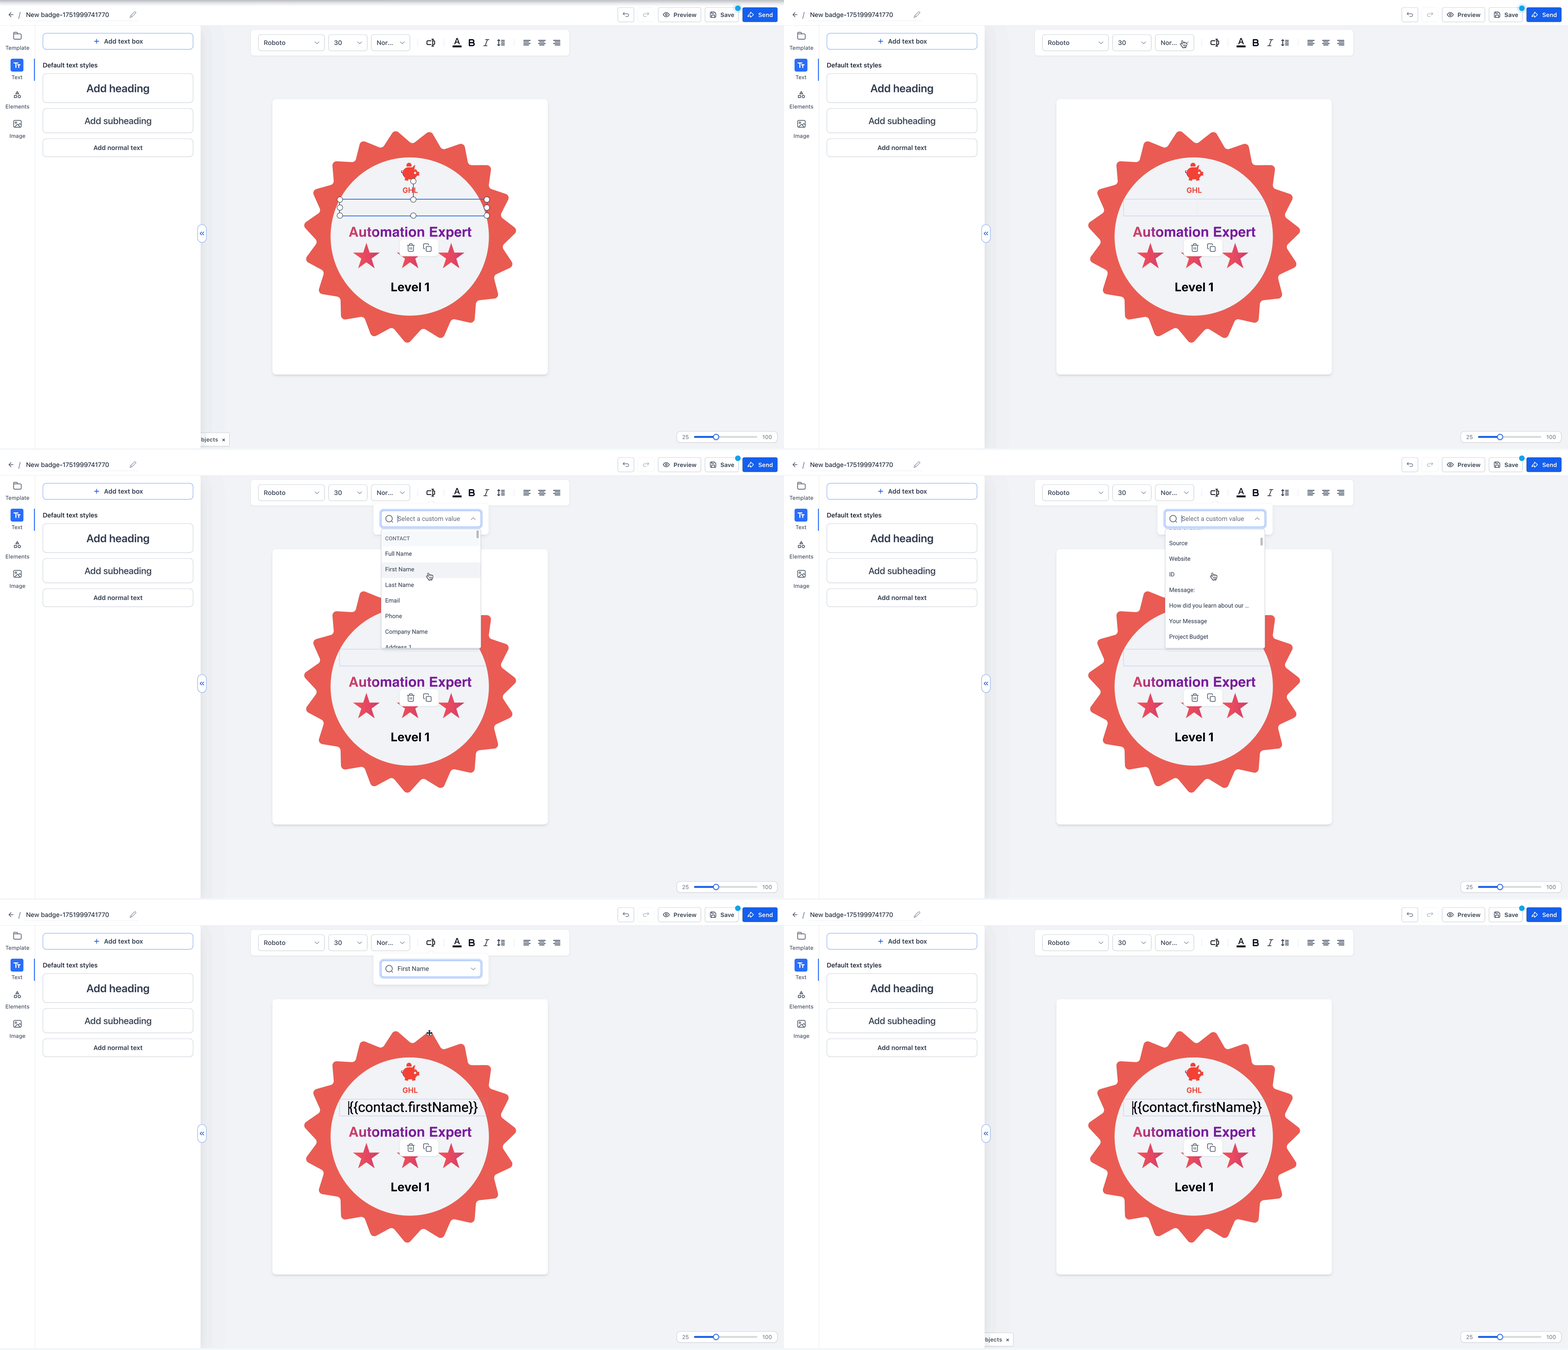
- Click the Text tab on the left panel.
- Click + Add Text Box to place a new text element.
- Select Heading, Subheading, or Normal Text for the box.
- Edit the text directly on the canvas.
- Hover over an element to highlight it before selecting it.
- Resize a selected element by dragging an edge or corner; line and shape resizing is more reliable and shows fewer corner markers.
- Use the move icon to reposition very small or tightly packed elements.
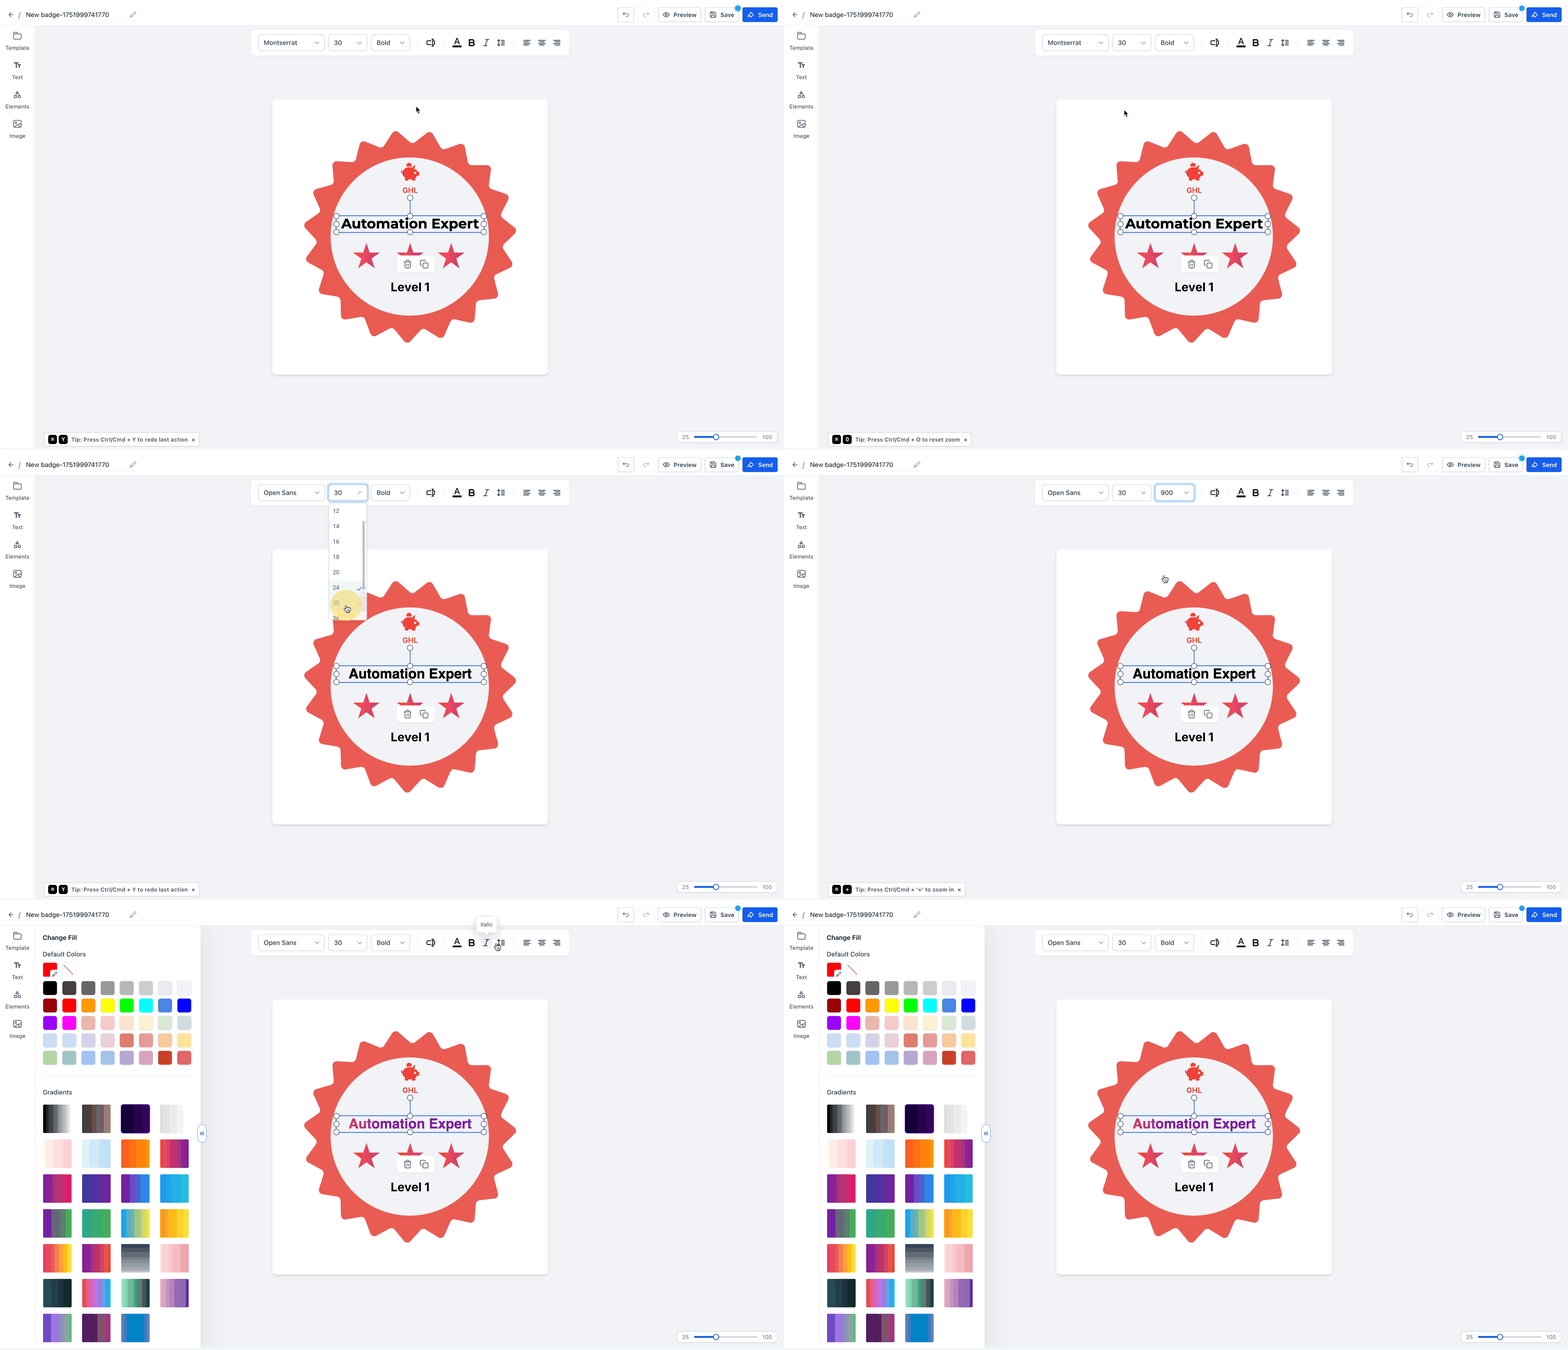
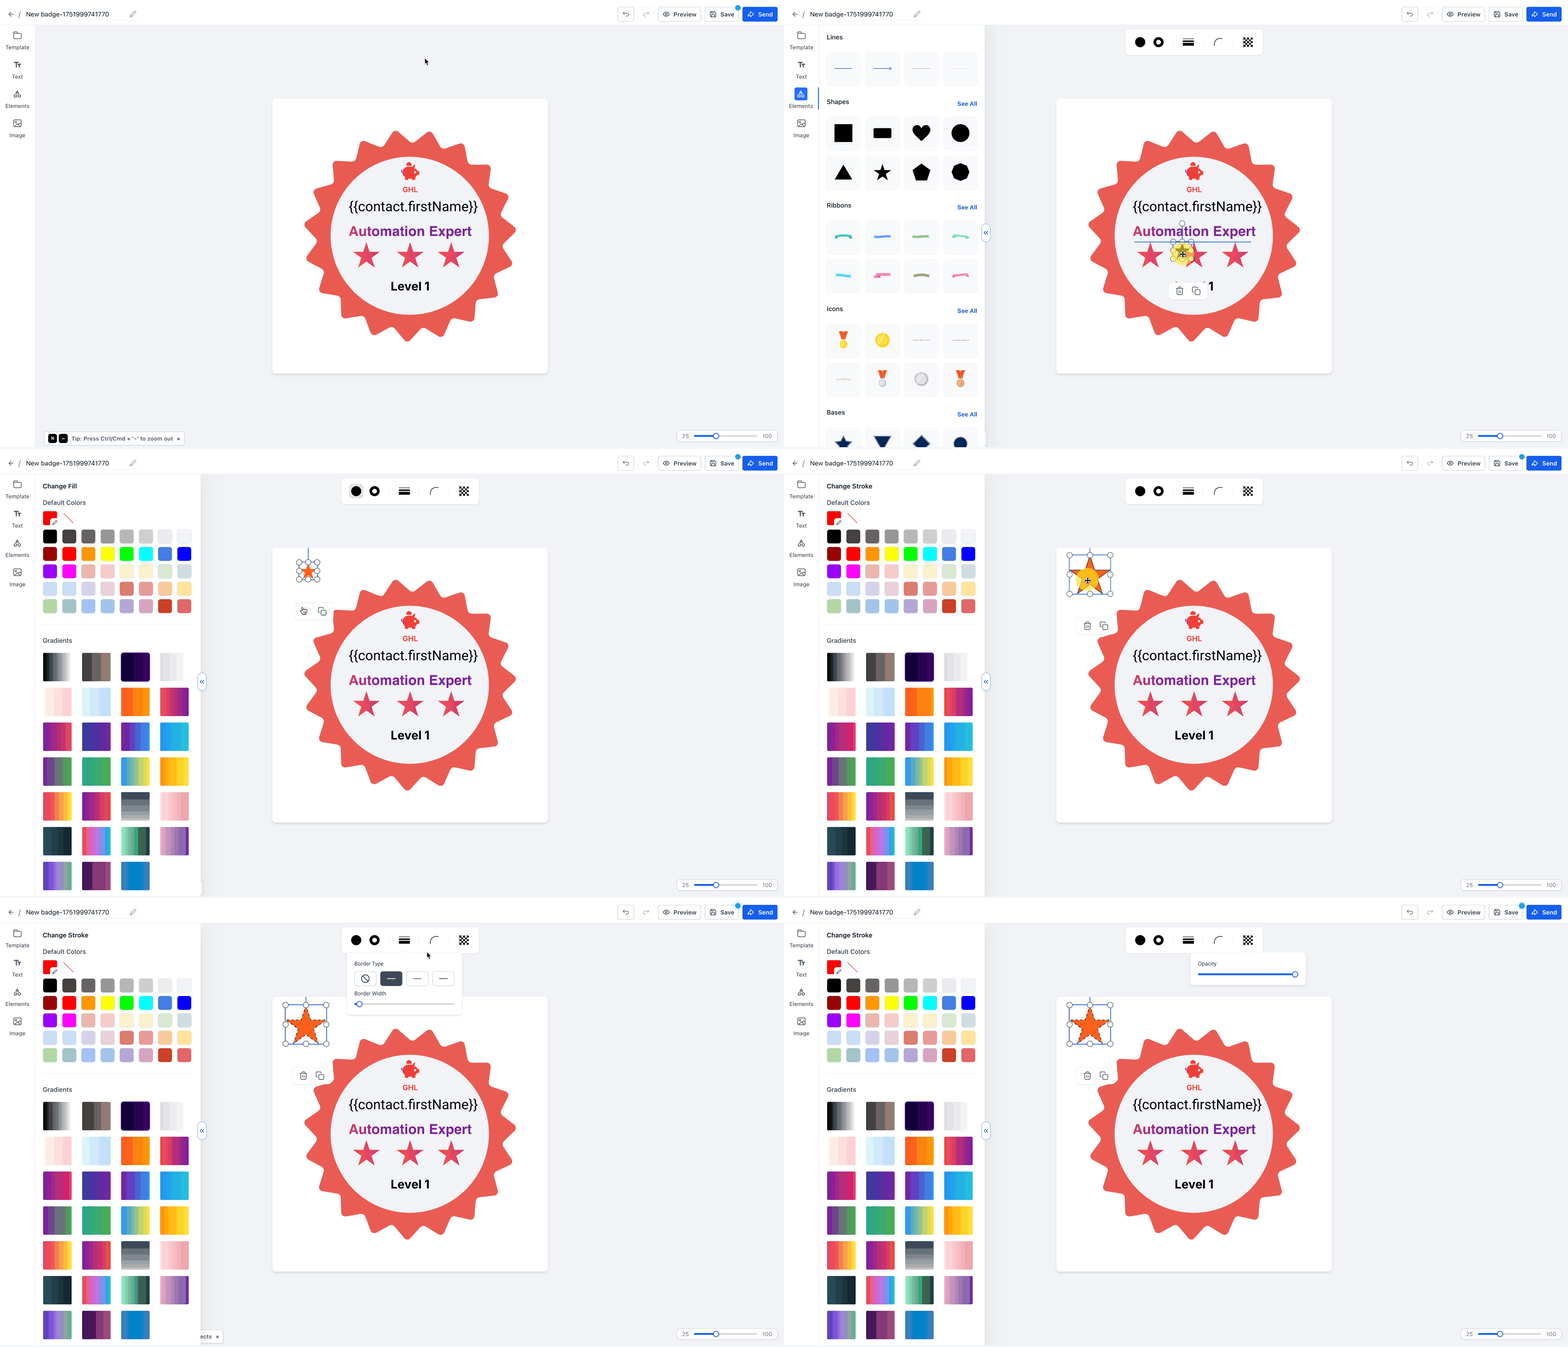
- Open the Elements tab and add a shape, line, ribbon, icon, or base.
- Select the added element and set its Fill Color, Stroke Color, Border Type, Border Width, Border Radius, and Opacity as needed.
- Upload an image via Upload Media or paste an Image URL.
- Use dynamic tags in a text box to insert Contact Full Name, Email, Company Name, etc. (only contact level values will populate).
- Notice that the editing toolbar auto hides while you move or rotate an element, keeping the canvas clear.
Preview and save the badge
- Click the Preview (eye icon) to view the badge.
- Click Save to store the badge in your HighLevel directory.
Send the badge via email
- Click the Send button.
- Enter an Instructor Name.
- Choose a recipient from Previously saved Recipients or click Add New.
- Select the Default Template or click the Edit button beside the eye icon to choose a saved email template.
- Preview the email using the eye icon.
- Edit the email subject if needed.
- Click Confirm and then click Send Email to deliver the badge.
Auto Save monitoring
- Observe the blue dot that appears when there are unsaved changes.
- Auto Save records changes every 60 seconds; the blue dot disappears when saving is complete.
- Click the Save button manually if you need to force a save before the interval.
07What it looks like in HighLevel
08Settings that matter
- Fill Color. Sets the interior color of a selected shape or element.
- Stroke Color. Defines the border color of a selected shape or element.
- Border Type. Determines the style of the element’s border, such as solid or dashed.
- Border Width. Controls how thick the border appears around an element.
- Border Radius. Rounds the corners of a shape to create smoother edges.
- Element Opacity. Adjusts the transparency level of the selected element.
09Things to know before you rely on it
- There is no limit on the number of badges you can create.
- Auto Save records changes every 60 seconds, indicated by a blue dot when unsaved changes exist.
- Only contact level custom values will populate in dynamic tags; some custom values may appear blank.
10How it connects to the rest of HighLevel
- Automate badge issuance through workflows for automatic delivery. Automate with workflows
- Create badge templates using the certificate builder. Create a template
- Review pricing and plan details for access to the Certificates module. Pricing and plans
Michael's take

I like using badges because they give learners a visual token they can showcase after completing something.
If you’re only handing out static certificates and don’t plan to encourage social sharing, you might decide that the extra design effort isn’t worth it for your audience.