
01Who this is for
- Course creators, they can award completion certificates that match their branding.
- Community managers, they can celebrate member achievements with tailored certificates.
02Certificates, explained
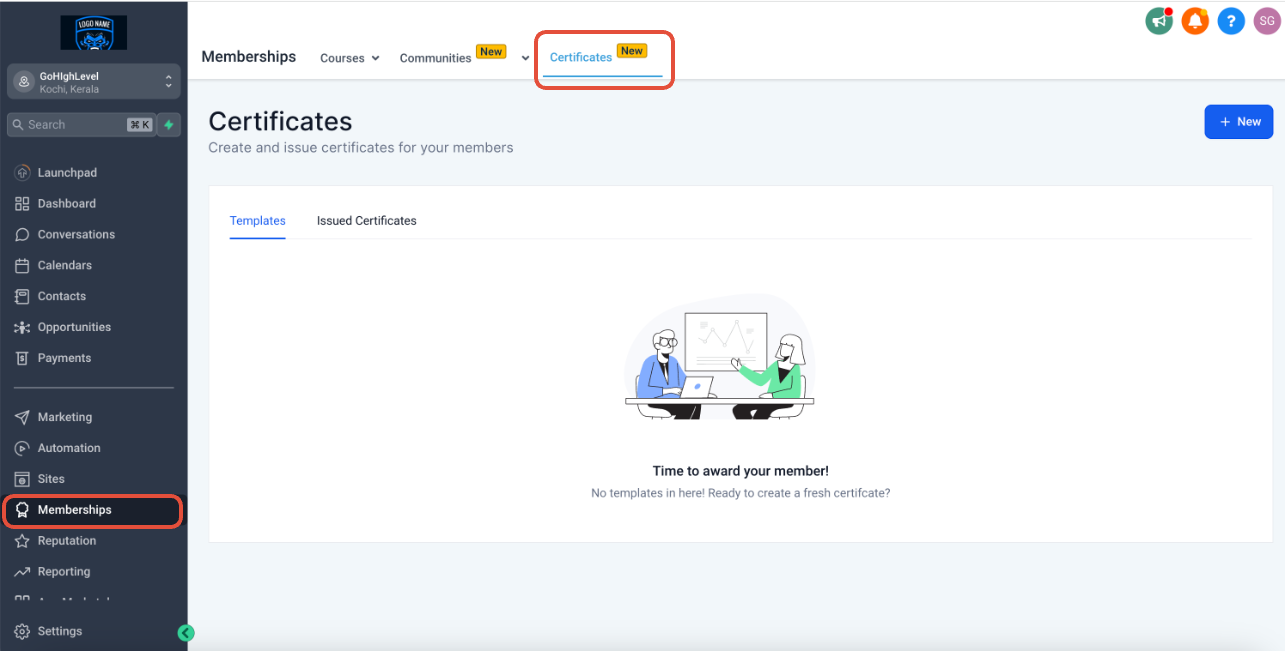
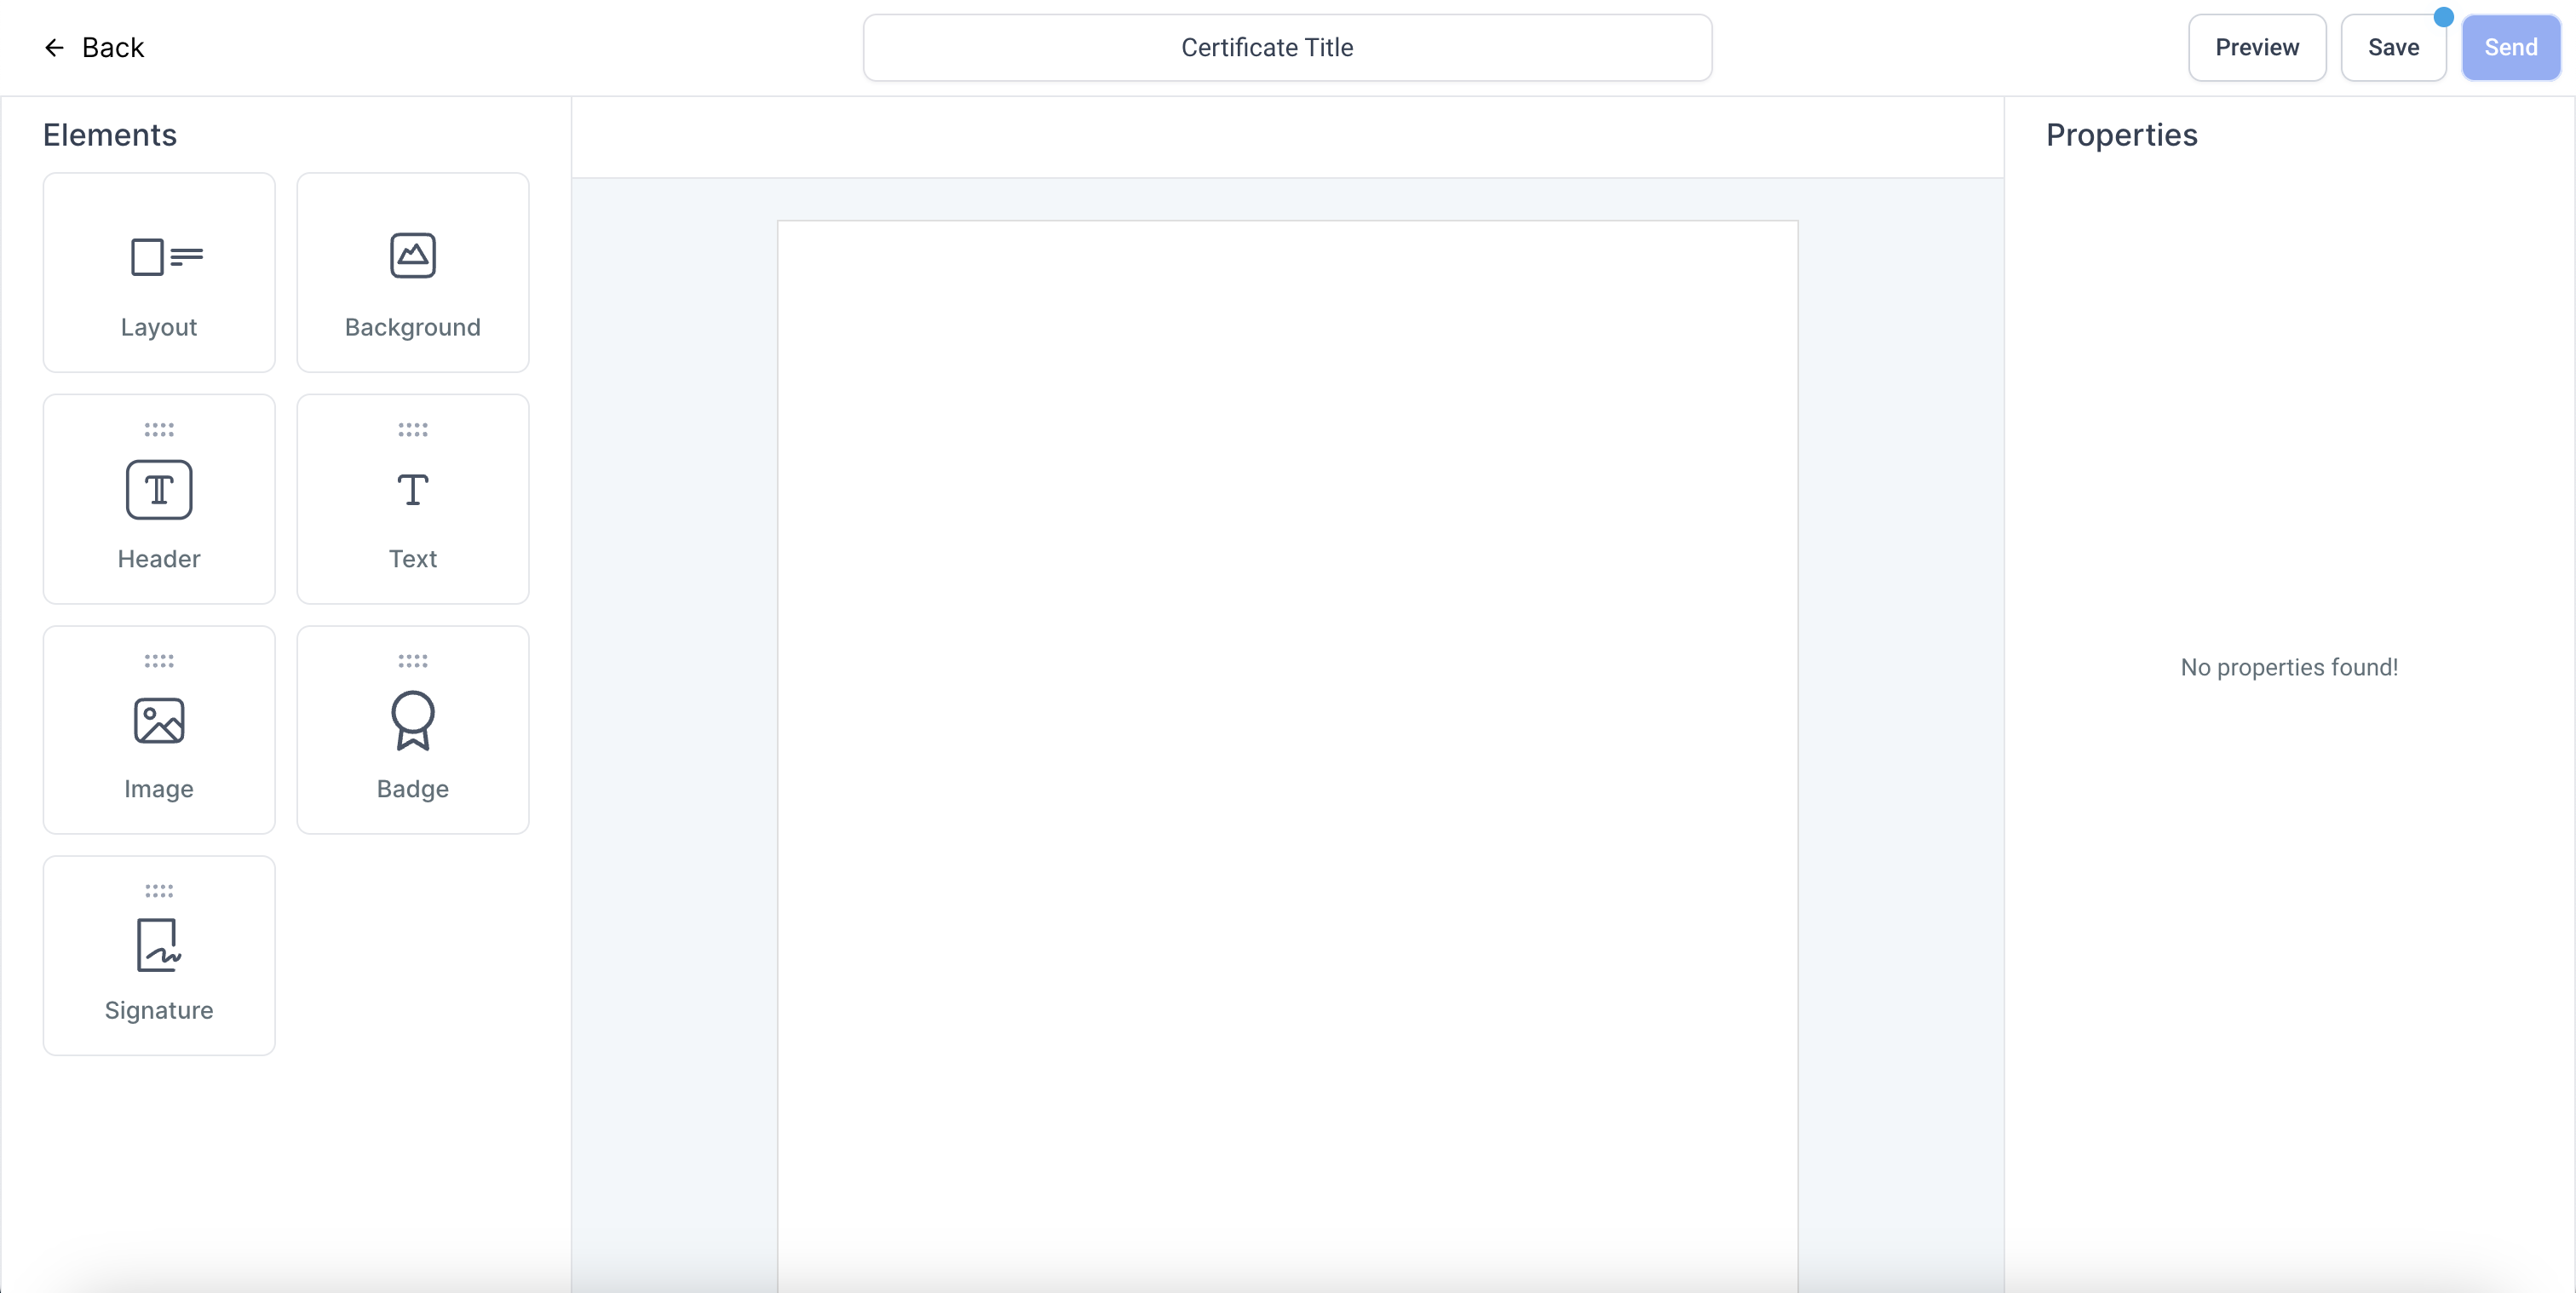
Certificates are a feature inside the Memberships area. From the left navigation select Memberships, then Certificates to open the Certificate Builder. The builder loads quickly, lets you pick A4, US Letter, or a custom canvas, and provides a real time preview as you work.
You can begin with a professional template or start from a blank canvas. Drag and drop lines, shapes, graphics, icons, text, images, badges, and signature fields. Backgrounds can be solid colors, gradients, uploaded images, or patterns, each with an opacity slider. All elements are resizable by dragging edges or corners.
03How businesses use create a template
- Online course platform. The platform selects a pre designed certificate, customizes the header and student name, previews the result, and saves the template to issue automatically on course completion.
- Fitness coaching business. A coach creates a blank certificate, adds a logo, background image, and a signature field, then saves the design to send after a client reaches a training milestone.
- Professional association. The association builds a certificate from scratch, inserts a badge, adjusts layout to landscape, previews the final look, and stores the template for future event recognitions.
04The numbers and rules that matter
- Standard and custom sizes: A4, US Letter, or custom canvas size.
05Before you start
- Access a location where Memberships is available.
06How to set up and use create a template in HighLevel
Create a template from an existing design
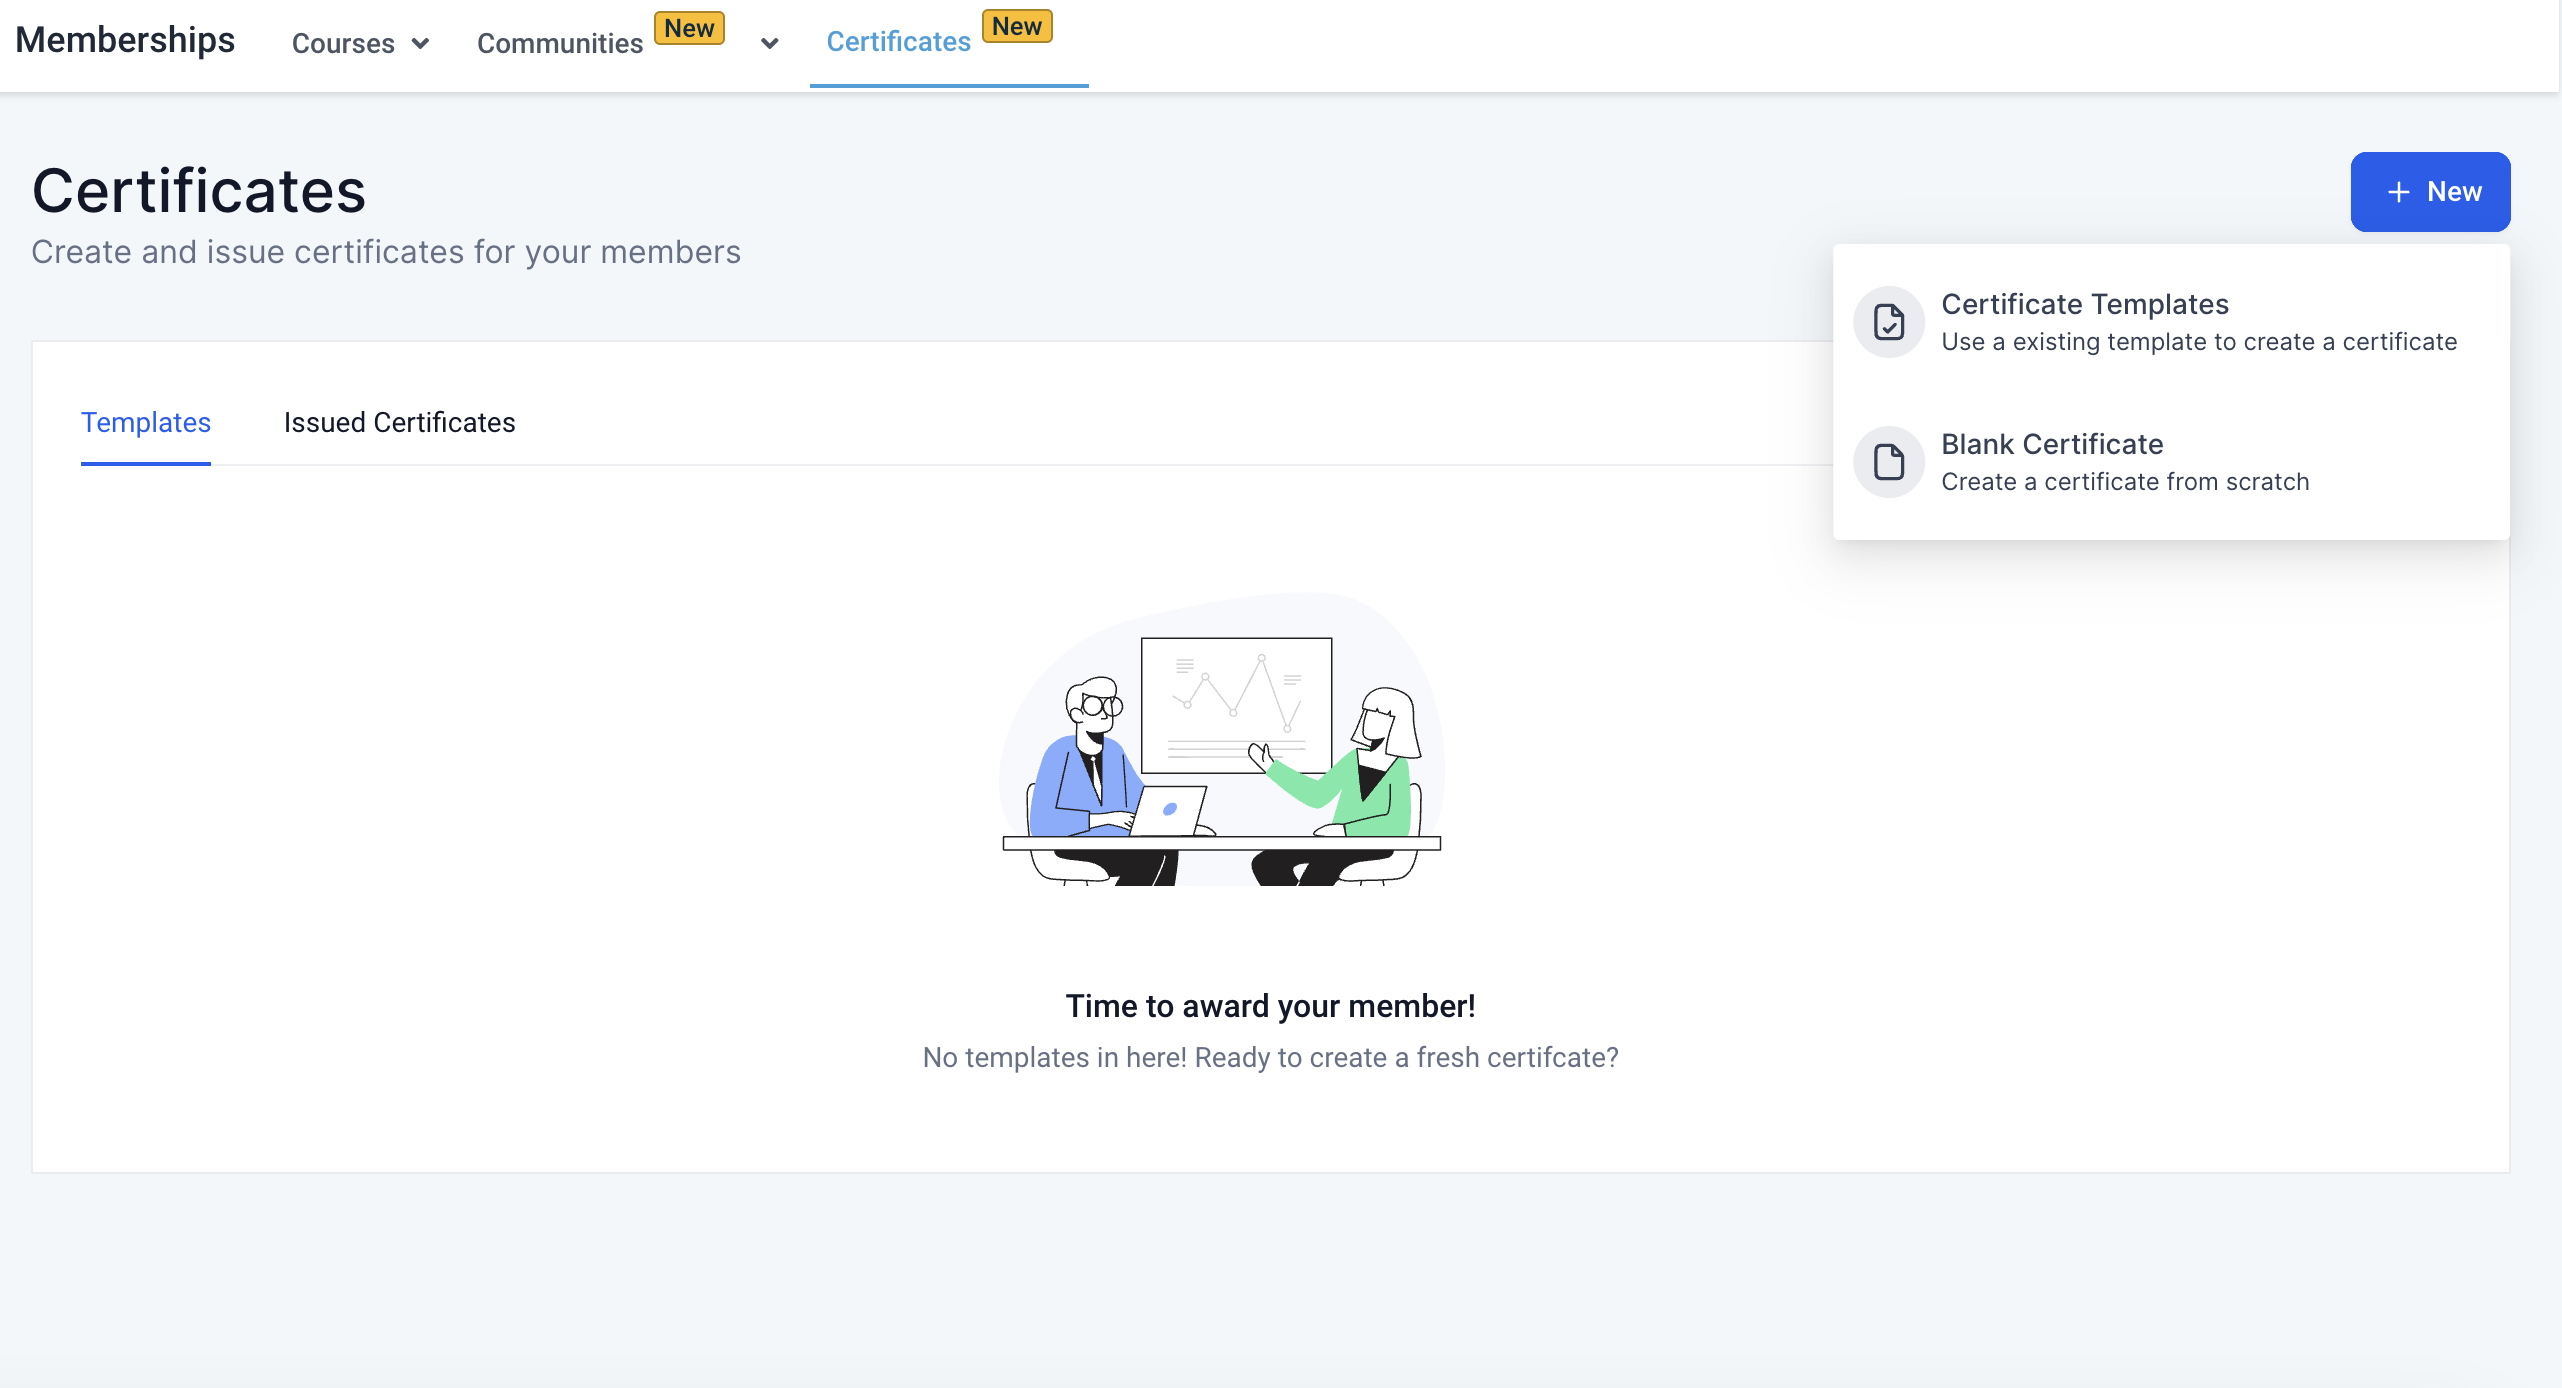
- Click the New button in the Certificates area.
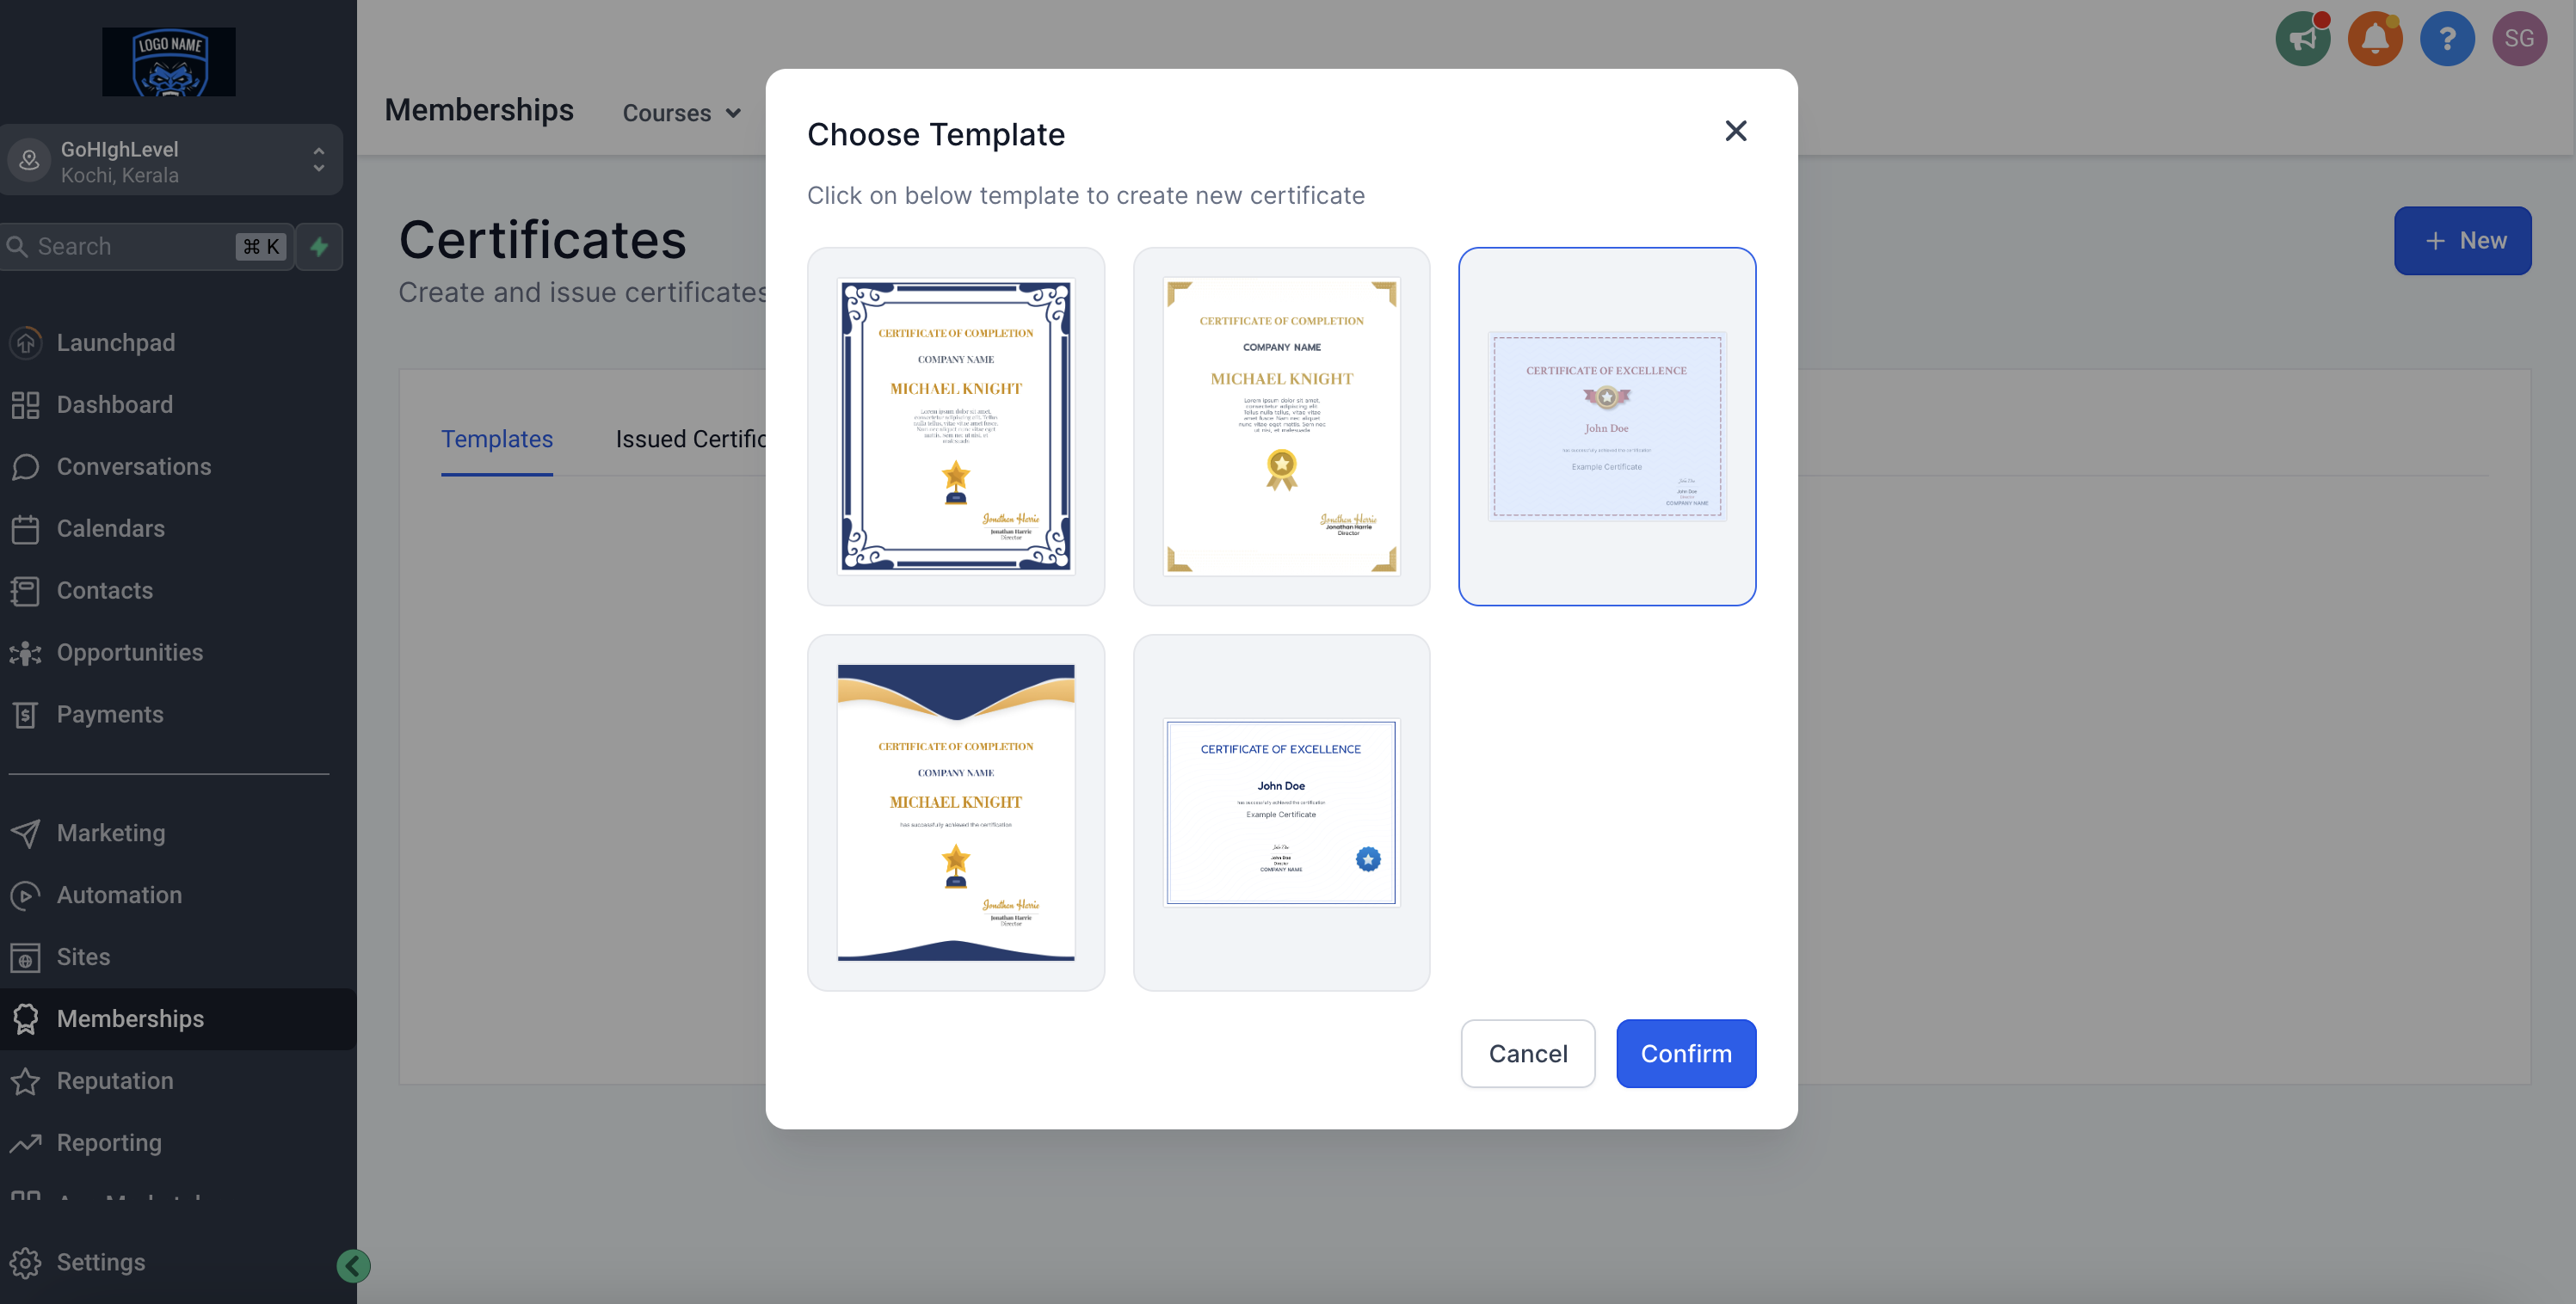
- Select Certificate Templates as the source.
- Select a template from the displayed options.
- Press Confirm to load the selected design.
- The template loads and is ready for further editing.
Create a template from scratch
- Click the New button in the Certificates area.
- Choose Blank Certificates to start with an empty canvas.
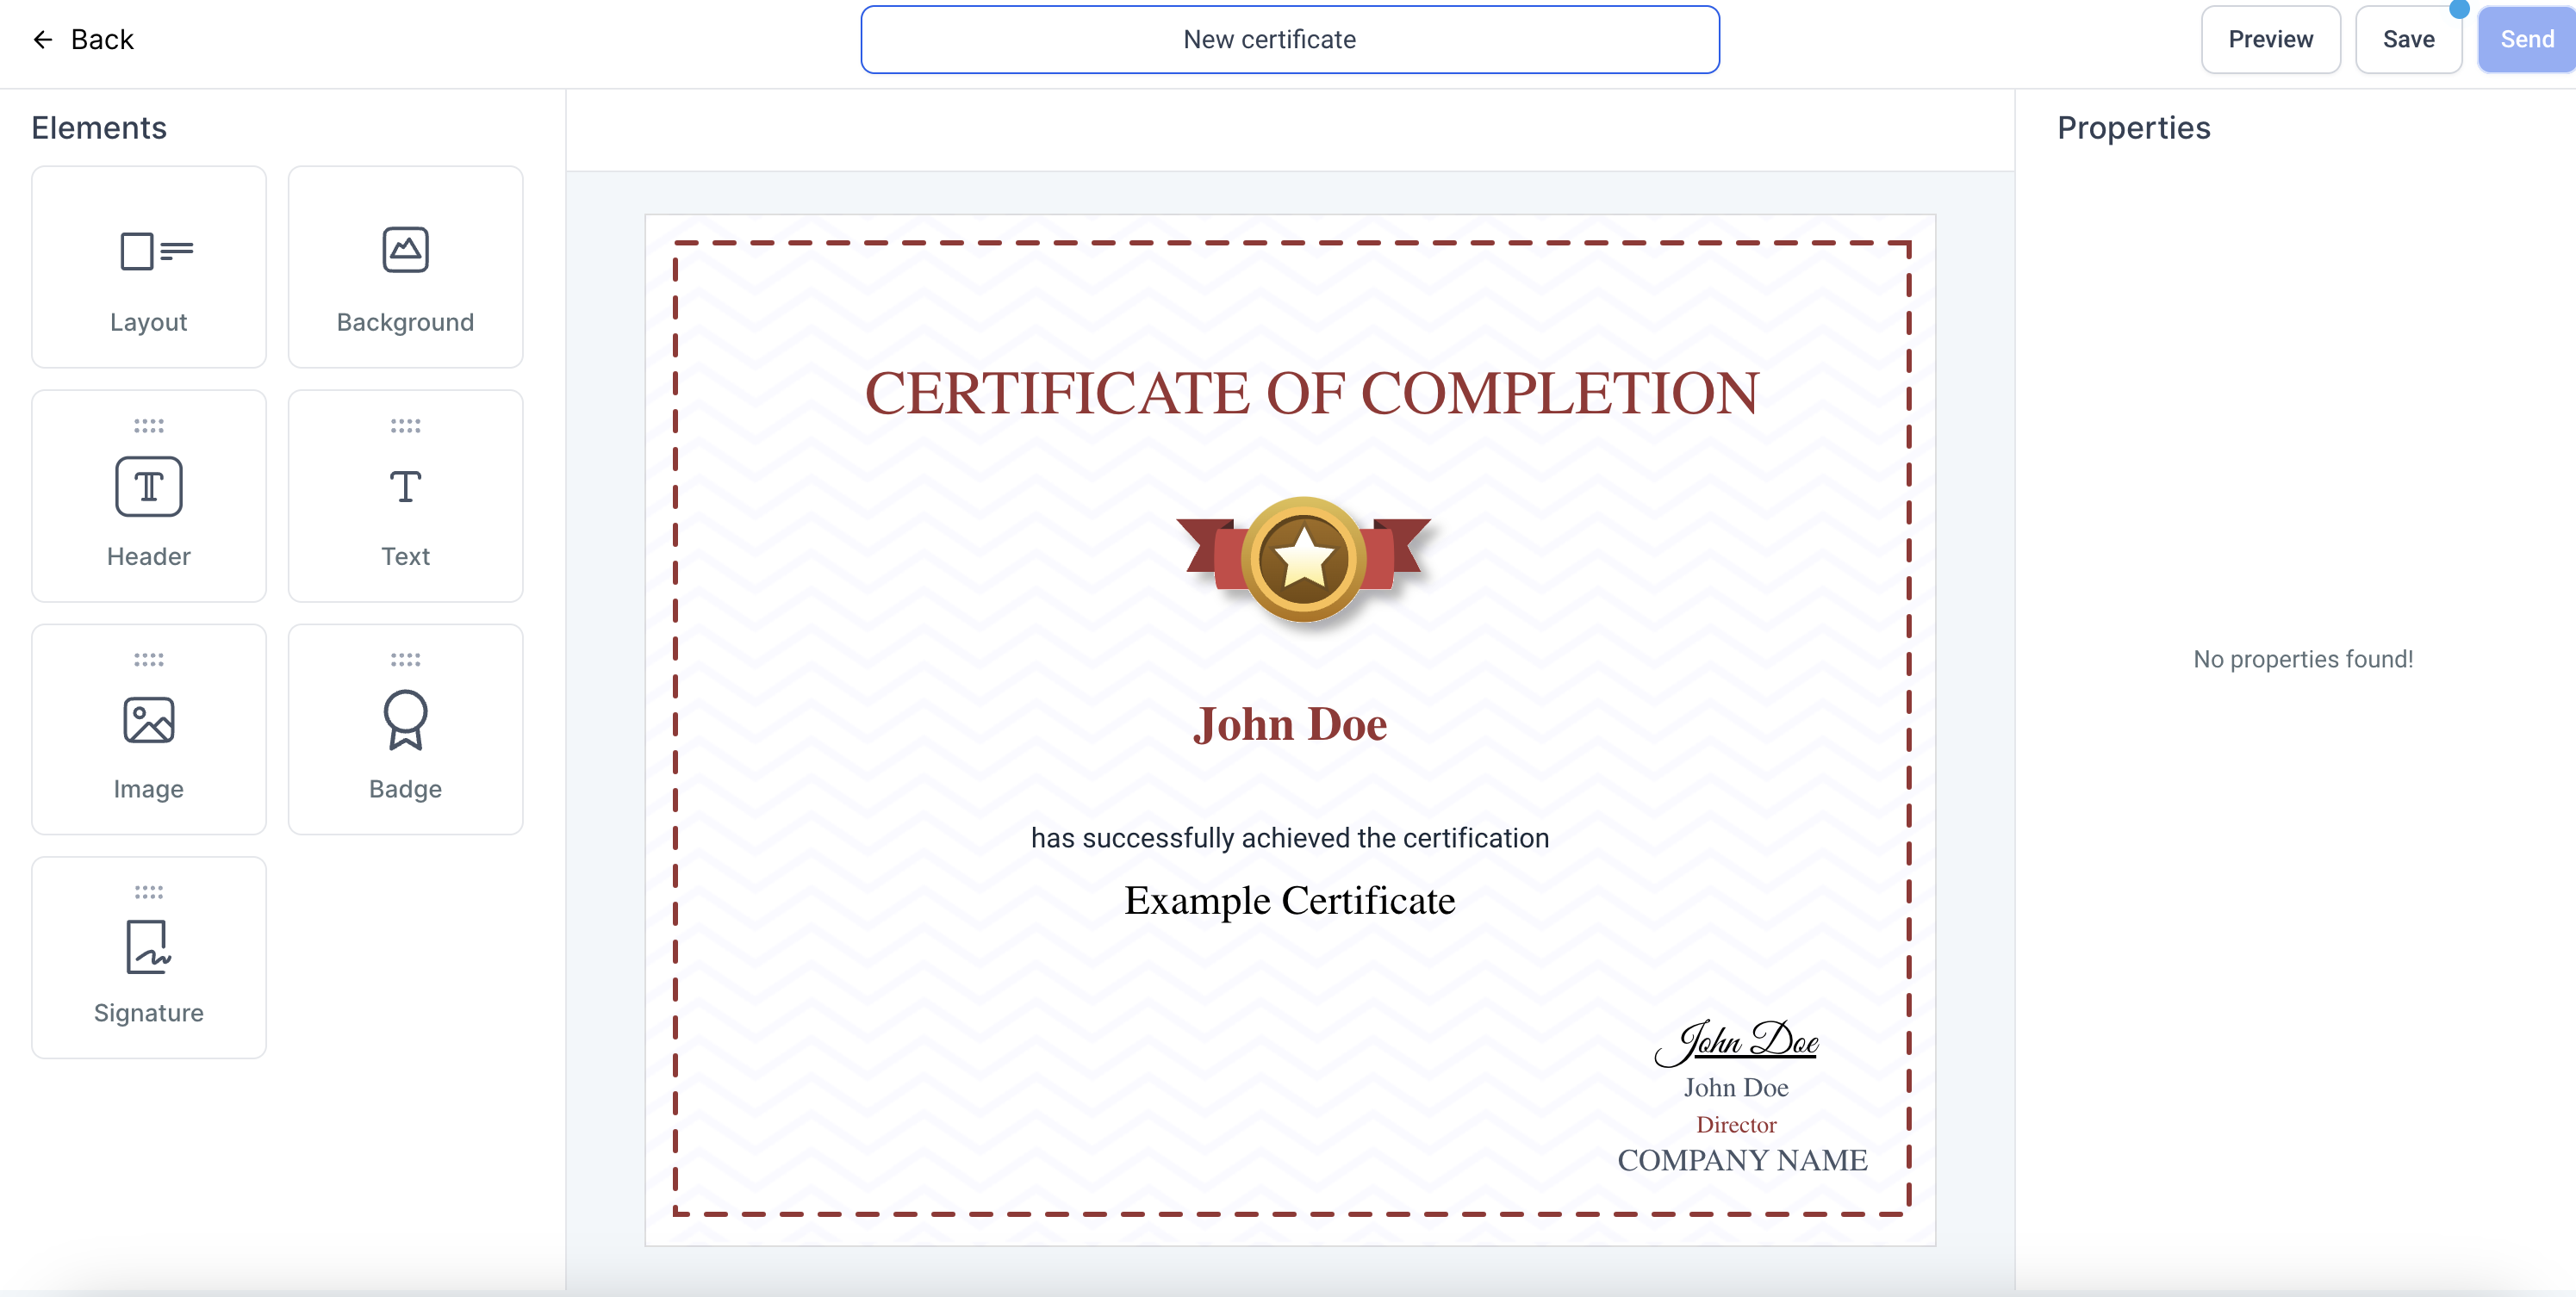
- Drag and drop desired elements such as text, images, or badges onto the canvas.
- Resize each element by dragging its edges or corners.
Edit a template
- Open a saved template and select Edit from the three dot menu.
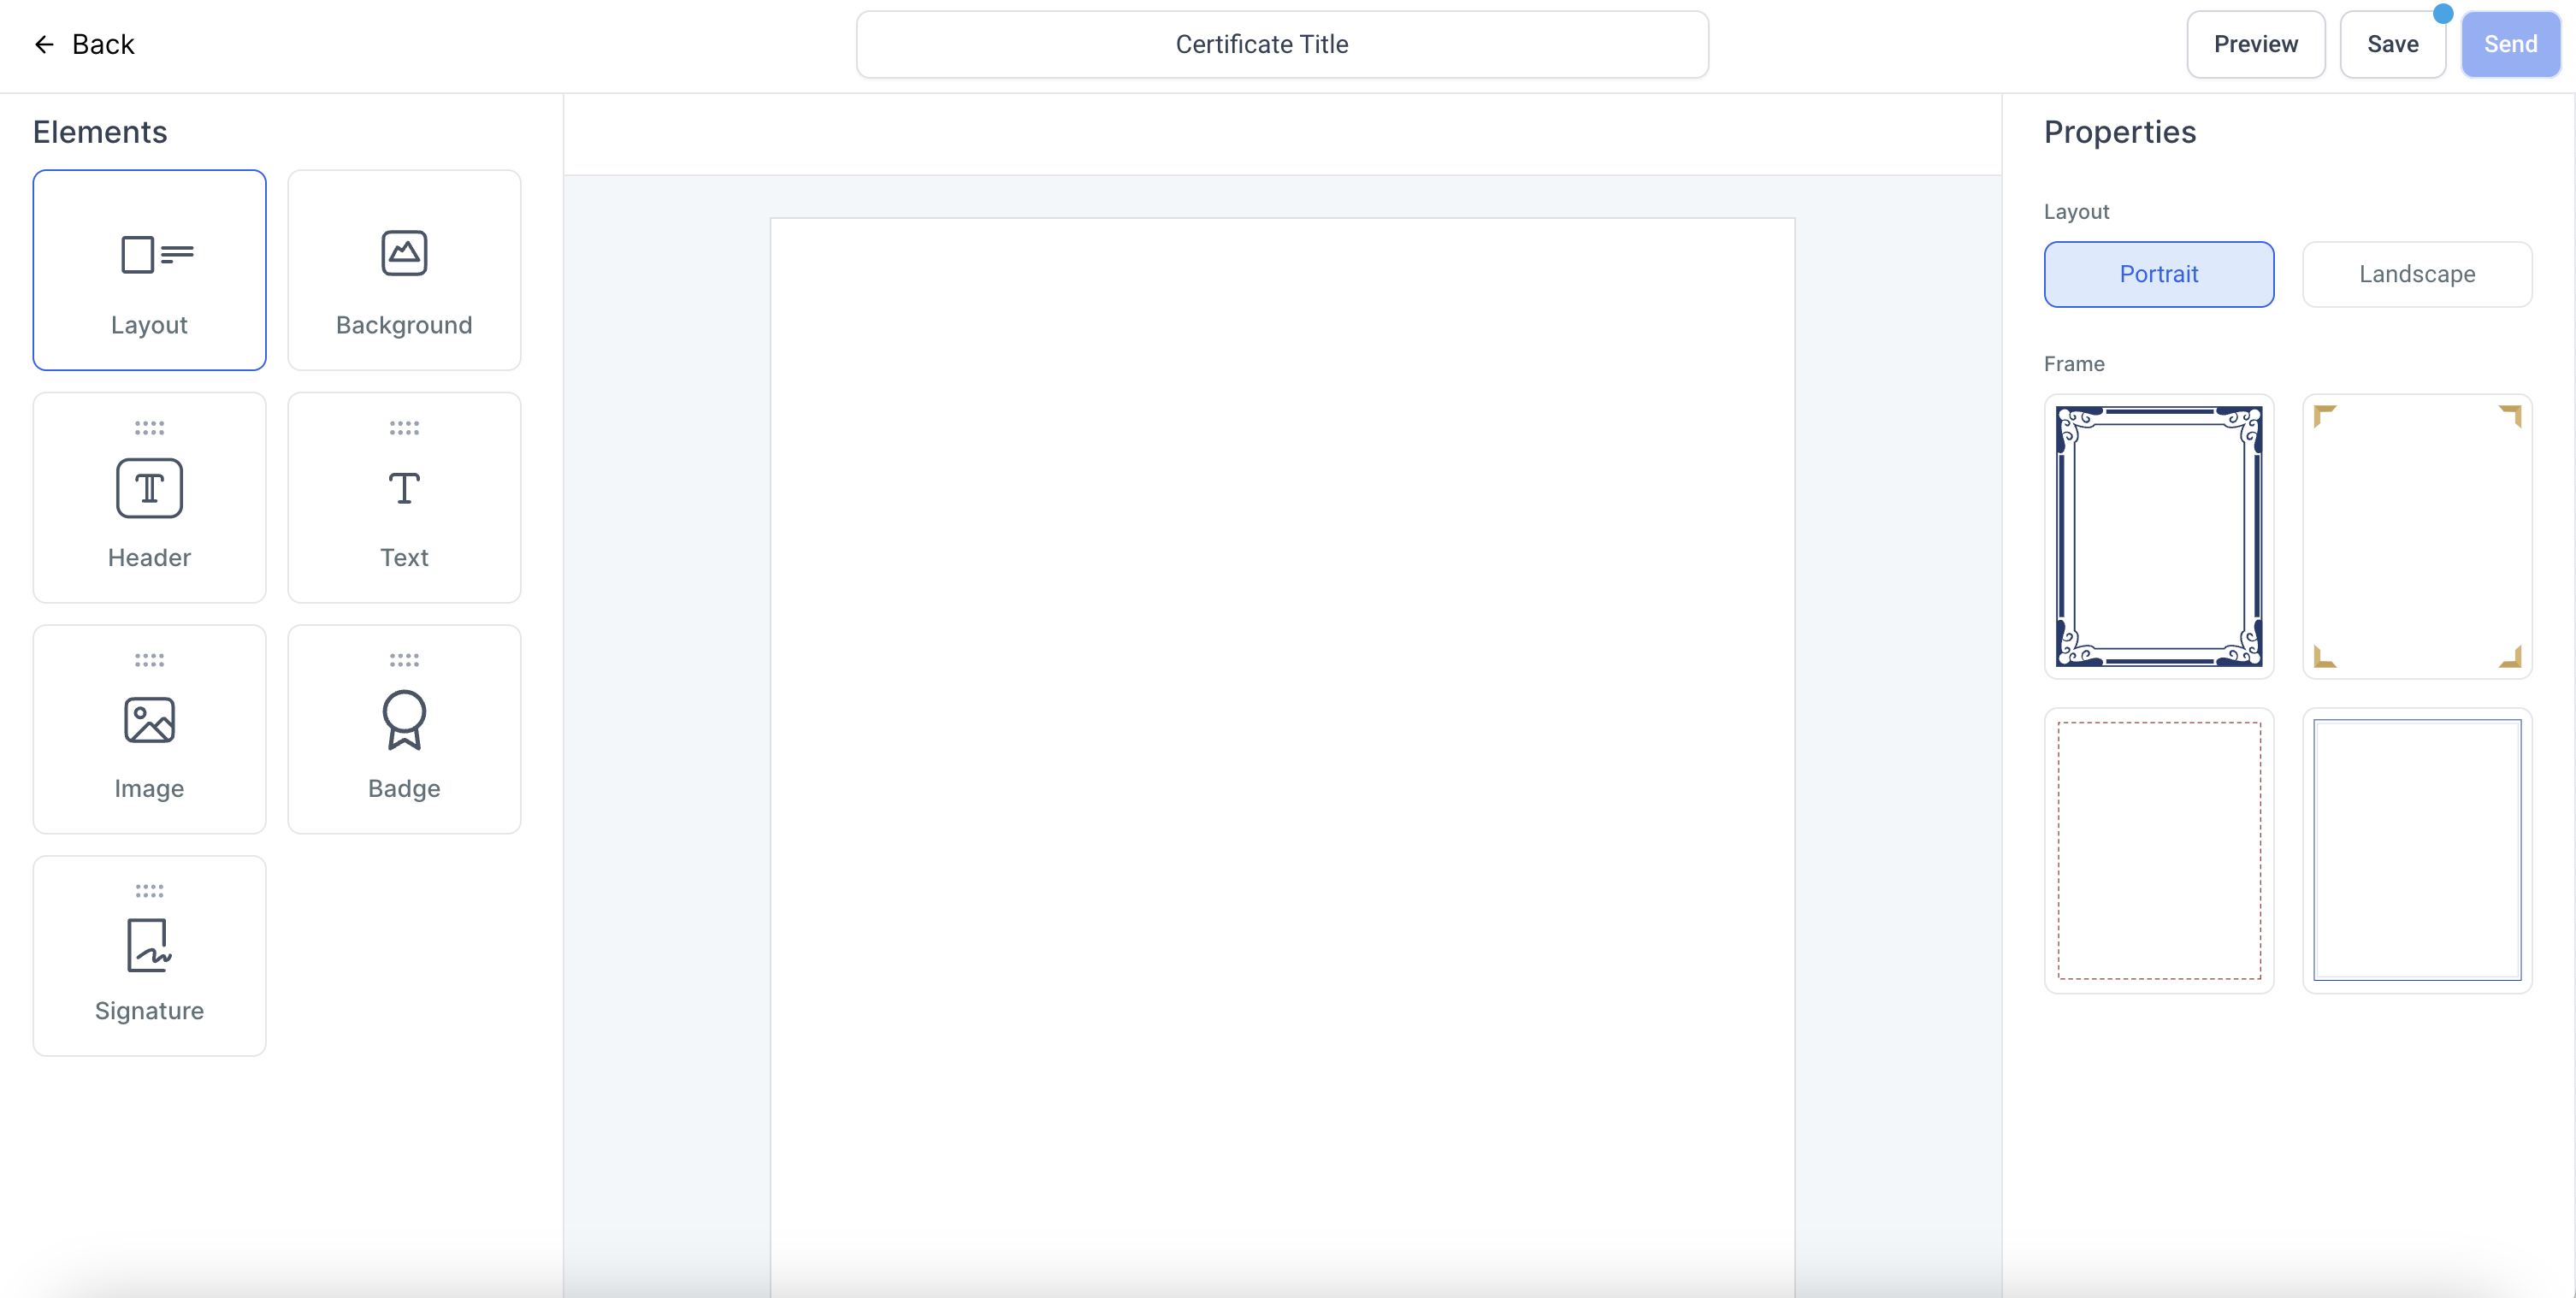
- Click Layout and set the orientation to Portrait or Landscape (changing the layout will disrupt existing edits).
- Click Background to choose a colour, upload an image, or select a pattern.
- Drag a Header element onto the canvas and edit its text, font, and colour.
- Drag an Image element, upload a picture, and adjust its opacity and size.
Preview and save a template
- Click Preview to view the certificate as it will appear to users.
- Enter a descriptive name for the certificate at the top of the screen.
- Click Save to store the template.
- Click Back to return to the Template tab where the saved design appears.
07What it looks like in HighLevel
08Settings that matter
- Layout. Controls whether the certificate orientation is Portrait or Landscape.
- Background. Sets the background colour, gradient, uploaded image, or pattern for the canvas.
- Header. Adds a header element that can be edited for text, font style, size, and colour.
- Text. Provides a text element for body copy with editable font options and formatting shortcuts.
- Image. Allows an image to be placed, uploaded or linked, with adjustable opacity and size.
- Badge. Inserts a badge element chosen from available badge options.
- Signatures. Adds a signature field with selectable font styles for signing certificates.
- Opacity slider. Adjusts the transparency of background images, patterns, or placed images.
- Patterns. Provides preset pattern images that can be applied as a background with colour selection.
09Things to know before you rely on it
- Changing the layout from Portrait to Landscape or vice versa will disrupt any existing edits.
- The initial release focuses on issuing certificates for course completion only.
10How it connects to the rest of HighLevel
- Explore all certificate capabilities All Certificates features
- Set up automatic issue on course completion Issue certificates on course completion
- Create email templates for sending certificates Manual certificate email templates
Michael's take

Certificates can feel like a distraction if you’re not already rewarding learners or members. The builder adds another layer of design work that can pull focus from core content creation, especially when you’re juggling multiple courses.
When you have a clear milestone to celebrate, the template engine gives you a way to produce polished, on brand proof of achievement. I’d jump straight into the modern templates, replace the placeholder text with your own branding, and let the system handle the rest.