
01Who this is for
- Service businesses that take deposits can track partial payments and collect balances without leaving the platform.
- Event organizers handling group bookings benefit from seeing each guest’s payment status and applying coupons in one place.
- Health clinics with multiple patients per slot use the tab to record cash or check payments quickly.
02Payments tab in calendars, explained
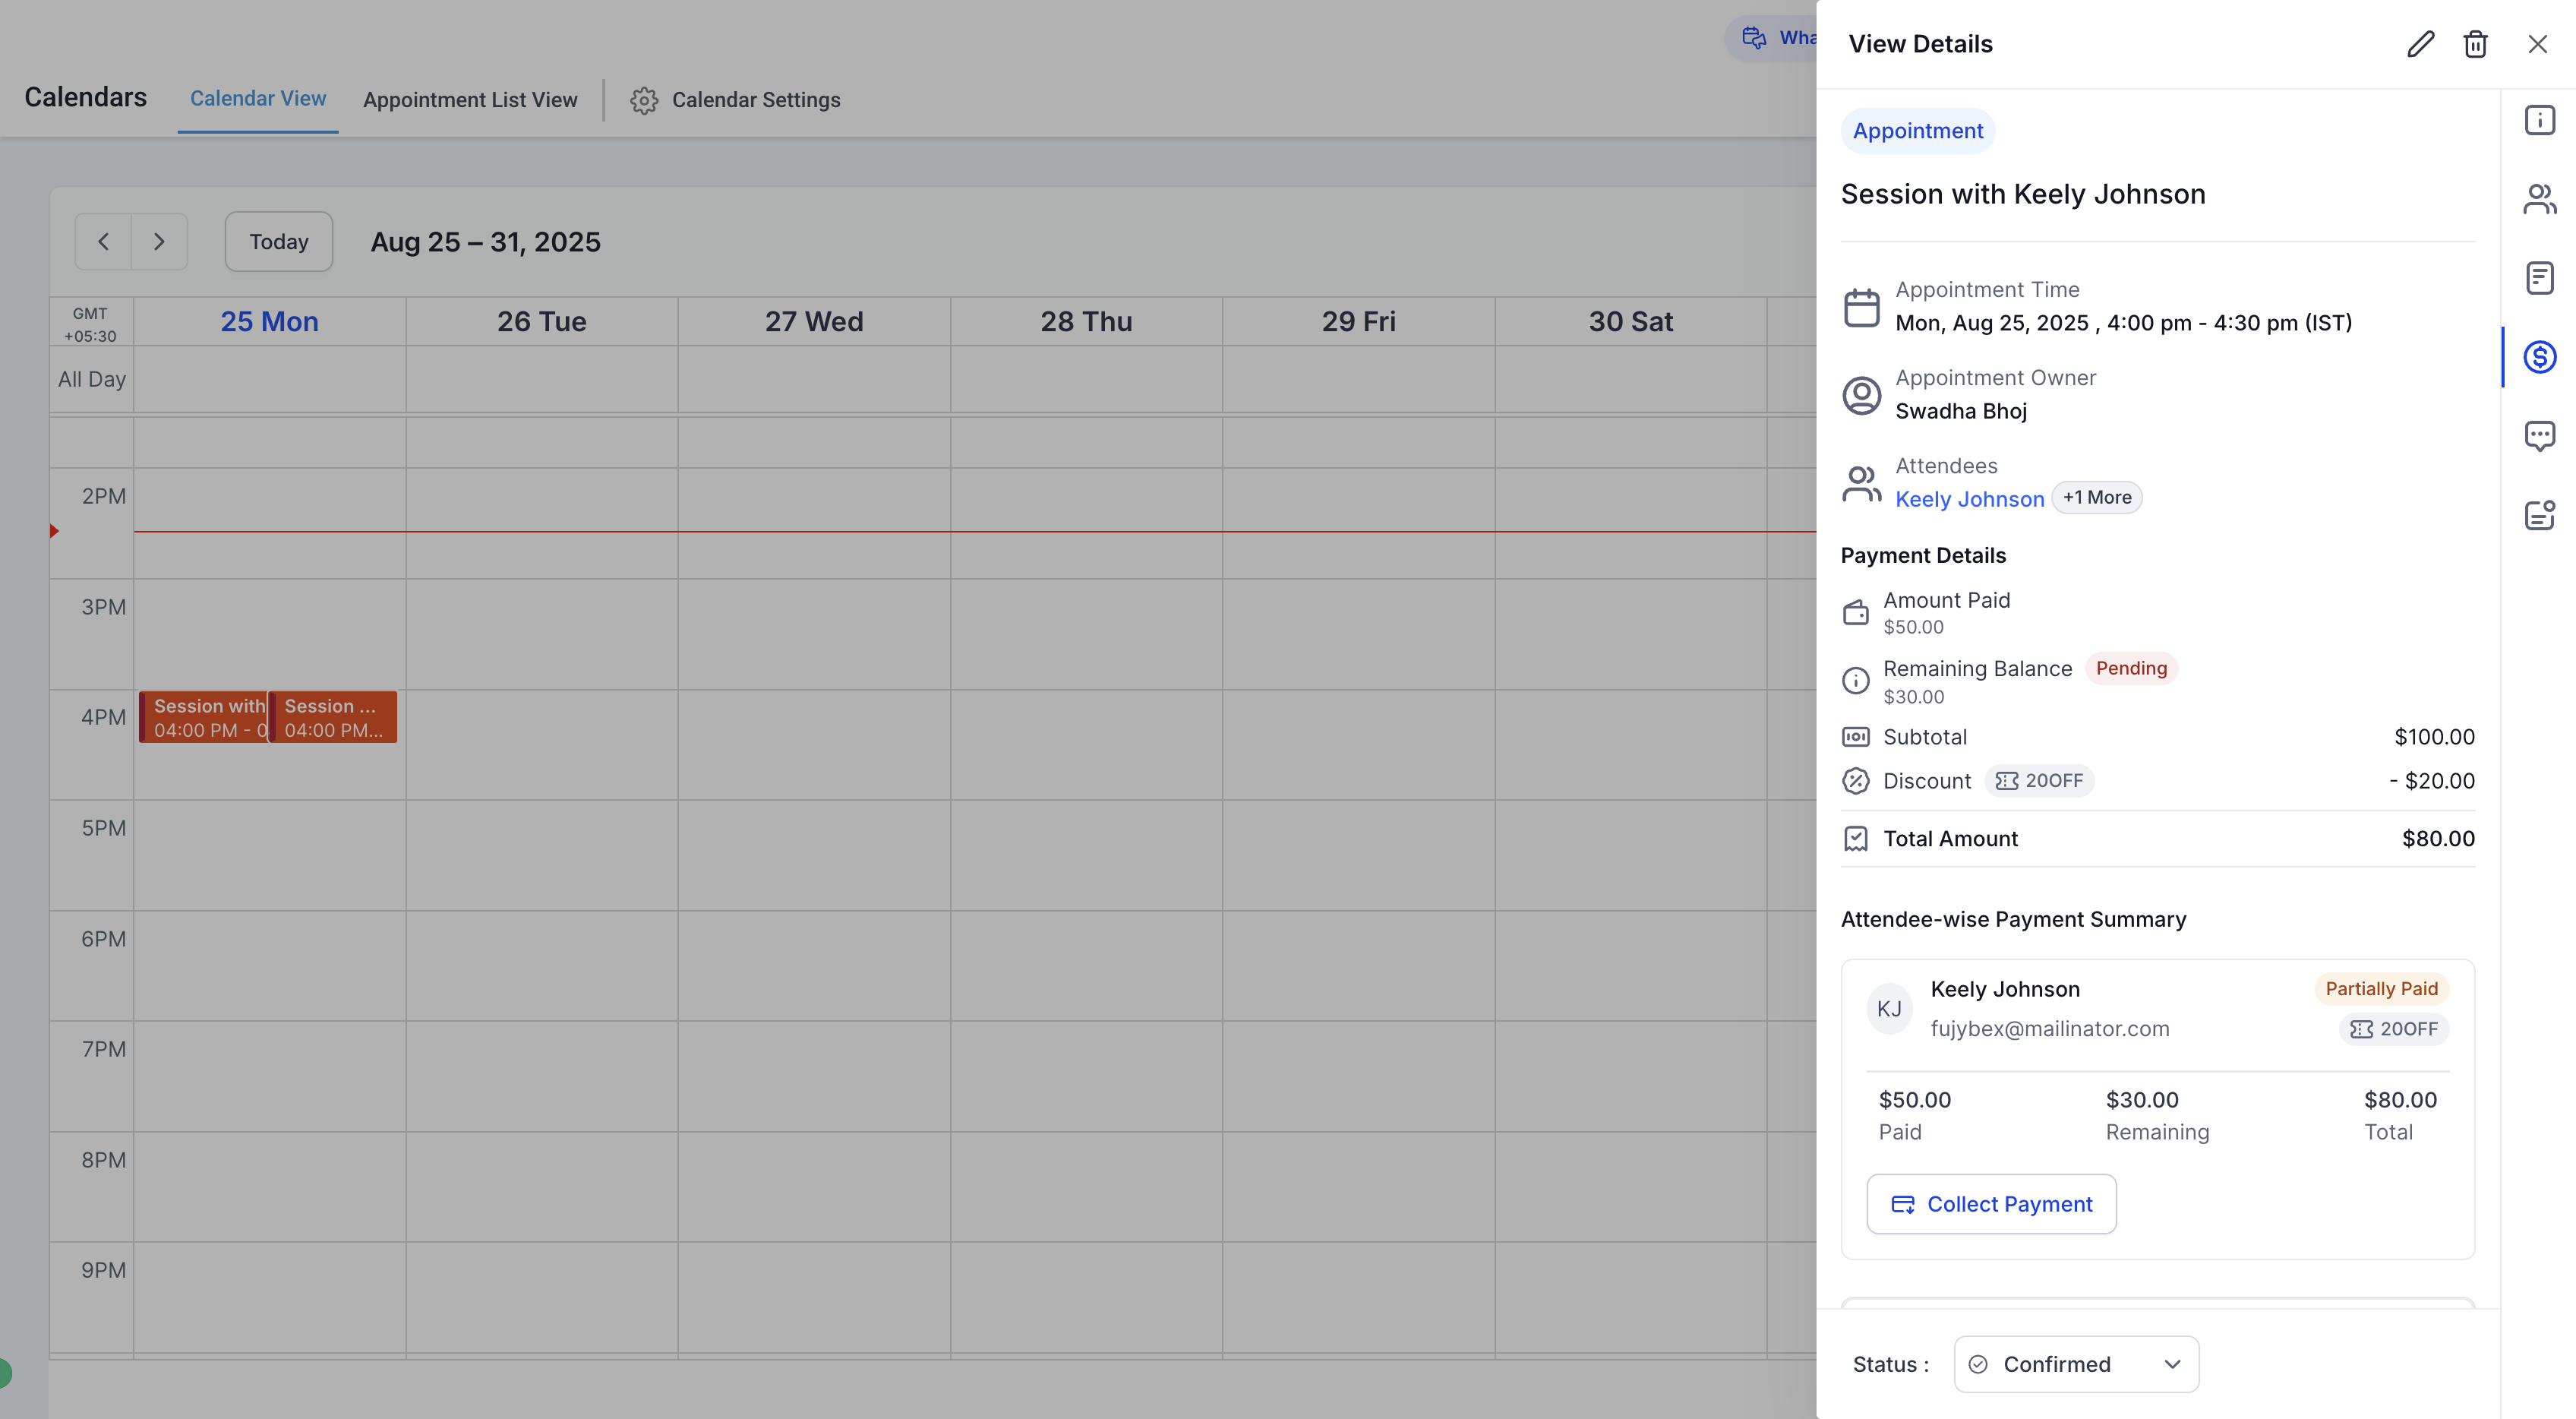
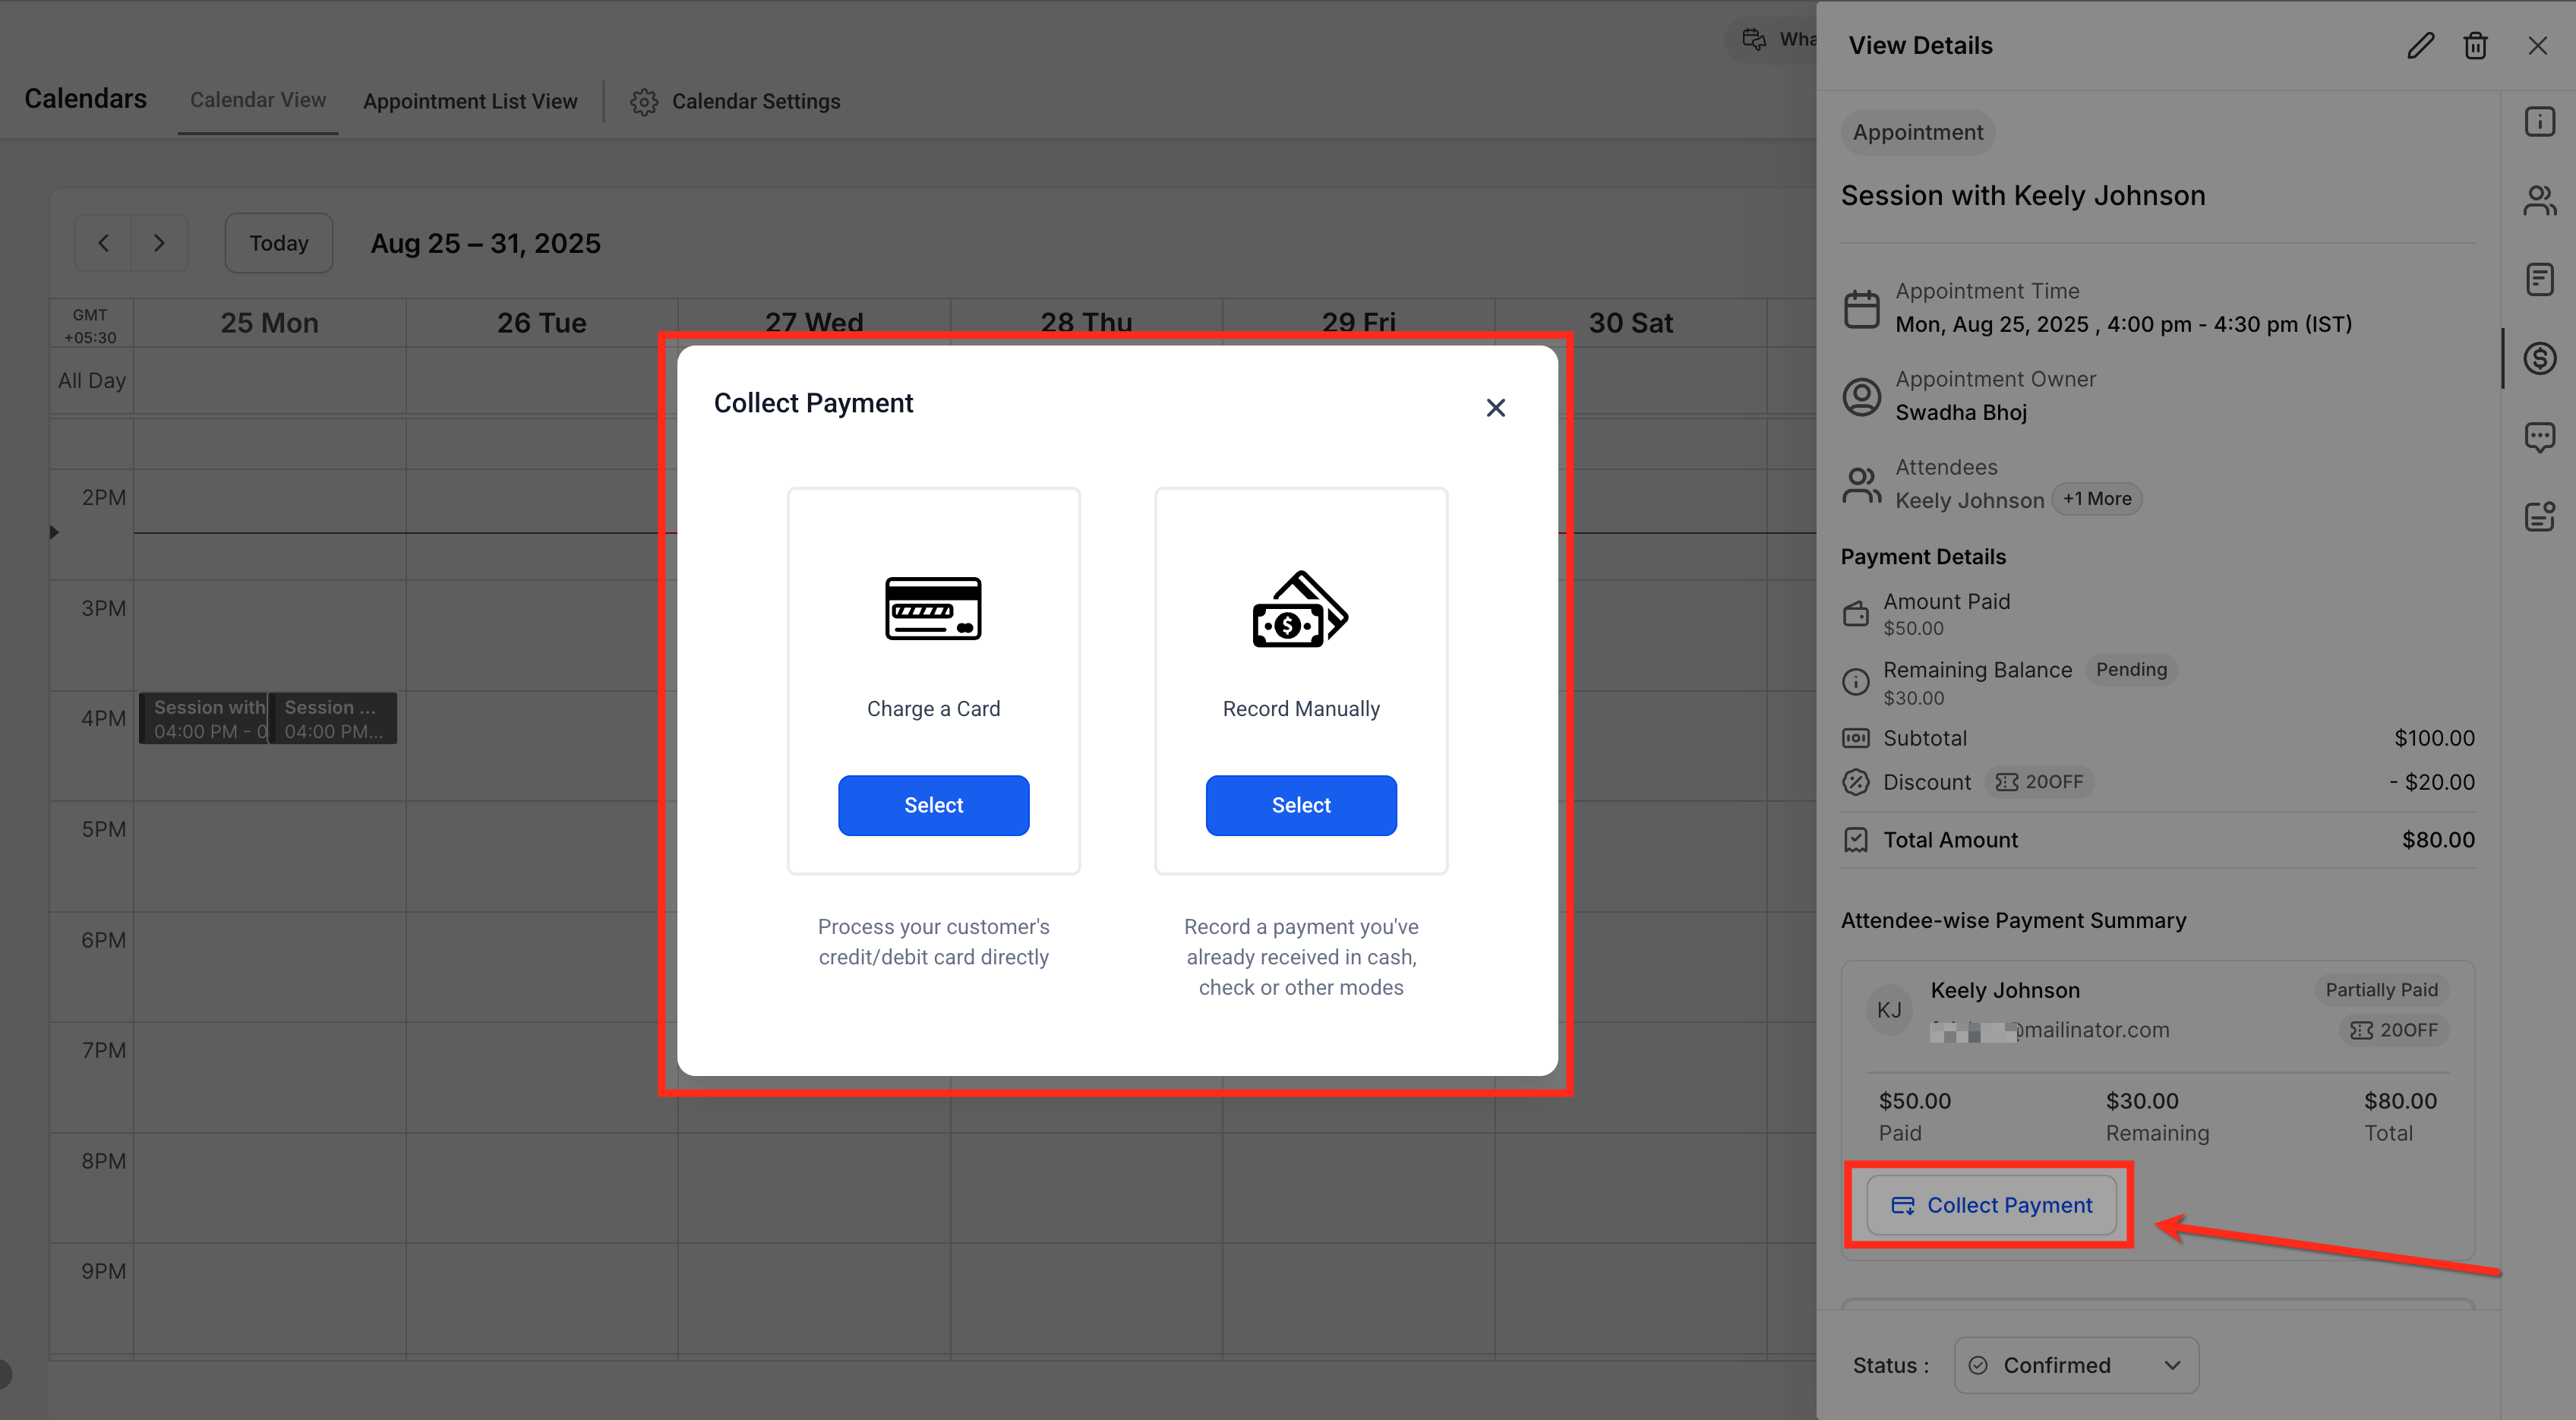
The Payments tab lives inside the appointment modal once a calendar has payment acceptance turned on. It aggregates the appointment’s total cost, any discounts, the amount already collected, and what remains due. The view also breaks down payments by each attendee, showing who is paid, partially paid, or still owes.
From the tab you can launch a payment collection flow. The Collect Payment button lets you either charge a saved card or record an offline transaction such as cash, check, or a gift card redemption. All transactions are listed in the history and an order is created automatically behind the scenes.
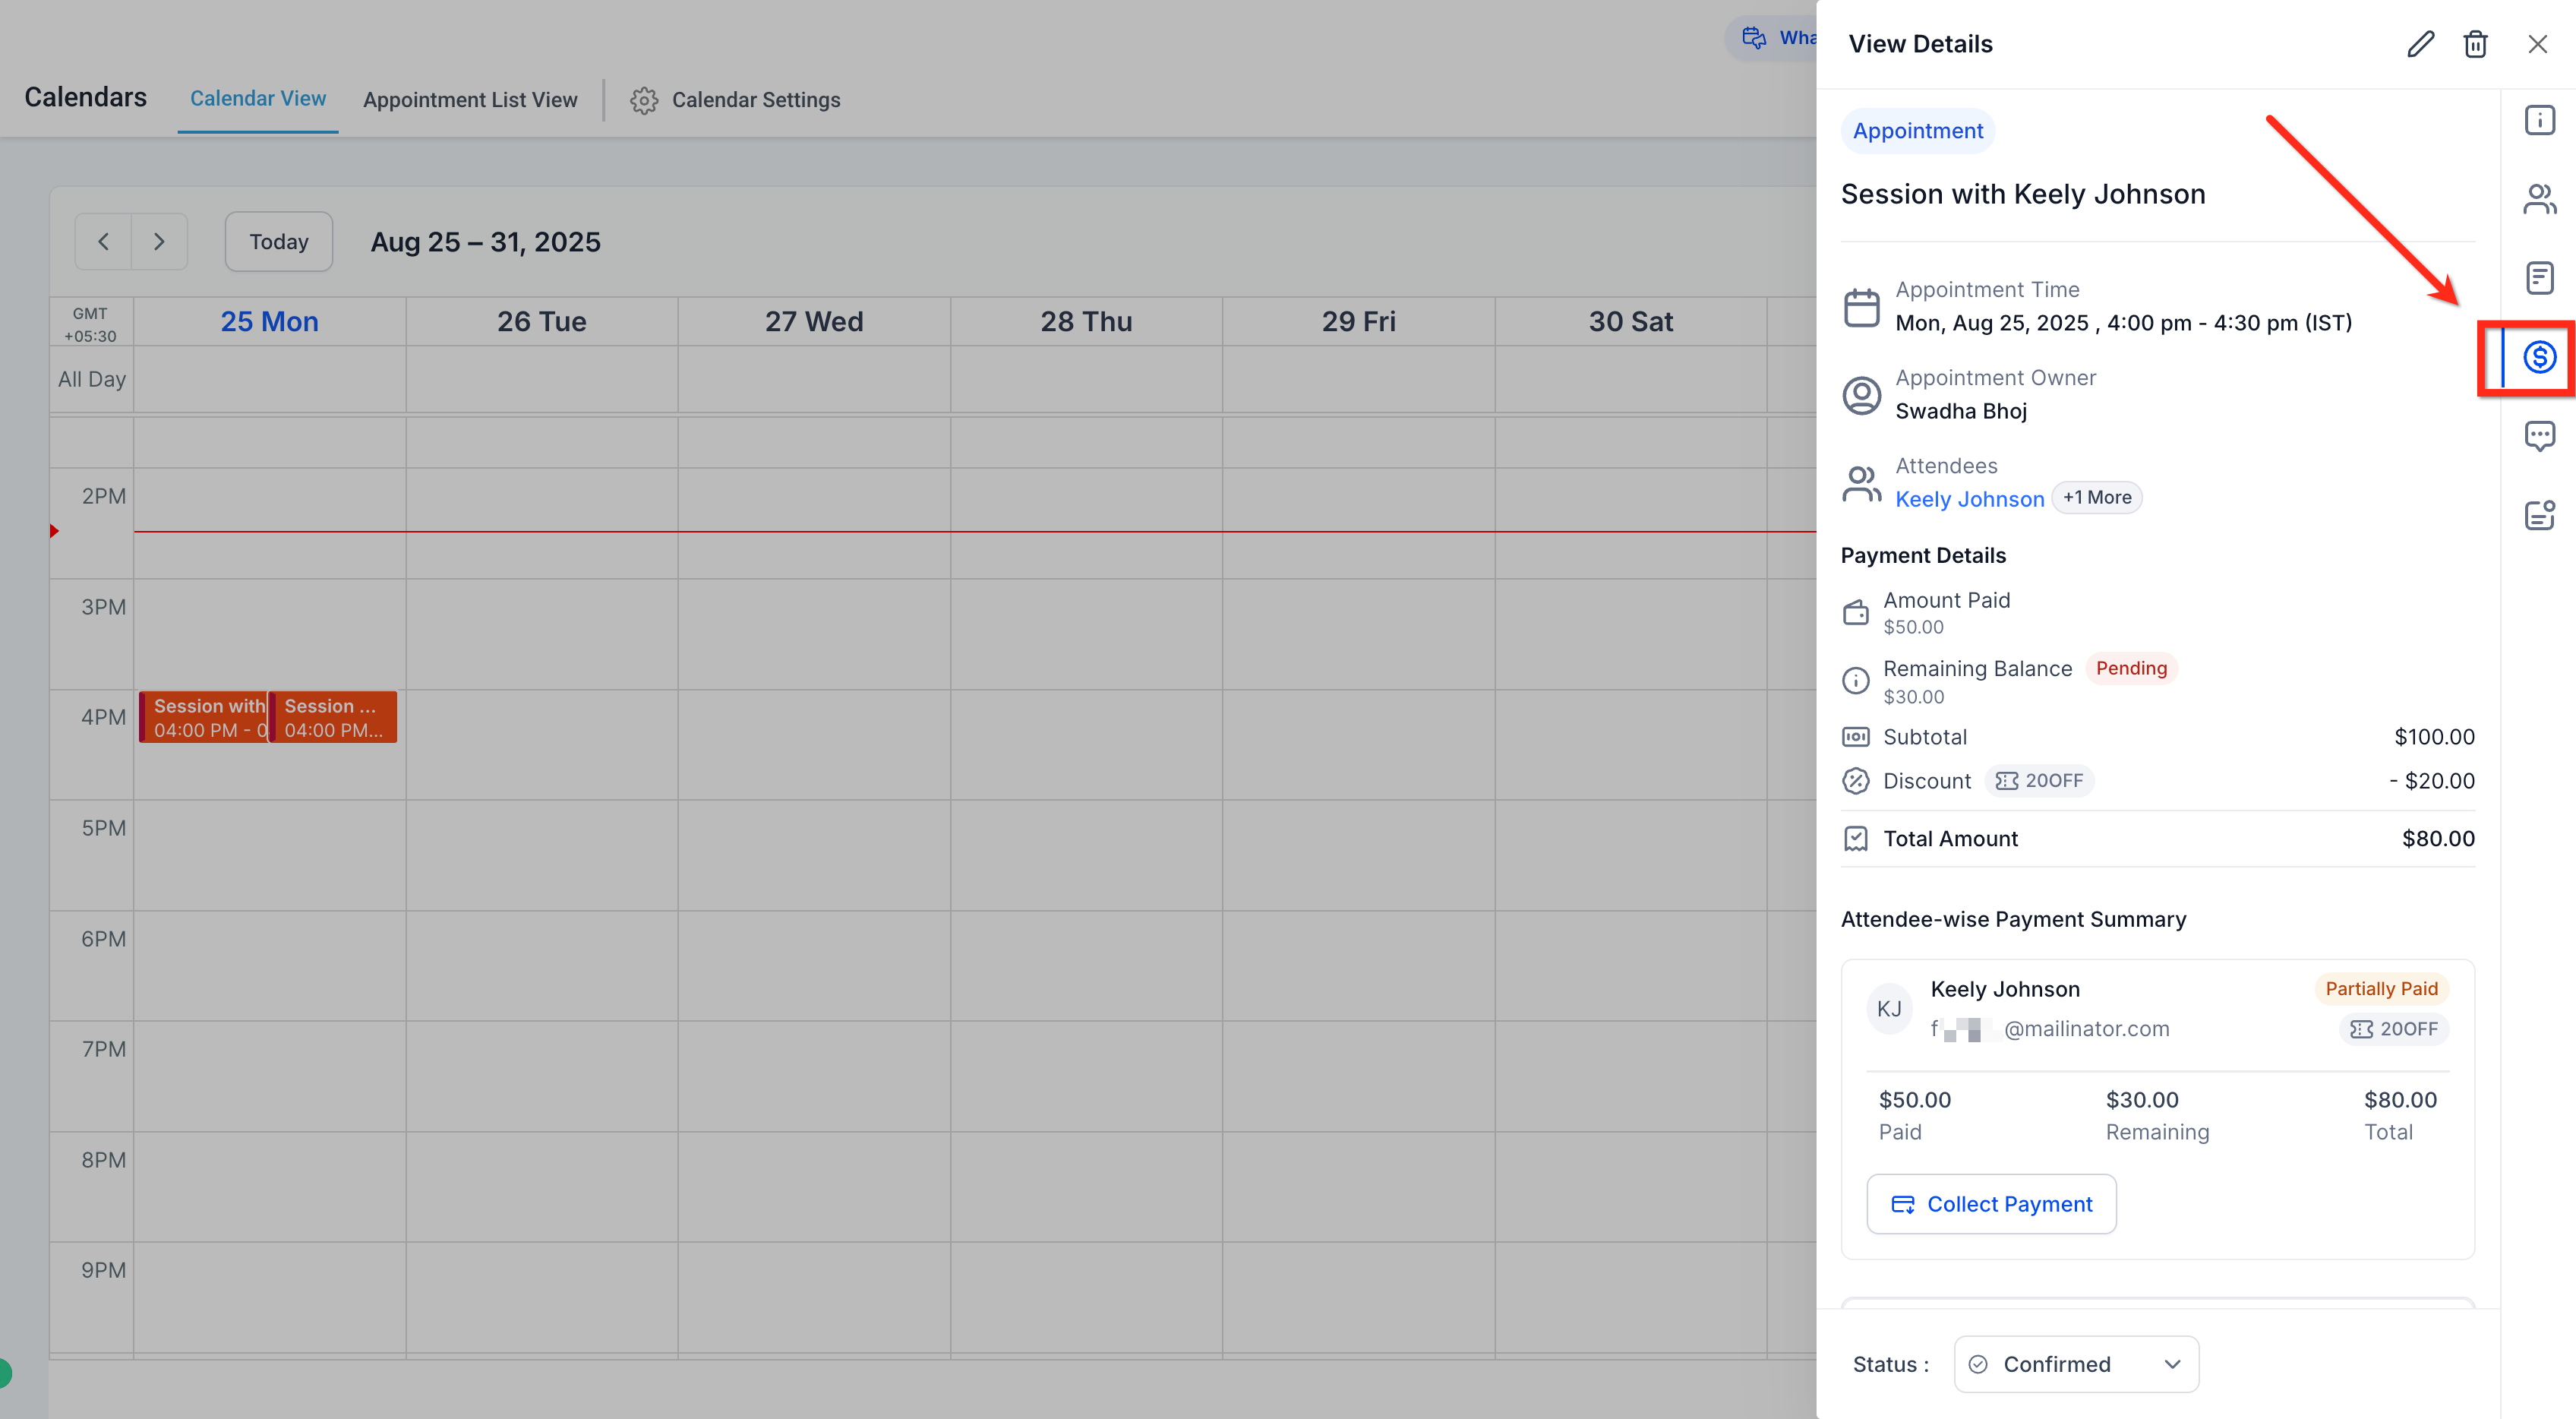
The feature is accessed by opening an appointment from the Calendars > Appointments list and clicking the Payments button. No separate order management is required because the order is linked to the appointment record.
03How businesses use payments tab
- Fitness studio. The studio enables Accept Payments on its class calendar, then opens each booking’s Payments tab to see which members have paid their fees. When a member owes a balance, the staff clicks Collect Payment, charges the saved card, and the tab updates the paid status.
- Dental practice. After setting up the calendar to accept payments, the practice reviews the Payments tab for each patient appointment. If a patient pays cash at the office, the staff selects Record Manually, enters the amount, and the tab reflects the new paid total.
- Wedding planning service. The planner activates Accept Payments and adds a coupon field for discounts. When a client books a consultation with guests, the planner checks the Payments tab to verify each attendee’s contribution, applies any gift card balance, and collects the remaining amount from the saved card.
04The numbers and rules that matter
- Not supported for bookings via older Service Menu (v1).
05How to set up and use payments tab in HighLevel
Enable accept payments on a calendar
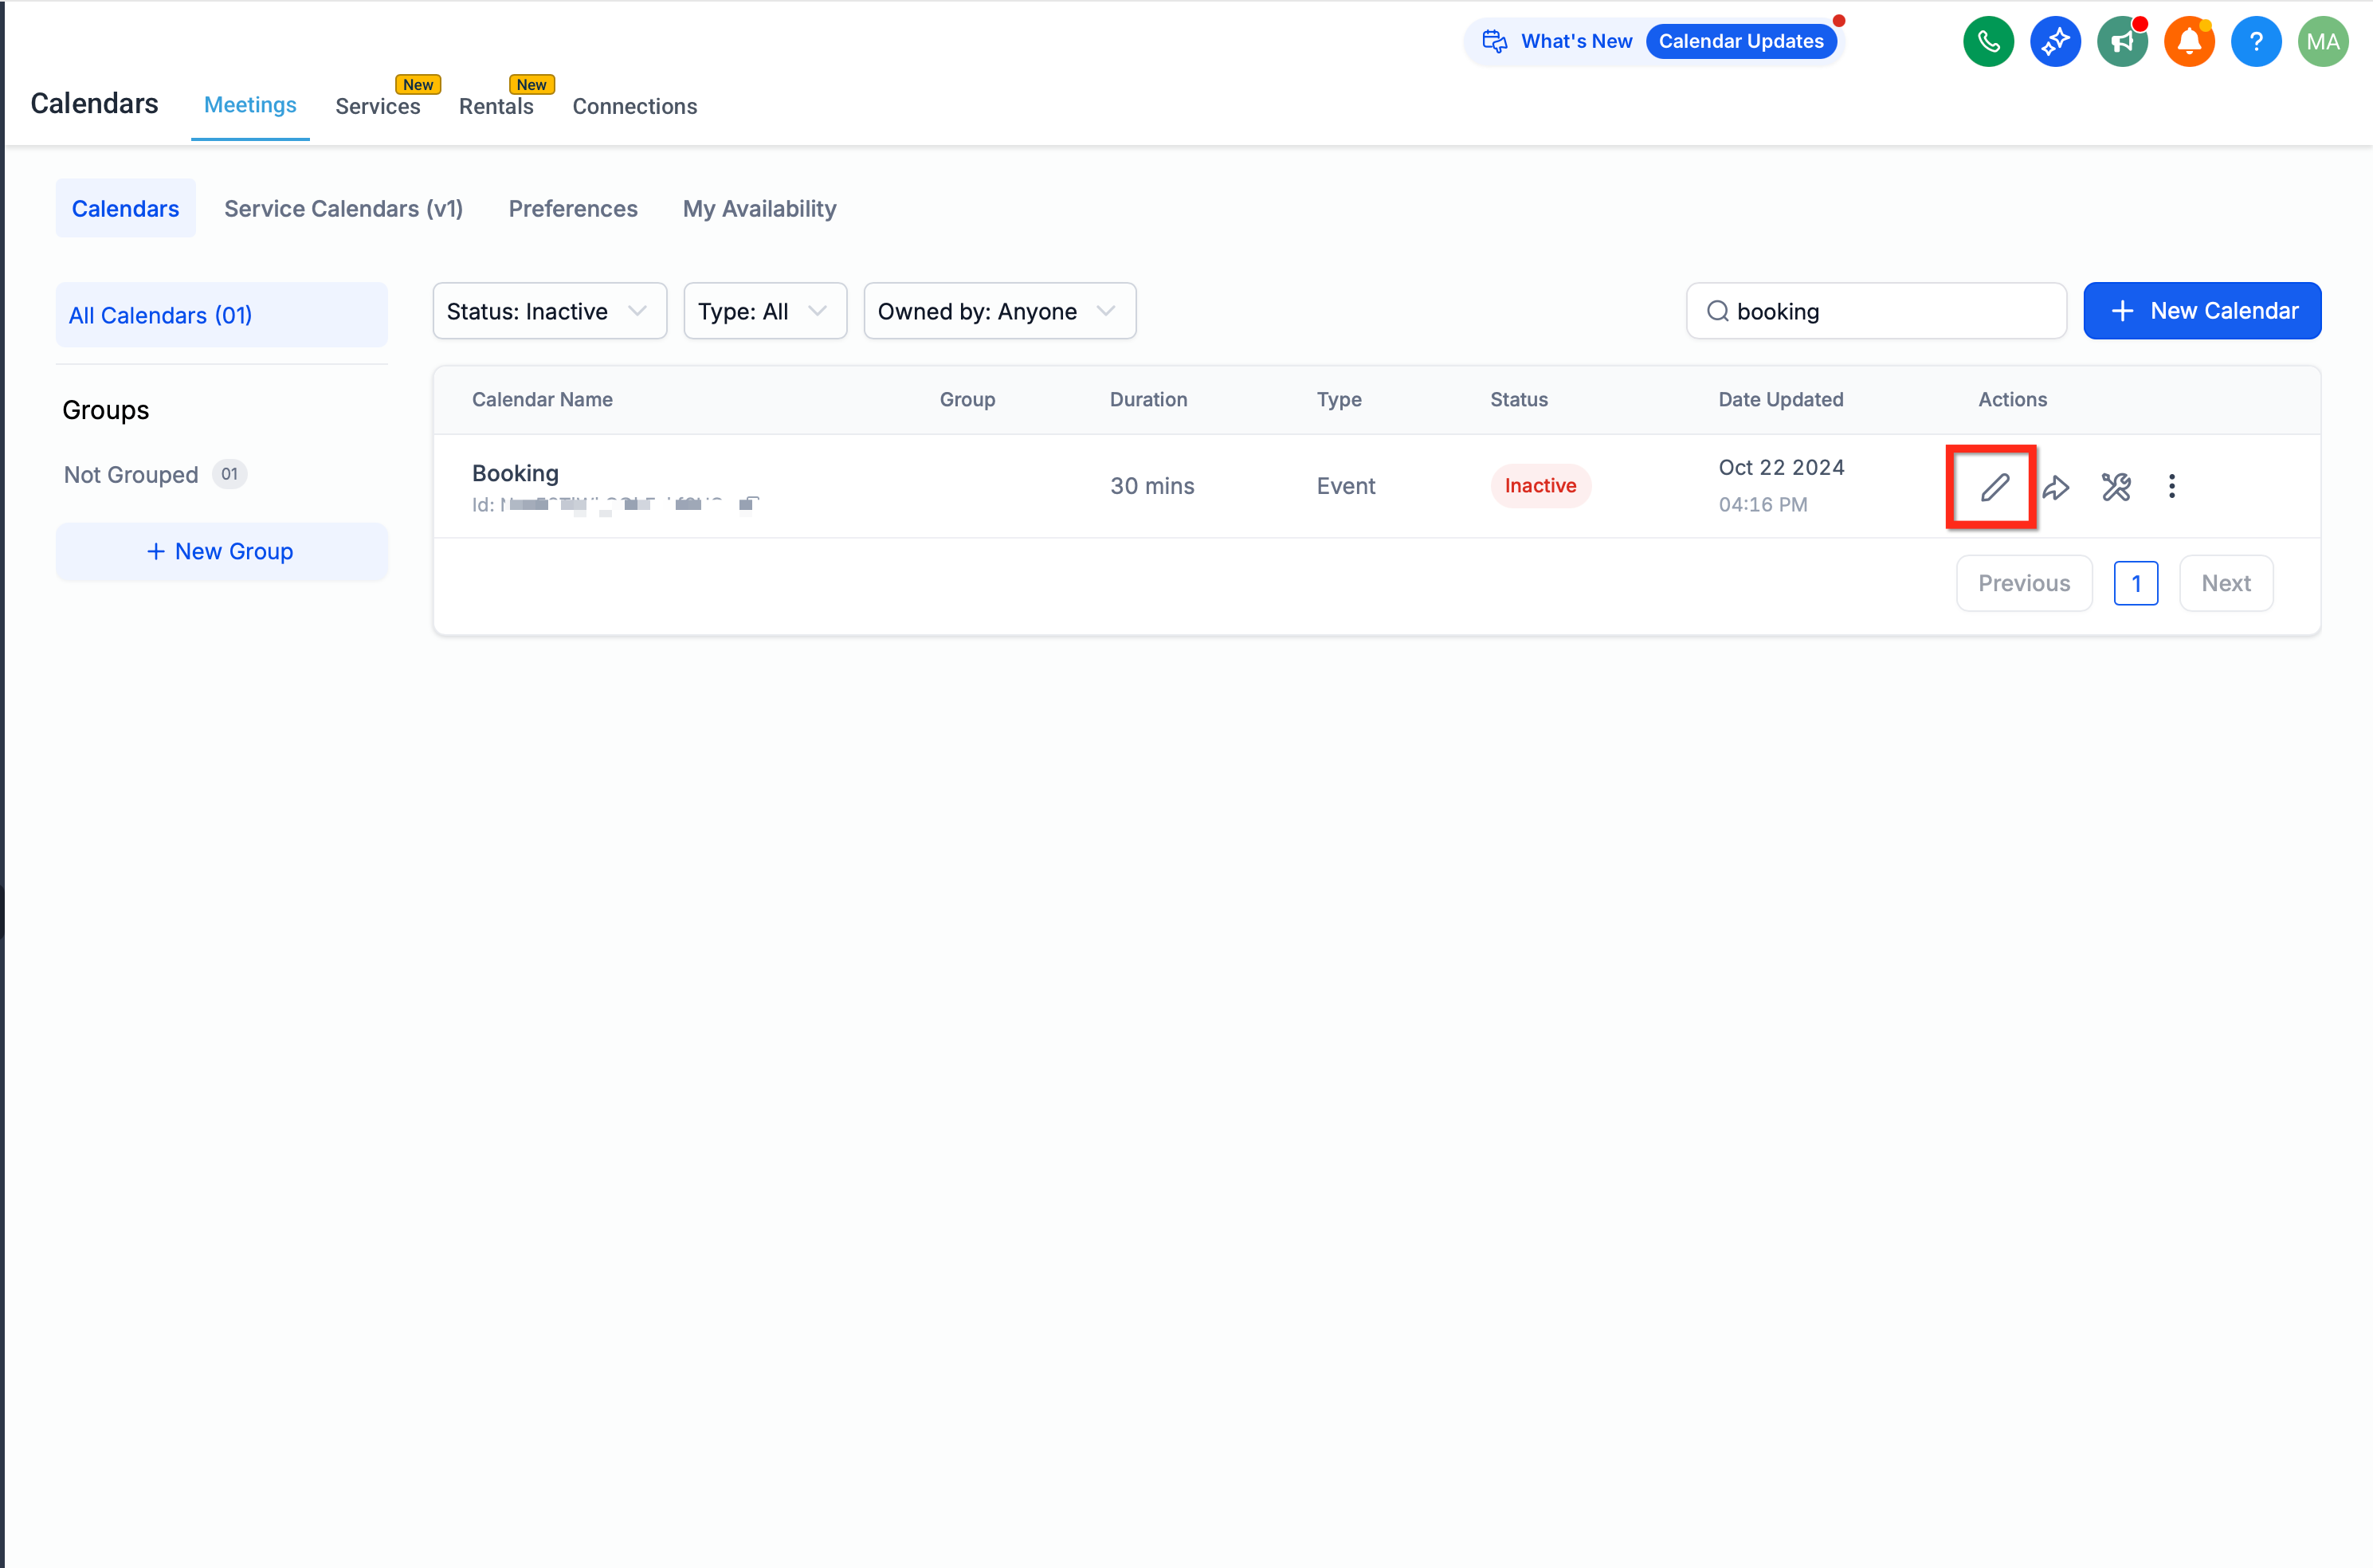
- Go to Calendars > Settings and edit the desired calendar.
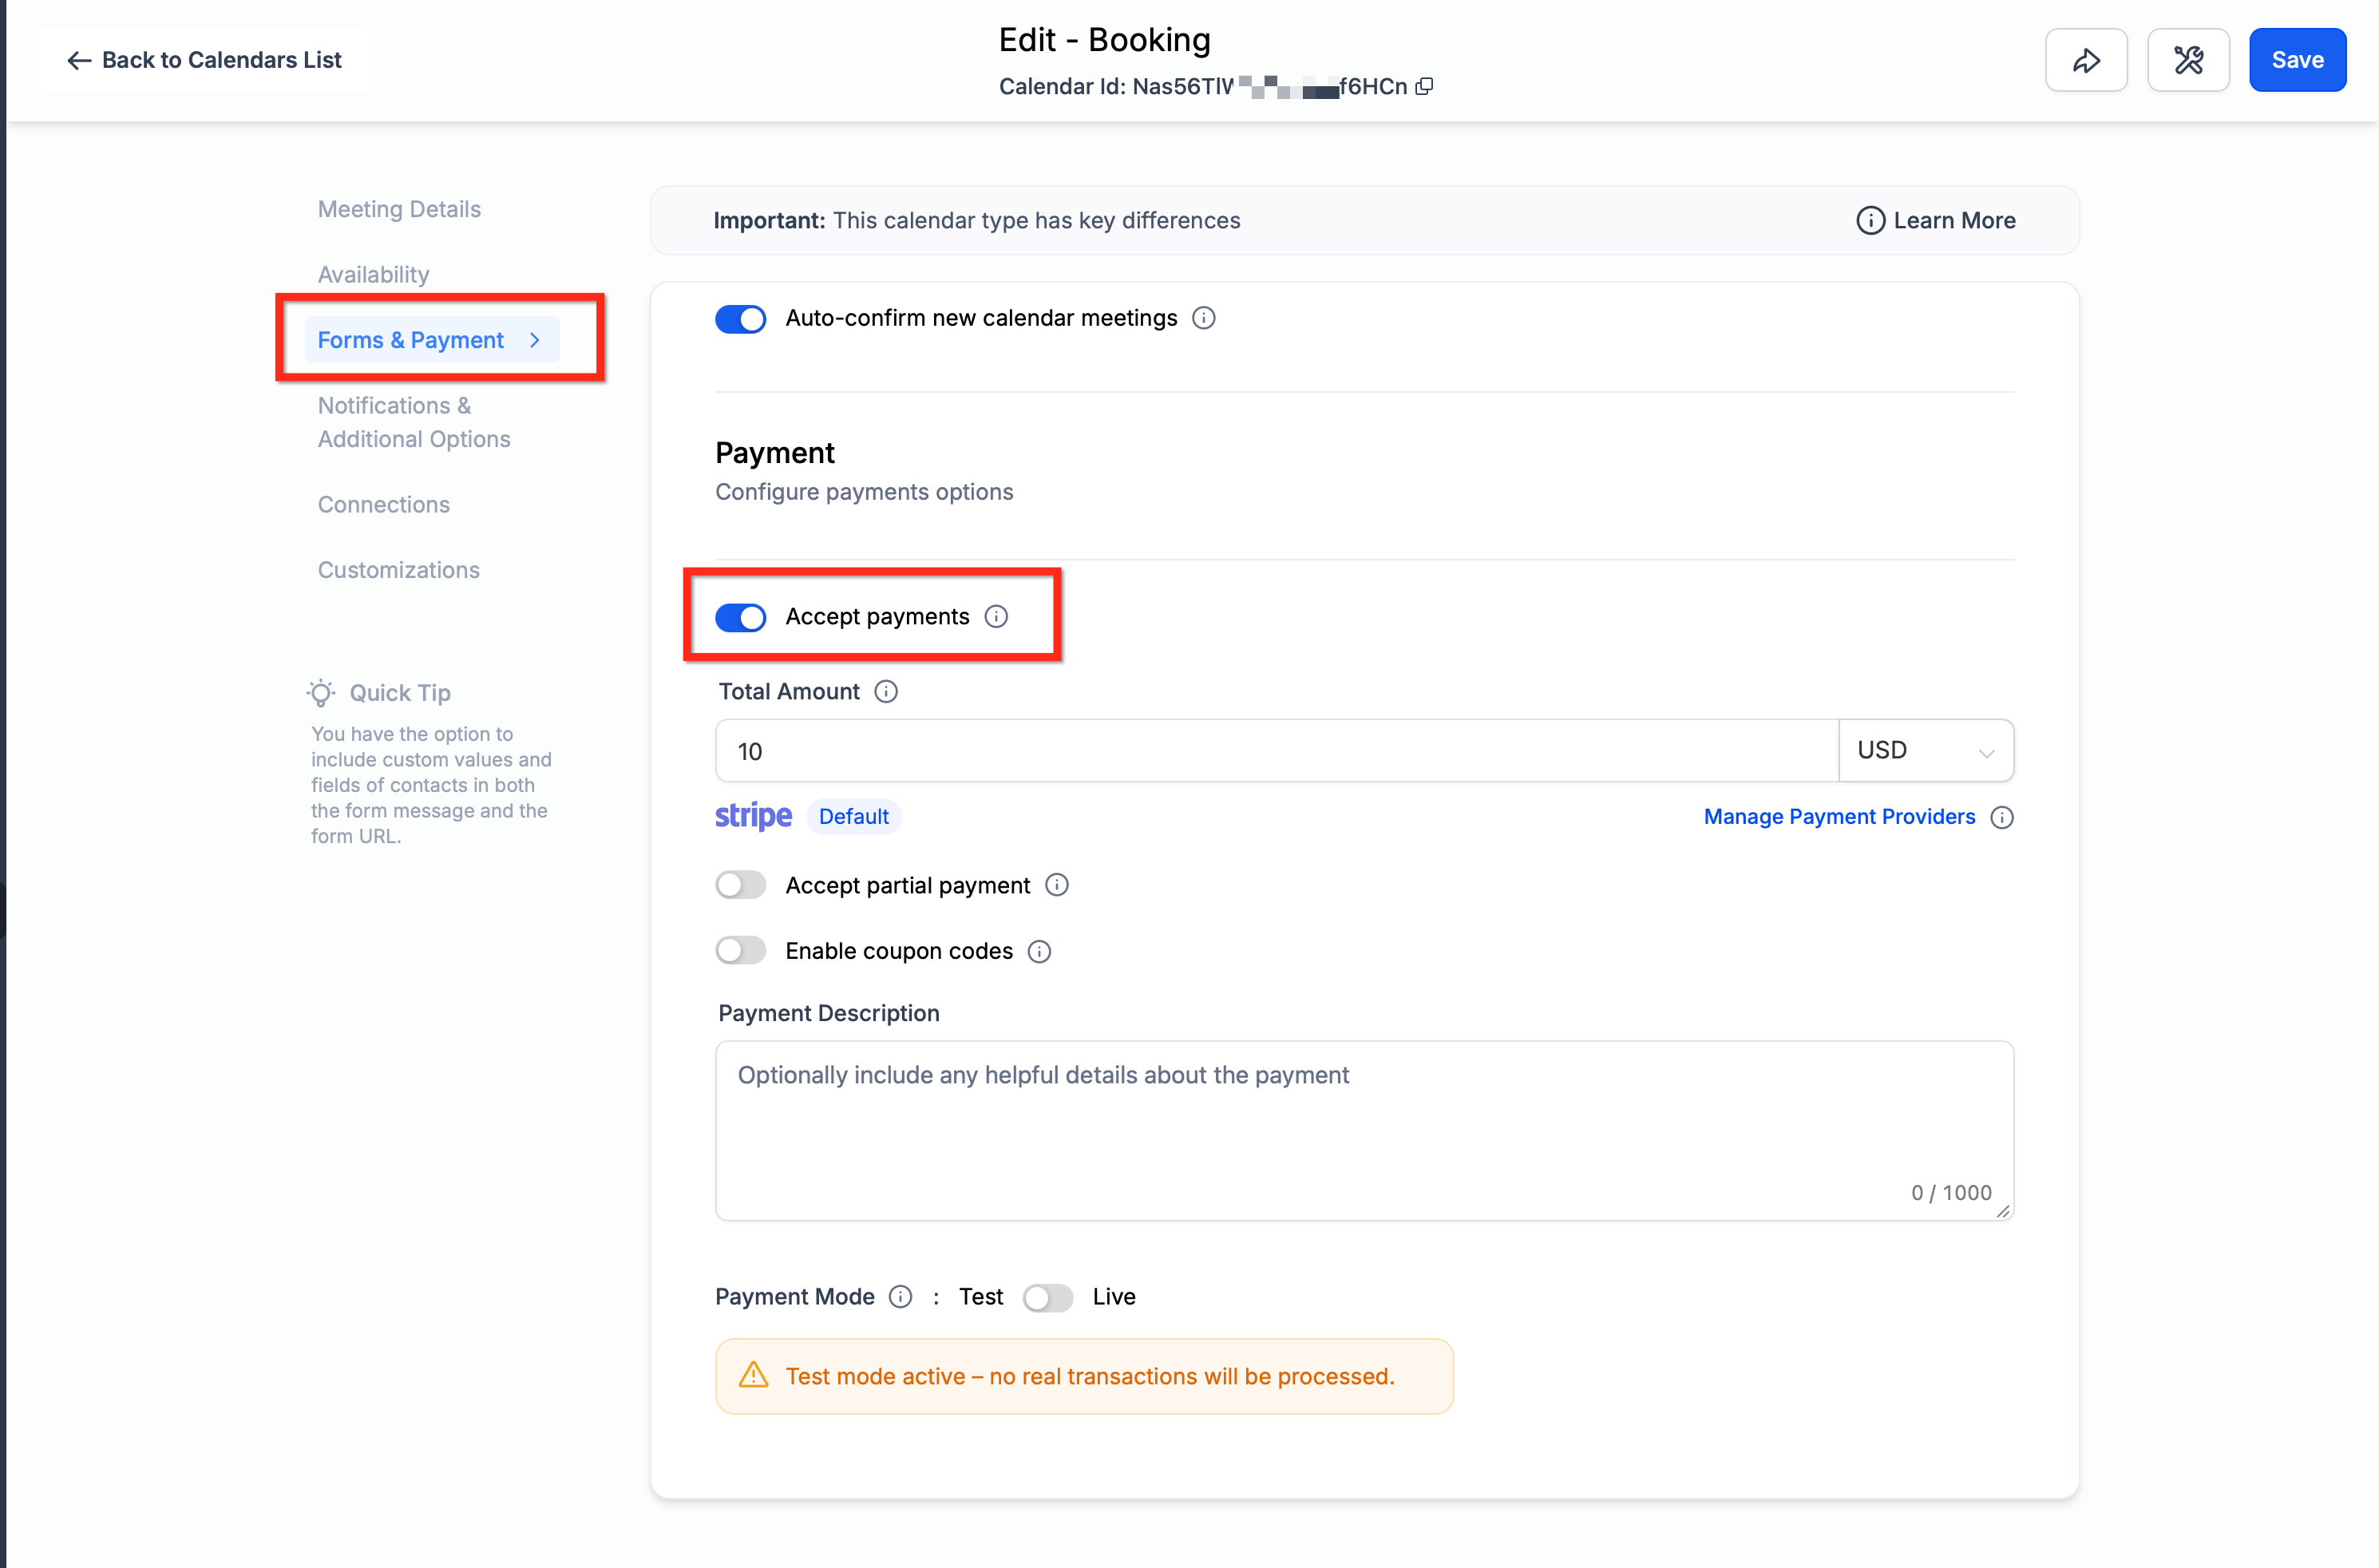
- Toggle the Accept Payments option; HighLevel automatically creates a linked product tagged Calendar.
- Optionally toggle Enable Coupon Code to show a coupon entry field on the booking widget.
- Optionally configure Partial Payment/Deposit rules if you want to collect a deposit at booking.
- Optionally, for recurring bookings, choose whether to charge for the First Appointment Only or for All Appointments on the widget.
Find the payments tab
- Navigate to Calendars > Appointments.
- Open any appointment record.
- Click the Payments button to open the Payments tab.
Collect or log a payment from the appointment
- Open the appointment and go to the Payments tab.
- Click Collect Payment and choose either Charge a Card or Record Manually.
- If the customer has a Gift Card, select Redeem a Gift Card and apply its balance before charging any remaining amount.
- Fill in the required fields and save the payment entry.
- Confirm that Amount Paid, Remaining Balance, and each attendee’s status reflect the updated amounts.
06What it looks like in HighLevel
07Settings that matter
- Accept Payments. Turns on payment processing for the calendar and creates an associated product for orders.
- Enable Coupon Code. Adds a coupon field to the booking widget and shows discount details in the Payments tab.
- Partial Payment/Deposit. Allows a deposit or partial amount to be collected at booking while showing the remaining balance.
- Collect Card on File. Saves a customer’s card details during booking without charging them immediately.
- Collect Payment for Guest. Enables payment collection when guests are added to an existing appointment.
08Things to know before you rely on it
- Payments are not supported for bookings via the older Service Menu (v1).
- Payments are not supported for custom recurring appointments created directly via the in app modal.
- Group bookings: one order is created for the full group at the initial booking.
- Editing an appointment and adding guests with Collect Payment for Guest enabled can create a new order each time the appointment is saved.
- Calendar linked products created automatically cannot be deleted directly from the Products Tab.
09How it connects to the rest of HighLevel
- How to manually book a calendar appointment Manual booking guide
- HighLevel pricing and plans for calendar features Pricing page
- Start a 30 day HighLevel trial to explore payments Free trial
Michael's take

The first setting I would lock down is the Accept Payments toggle on the calendar. Without it the Payments tab never appears, and all the tracking and collection features stay hidden.