
01Who this is for
- Admins who need a single place to oversee appointments from multiple calendars.
- Sales teams that must quickly update lead appointment statuses without opening each record.
- Support staff that require a repeatable view for follow up calls and service sessions.
02Appointment list view, explained
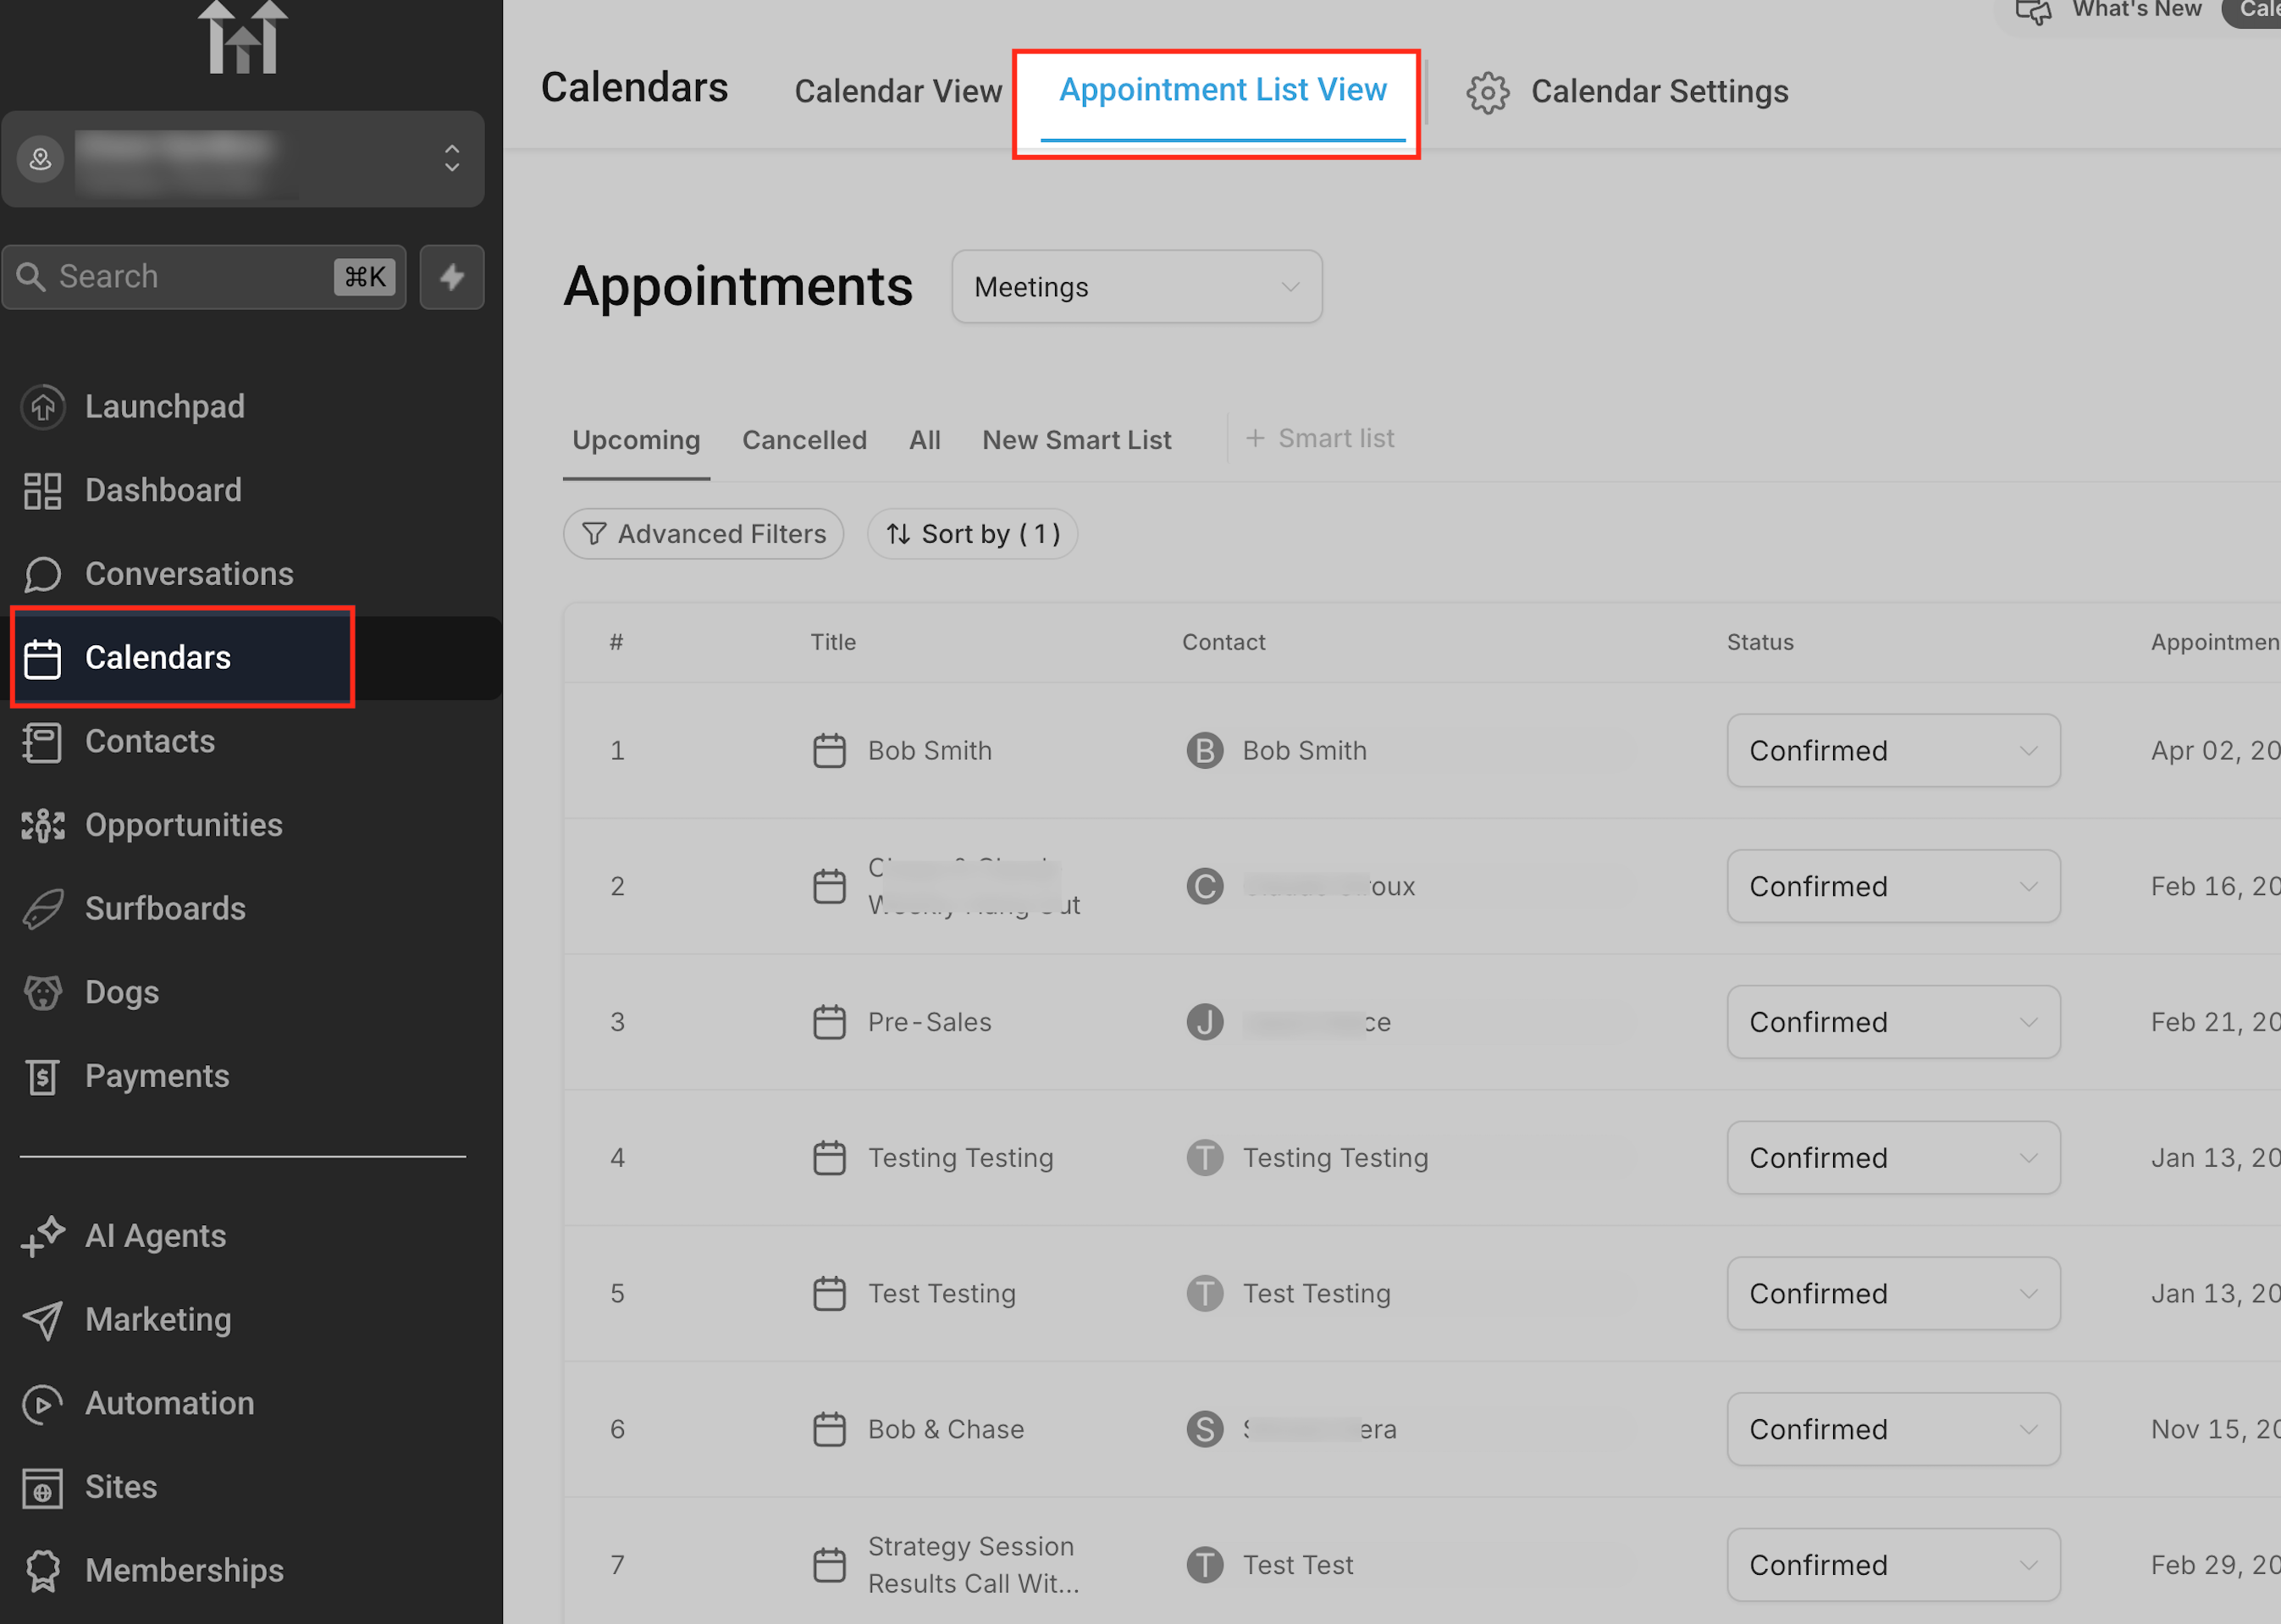
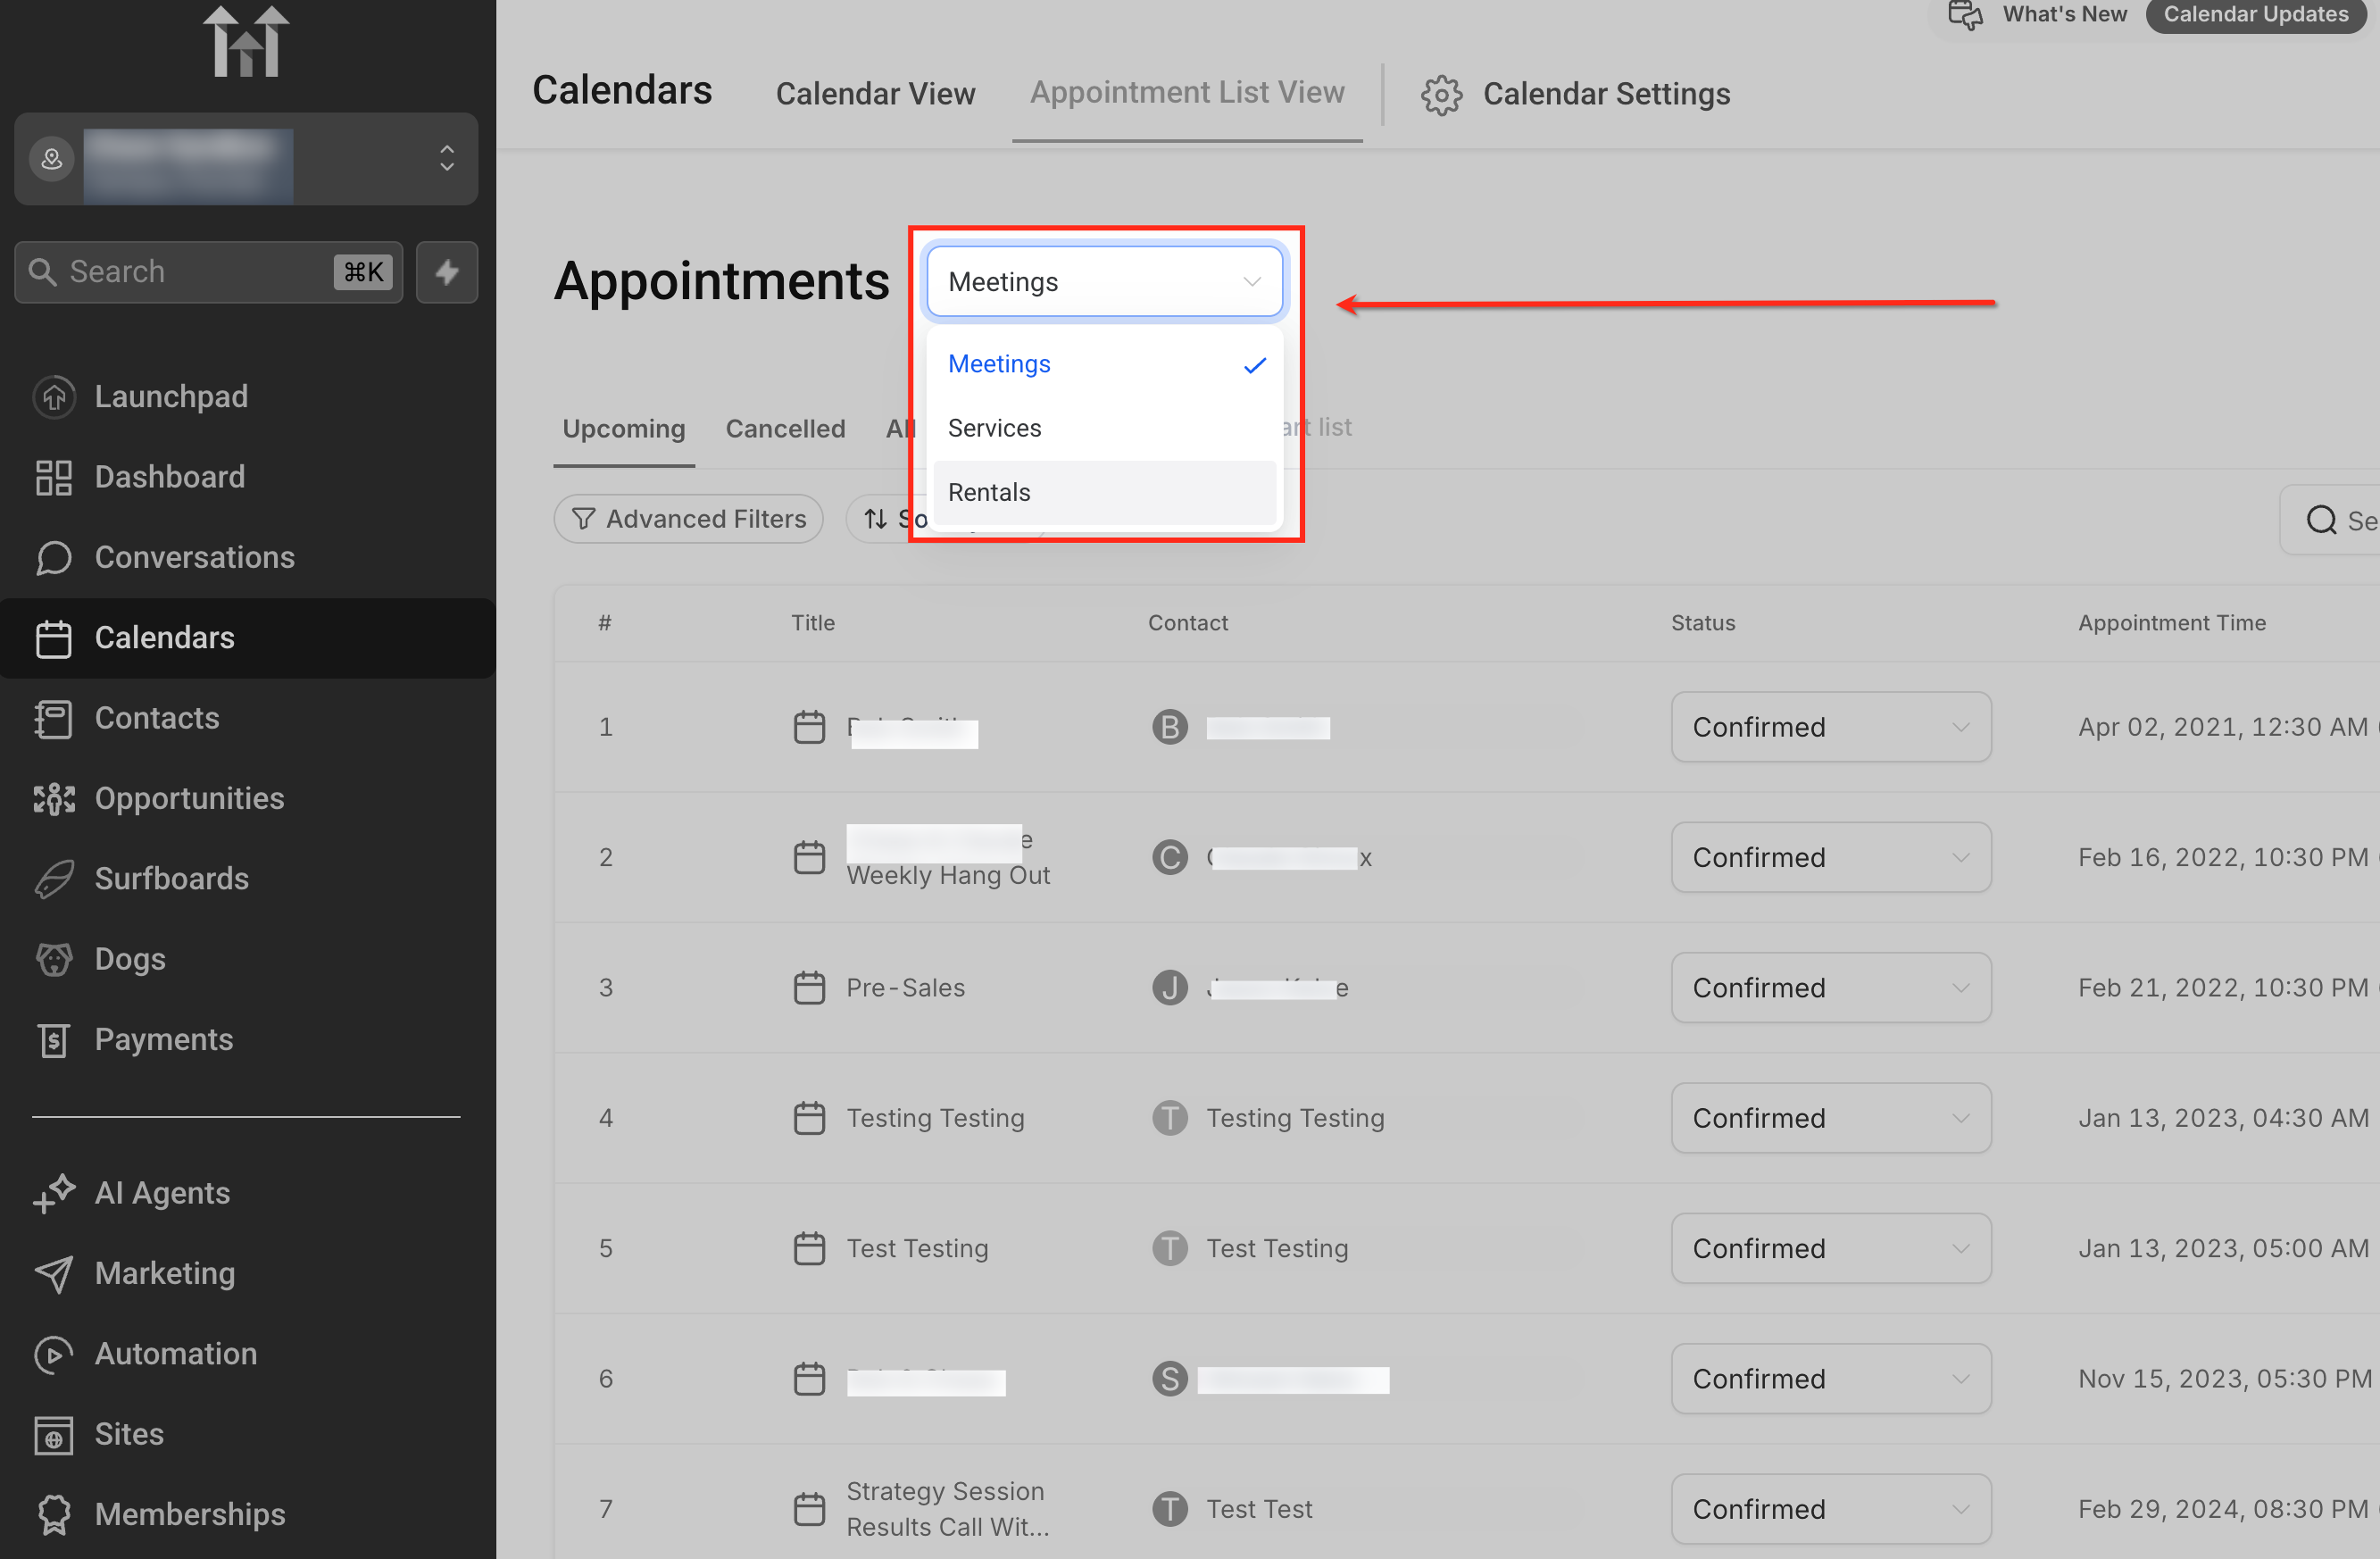
Appointment List View is a separate tab in the Calendars section that replaces the traditional calendar grid with a sortable, filterable table of bookings. The view works alongside Calendar View, letting users switch between date based scheduling and list based management.
The core of the view is the Smart List. A Smart List saves a combination of filters, sort order, and column choices, turning the list into a reusable workspace. Users can create, rename, and store Smart Lists, then recall them right away for consistent appointment handling.
From the list, users can add new appointments, modify existing ones, change statuses, and perform row actions such as edit, reschedule or delete, all without leaving the list interface.
03How businesses use appointment list view
- Consulting firm. The firm creates a Smart List that filters upcoming consultations by assigned consultant and appointment date. Consultants use the list to mark sessions as Showed or No Show directly, keeping their calendars aligned without opening each record.
- Fitness center. The center builds a Smart List showing all class bookings for the day, hides columns that are not needed, and uses the row actions to reschedule members who request a change, all from the list view.
- Real estate agency. Agents generate a Smart List that includes property showing appointments across all agents, sort by time, and update the status to Confirmed or Cancelled with a single click, simplifying team coordination.
04Before you start
- User must be able to open the Calendars area from the left hand menu.
05How to set up and use appointment list view in HighLevel
Create a new appointment
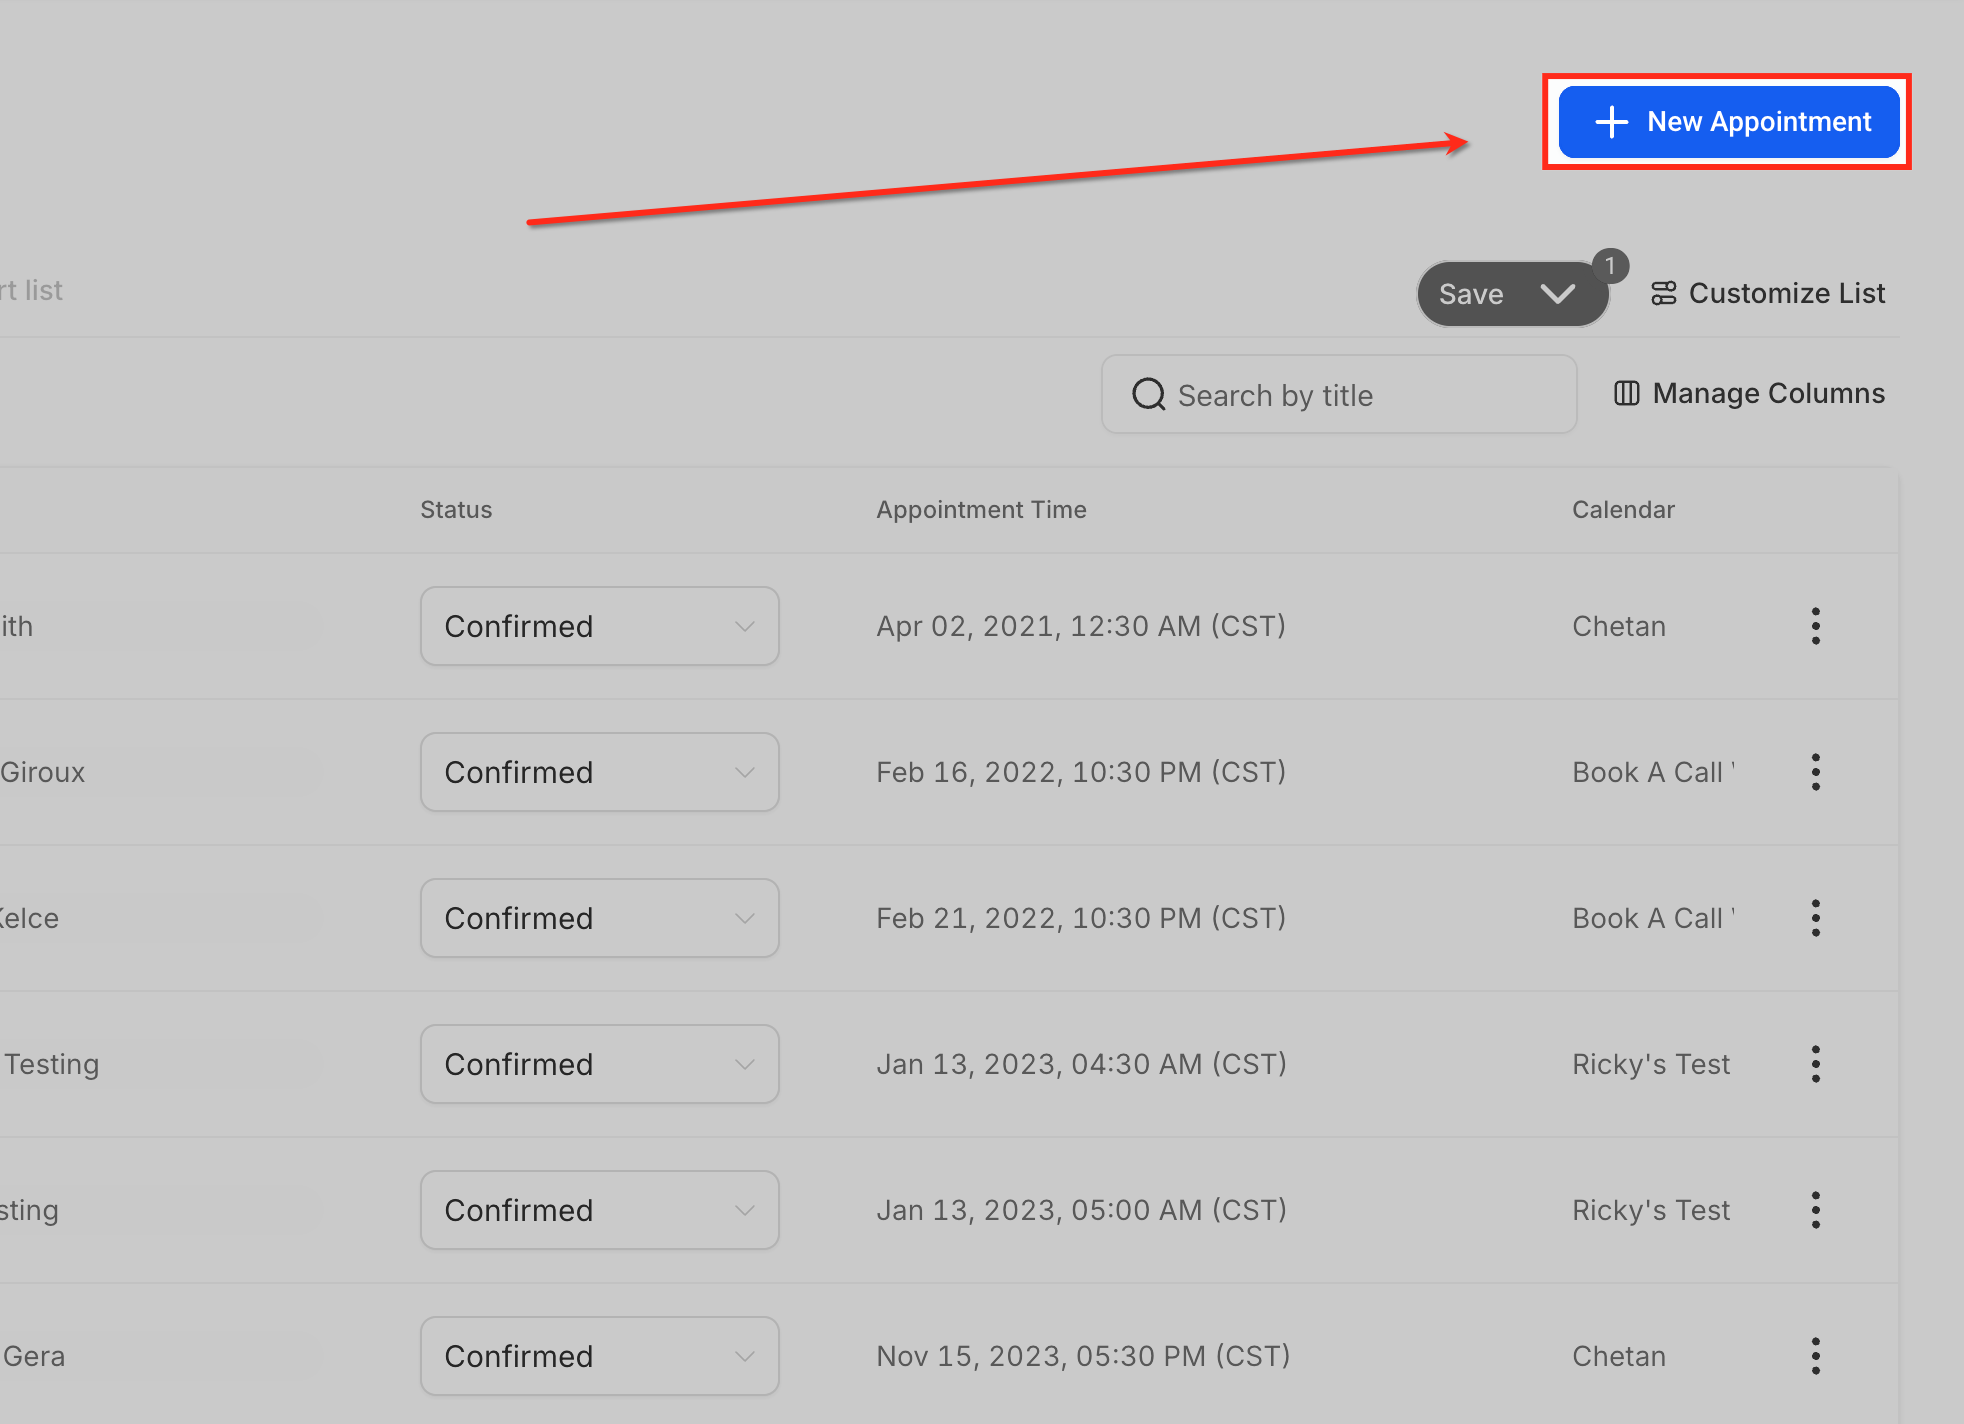
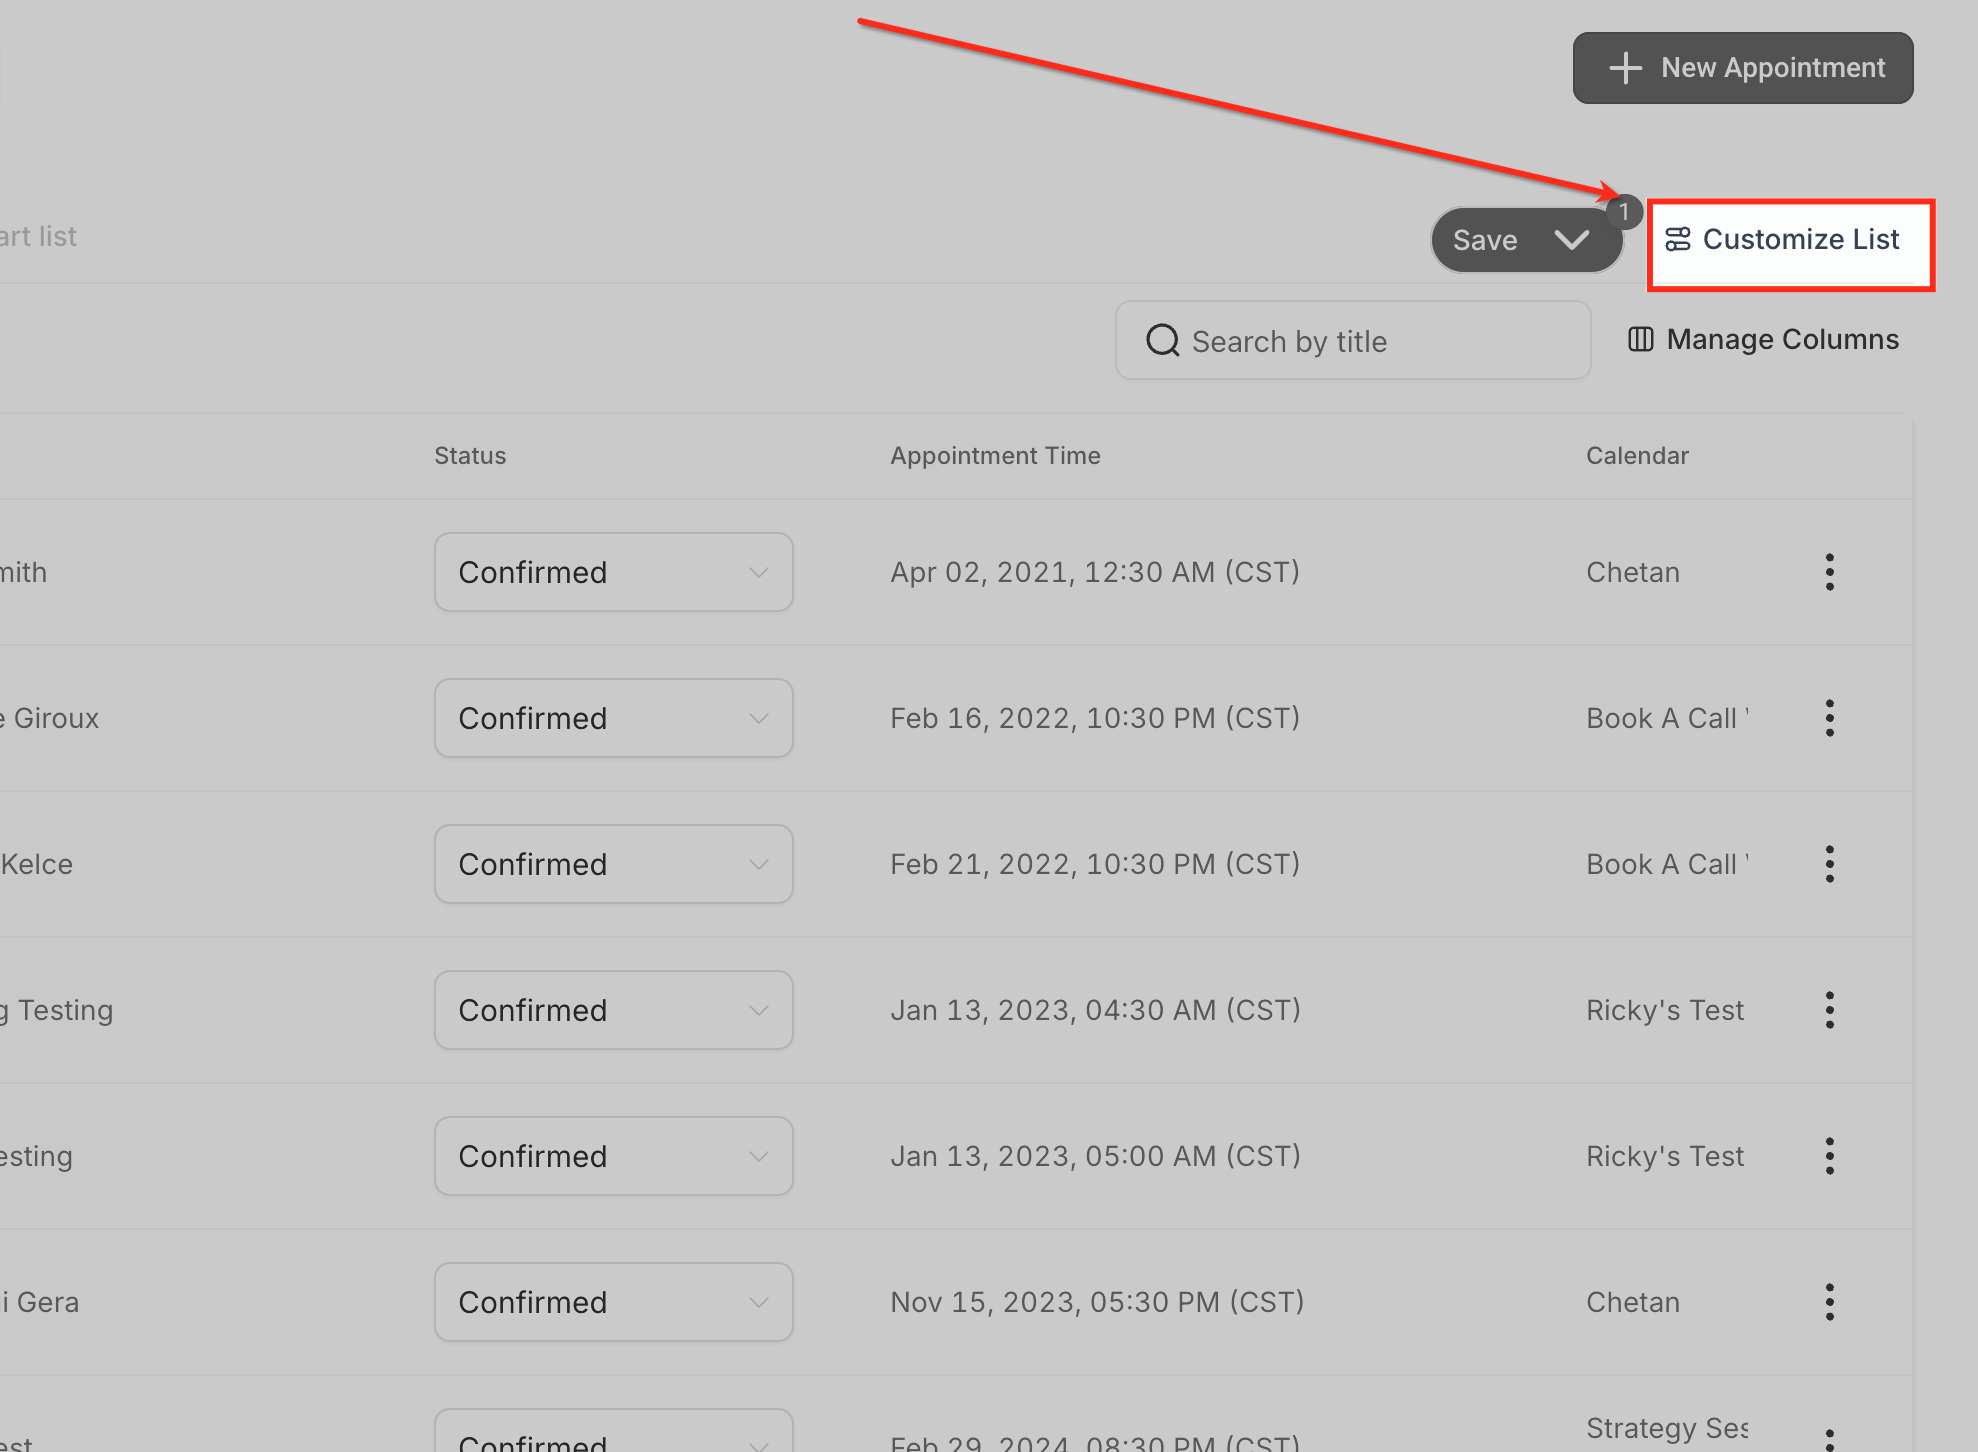
- Click the New Appointment button in Appointment List View.
- Select the calendar, set the date and time, and associate the entry with an existing contact or create a new one.
- Confirm the booking so the appointment appears in the list according to the active Smart List.
Create a smart list
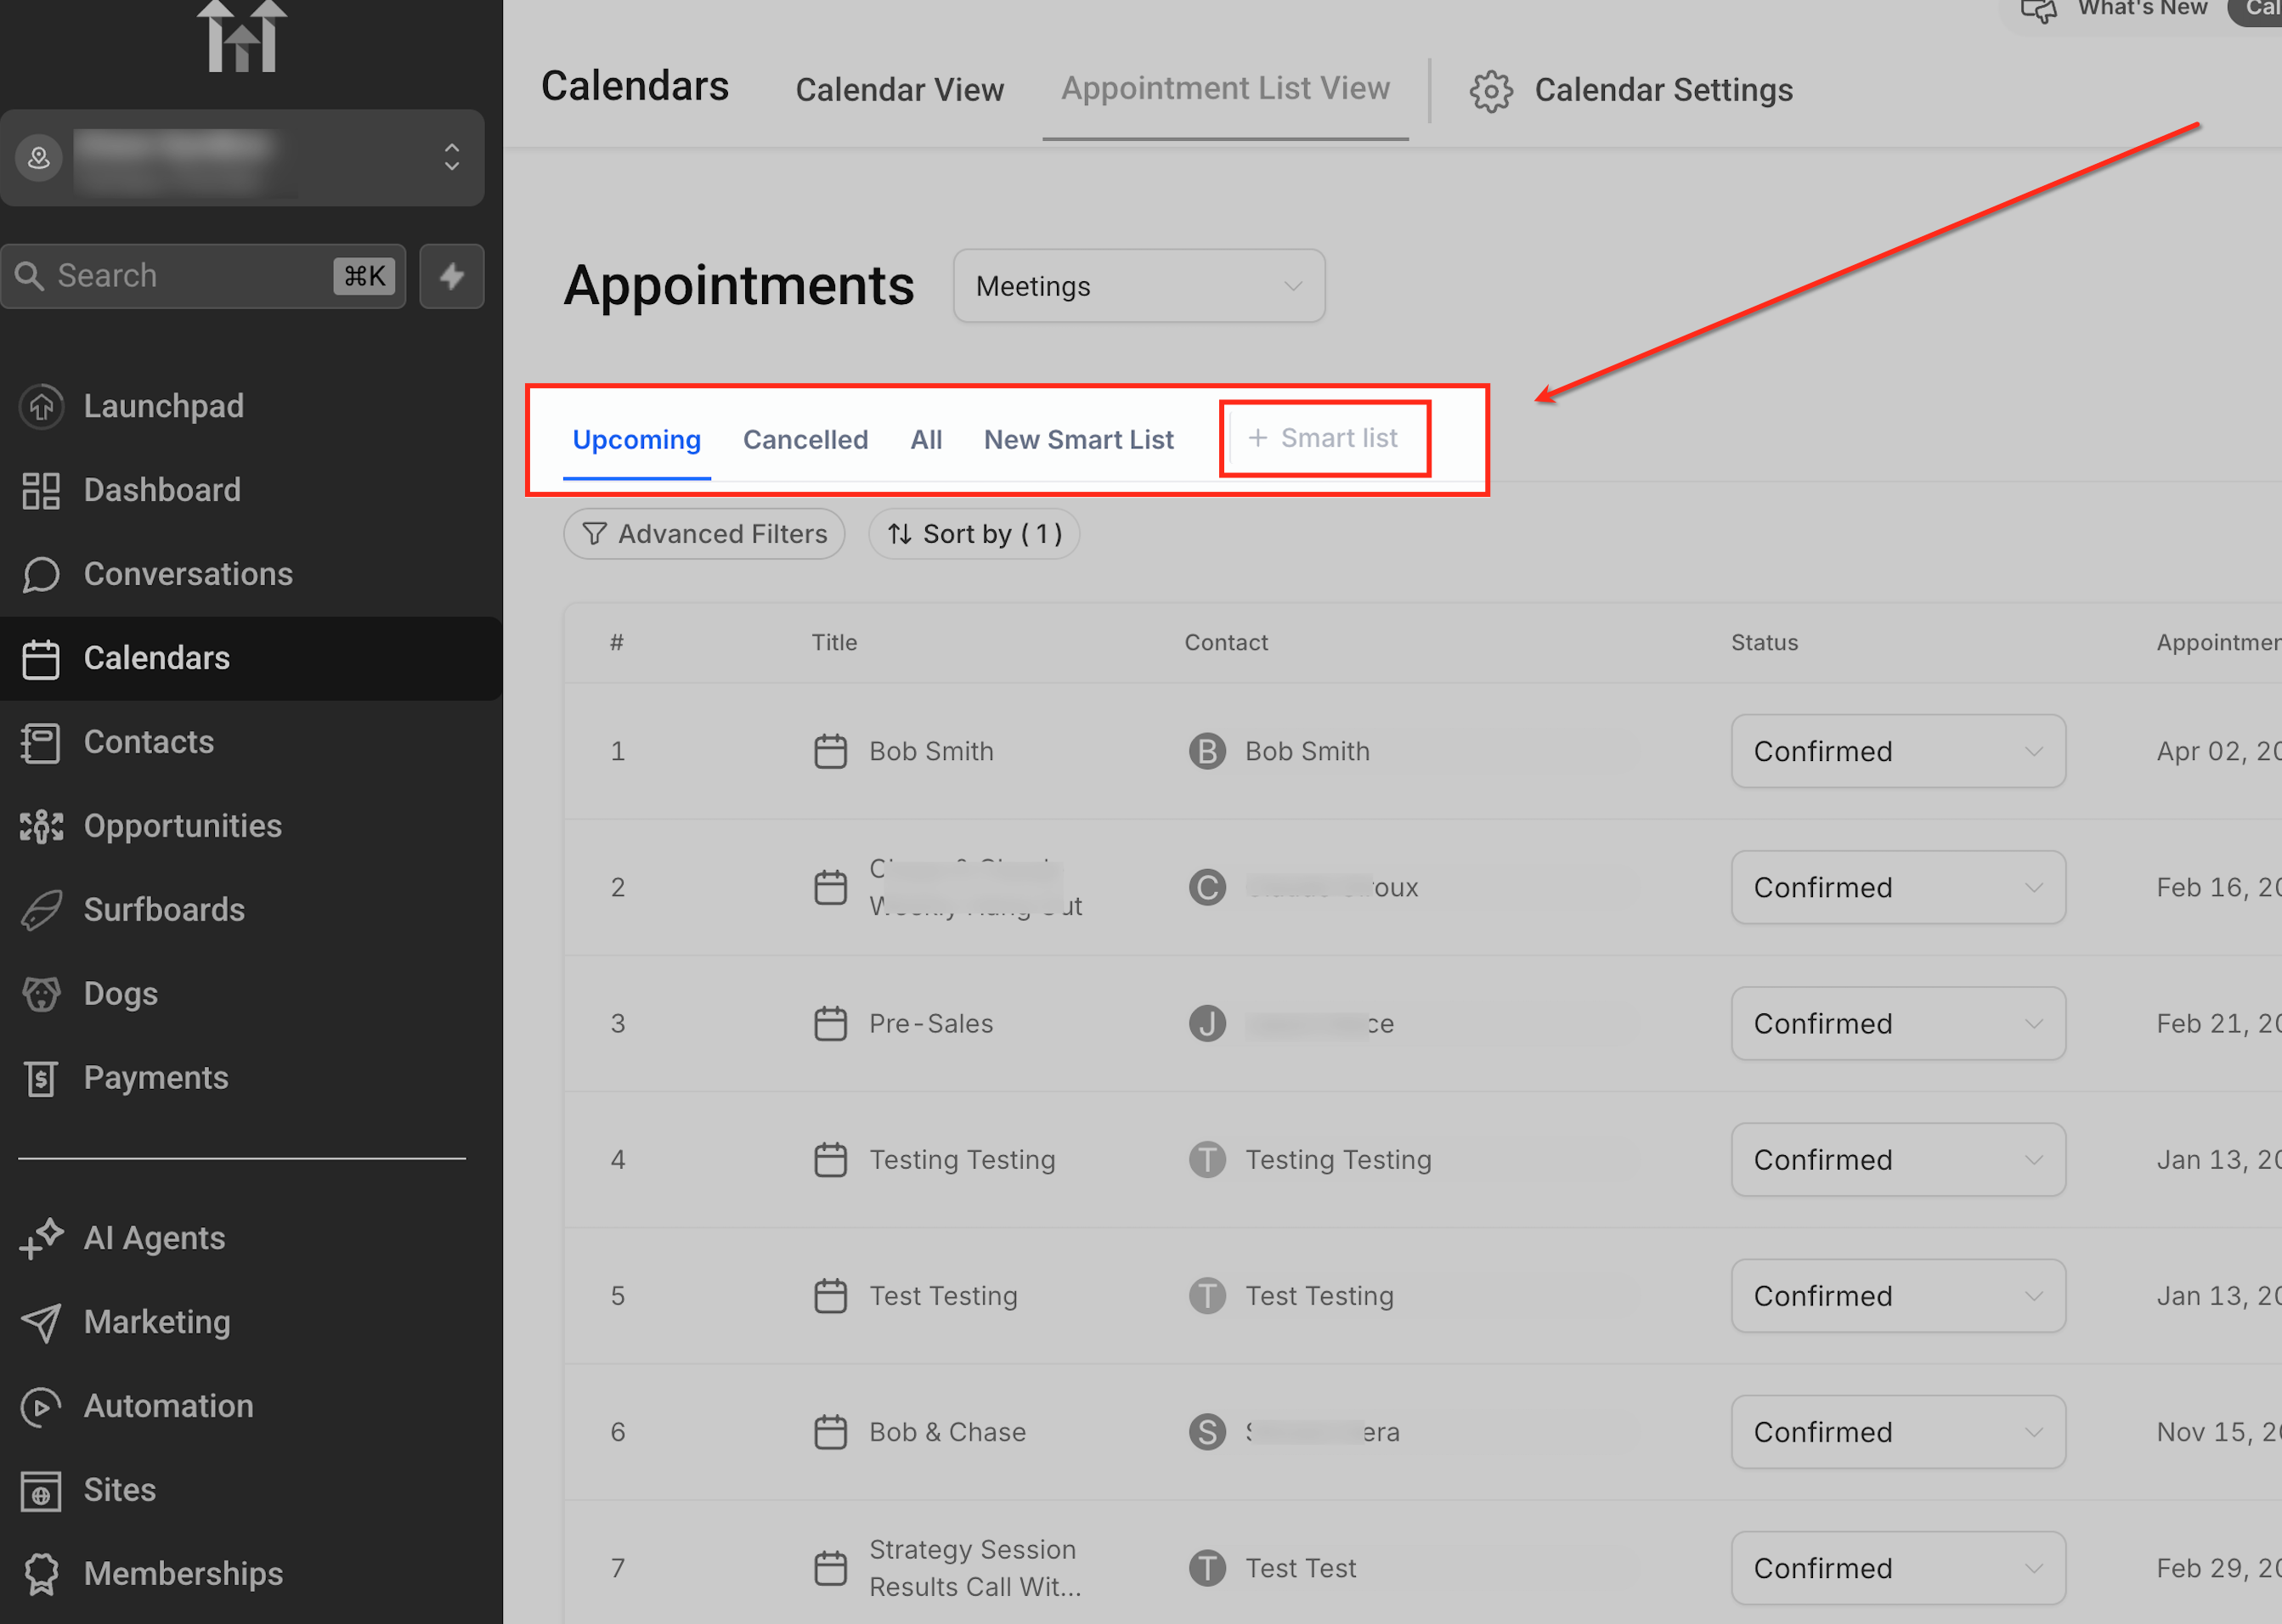
- Press the + Smart list button at the top of Appointment List View.
- Enter a name for the new Smart List.
- Save the list, which captures any current filters, sorting, and column settings.
Customize the list
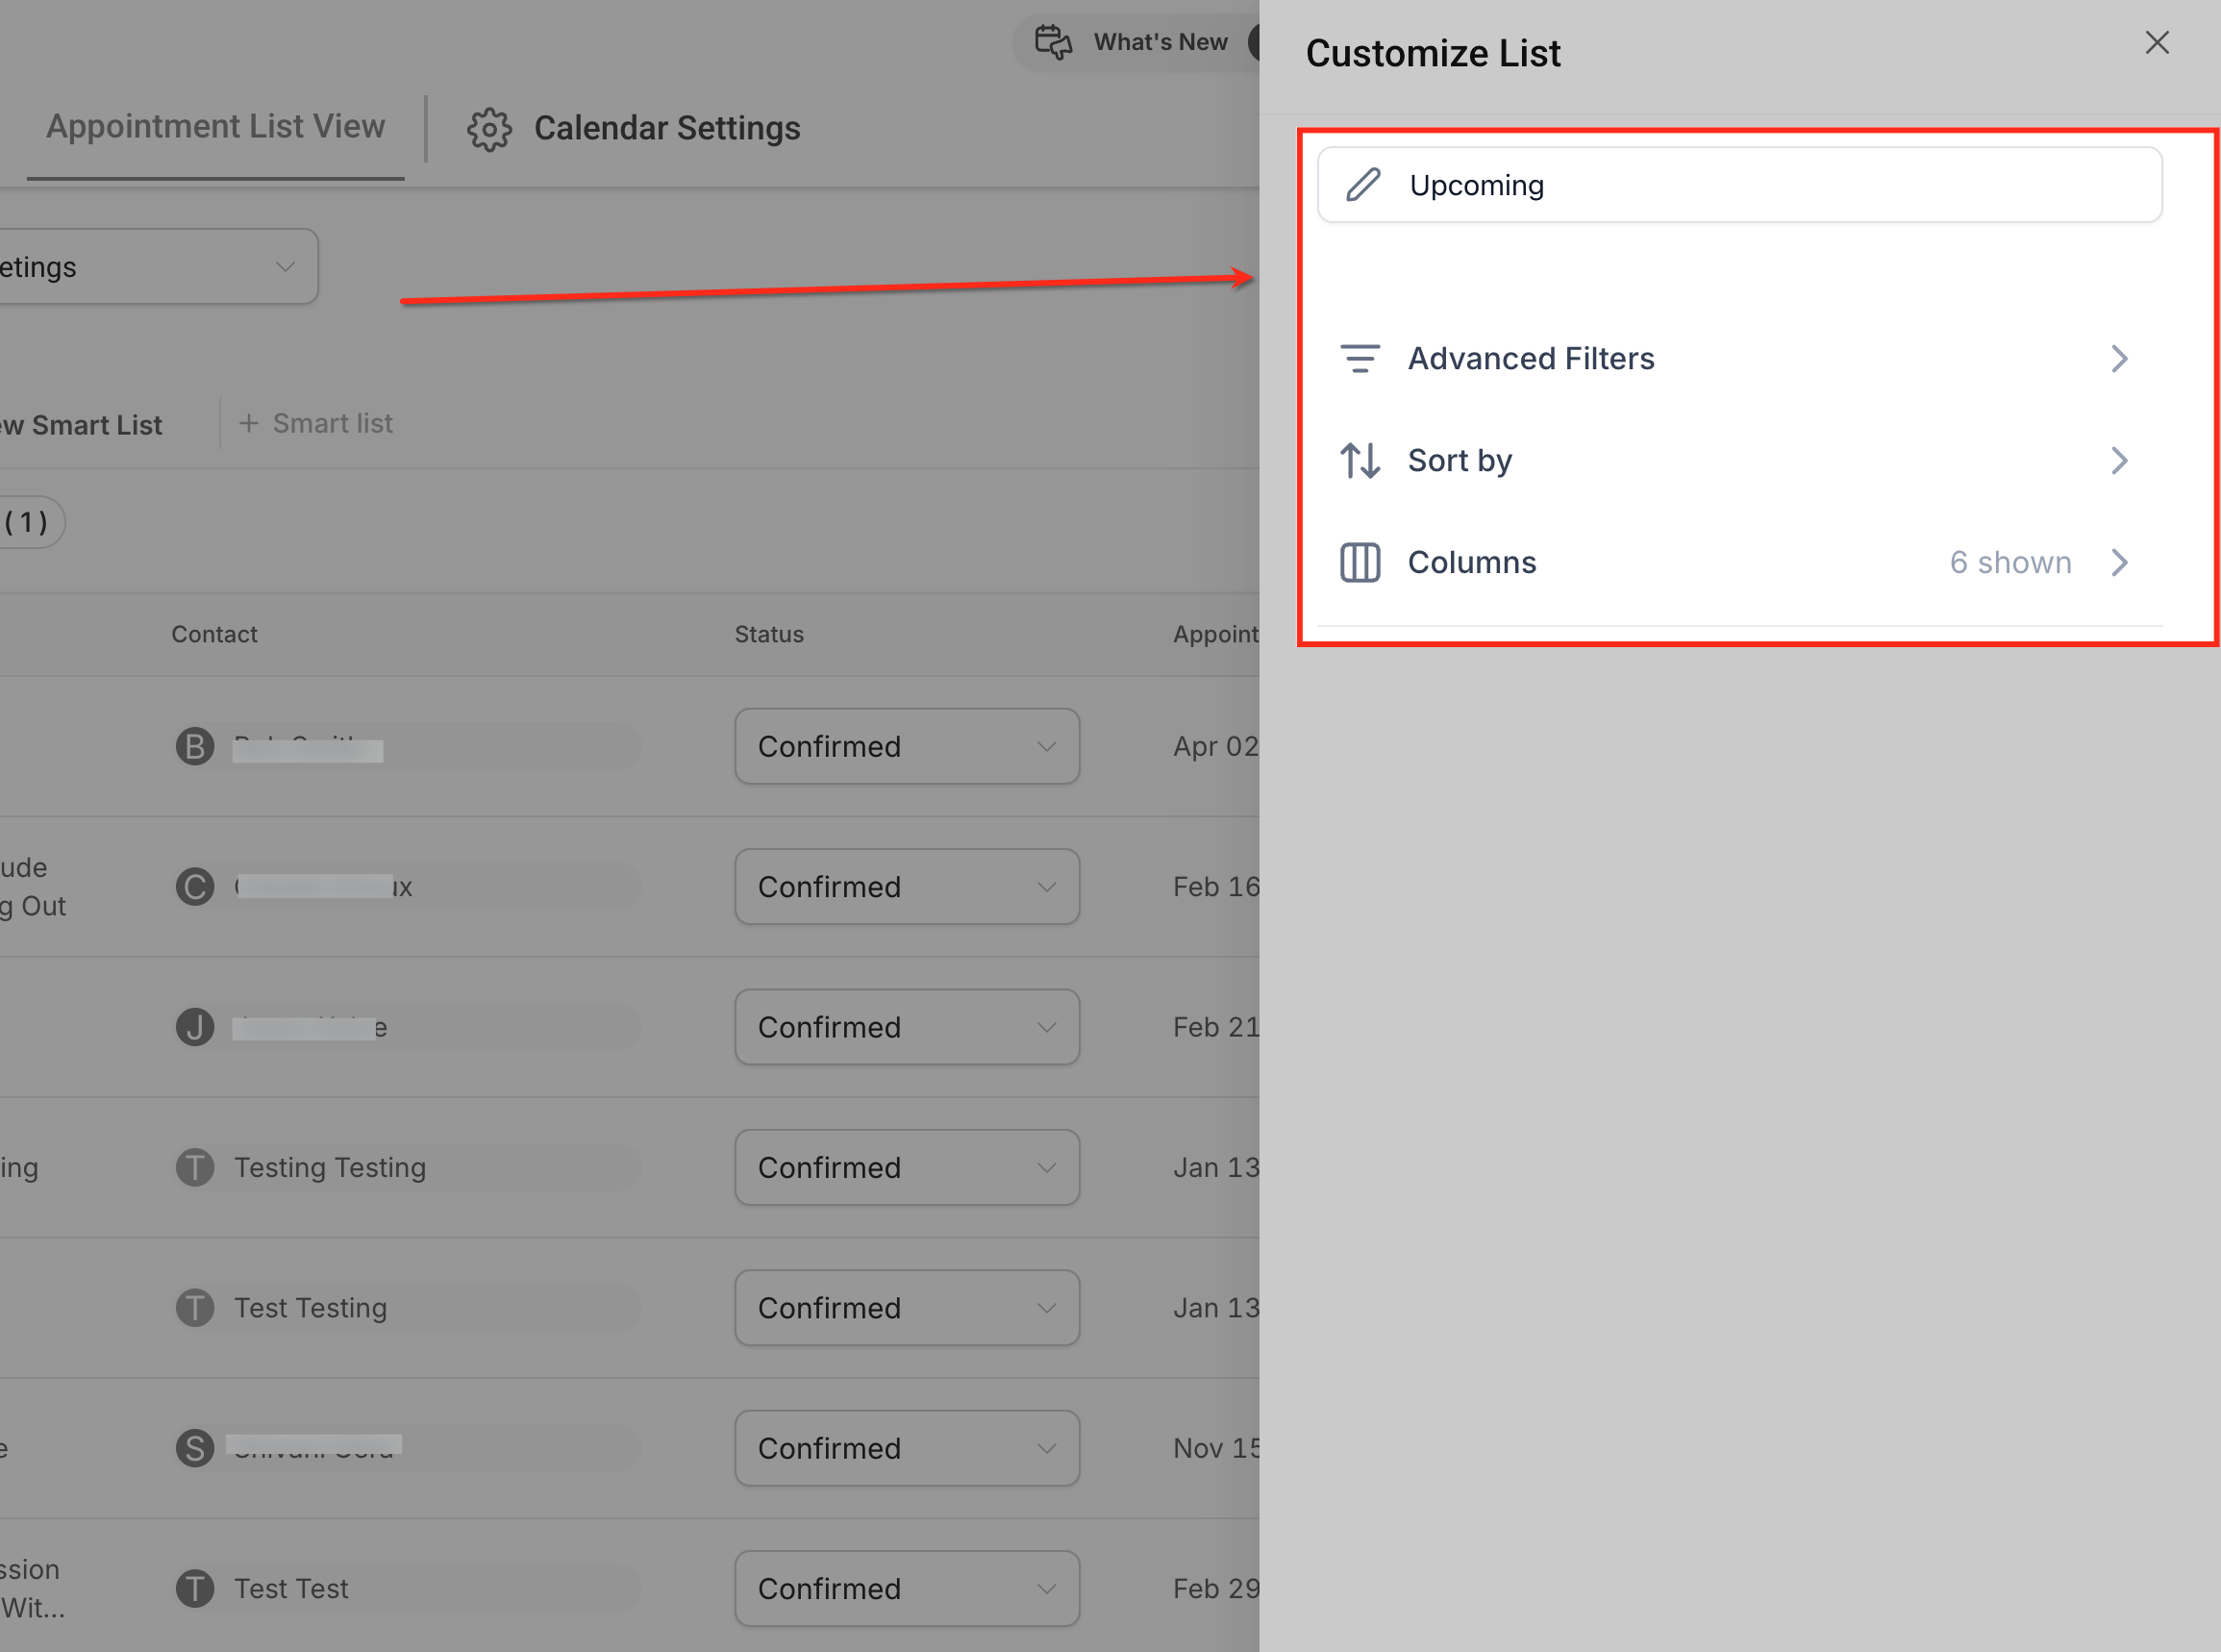
- Click Customize List to open the configuration panel.
- Rename the list if a different title is needed.
- Modify filters, sorting, or column choices inside the panel.
- Save the changes, turning the current view into a Smart List.
Apply advanced filters
- Open the Customize List panel.
- Choose Advanced Filters and add the desired conditions such as status, owner, calendar, date range, or contact.
- Apply the filters to refresh the appointment list.
Add filter
- In the Advanced Filters area, click Add Filter.
- Pick a filter field and specify the required value.
- Confirm the addition, which narrows the list using AND logic.
Apply sorting
- Within the Customize List panel, locate the Sorting option.
- Select a sorting field like Appointment Time or Date Added and choose ascending or descending.
- Apply the sorting to reorder the appointments in the list.
Manage columns
- Open the Customize List panel.
- Go to the Columns section.
- Show or hide specific columns and drag them to reorder.
- Save the column layout as part of the Smart List.
Update appointment status
- Find the appointment row in the list.
- Click the Status dropdown in that row.
- Select the new status such as Confirmed, Showed, No Show, Cancelled, or Invalid.
- Note that changing status to Showed or No Show updates HighLevel only and does not push an event to connected third party calendars.
Manage appointments using row actions
- Click the three dot menu (⋮) on the appointment row.
- Choose an action like View Details, Edit, Reschedule, or Delete.
- If consent tracking is enabled, you may also see a View Consent option.
- Complete the action; changes are saved immediately.
06What it looks like in HighLevel
07Settings that matter
- Customize List. Opens the panel where users can rename the view, set filters, choose sorting, and configure visible columns.
- Advanced Filters. Controls which appointments appear by applying one or more criteria such as status, owner, calendar, date range, or contact.
- Add Filter. Adds an additional condition to the Advanced Filters set, sharpening the appointment selection.
- Sorting. Determines the order of appointments in the list, with options like Appointment Time or Date Added in ascending or descending order.
- Columns. Defines which appointment details are shown, allowing columns to be shown, hidden, or reordered.
08Things to know before you rely on it
- Changing an appointment status to Showed or No Show updates HighLevel only and does not trigger an event in connected third party calendars.
- Smart List visibility depends on user permissions and the account’s configuration; not all users may see every saved list.
09How it connects to the rest of HighLevel
- Learn how to manually book appointments from the list view. Manual booking
- Explore all calendars and appointments features in HighLevel. Feature overview
- View HighLevel pricing and plan options. Pricing
Michael's take

In my experience, the list view can reduce the number of clicks needed to update appointments, keeping the data fresh for reporting.
If your workflow revolves around visualizing availability and confirming slots in real time, the list view adds little value. It won’t push status changes to external calendars, so agencies that rely on synchronizing with client calendars may find the feature limiting.