
01Class booking calendars, explained
The Class Booking Calendar is a calendar type built for scenarios where one host meets several attendees at the same time. It works for fitness classes, webinars, workshops and similar group events. The calendar lets you set seat limits, define recurring schedules and collect payments through Stripe.
Bookings appear on a booking page that can be shared via a custom URL, and the calendar syncs with the host’s availability and sends confirmation, reminder and follow up messages.
02How businesses use class booking calendars
- Run recurring fitness classes. Set a recurring availability on Tuesdays and Thursdays, define the seat count, and enable Stripe payments. Members book their spot and receive automated reminders, while the calendar tracks remaining seats.
- Host online webinars. Create a class calendar with a Zoom or Google Meet link as the meeting location, toggle payment collection if the webinar has a fee, and publish the custom URL. Registrants fill out a form, pay, and get the meeting link in their confirmation email.
03The numbers and rules that matter
- Seats per class limit controls maximum participants.
- One host per class calendar; separate calendars needed for multiple instructors.
04How to set up and use class booking calendars in HighLevel
Create a class booking calendar
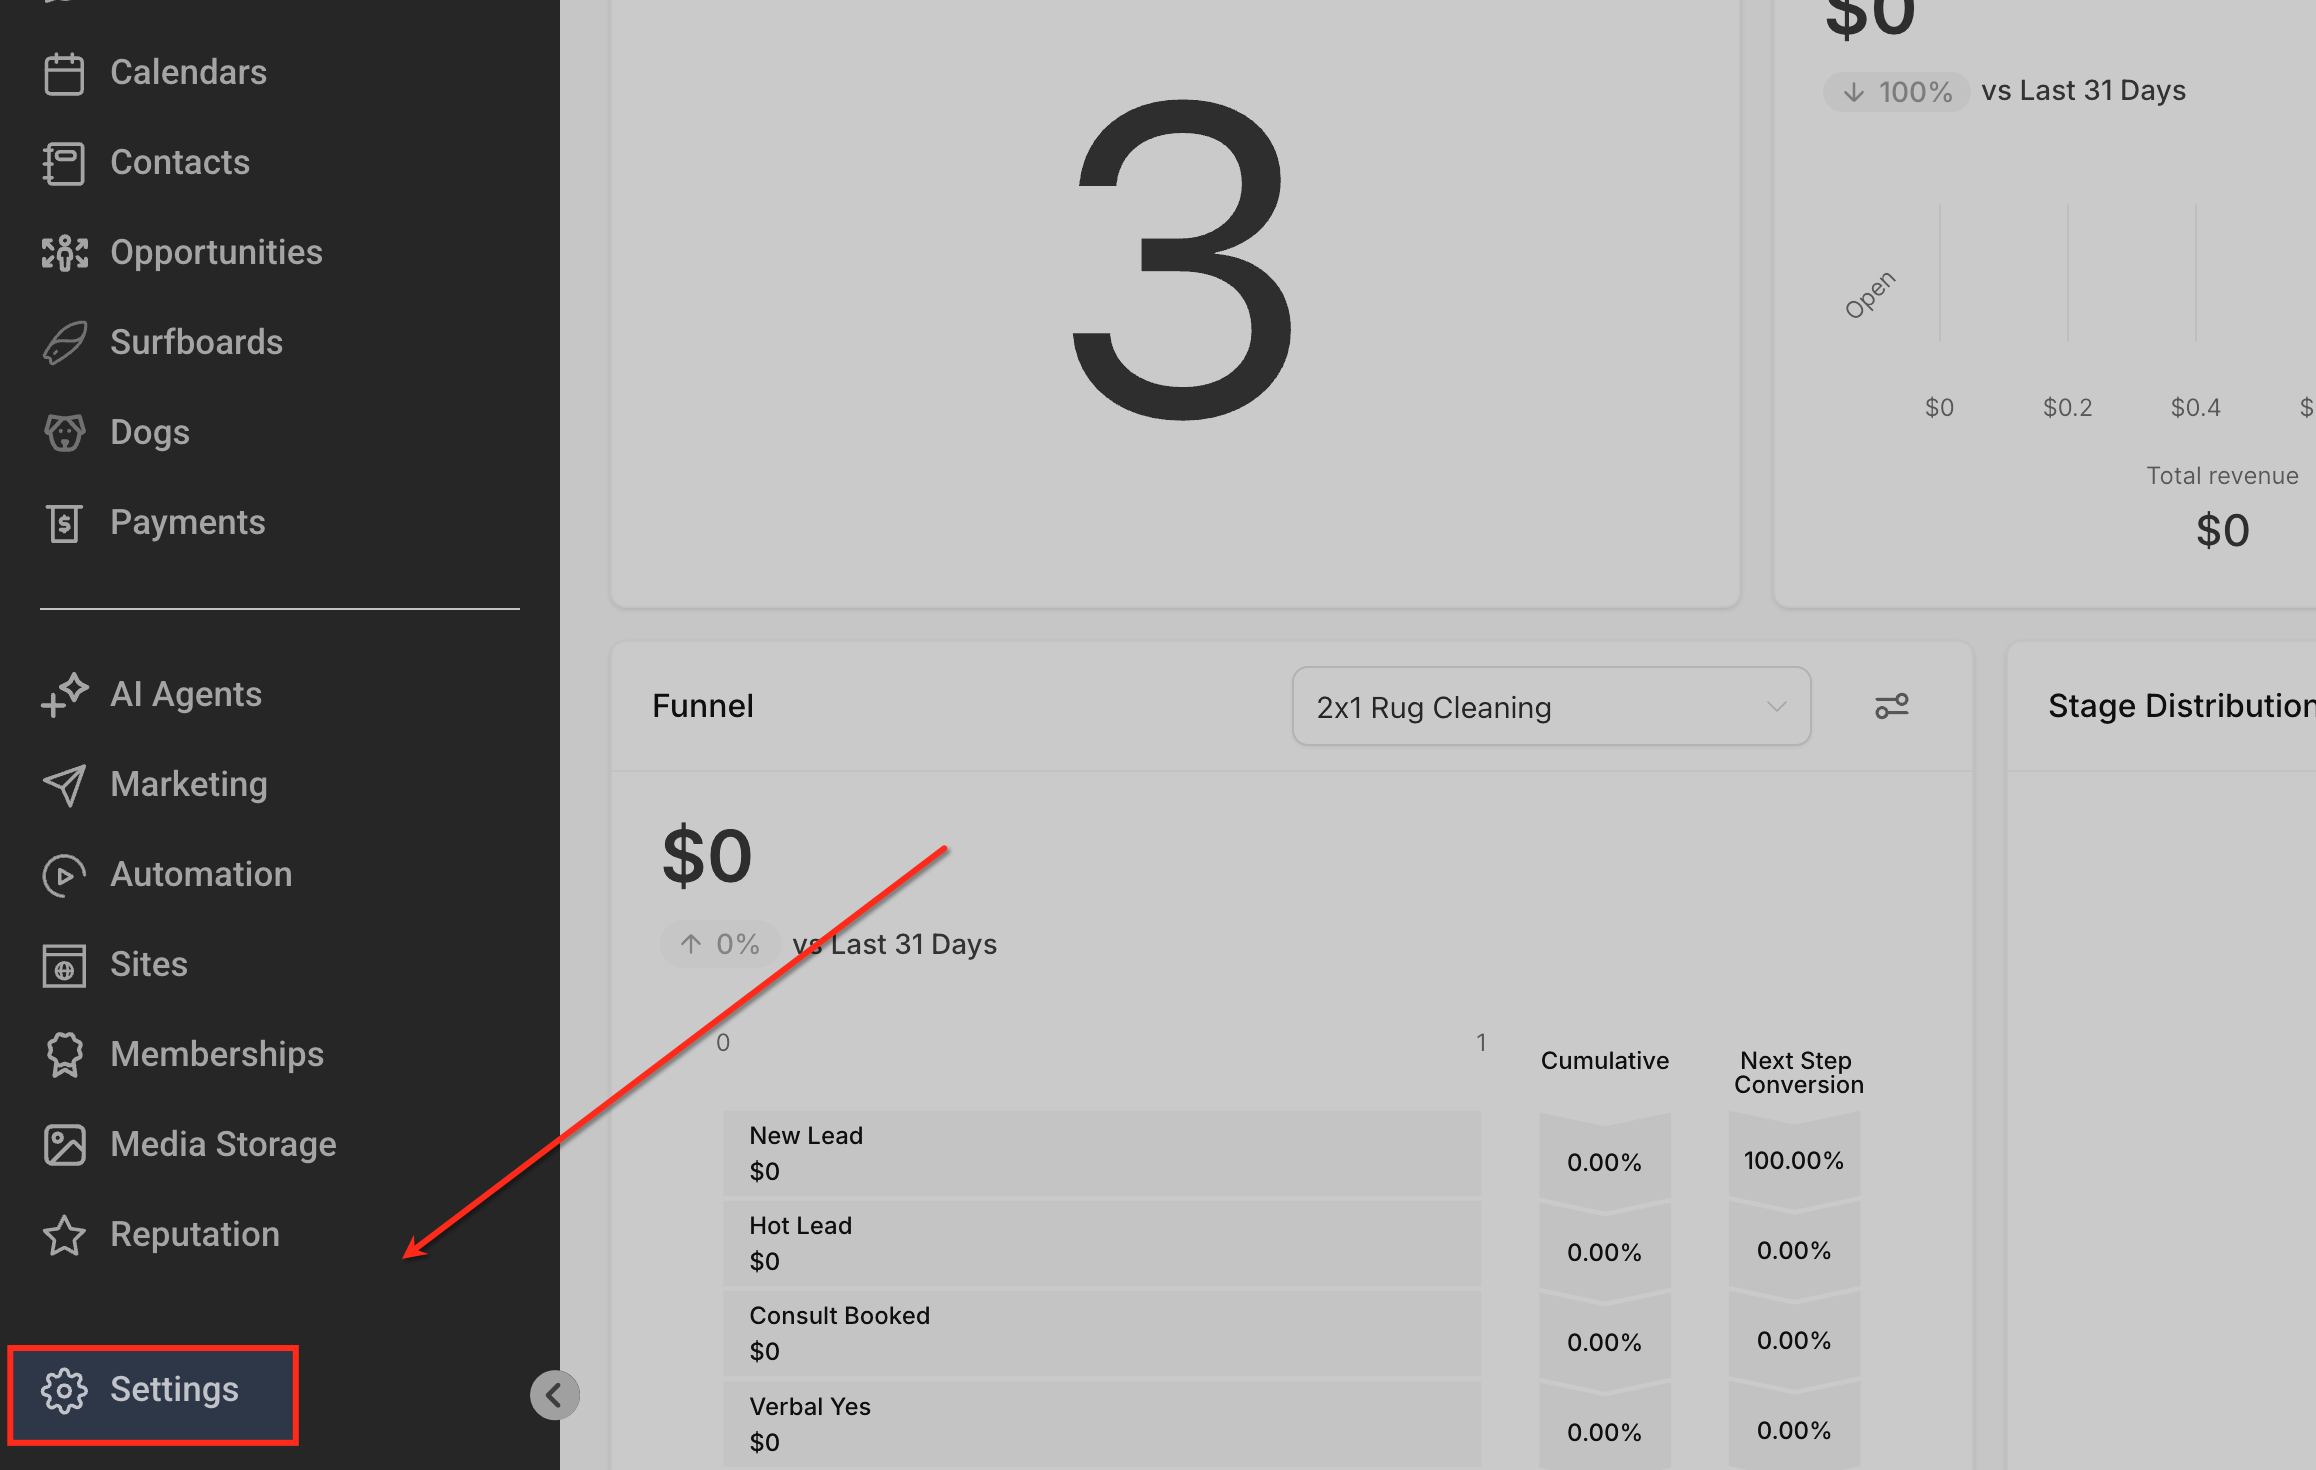
- From the HighLevel dashboard click Settings in the left sidebar.
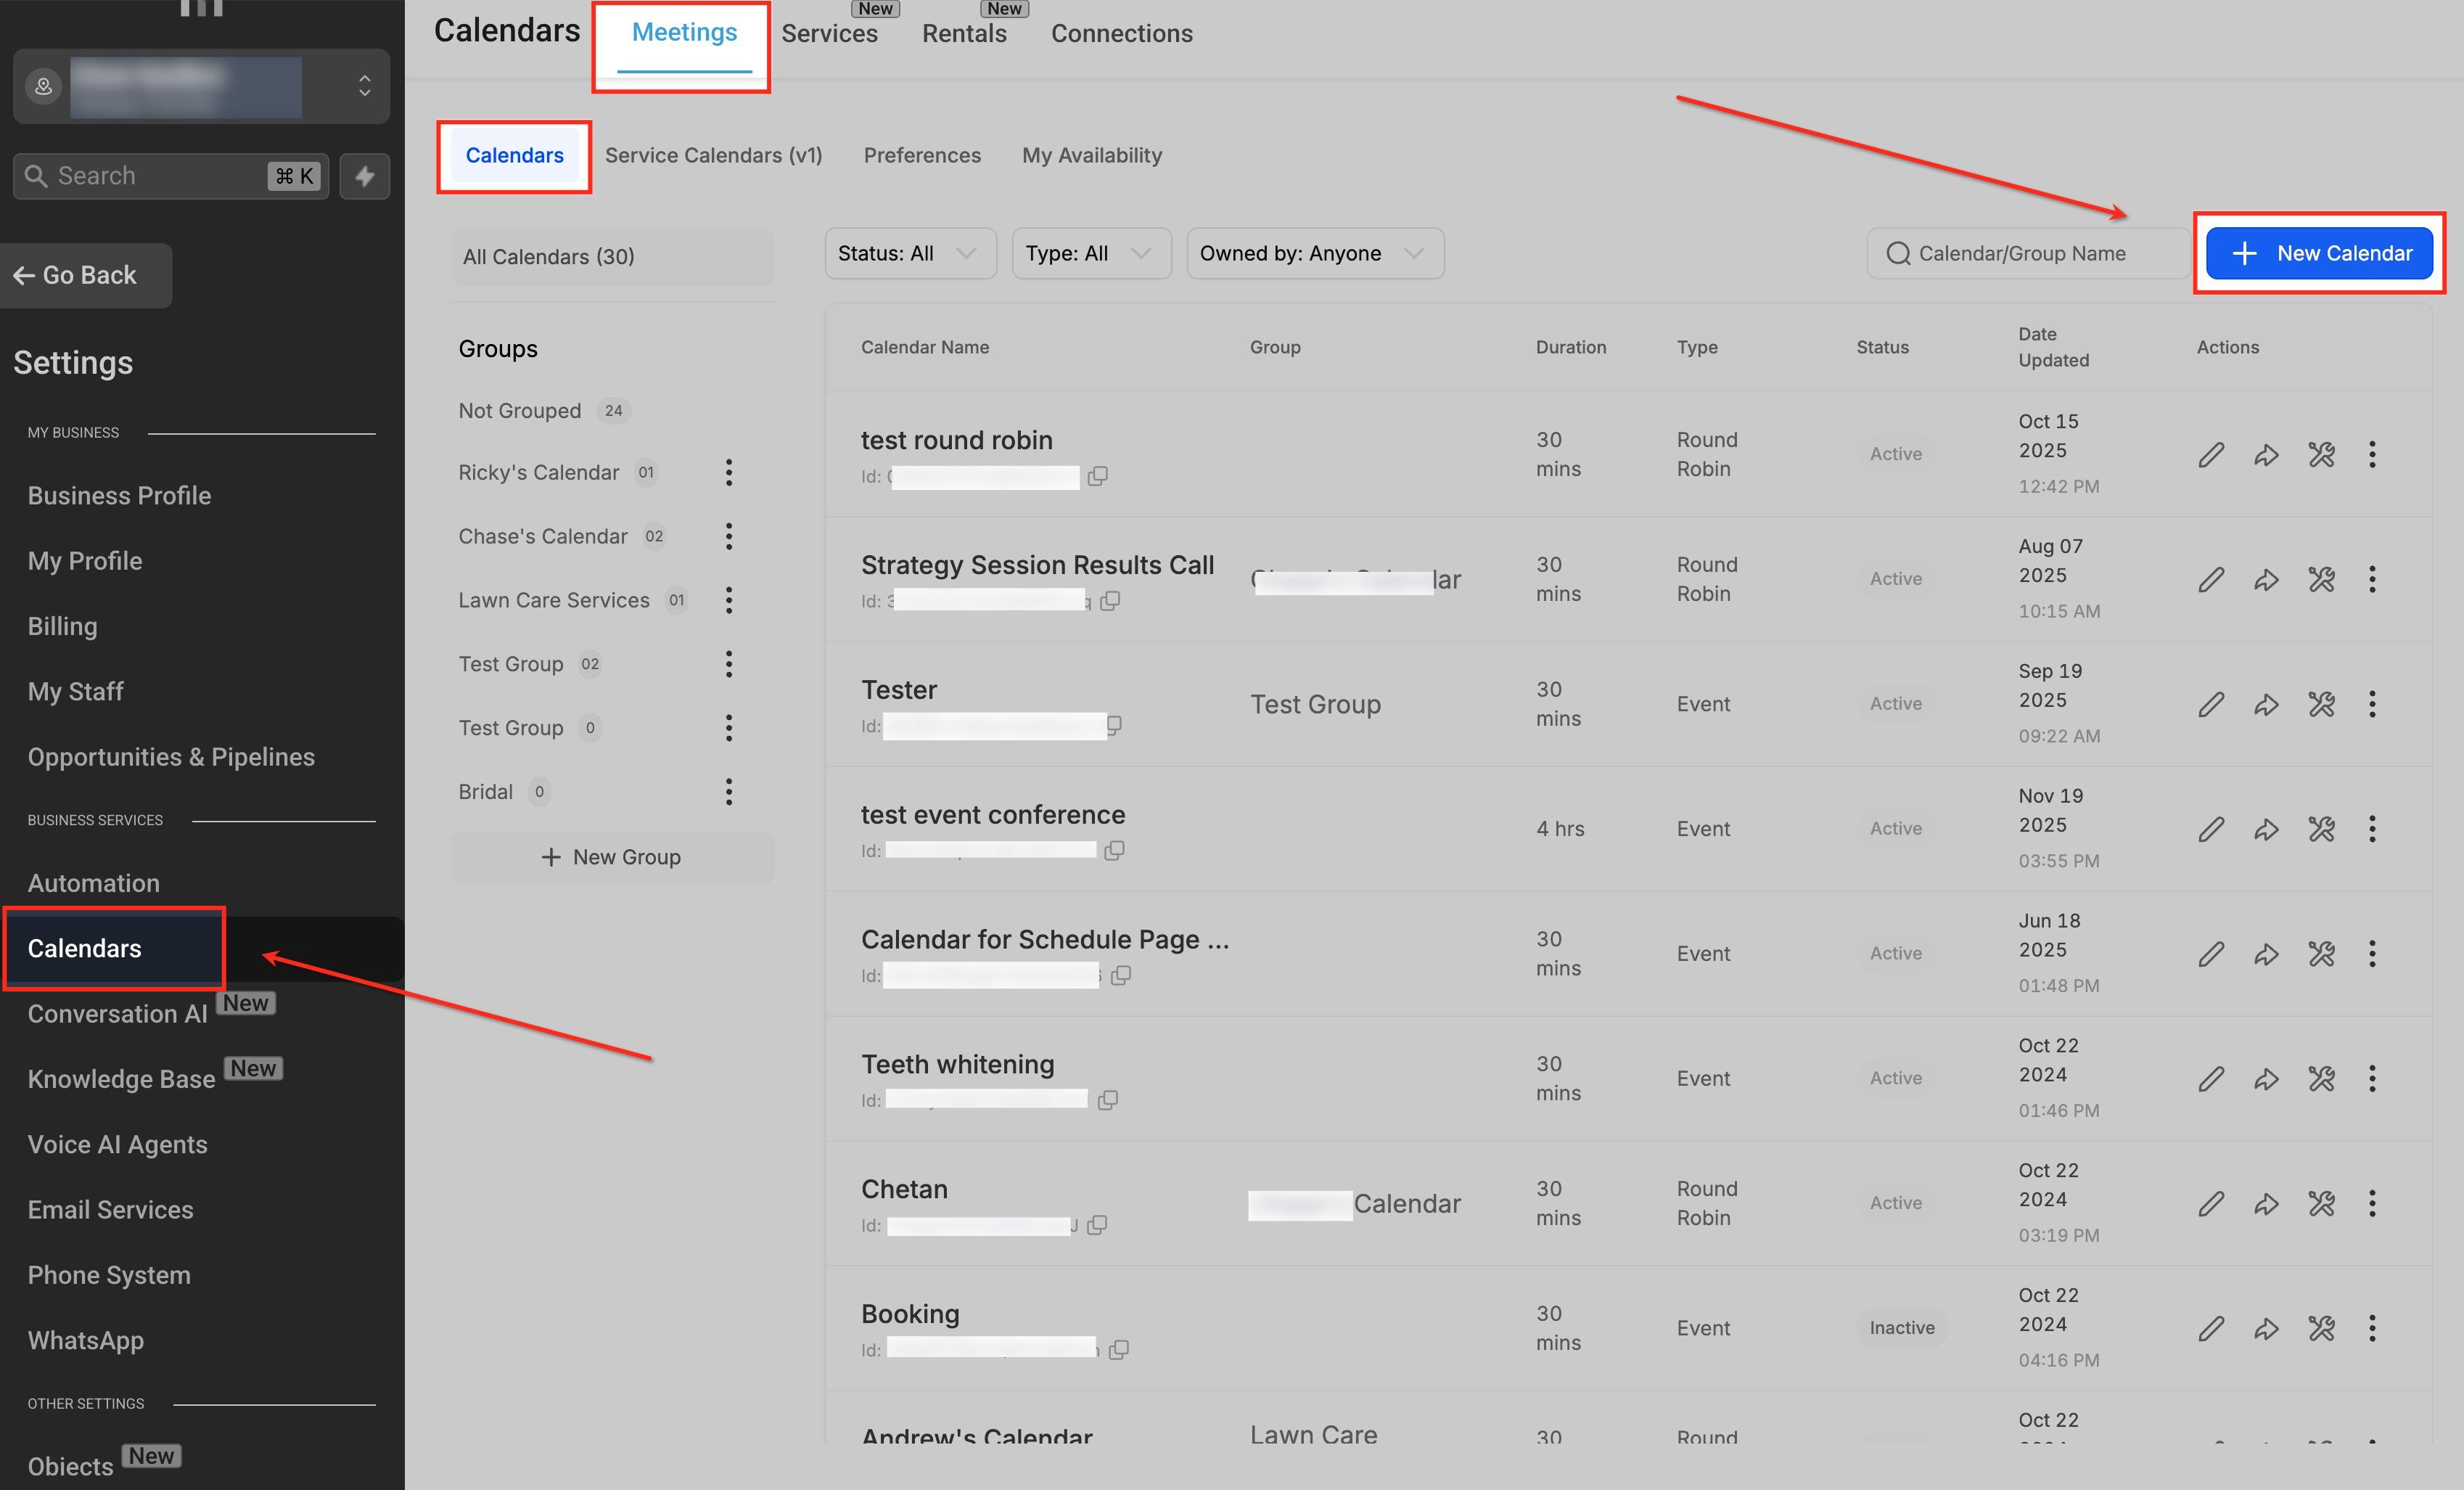
- Click Calendars on the left sidebar, then open the Meetings tab.
- Click + New Calendar.
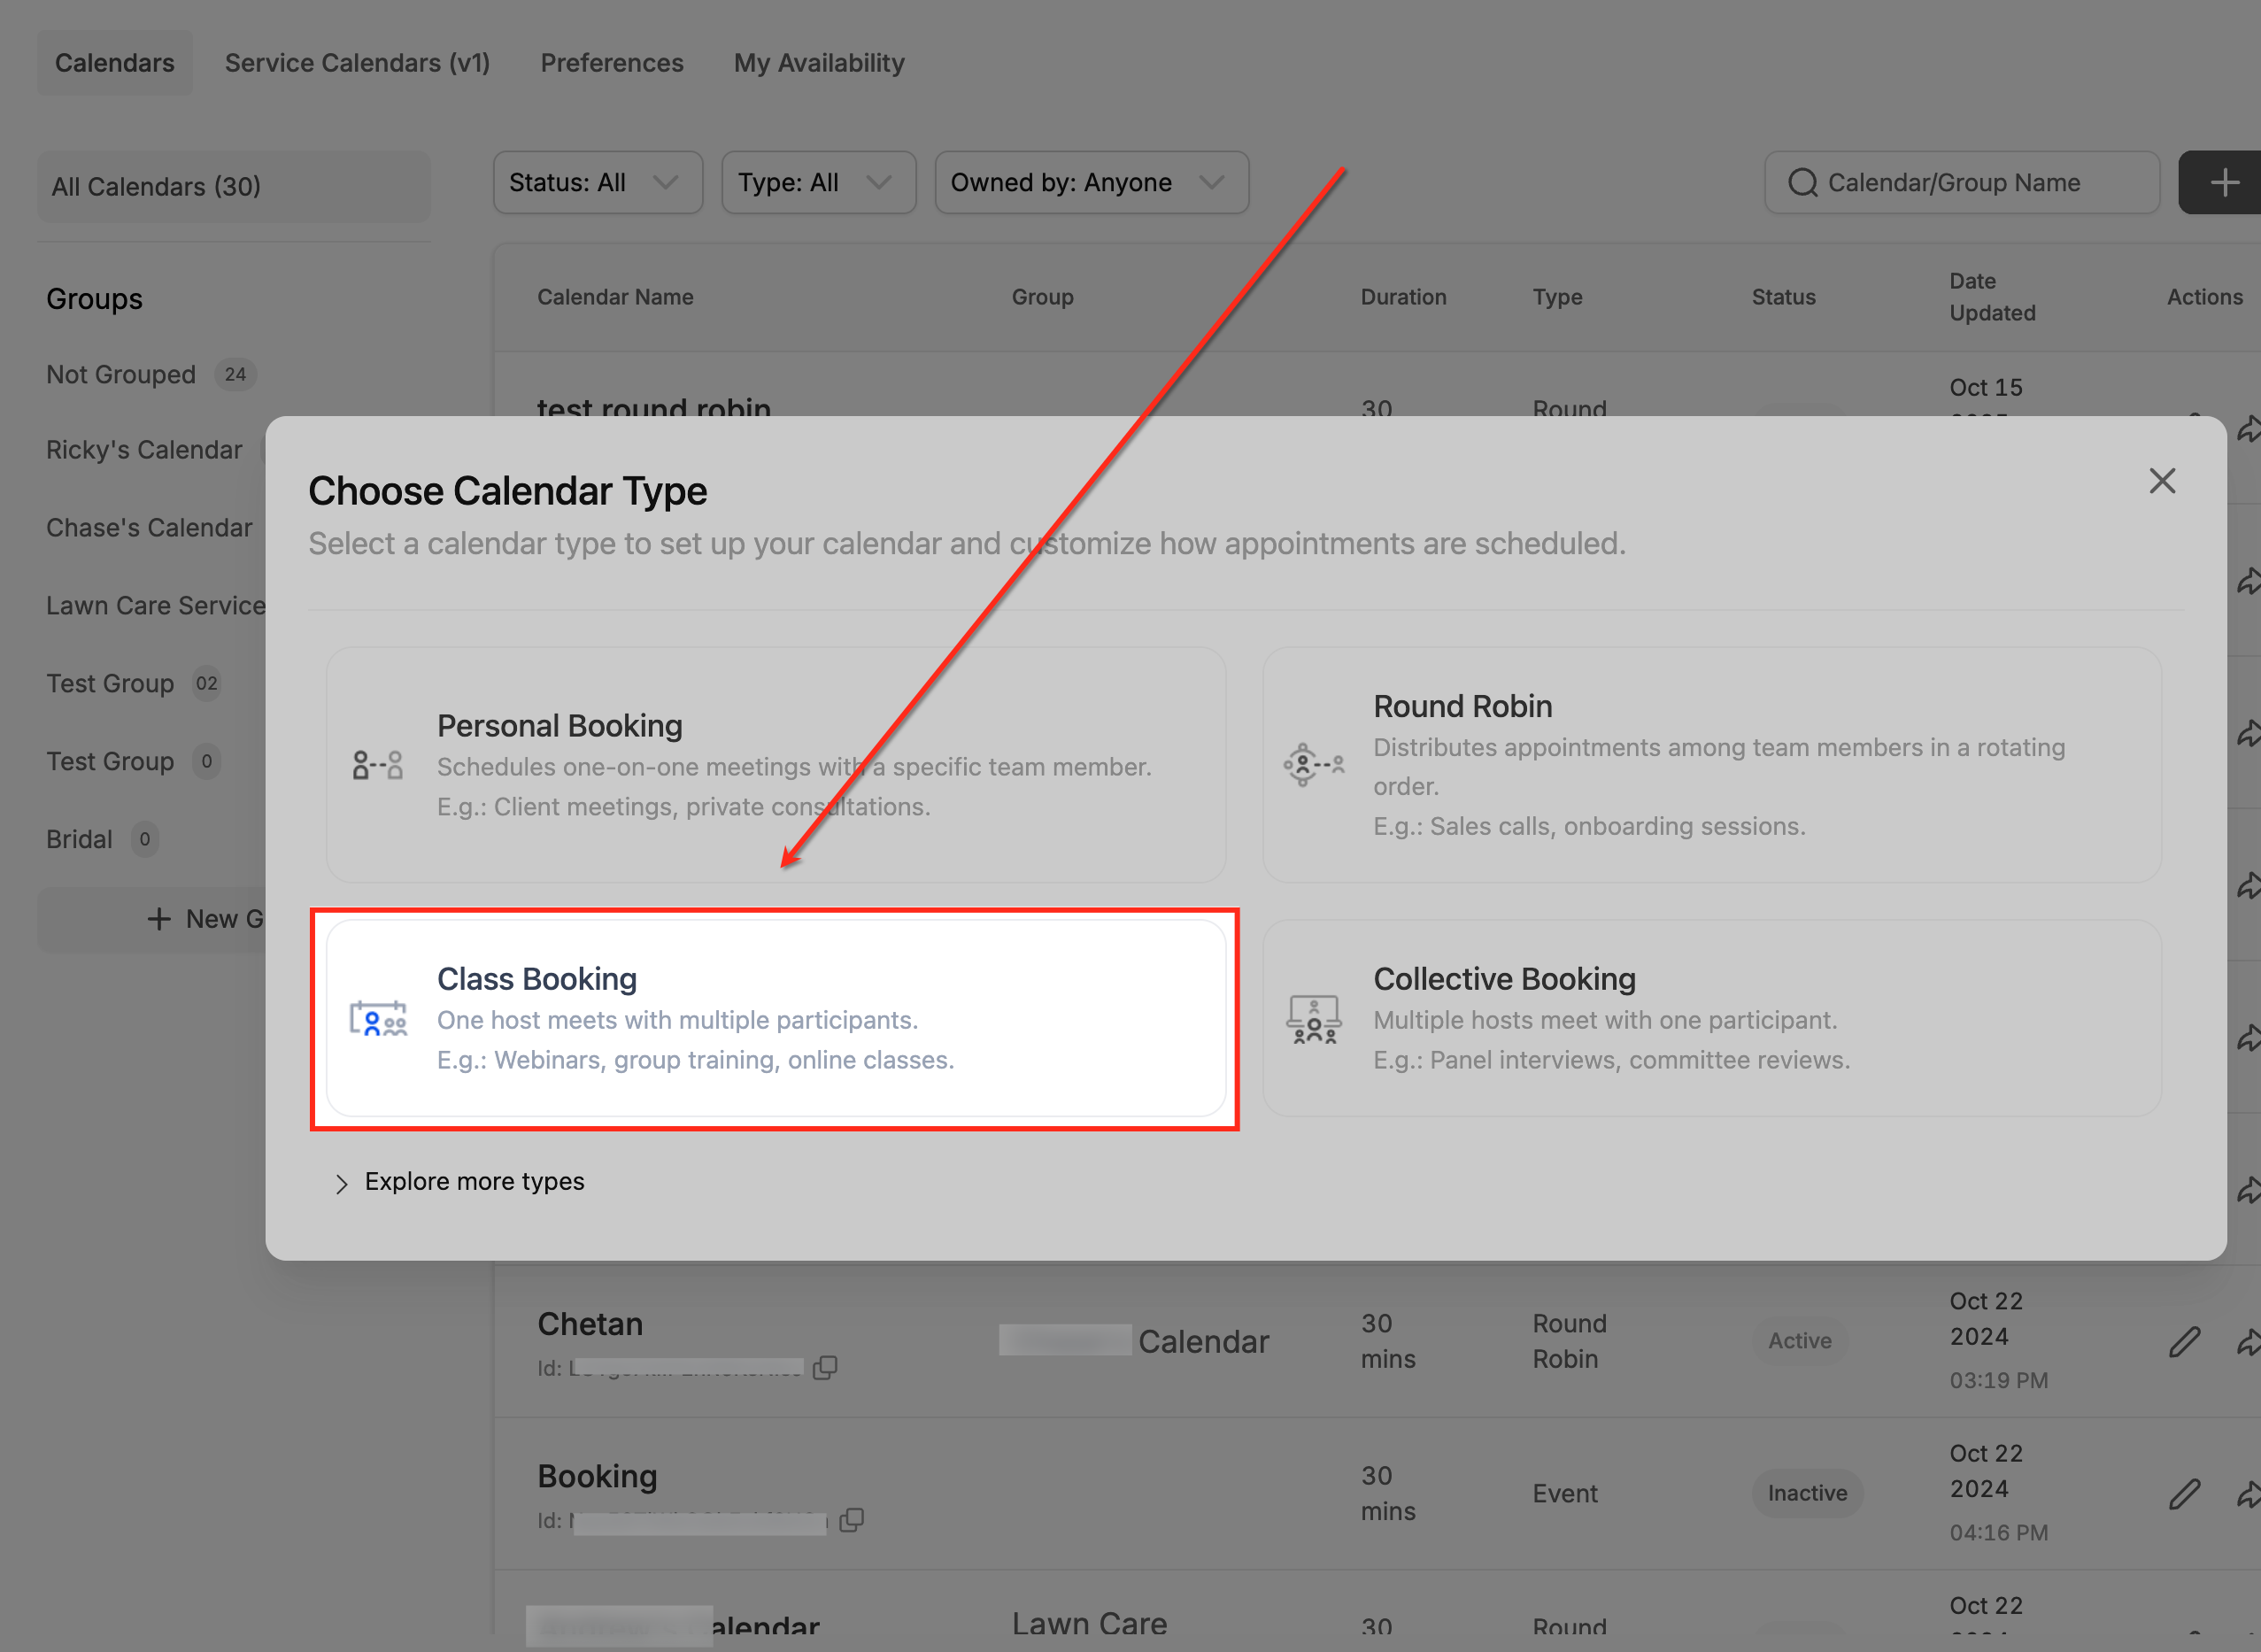
- Select Class Booking as the calendar type.
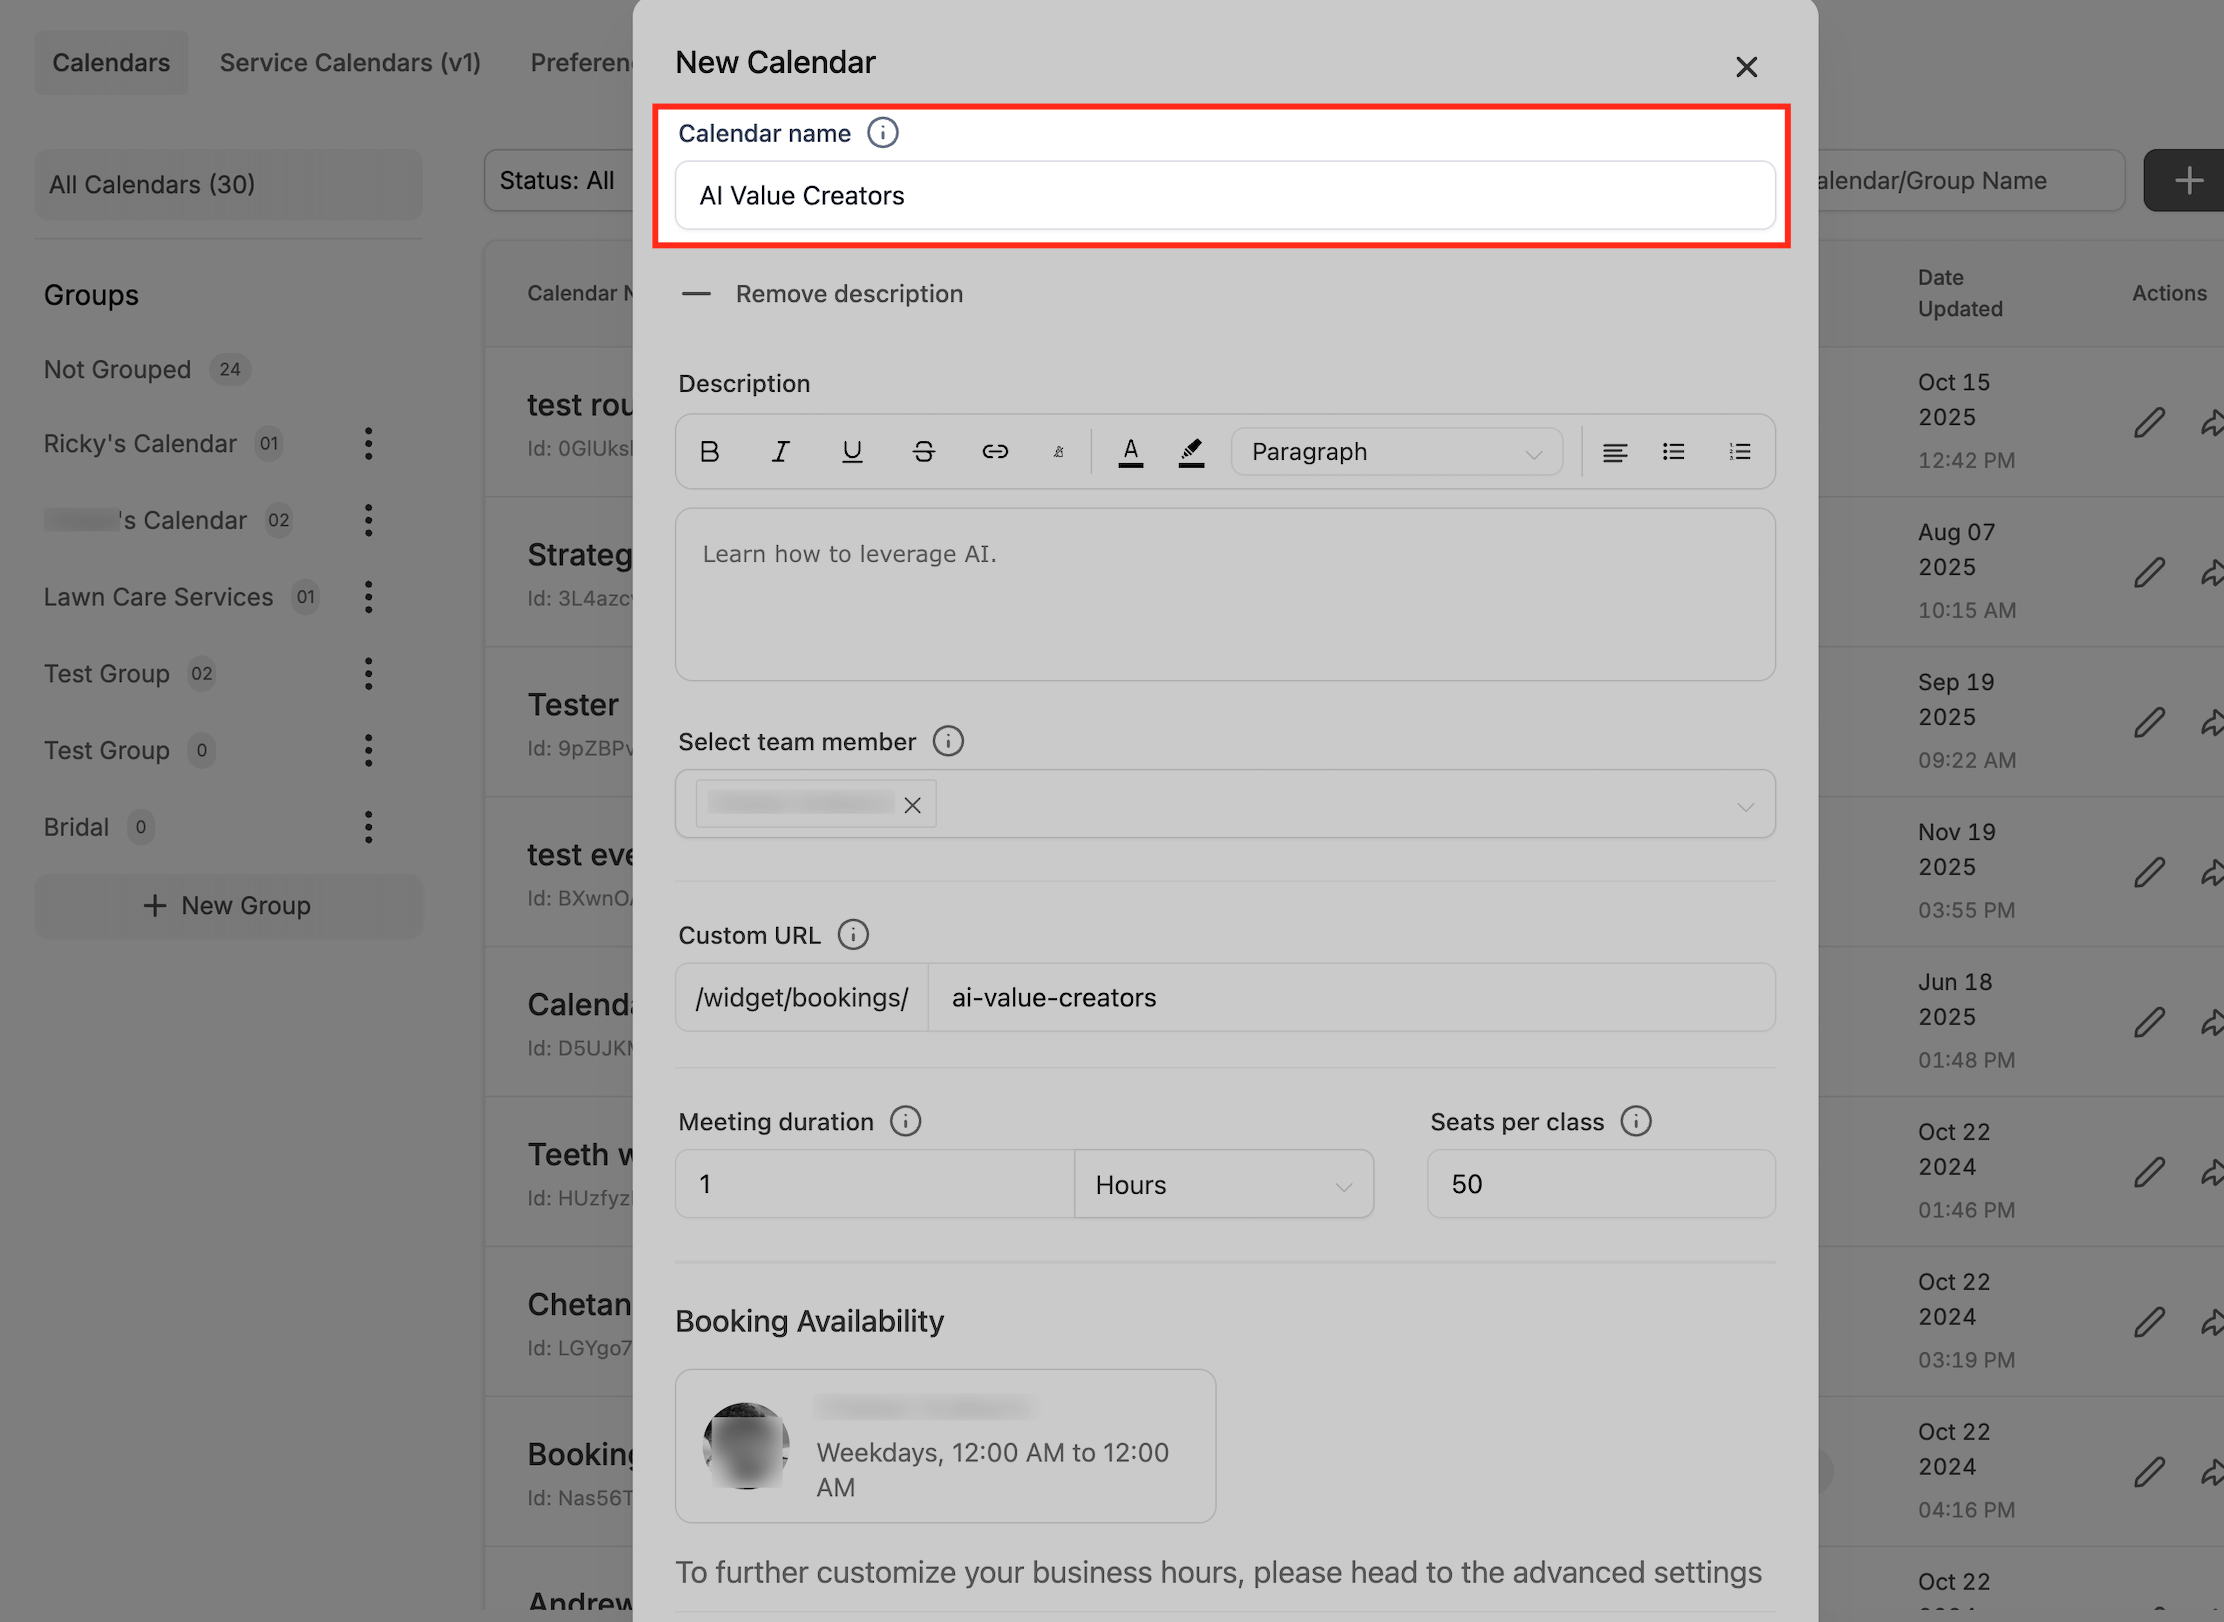
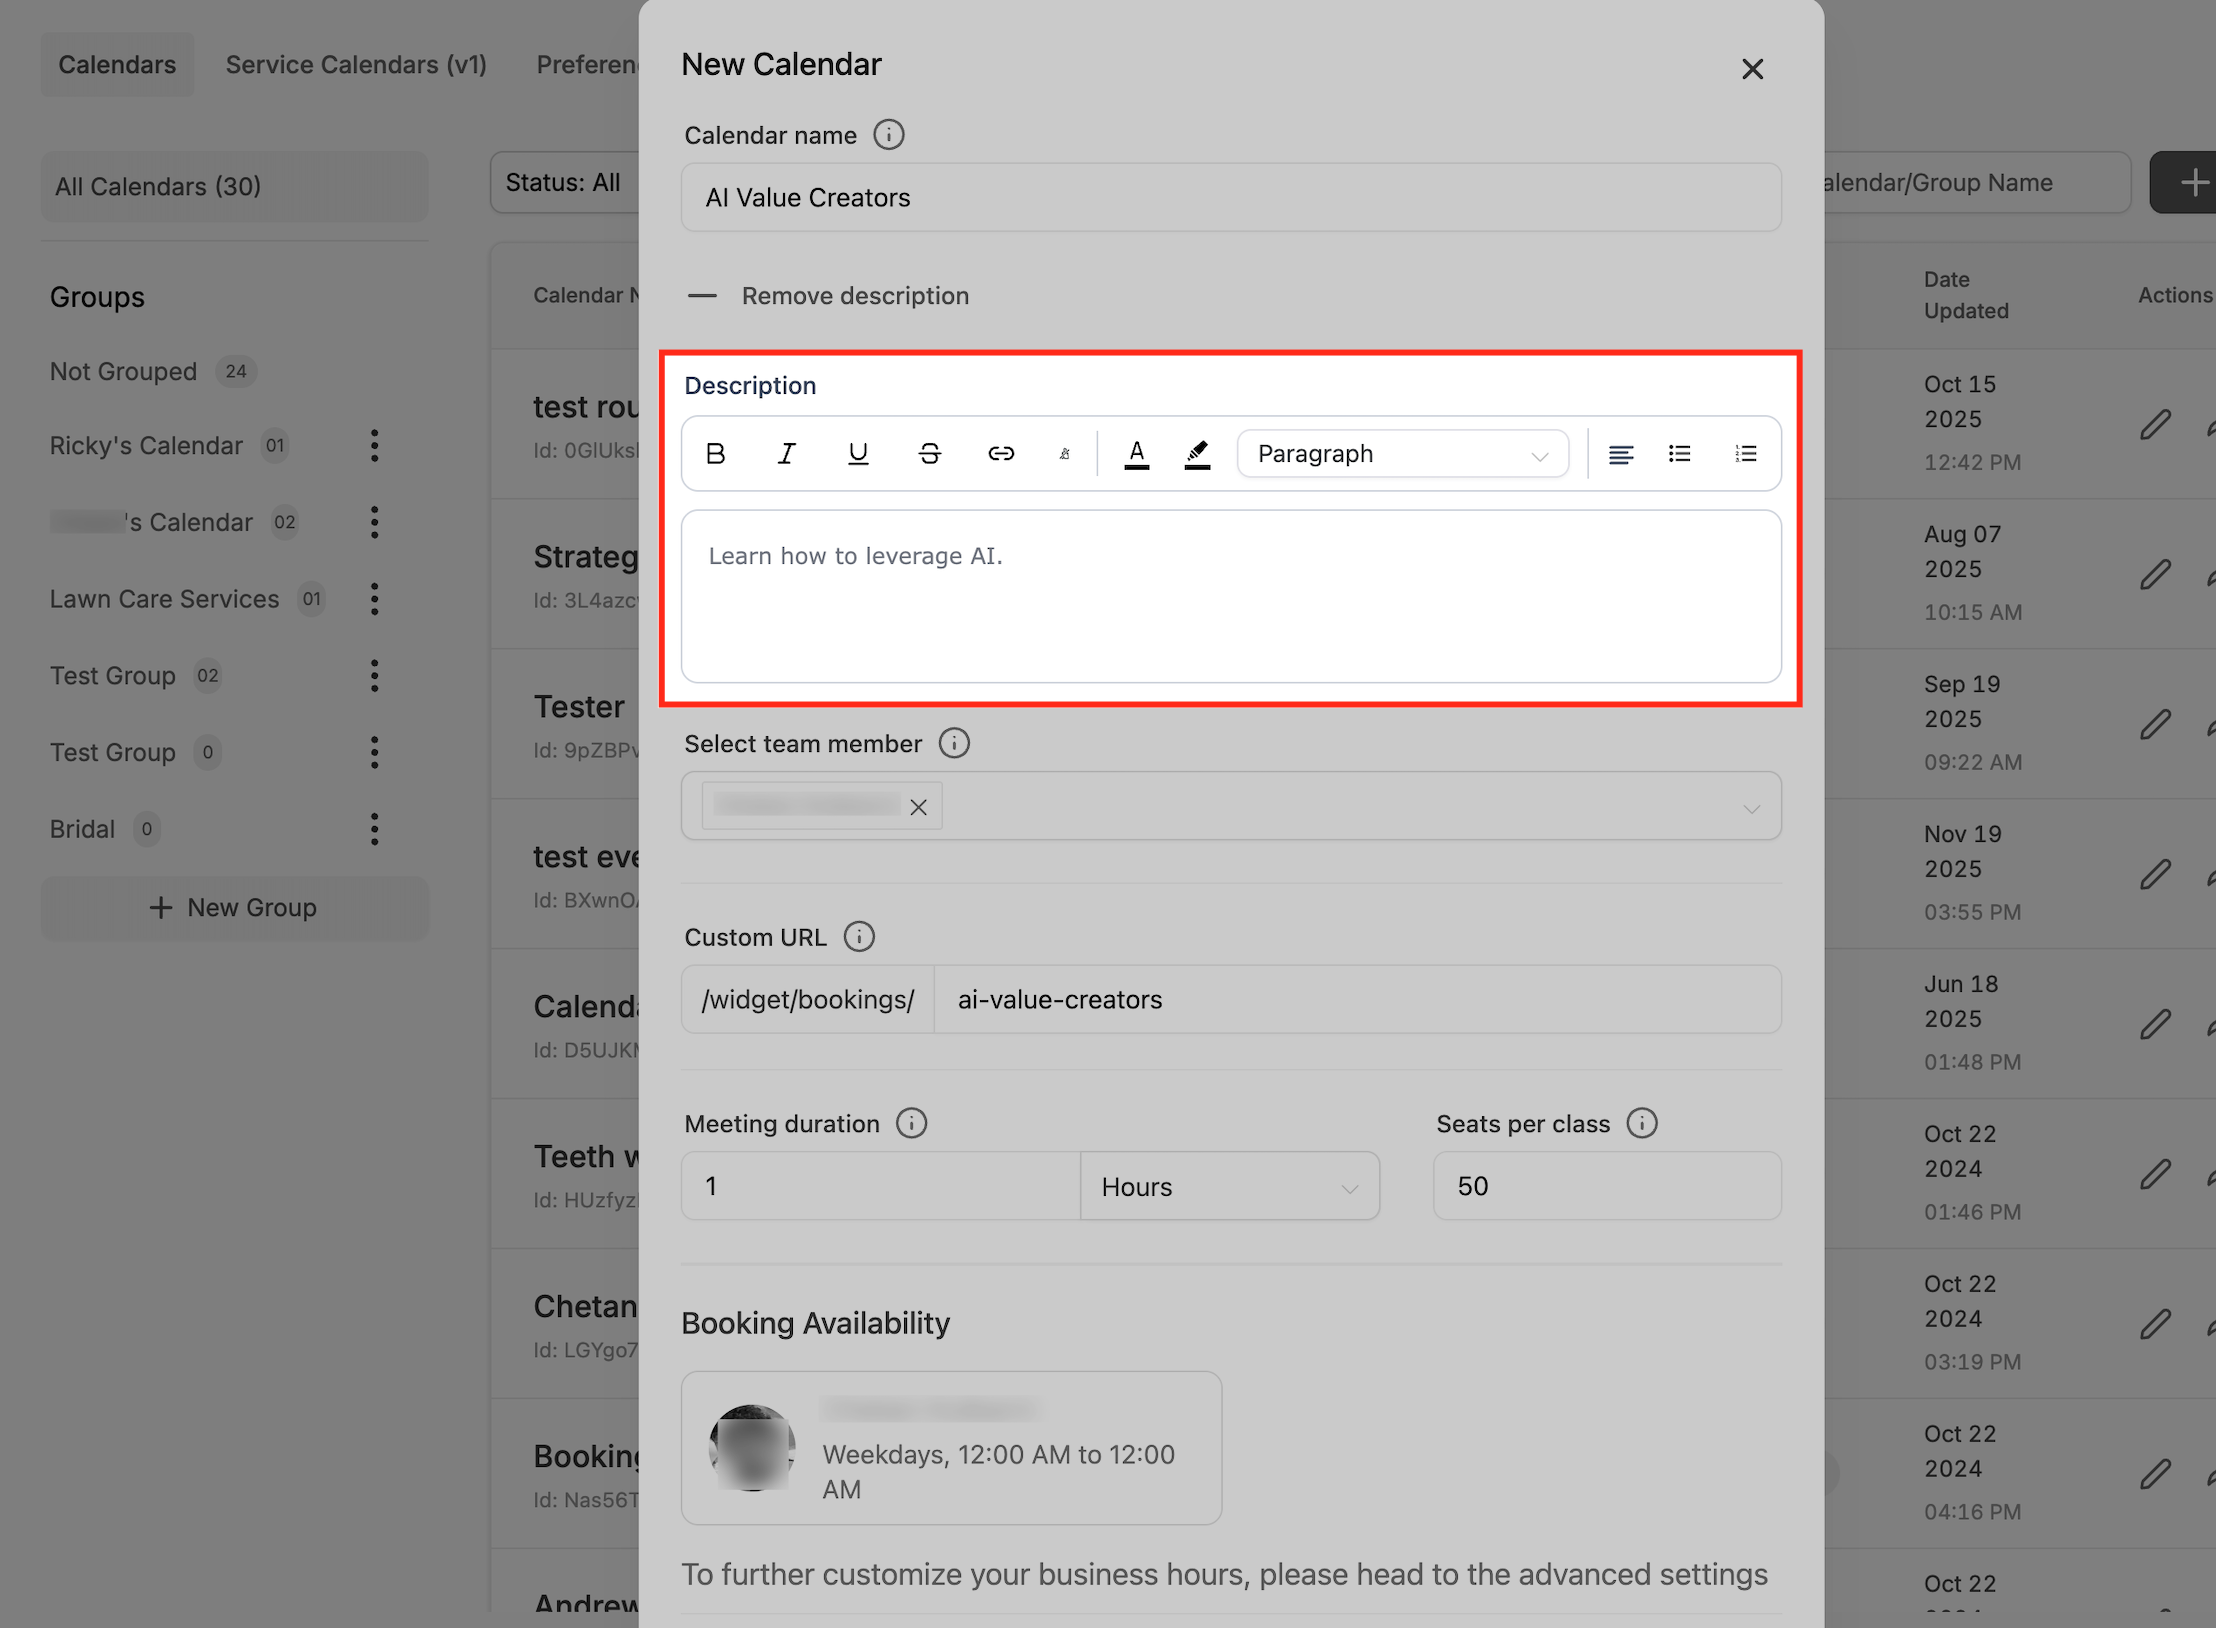
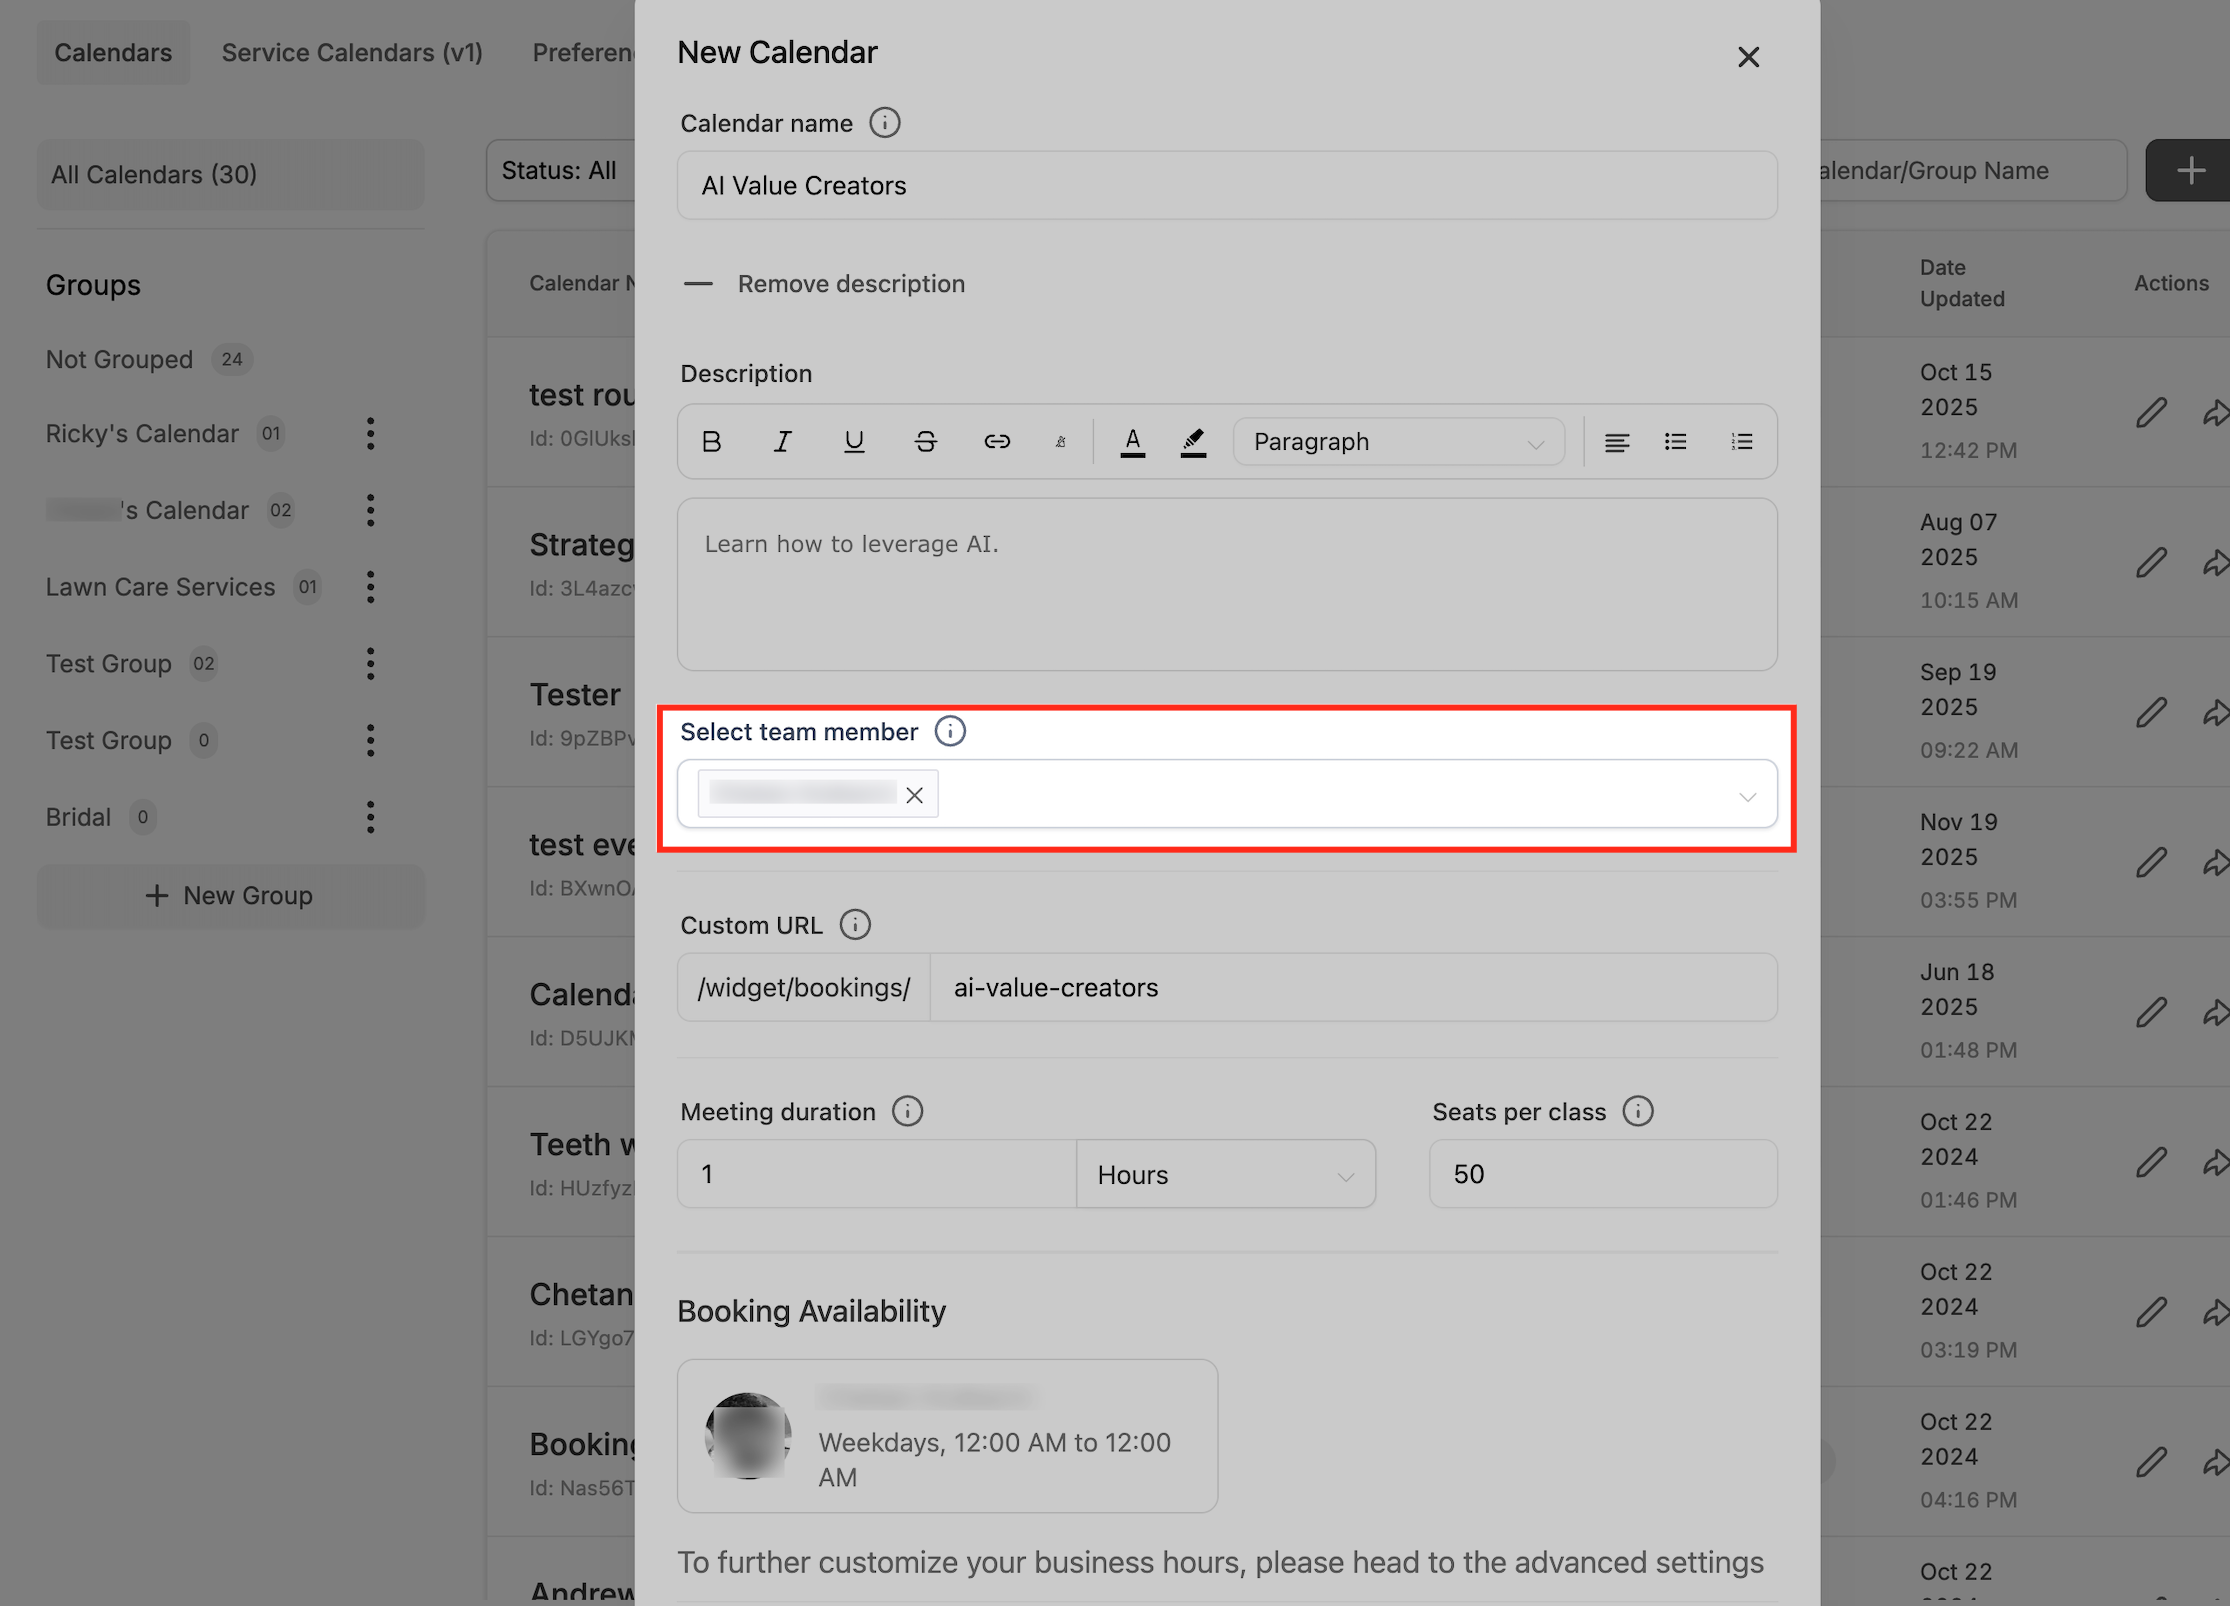
- Enter a name in the Calendar name field.
- Add a brief summary in the Description box.
- Choose the instructor in the Select team member field.
- Enter a unique slug in the Custom URL field.
- Set the class length in the Meeting duration field.
- Enter the maximum participants in the Seats per class field.
- Provide the Zoom or Google Meet link in the Meeting Location field.
- Toggle Accept payments, then set Amount and Currency, and add a payment description.
- Click Advanced Settings to configure availability, notifications and visual customizations.
- Save the calendar.
Add multiple sessions to one class calendar
- Go to Settings > Calendars > Edit your Class Booking calendar.
- Open the Availability tab.
- Toggle Recurring Availability and add the days/times the class runs.
- Click + Add Date Override to add one off sessions.
- Click Save.
- Open the Preview of the booking link to confirm multiple dates appear.
05What it looks like in HighLevel
06Settings that matter
- Accept payments. Enables Stripe payment collection for the class and requires an amount, currency and description.
- Recurring Availability. Allows you to define repeating days and times so the same class shows on multiple dates.
- Meeting Interval. Sets the gap between available booking slots, such as every 30 minutes.
- Minimum Scheduling Notice. Defines how far in advance attendees must book a class.
- Date Range. Limits how far into the future classes can be scheduled.
- Pre/Post Buffer Time. Adds time before or after each class to prevent overlapping bookings.
- Consent Checkbox. Adds marketing consent language to the registration form.
- Calendar Sync. Allows syncing with Google, Outlook or iCloud to send invitations directly to attendees.
- Calendar Widget Style. Choose between the modern Neo layout or the classic layout for the booking widget.
Michael's take

Adding a class booking calendar feels like a small shift that can change how a studio runs day to day. It gives you a single place to manage seats, payments and reminders without juggling separate tools. I see it fitting perfectly for a yoga studio that wants to open up daily classes, collect fees through Stripe and keep the schedule tidy for both teachers and members.
If I were setting this up, I would first lock in the recurring times and seat count, then test a fake booking to see the confirmation flow. A quick preview of the booking link helps confirm everything looks right before you start sharing it with clients.