
01Who this is for
- Digital agencies that manage many client WordPress sites, can test updates safely before going live.
- Solo entrepreneurs maintaining their own WordPress site, can experiment with design changes without risking downtime.
- In house marketing teams, can collaborate on new content or features in isolation from the public site.
02Staging environment access, explained
The staging feature creates a full copy of a WordPress site, including files, database, and configuration, on a separate server location. The copy appears at its own URL and provides its own admin login, so any modifications stay isolated until you decide to publish.
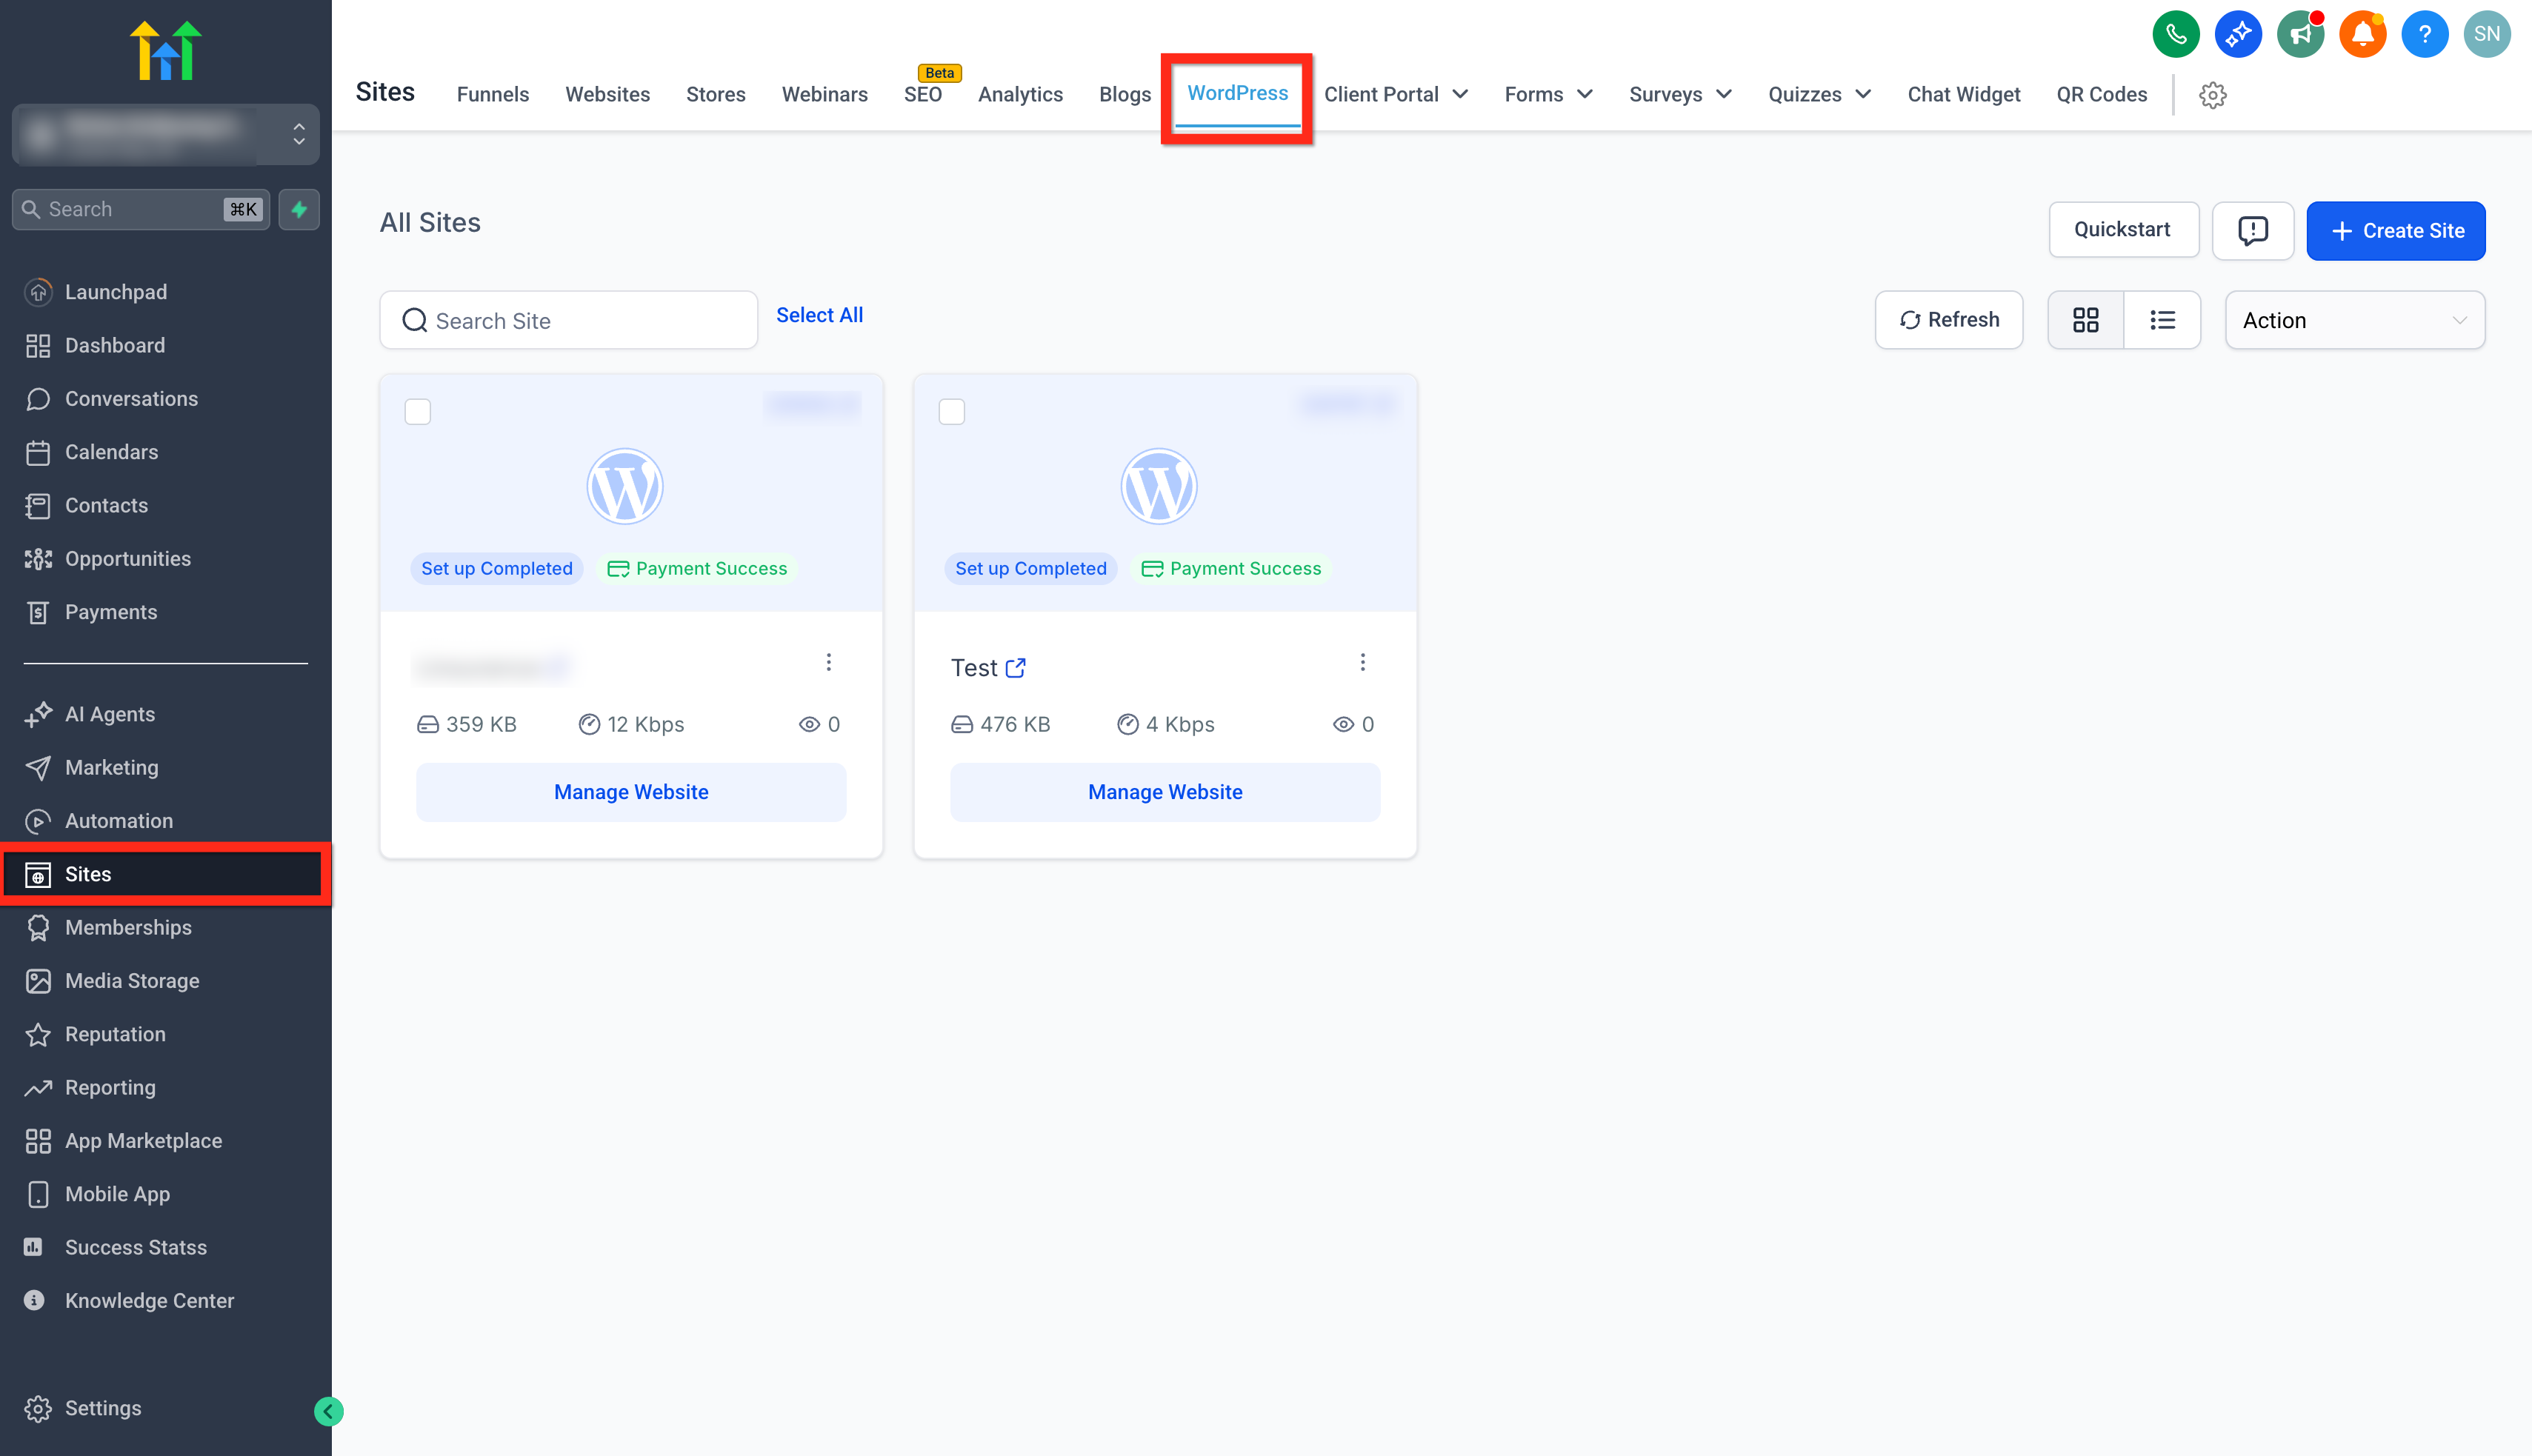
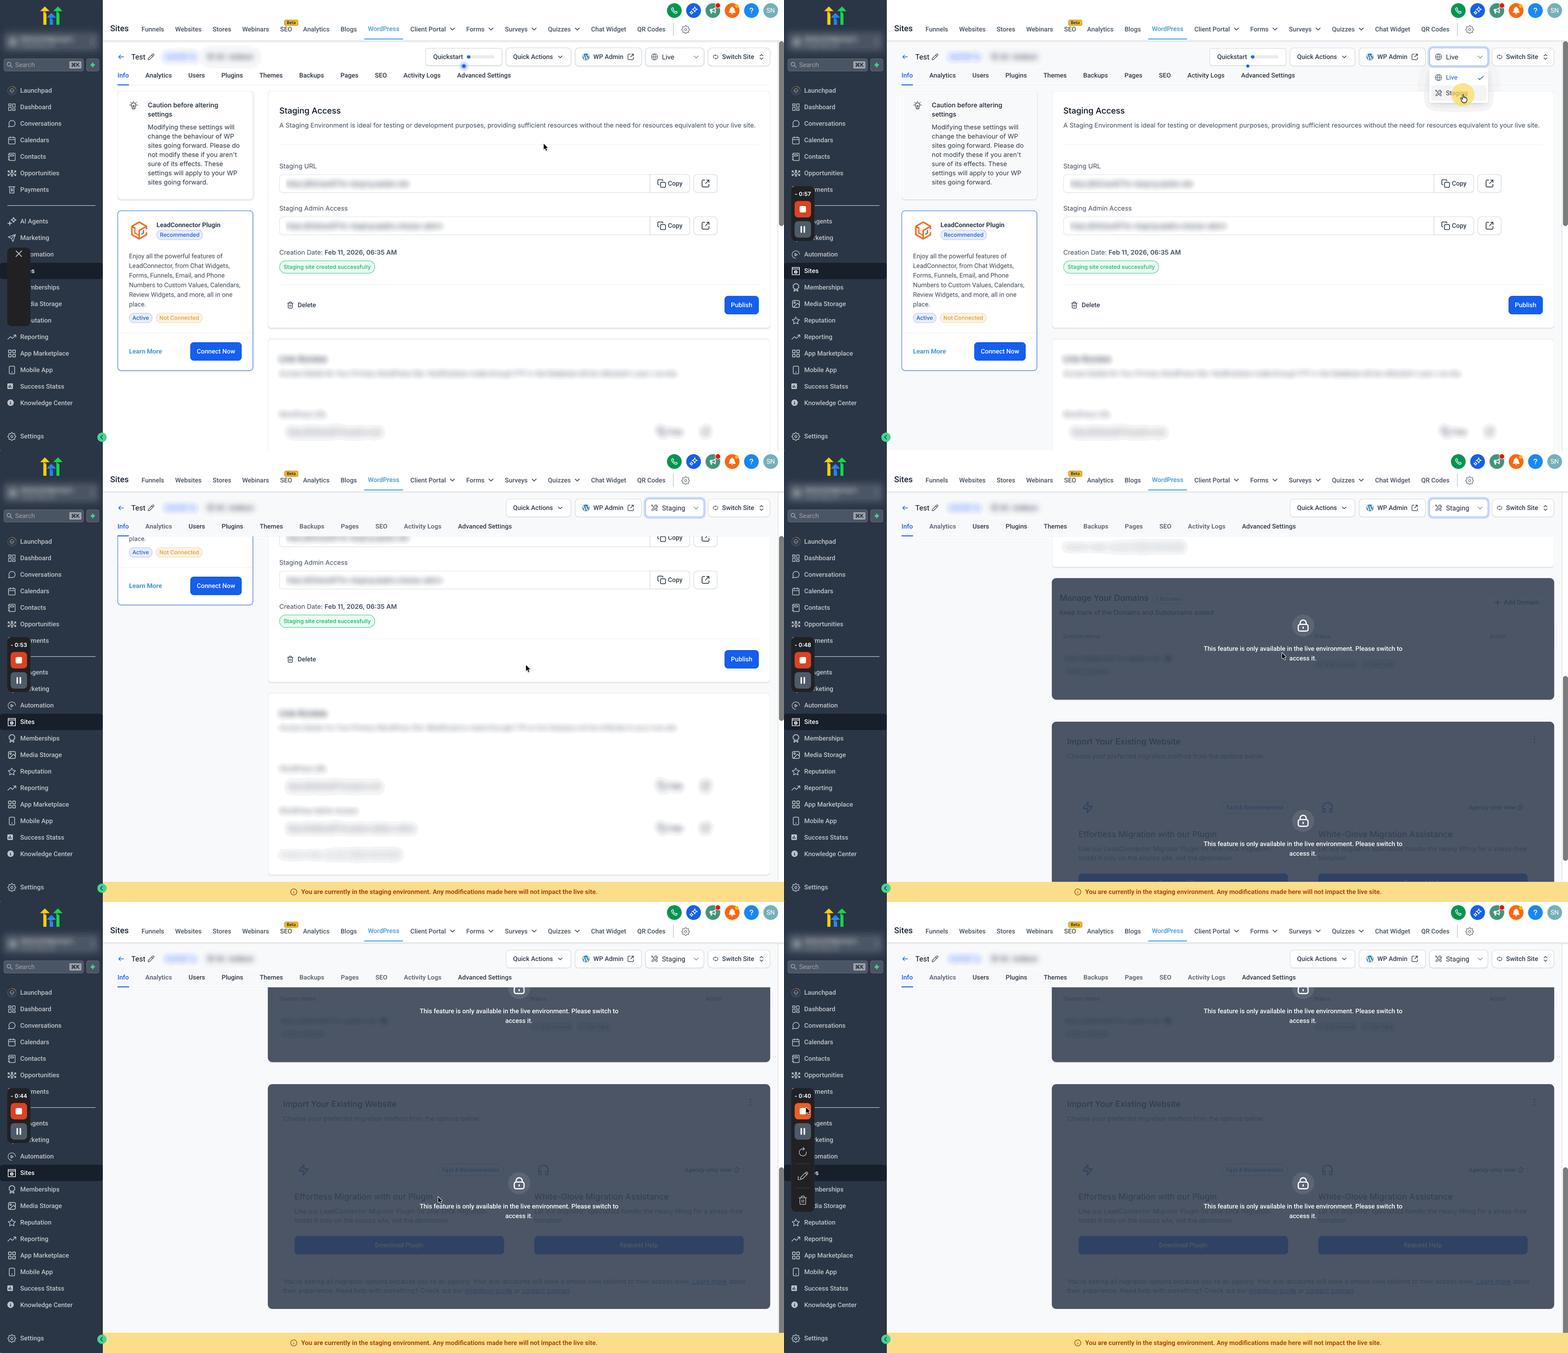
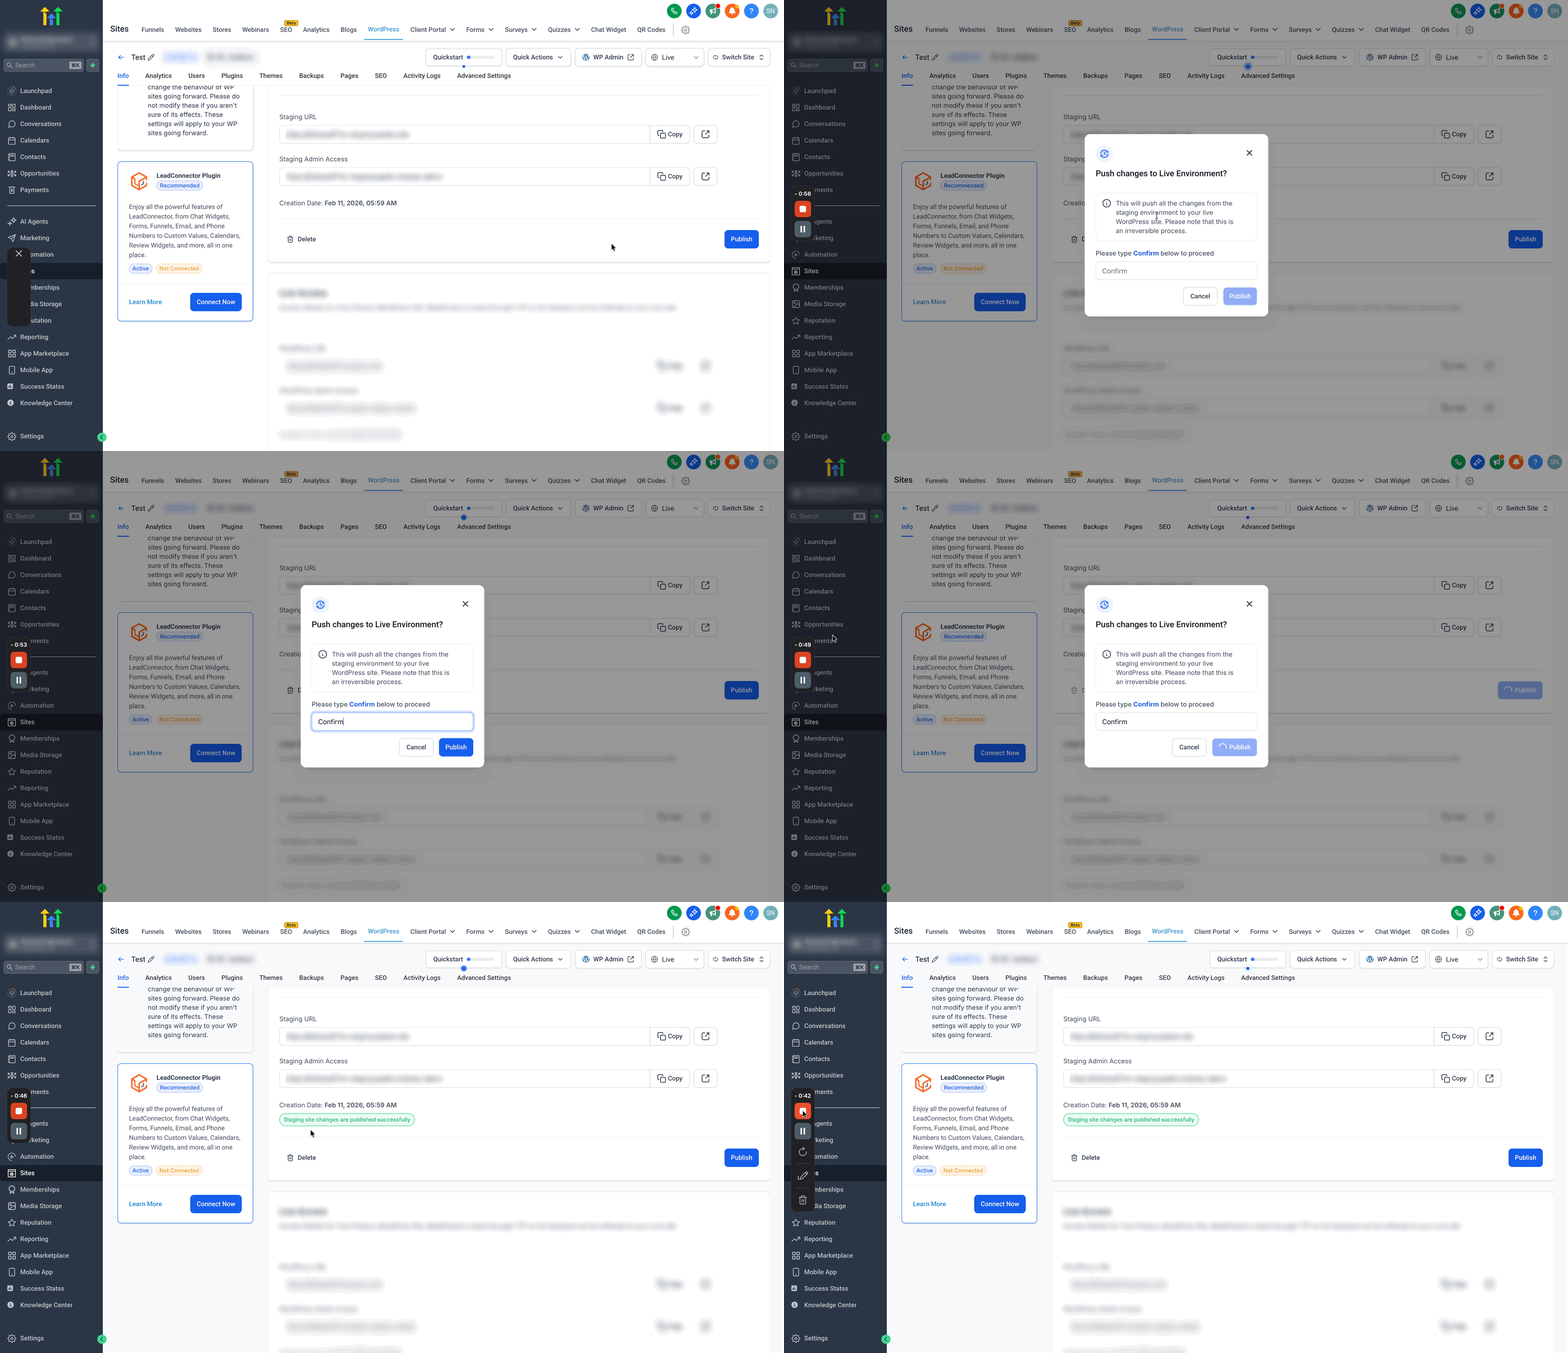
Staging lives under the Sites > WordPress section of a subaccount. From there you can toggle between the live and staging views using a selector in the top right header. Publishing pushes every change from the staging copy to the live site and cannot be undone. The process usually completes within a few minutes.
Only certain functions are available in each environment. Plugins, themes, users, debugging tools, and server settings are present in both live and staging. Domain management, production analytics, and subscription cancellation exist only on the live site, while a dedicated staging URL and isolated user messaging are exclusive to staging.
03How businesses use staging environment access
- Marketing agency. The agency creates a staging copy of a client’s WordPress site, installs a new theme, and runs functional tests. After confirming the design works, the agency clicks Publish to copy the changes to the client’s live site.
- Ecommerce boutique. The boutique adds a payment plugin in the staging environment and verifies checkout flow without exposing shoppers to potential errors. Once the transaction process is verified, the boutique publishes the update.
- Consulting firm. The firm uses the staging URL to let multiple team members edit content simultaneously. After reviewing the drafts, the firm uses the Publish action to move the finalized pages to the live website.
04The numbers and rules that matter
- Available in Both Live & Staging: Plugins, Themes, Users, WordPress Debugging, Server Settings (phpMyAdmin, PHP version), WordPress Management (Autoupdates, SEO indexing).
- Available in Live Only: Domain Management, Production Analytics, Cancel Subscription.
- Available in Staging Only: Dedicated staging URL and admin access, Disabled areas clearly marked as staging only, Users added in an isolated environment with messaging during publish.
- Publish completes within the next 2 to 5 minutes.
05Before you start
- WordPress Hosting subscription must be active for the location or subaccount.
06How to set up and use staging environment access in HighLevel
Set up and use a staging environment for a WordPress site
- Log into the appropriate subaccount.
- Navigate to Sites > WordPress.
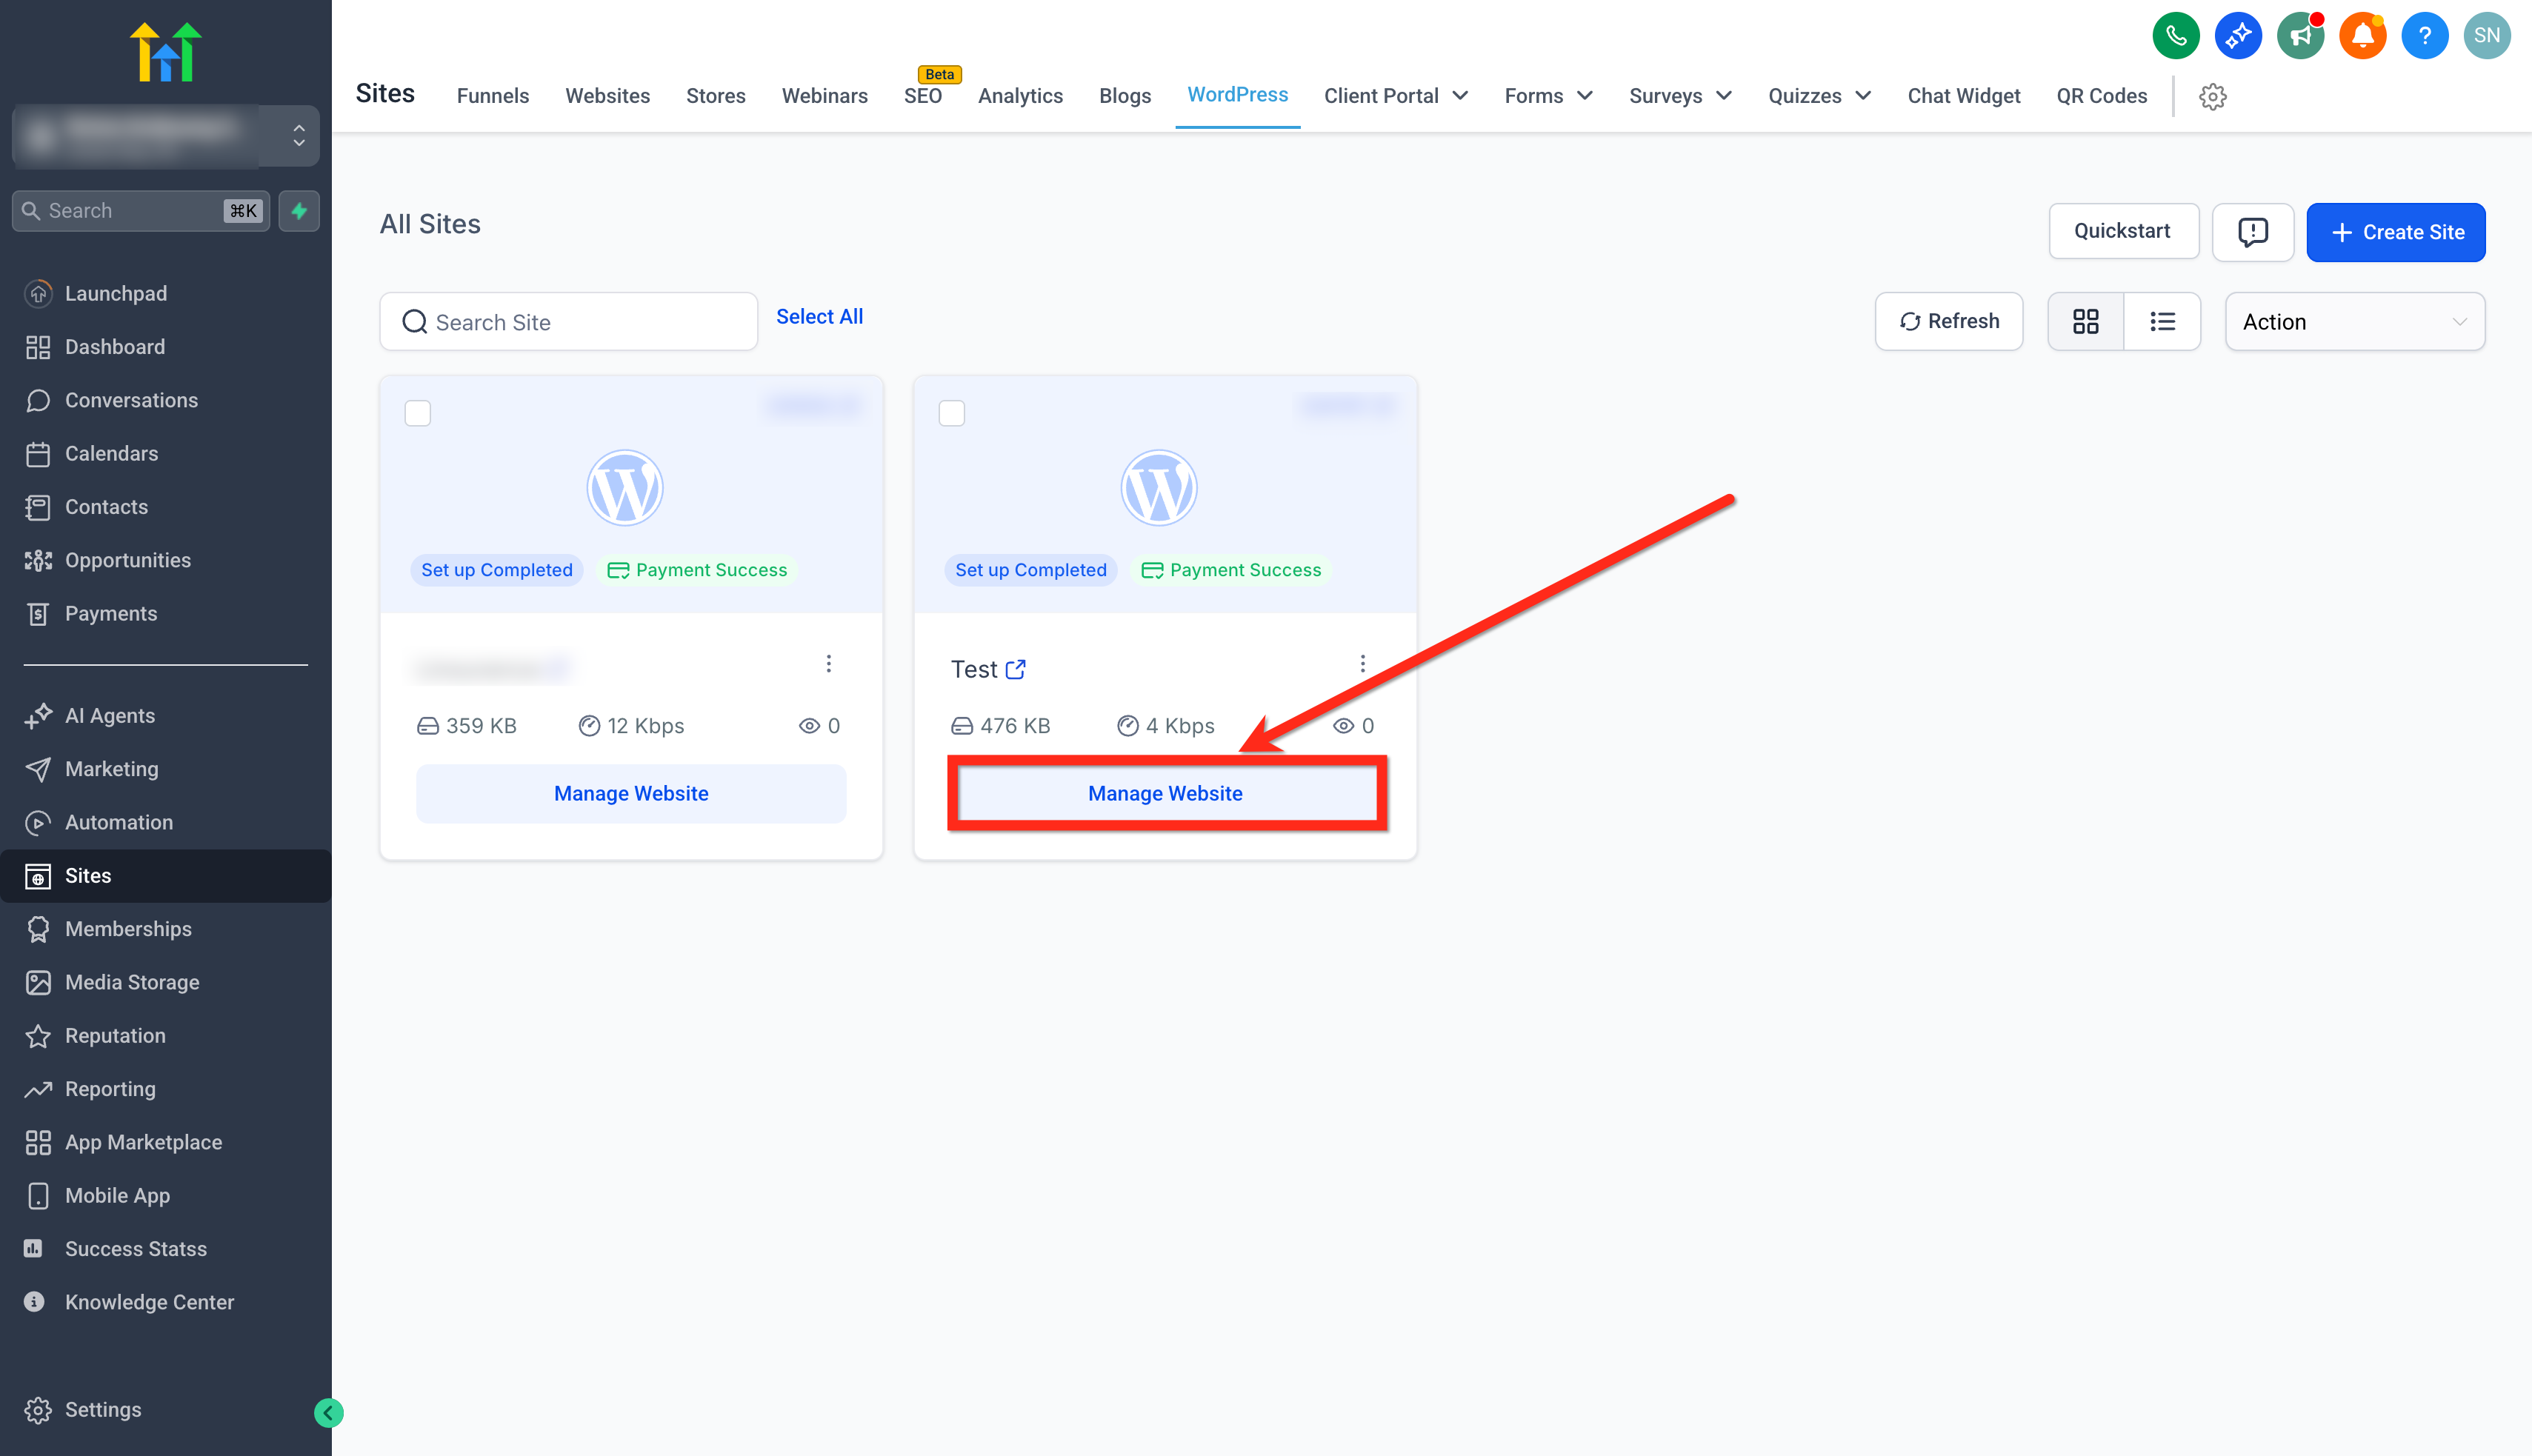
- Select Manage Website for the target site.
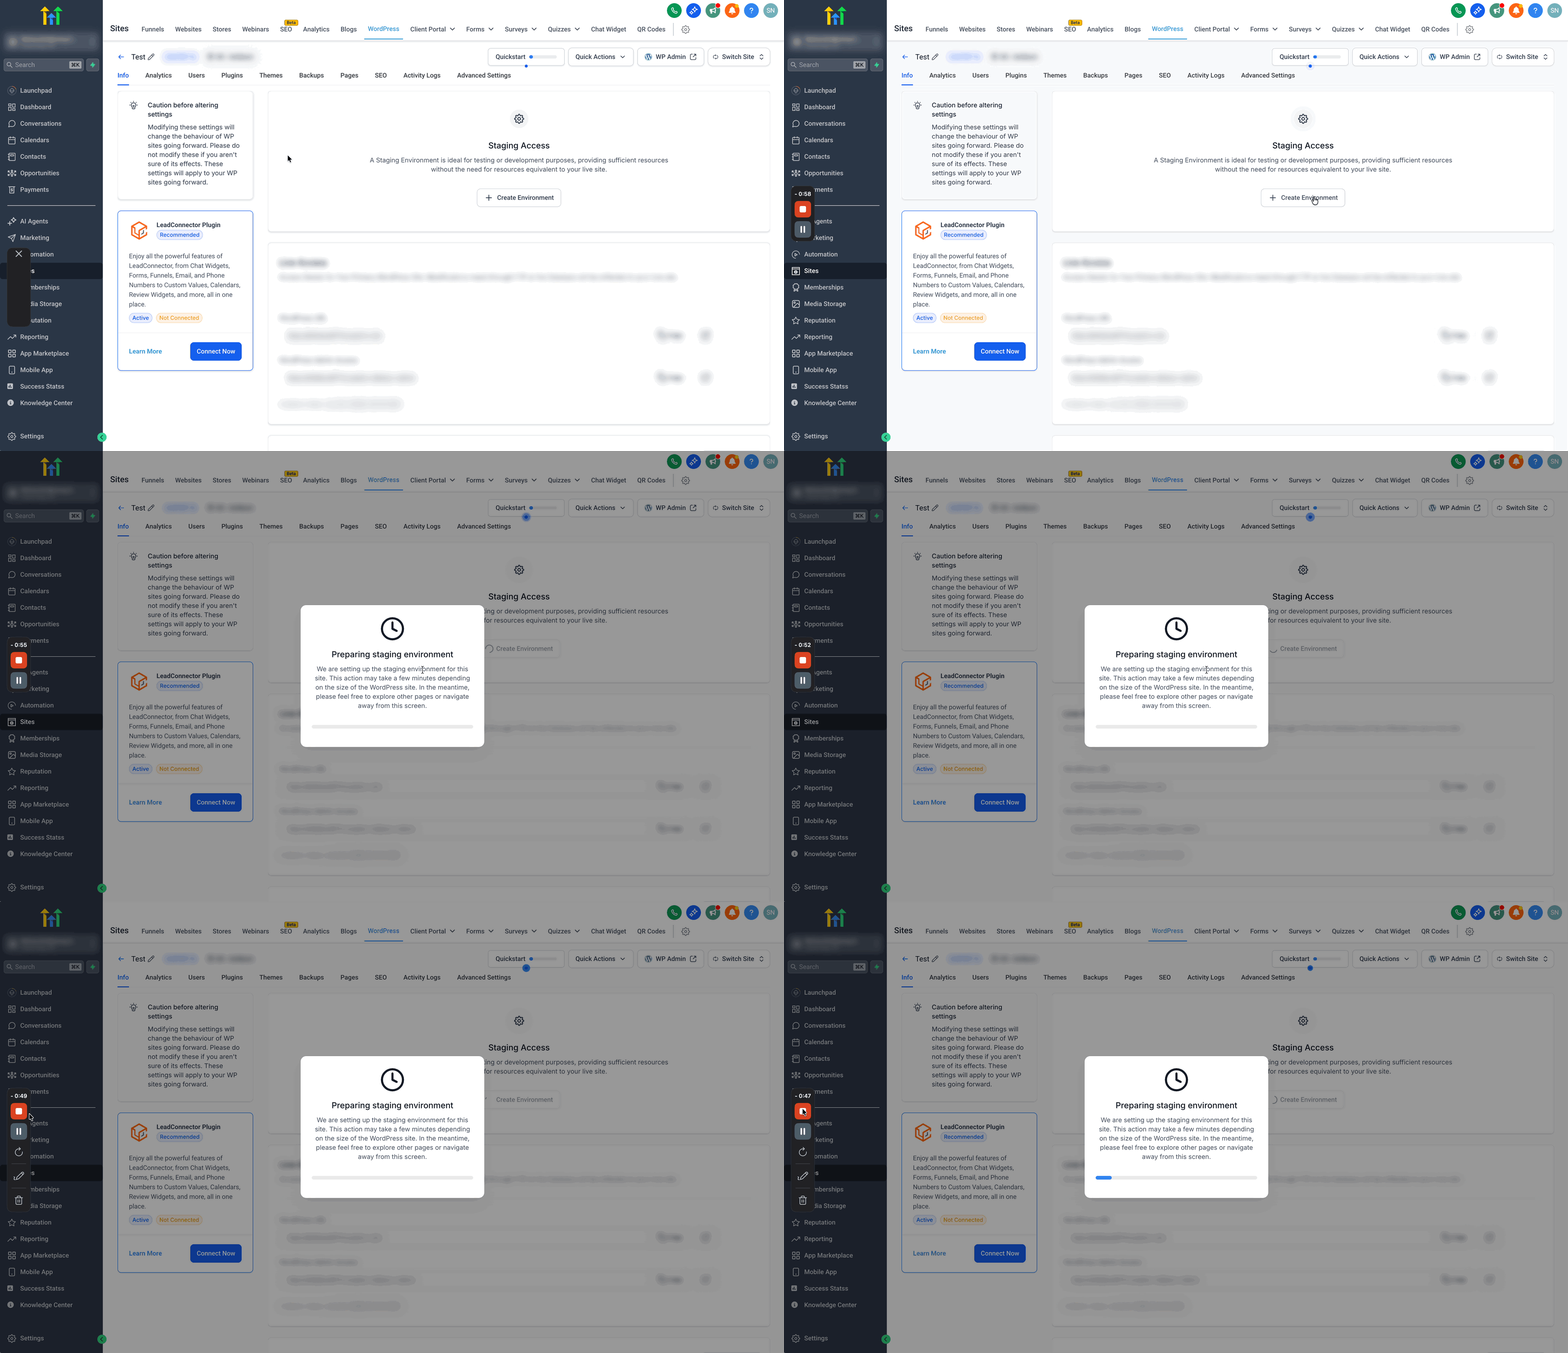
- Click the + Create Environment button.
- Allow time for the system to prepare the staging copy.
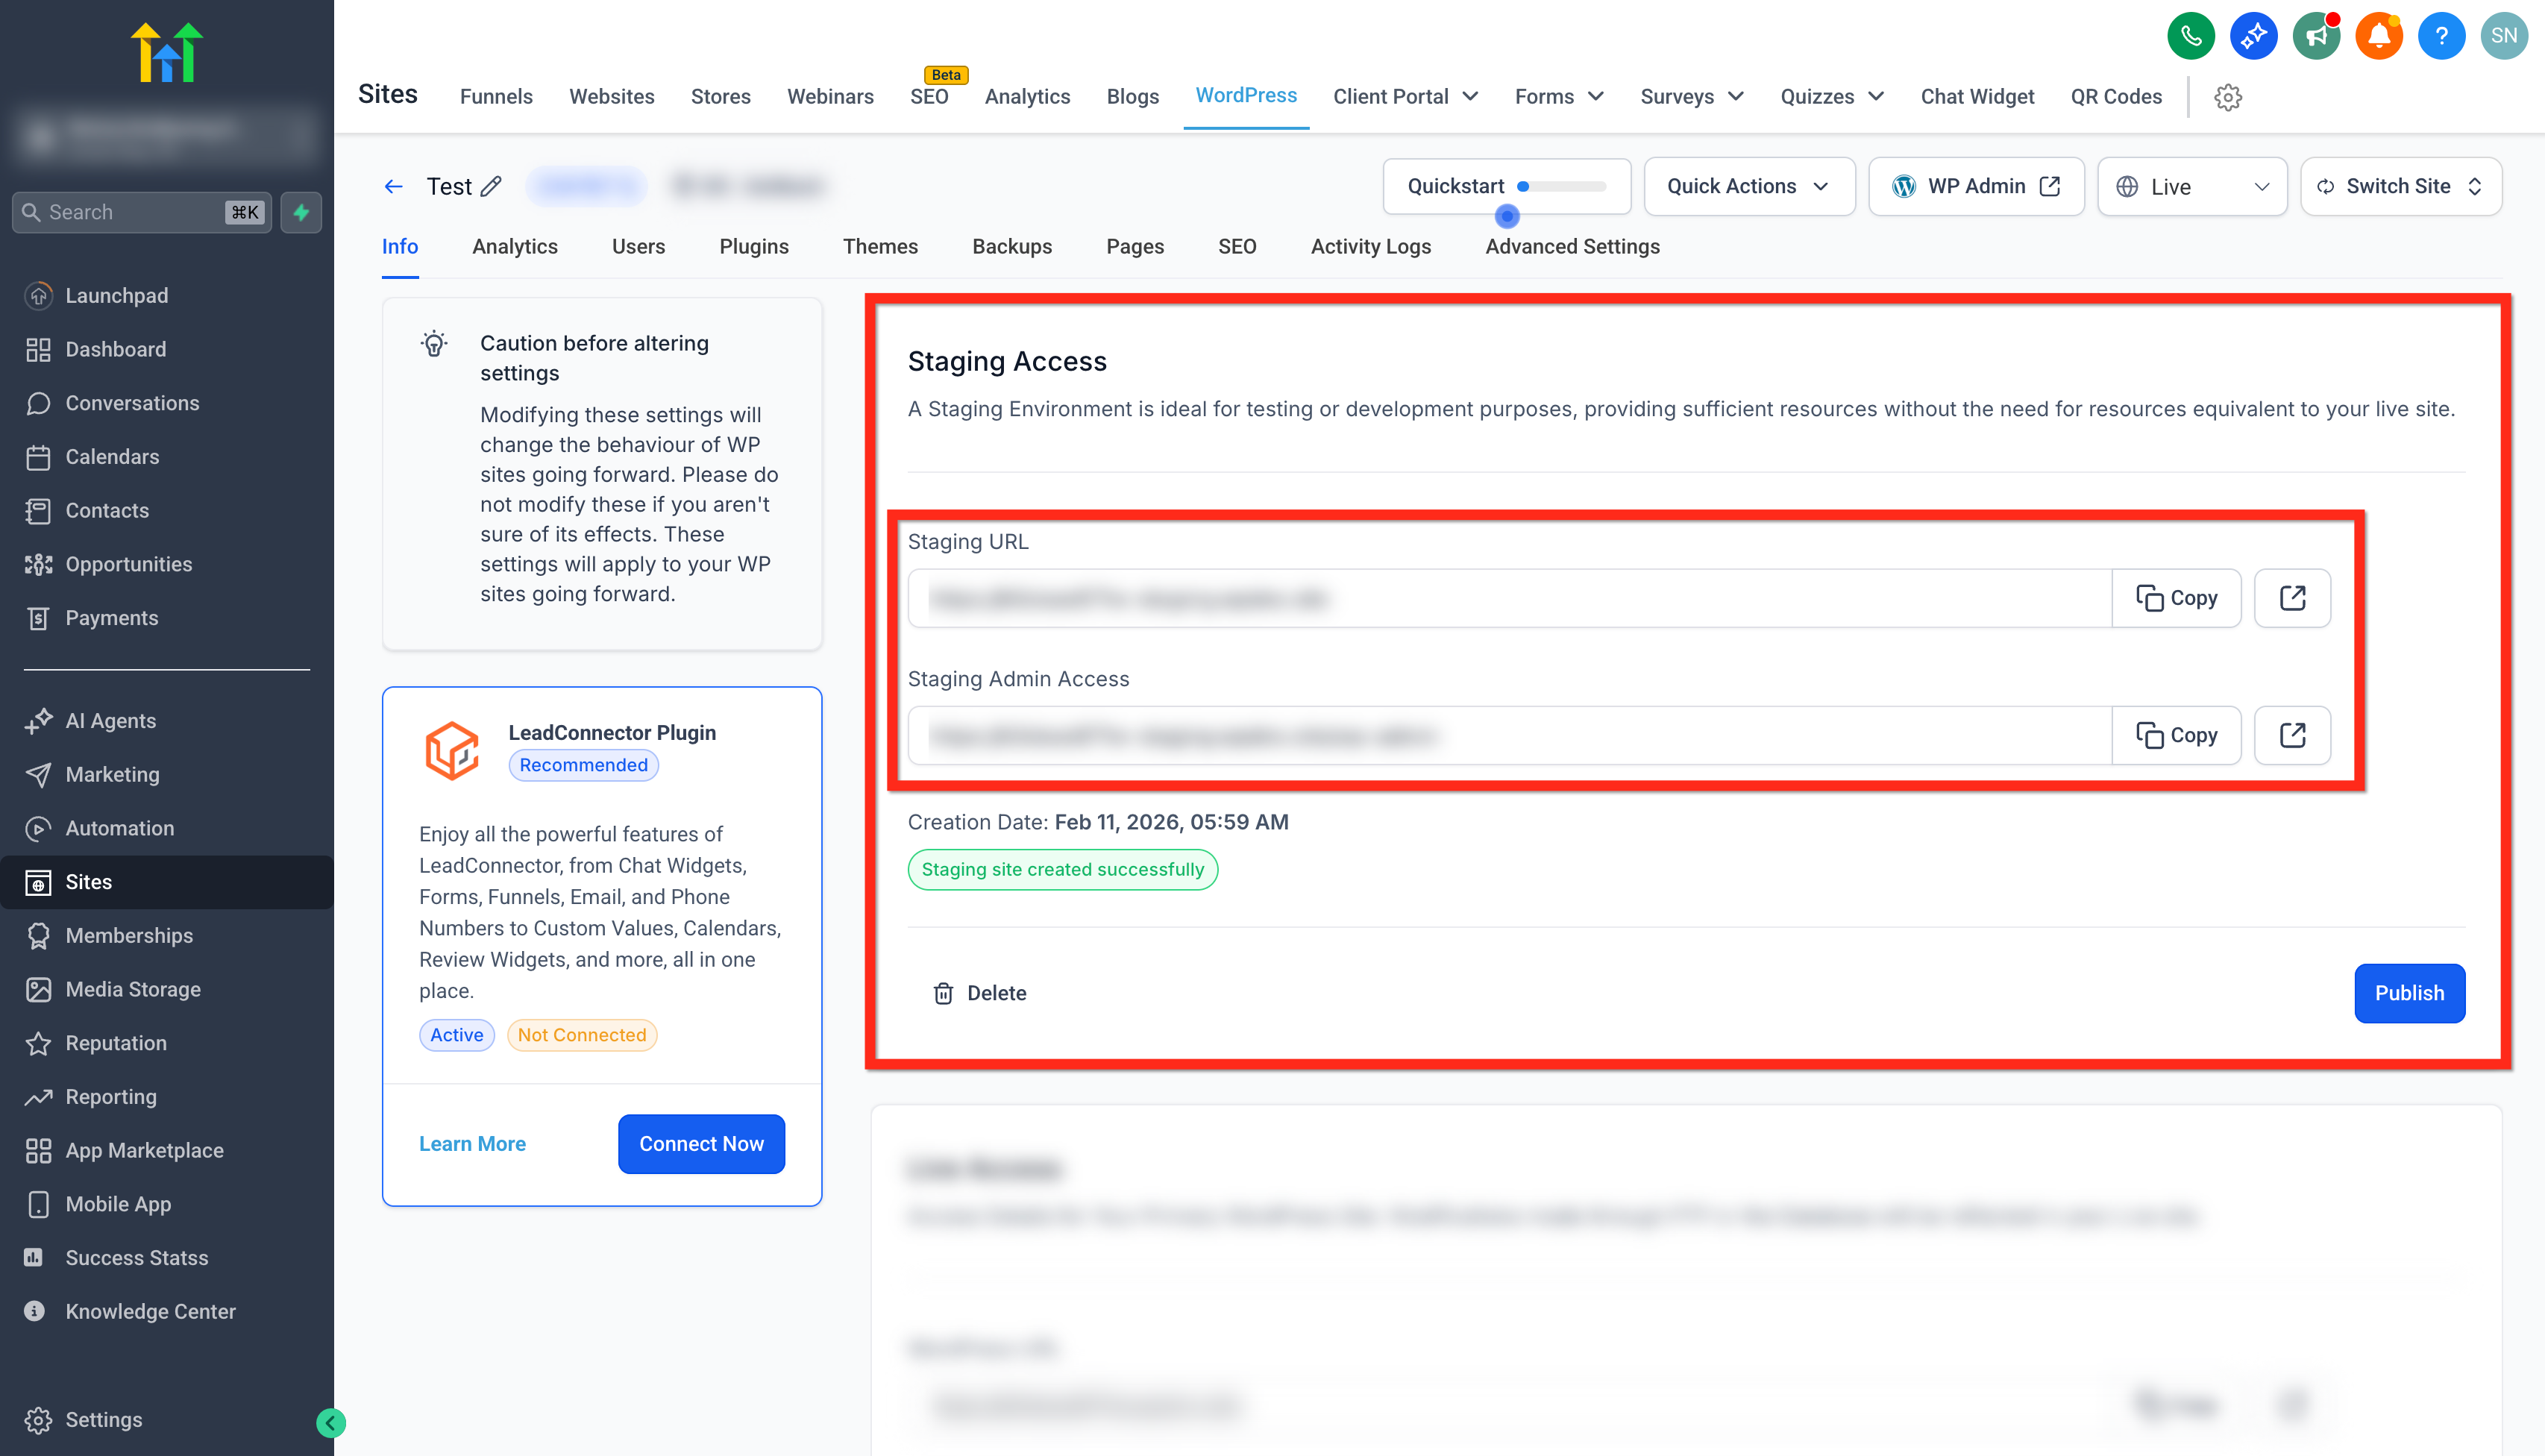
- View the new staging URL and admin credentials displayed.
- Use the Live | Staging toggle in the header to change views.
- When ready, click Publish to move staging changes to the live site.
- If needed, press Delete to remove the current staging environment.
07What it looks like in HighLevel
08Settings that matter
- Plugins. Controls which plugins are installed and active in both live and staging sites.
- Themes. Manages the theme files and activation status across both environments.
- Users. Defines user accounts and permissions for live and staging, with isolated users in staging.
- WordPress Debugging. Enables debugging tools that function in both live and staging copies.
- Server Settings (phpMyAdmin, PHP version). Sets database access and PHP configuration for both environments.
- WordPress Management (Auto, updates, SEO indexing). Controls automatic updates and SEO indexing behavior in live and staging.
- Domain Management. Handles domain assignments and DNS only on the live site.
- Production Analytics. Collects analytics data solely for the live environment.
- Cancel Subscription. Allows subscription cancellation only from the live view.
- Dedicated staging URL and admin access. Provides a unique URL and admin login for the isolated staging copy.
- Disabled areas clearly marked as staging, only. Shows messages for features that cannot be used in staging.
- Users added in an isolated environment with messaging during publish. Creates separate user accounts in staging and informs when they are moved to live.
09Things to know before you rely on it
- Publishing from staging to live cannot be undone.
- Creating a staging environment may take an indeterminate amount of time.
- The publish process typically completes within two to five minutes.
- Changes made directly on the live site do not appear in the staging copy.
- Domain management, production analytics, and subscription cancellation are unavailable in staging.
10How it connects to the rest of HighLevel
- Manage plugins and themes for WordPress sites in HighLevel Plugin & theme management
- Clone a WordPress website for an agency in HighLevel Clone sites
- Create and manage WordPress sites for clients Set up WordPress hosting
Michael's take

I find staging environment access convenient for testing changes before publishing live.