
01Who this is for
- Agency owners who host multiple client sites need flexible storage that grows with each site.
- Web developers managing client WordPress installations benefit from adding capacity without migrating to a higher plan.
02Disk space add ons, explained
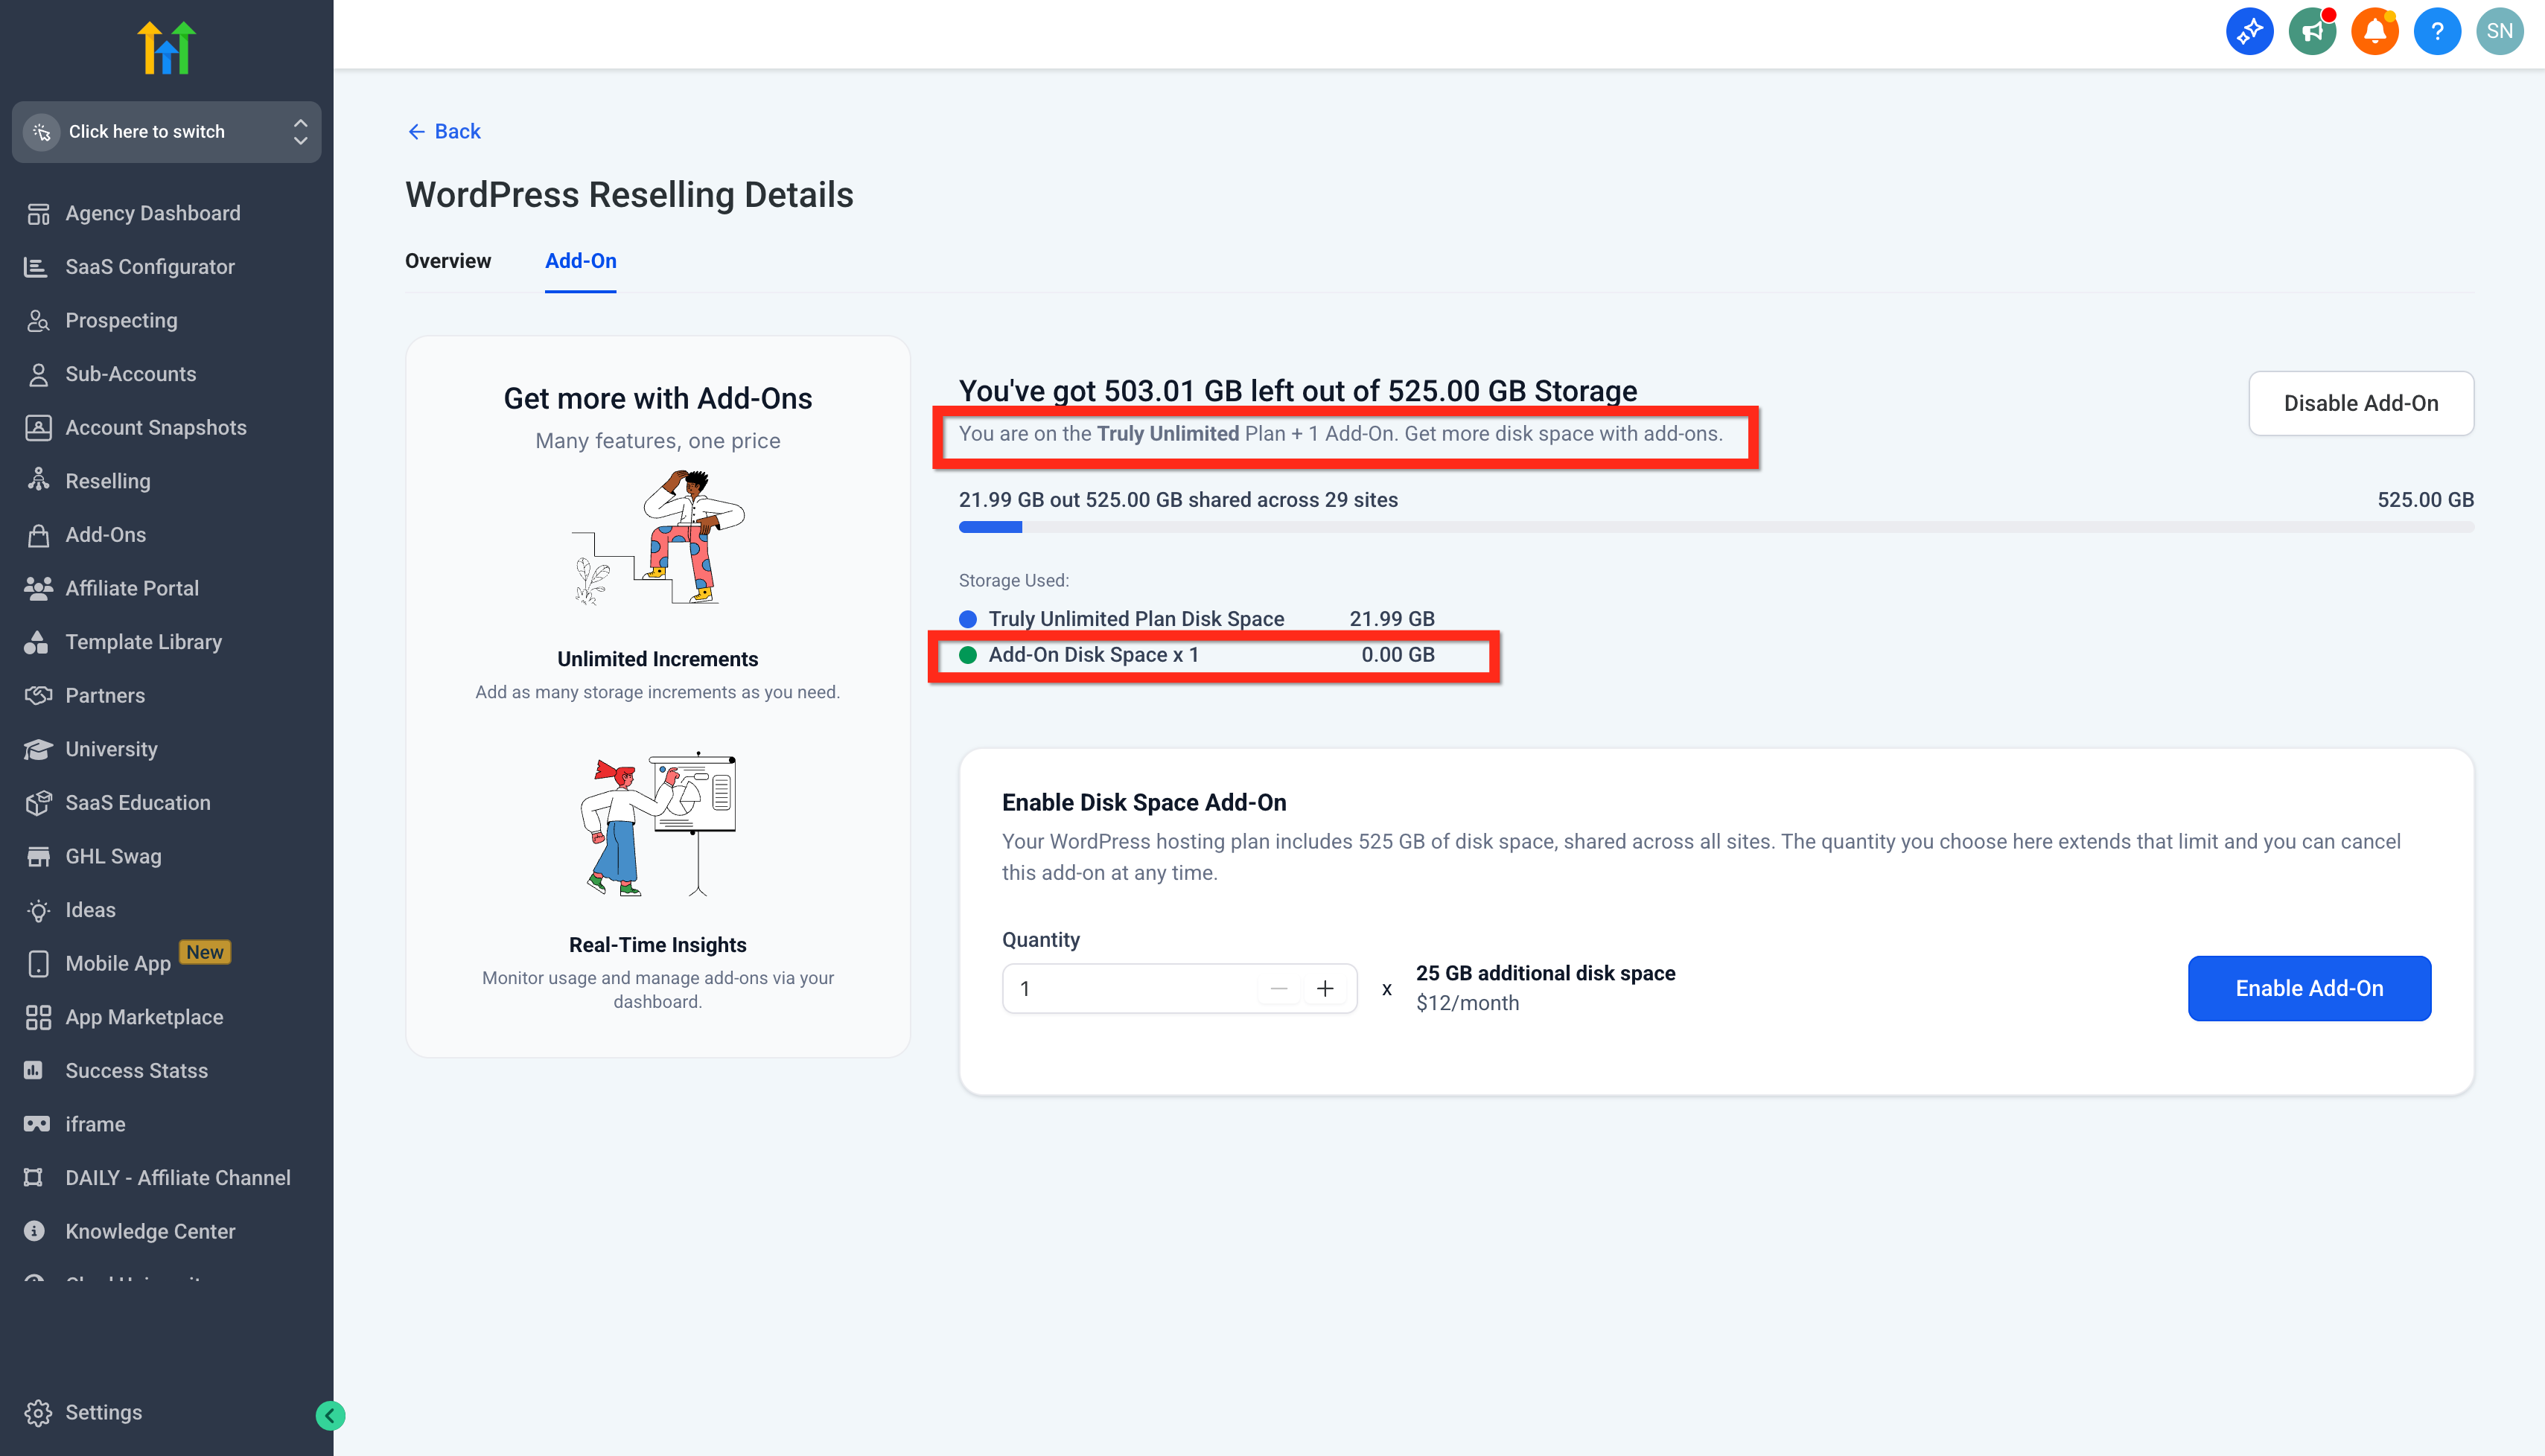
The Disk Space Add On is an optional purchase that adds 25 GB of storage to the WordPress hosting environment. It does not alter any other limits of the existing hosting plan. The extra space is pooled and used by every WordPress site within the agency’s subaccounts.
Management of the add on occurs in the Reselling area of the platform. From there, users can select how many 25 GB blocks to buy, enable the add on, view current usage, and later disable blocks that are no longer needed. All changes are reflected on the Add On page in real time.
Because the add on is independent of the base plan, agencies can keep their current subscription level while scaling storage only when required.
03How businesses use disk space add on
- Digital marketing agency. The agency purchases one or more 25 GB blocks from the Reselling > WordPress > Manage screen. After enabling the add on, the agency monitors usage on the same page and disables any block that has at least 25 GB free.
- Web design studio. When a client’s site needs to upload large media files, the studio adds an extra 25 GB block through the Add On tab, then proceeds with the upload knowing storage limits have increased.
- Managed WordPress service provider. Before a major backup or migration, the provider checks the Add On page for available space, adds blocks if necessary, and later disables any unused blocks after the operation completes.
04The numbers and rules that matter
- $12/month per 25 GB increment (per HighLevel's help center, checked November 2026).
- Add on expands storage in 25 GB blocks.
- Disable an add on only when at least 25 GB is unused.
05Before you start
- Log in to an Agency account that already has an active WordPress hosting plan.
06How to set up and use disk space add on in HighLevel
Add disk space for WordPress hosting
- Sign in to the Agency account.
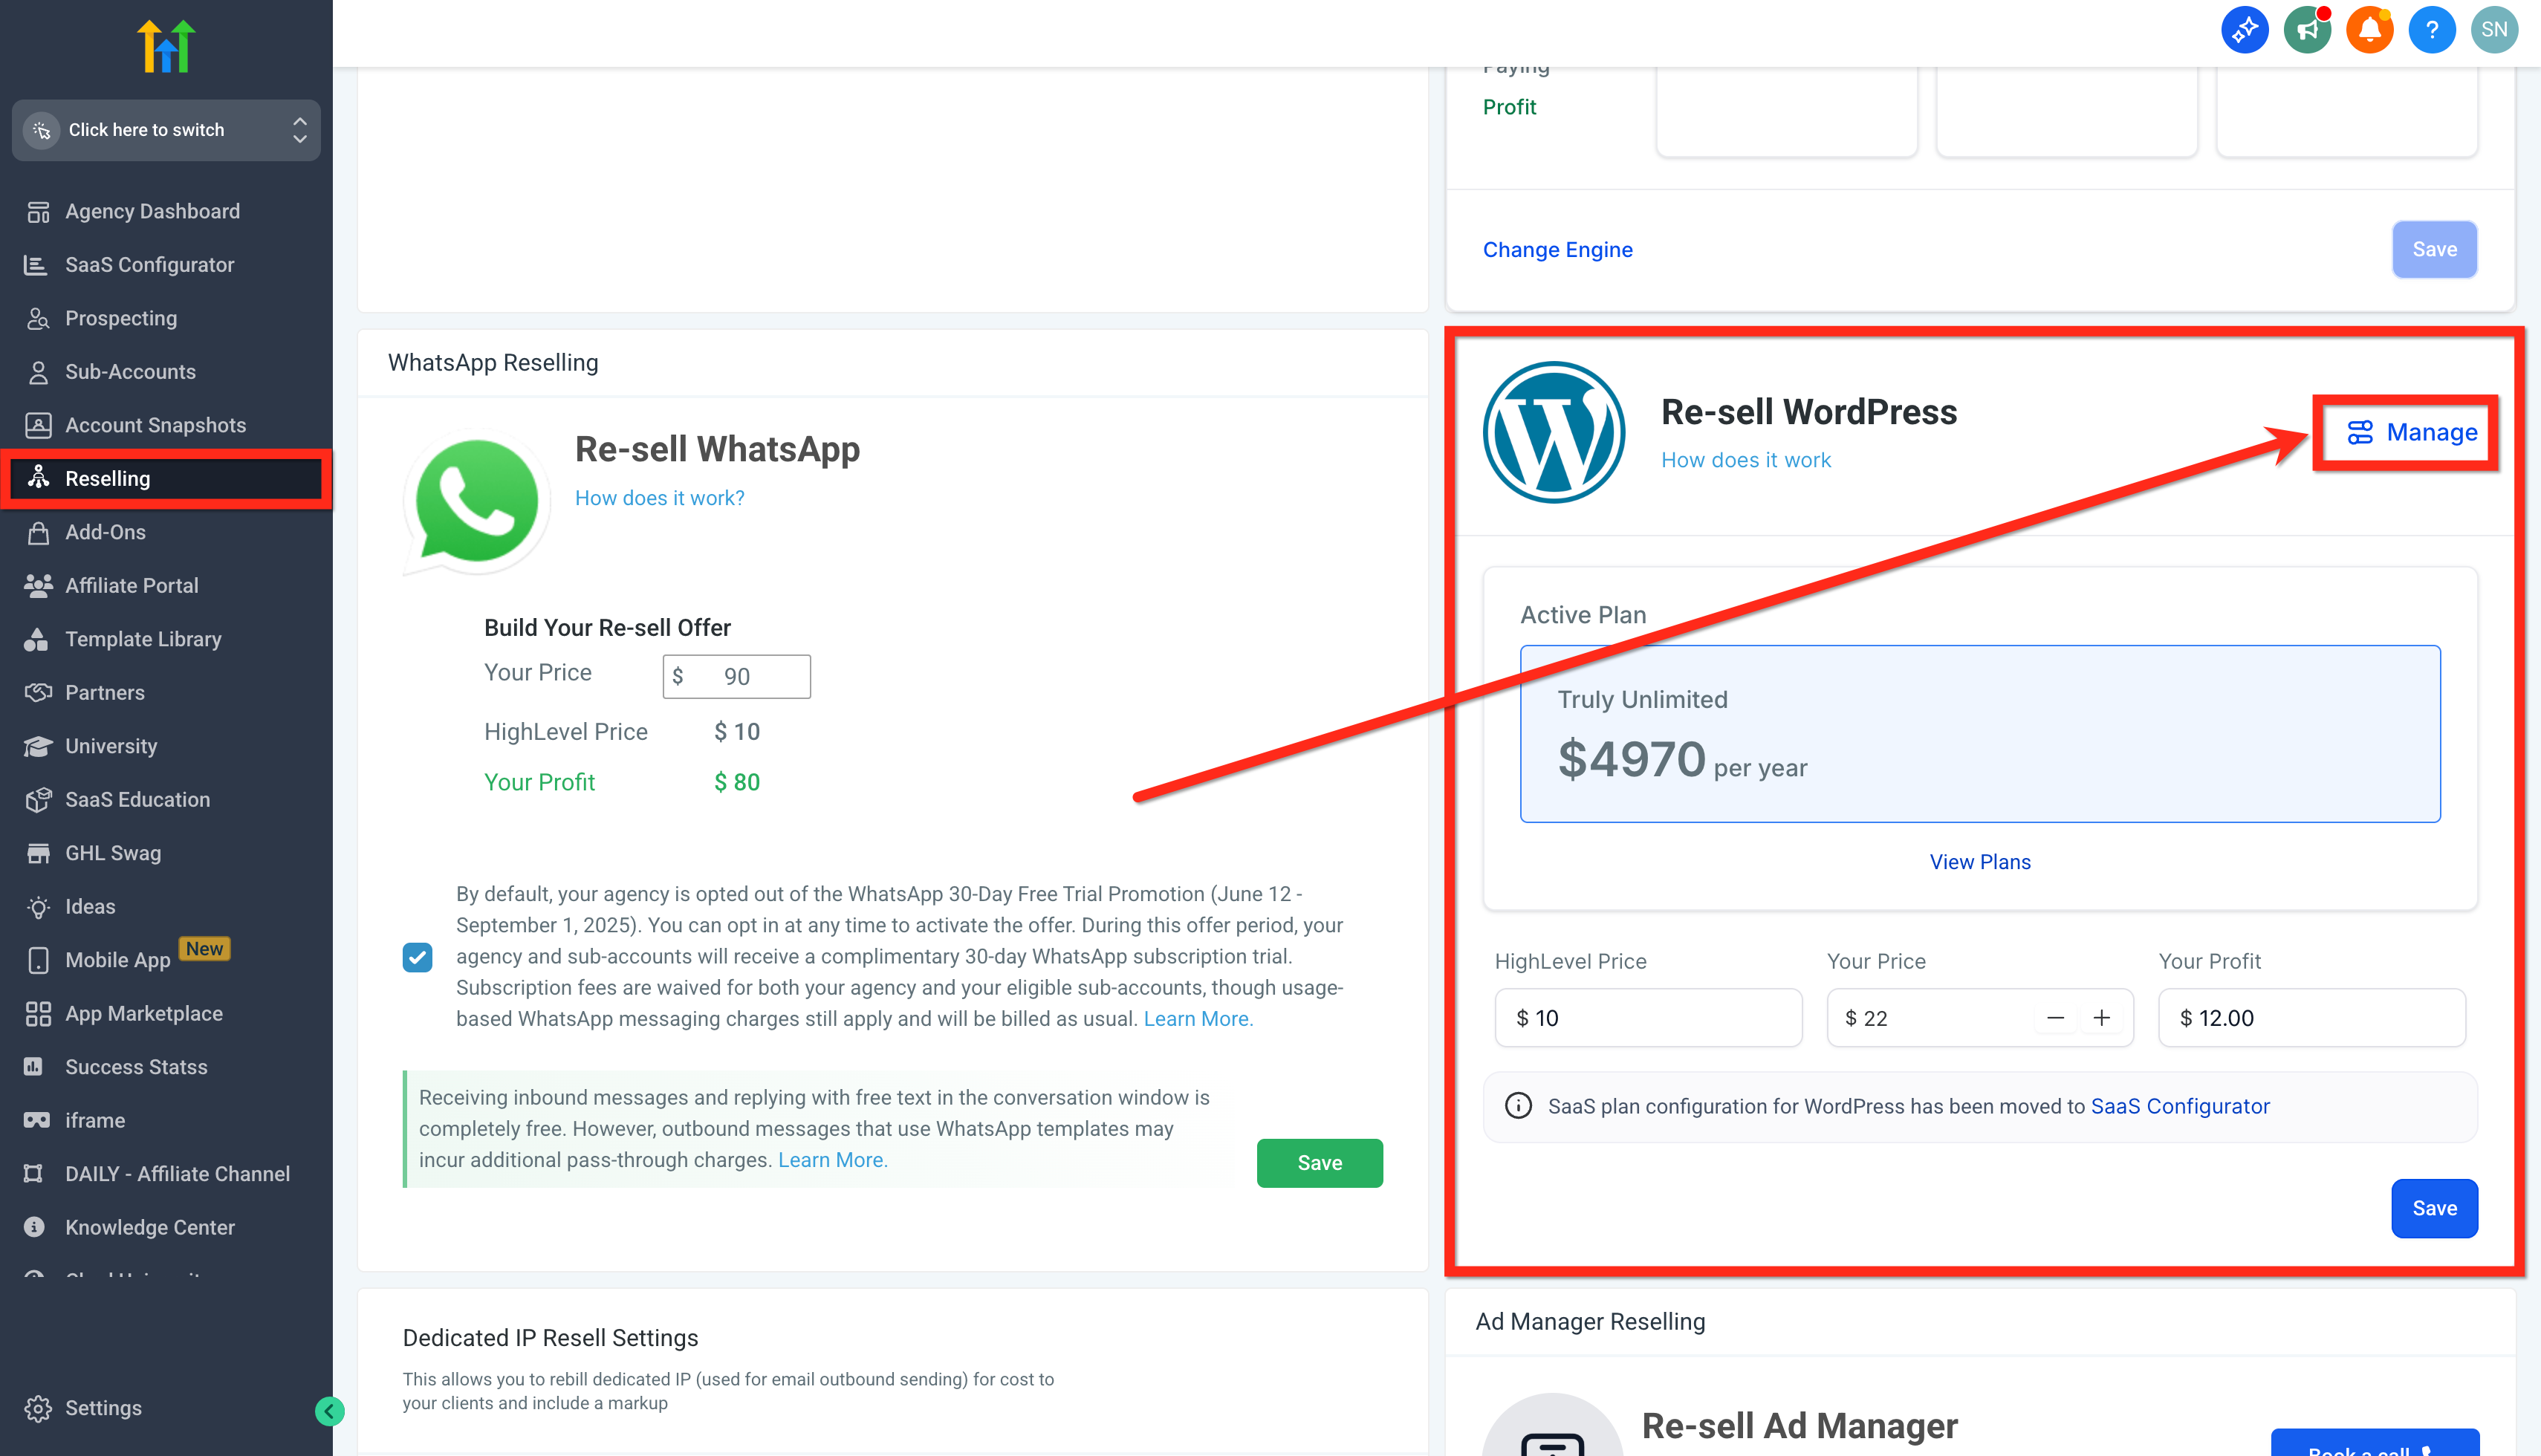
- Open the Reselling menu, choose WordPress, then click Manage.
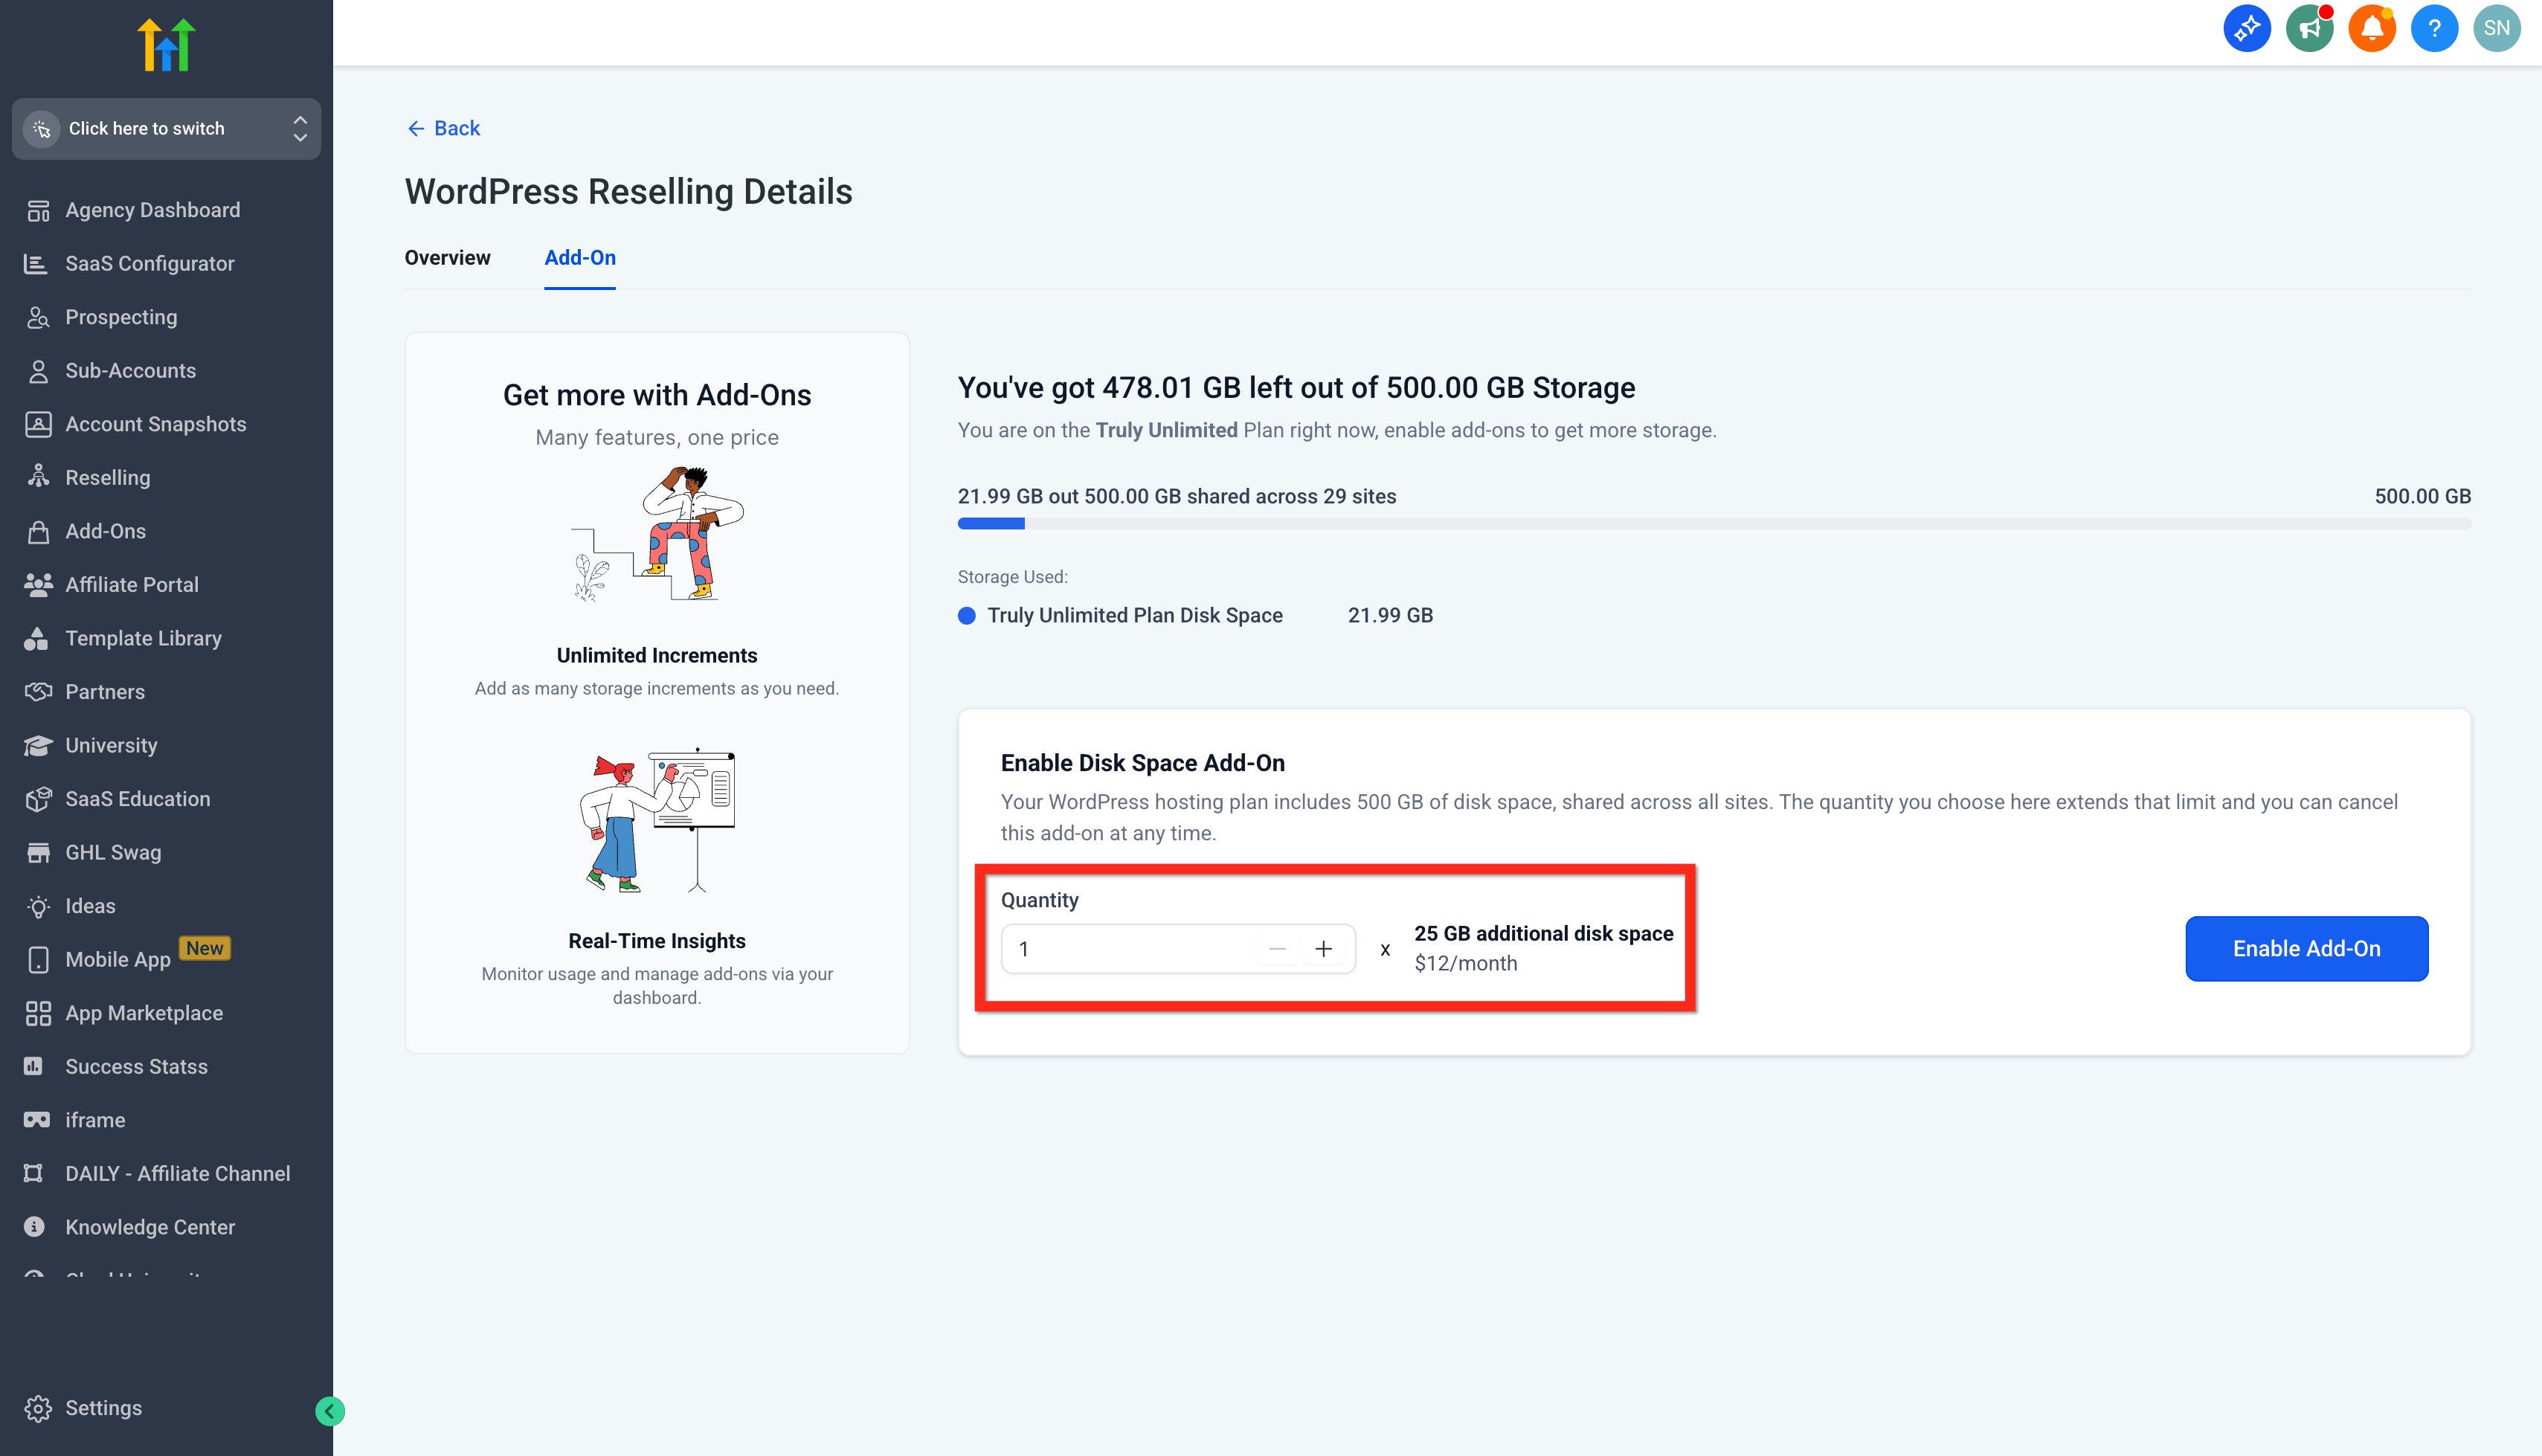
- Select the Add On tab.
- Enter the desired quantity, where each unit adds 25 GB of storage.
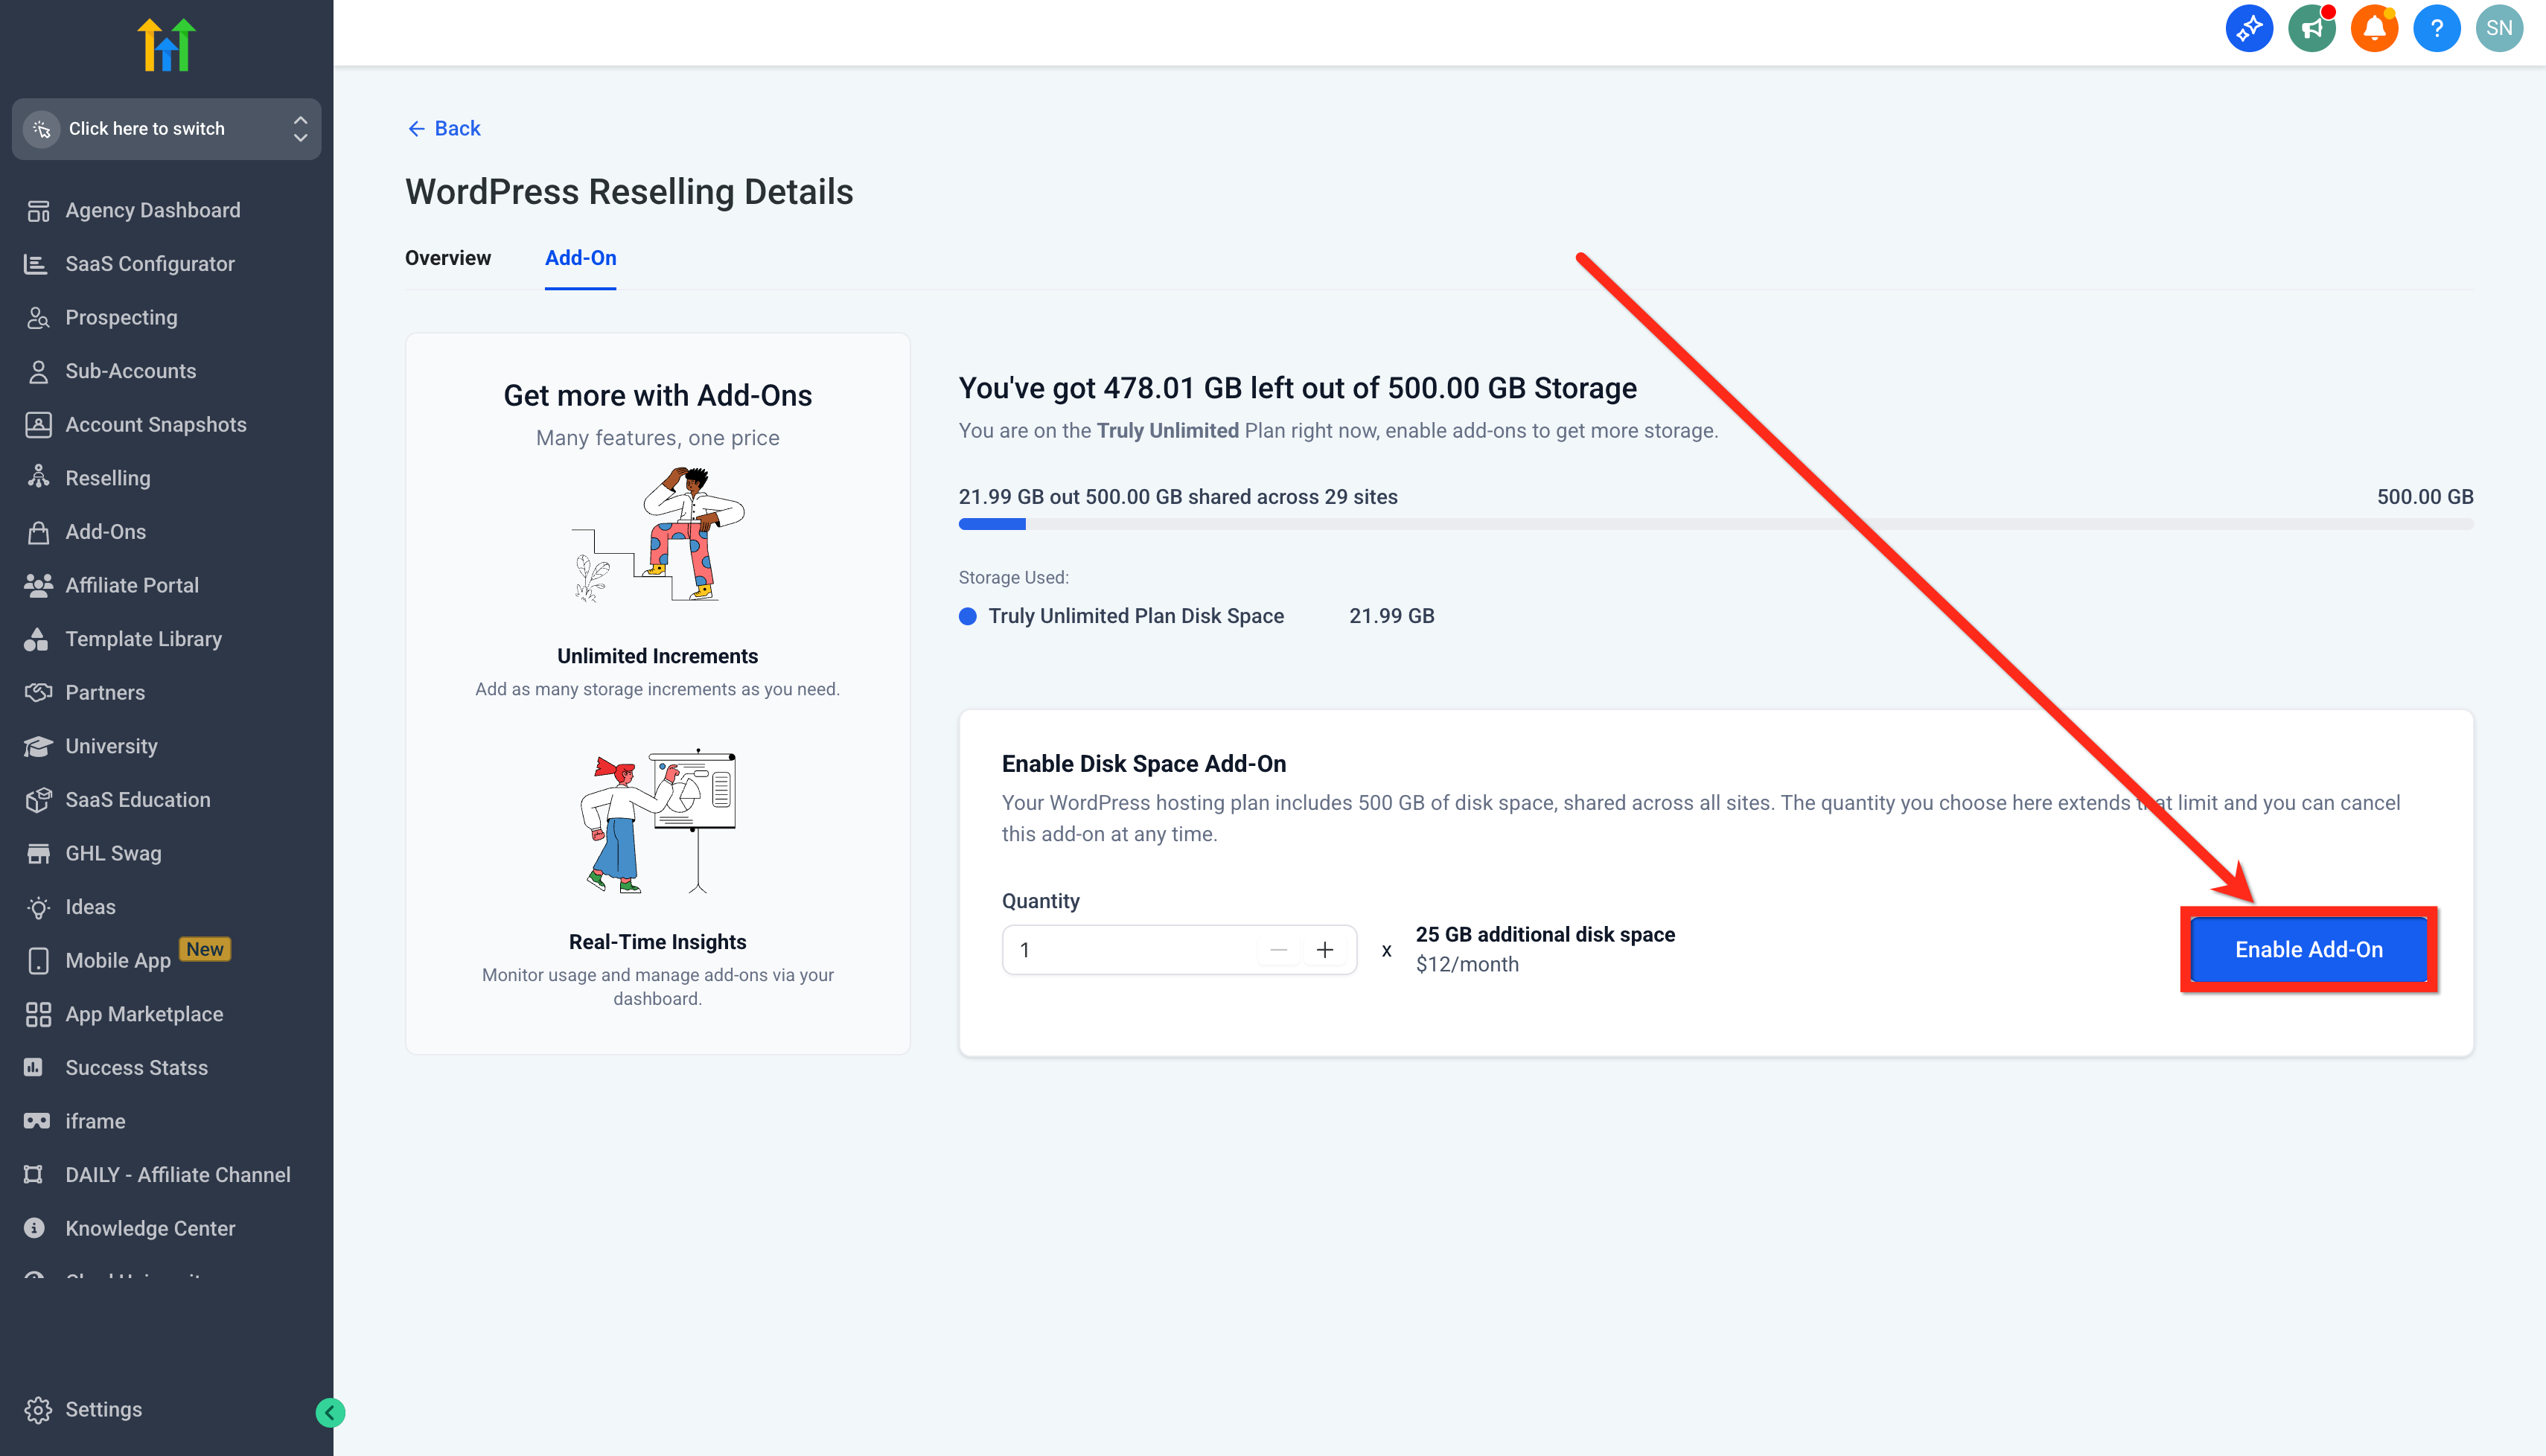
- Press the Enable Add On button.
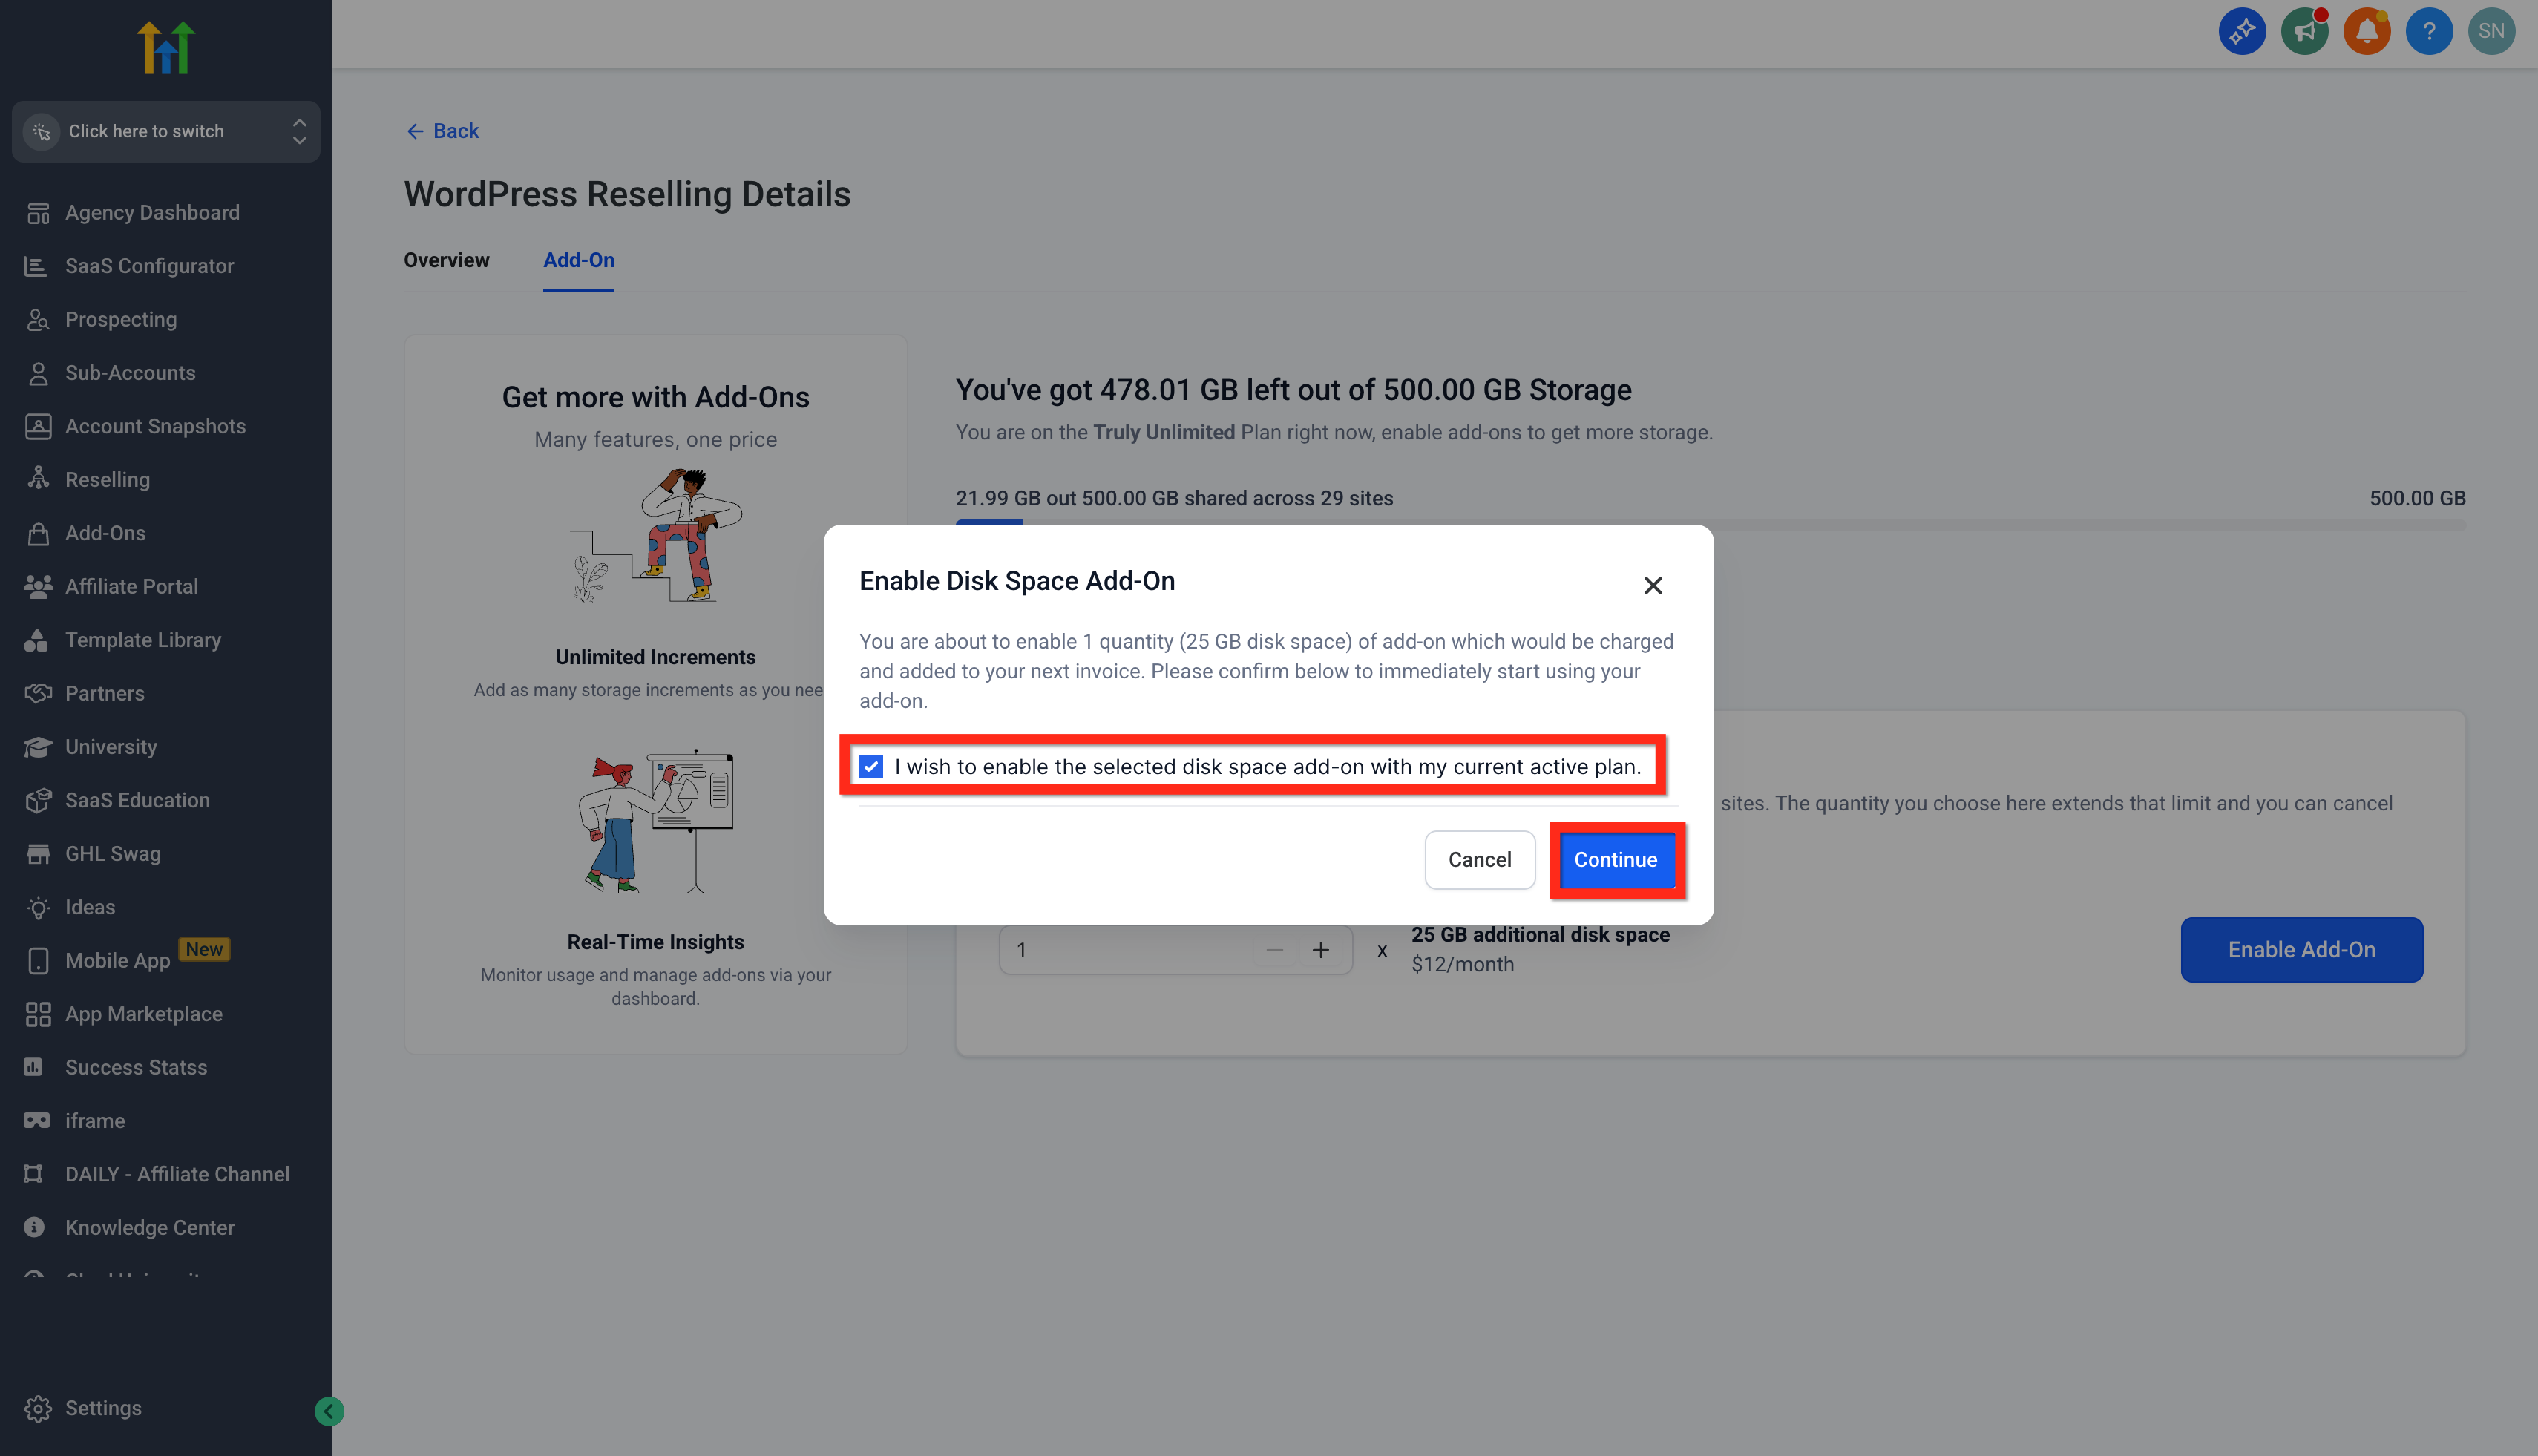
- Mark the confirmation box and press Continue.
- View the new storage amount and usage on the Add On page.
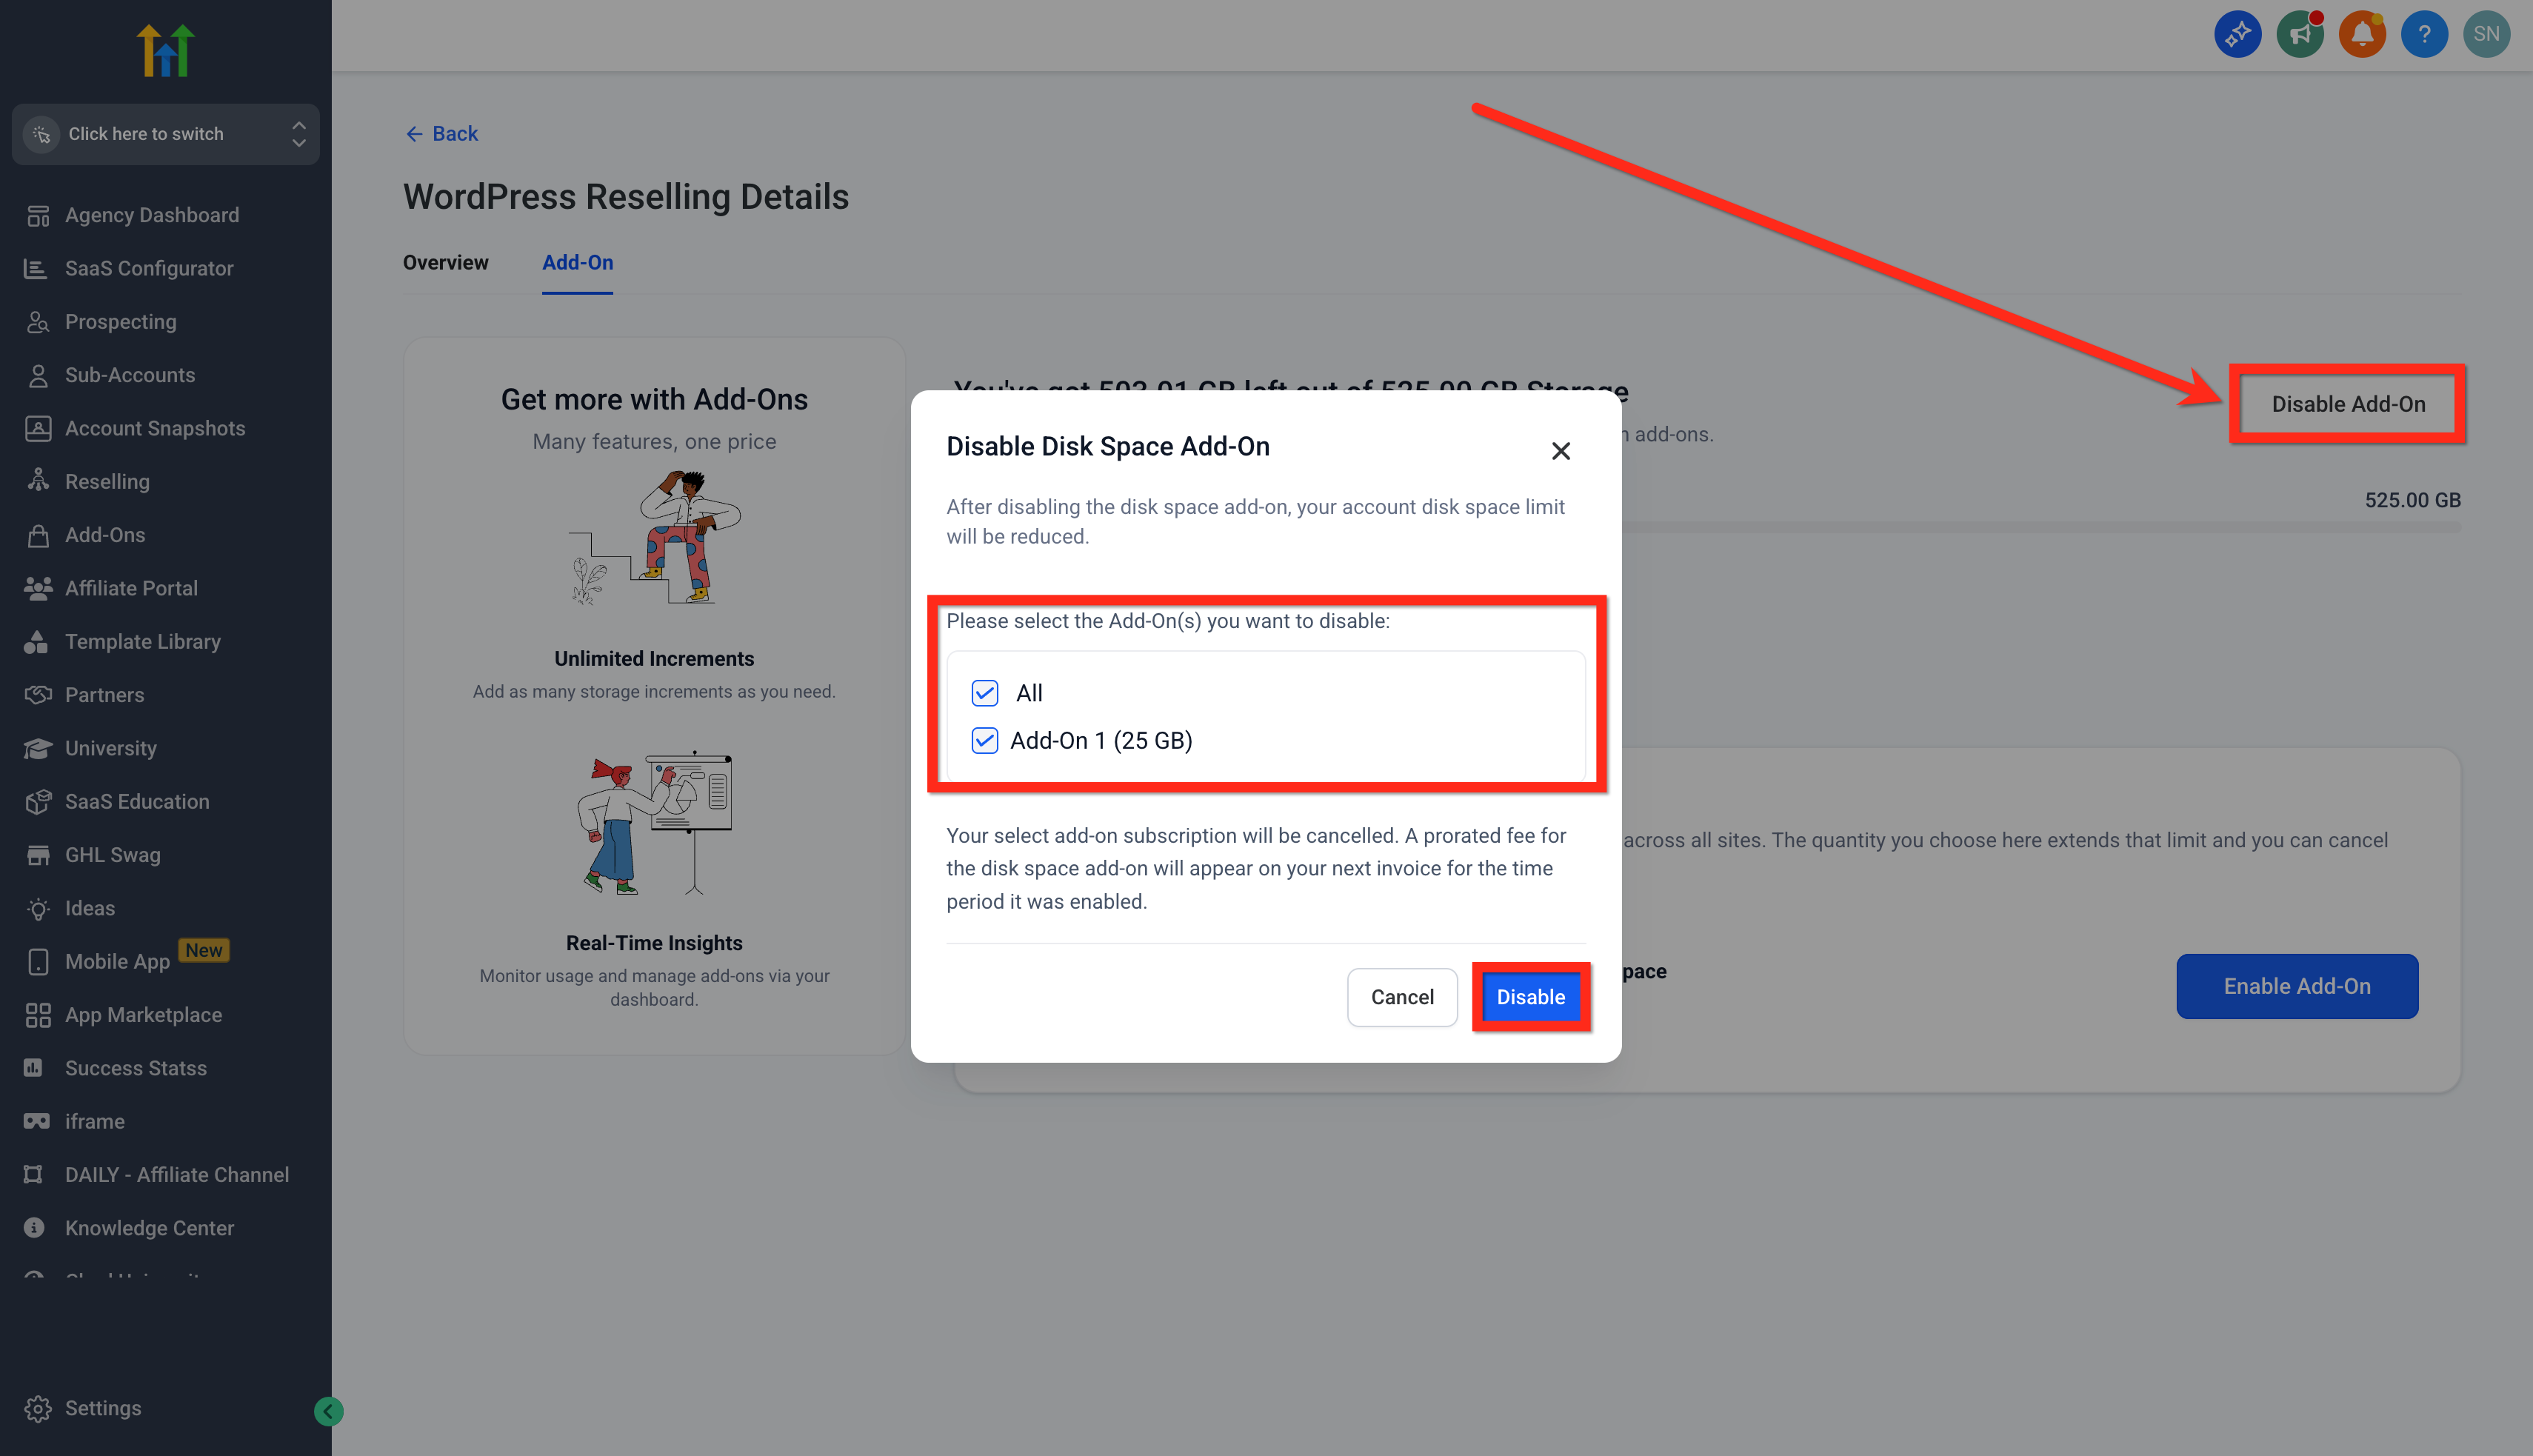
- To free capacity later, verify that at least 25 GB is unused and click Disable Add On.
- Choose All or specific add ons and click the Disable button.
07What it looks like in HighLevel
08Settings that matter
- Quantity. Controls how many 25 GB blocks are added to the hosting account.
- Enable Add, On button. Activates the selected quantity of additional disk space.
- Disable Add, On. Removes selected storage blocks, but only when 25 GB or more is free.
09Things to know before you rely on it
- Each block adds exactly 25 GB of storage.
- The extra storage is shared across all WordPress sites in the agency’s subaccounts.
- A block can be disabled only when at least 25 GB of its space is unused.
10How it connects to the rest of HighLevel
- Learn how to activate a WordPress hosting plan and see the pricing details. WordPress hosting plans
- Explore the process for reselling WordPress services to clients. Resell WordPress
- Get step by step instructions for creating and managing WordPress sites in HighLevel. Manage WordPress sites
Michael's take

When a client site needs extra room for media or backups, the $12 per month block can be a cost effective way to add capacity.
If your sites are already well under their storage limits, the add on may become an unnecessary expense, so it’s wise to monitor usage before purchasing.