
01Who this is for
- Developers can publish static pages generated elsewhere while staying inside the HighLevel environment.
- Agencies can host client microsites or one off landing pages without a separate hosting provider.
- Founders can add quick campaign pages and keep domain and SSL management centralized in HighLevel.
02Custom HTML pages, explained
The Custom HTML Pages feature adds a simple upload flow to a WordPress site managed in HighLevel. You select a site, provide a page name and a URL slug, then upload a single .html file. The platform stores the file on its hosting infrastructure and serves it at the chosen path.
After upload you can preview the page, then publish it with one click. The page lives alongside any builder generated pages in the same WordPress site, using the same SSL certificate and domain configuration already set up for the site.
If you need to change the content, you upload a new version of the same file. The URL and settings remain unchanged, allowing smooth updates without rebuilding the site.
03How businesses use custom HTML pages
- Digital marketing agency. The agency uploads a pre designed HTML landing page for a client campaign, sets a custom slug, previews it, and publishes it directly from HighLevel, keeping the client’s domain and SSL intact.
- Ecommerce store owner. The owner adds a static promotional page for a holiday sale by uploading the HTML file, referencing product images hosted on a CDN, and publishing the new page without touching the main store builder.
- Software startup. The startup creates a separate microsite for a new product, uploads the generated HTML from its static site generator, assigns a slug like /product beta, and makes it live while still using the same HighLevel hosting.
04The numbers and rules that matter
- Maximum file size: 5 MB.
05Before you start
- WordPress hosting must be activated for the site in HighLevel.
- A single .html file no larger than 5 MB must be ready for upload, with all assets referenced by absolute URLs.
06How to set up and use custom HTML pages in HighLevel
Upload a custom HTML page to a HighLevel WordPress site
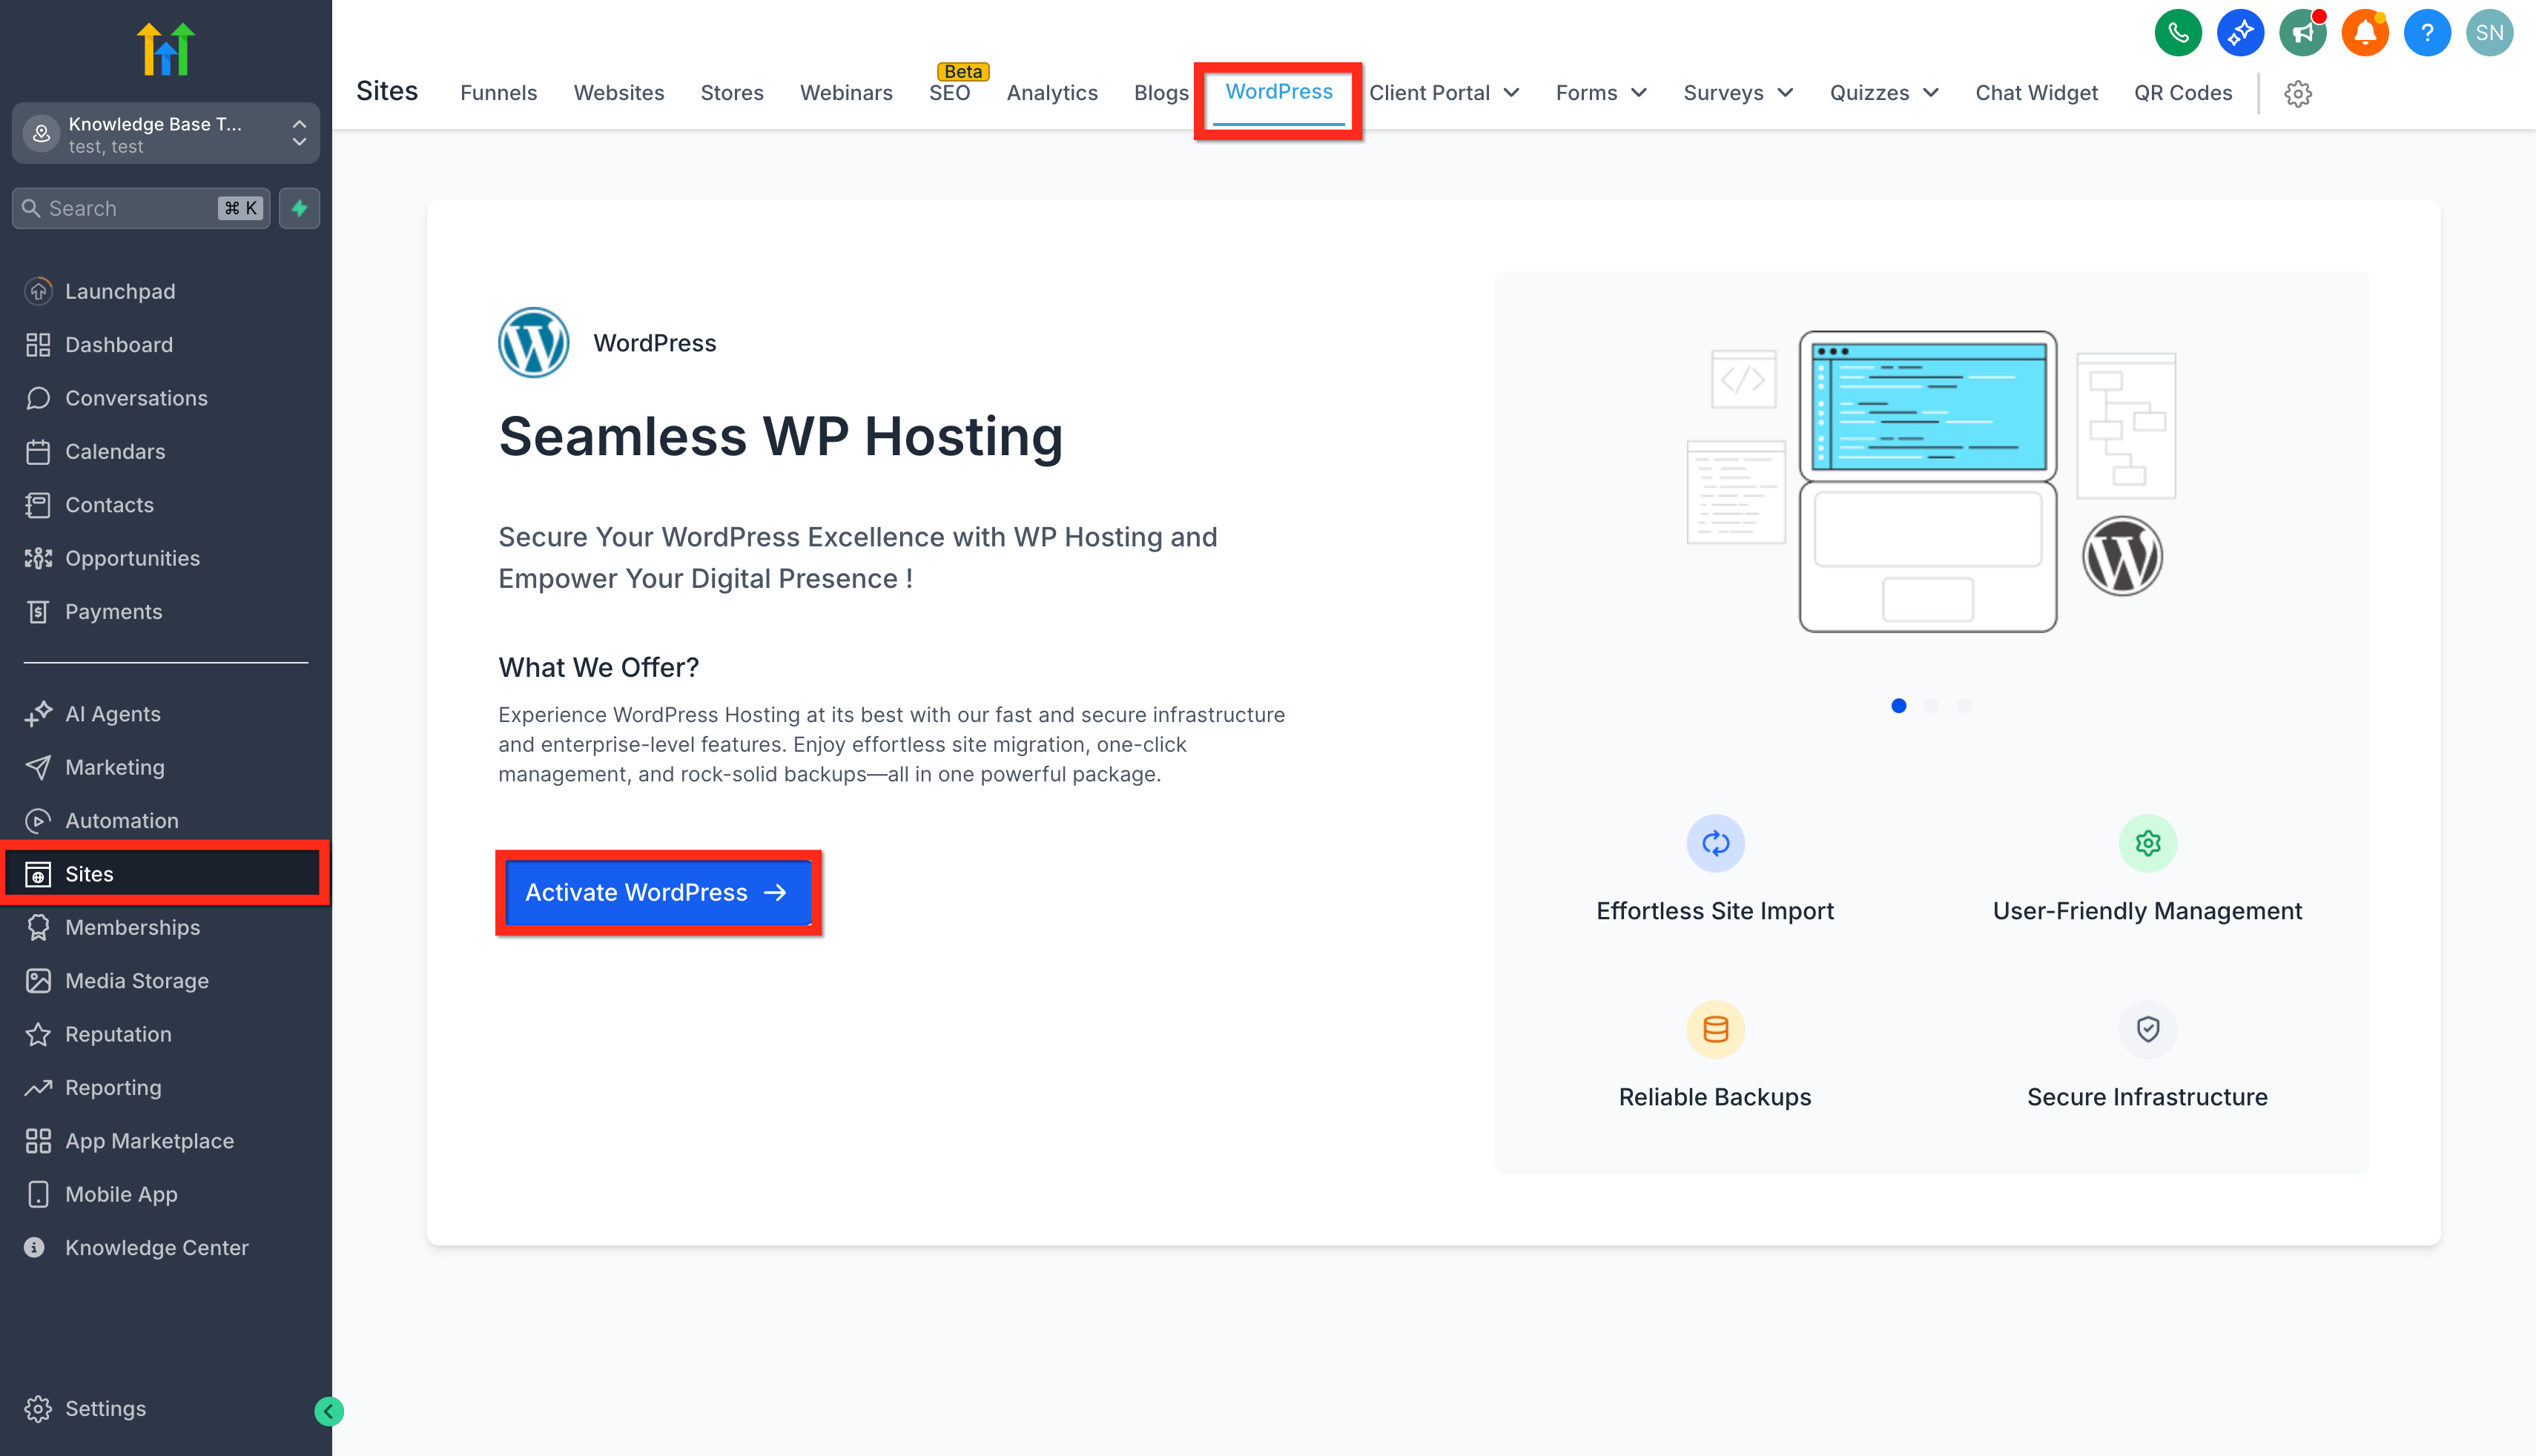
- Go to Sites > WordPress in the HighLevel dashboard.
- Click Activate WordPress if the site is not yet enabled.
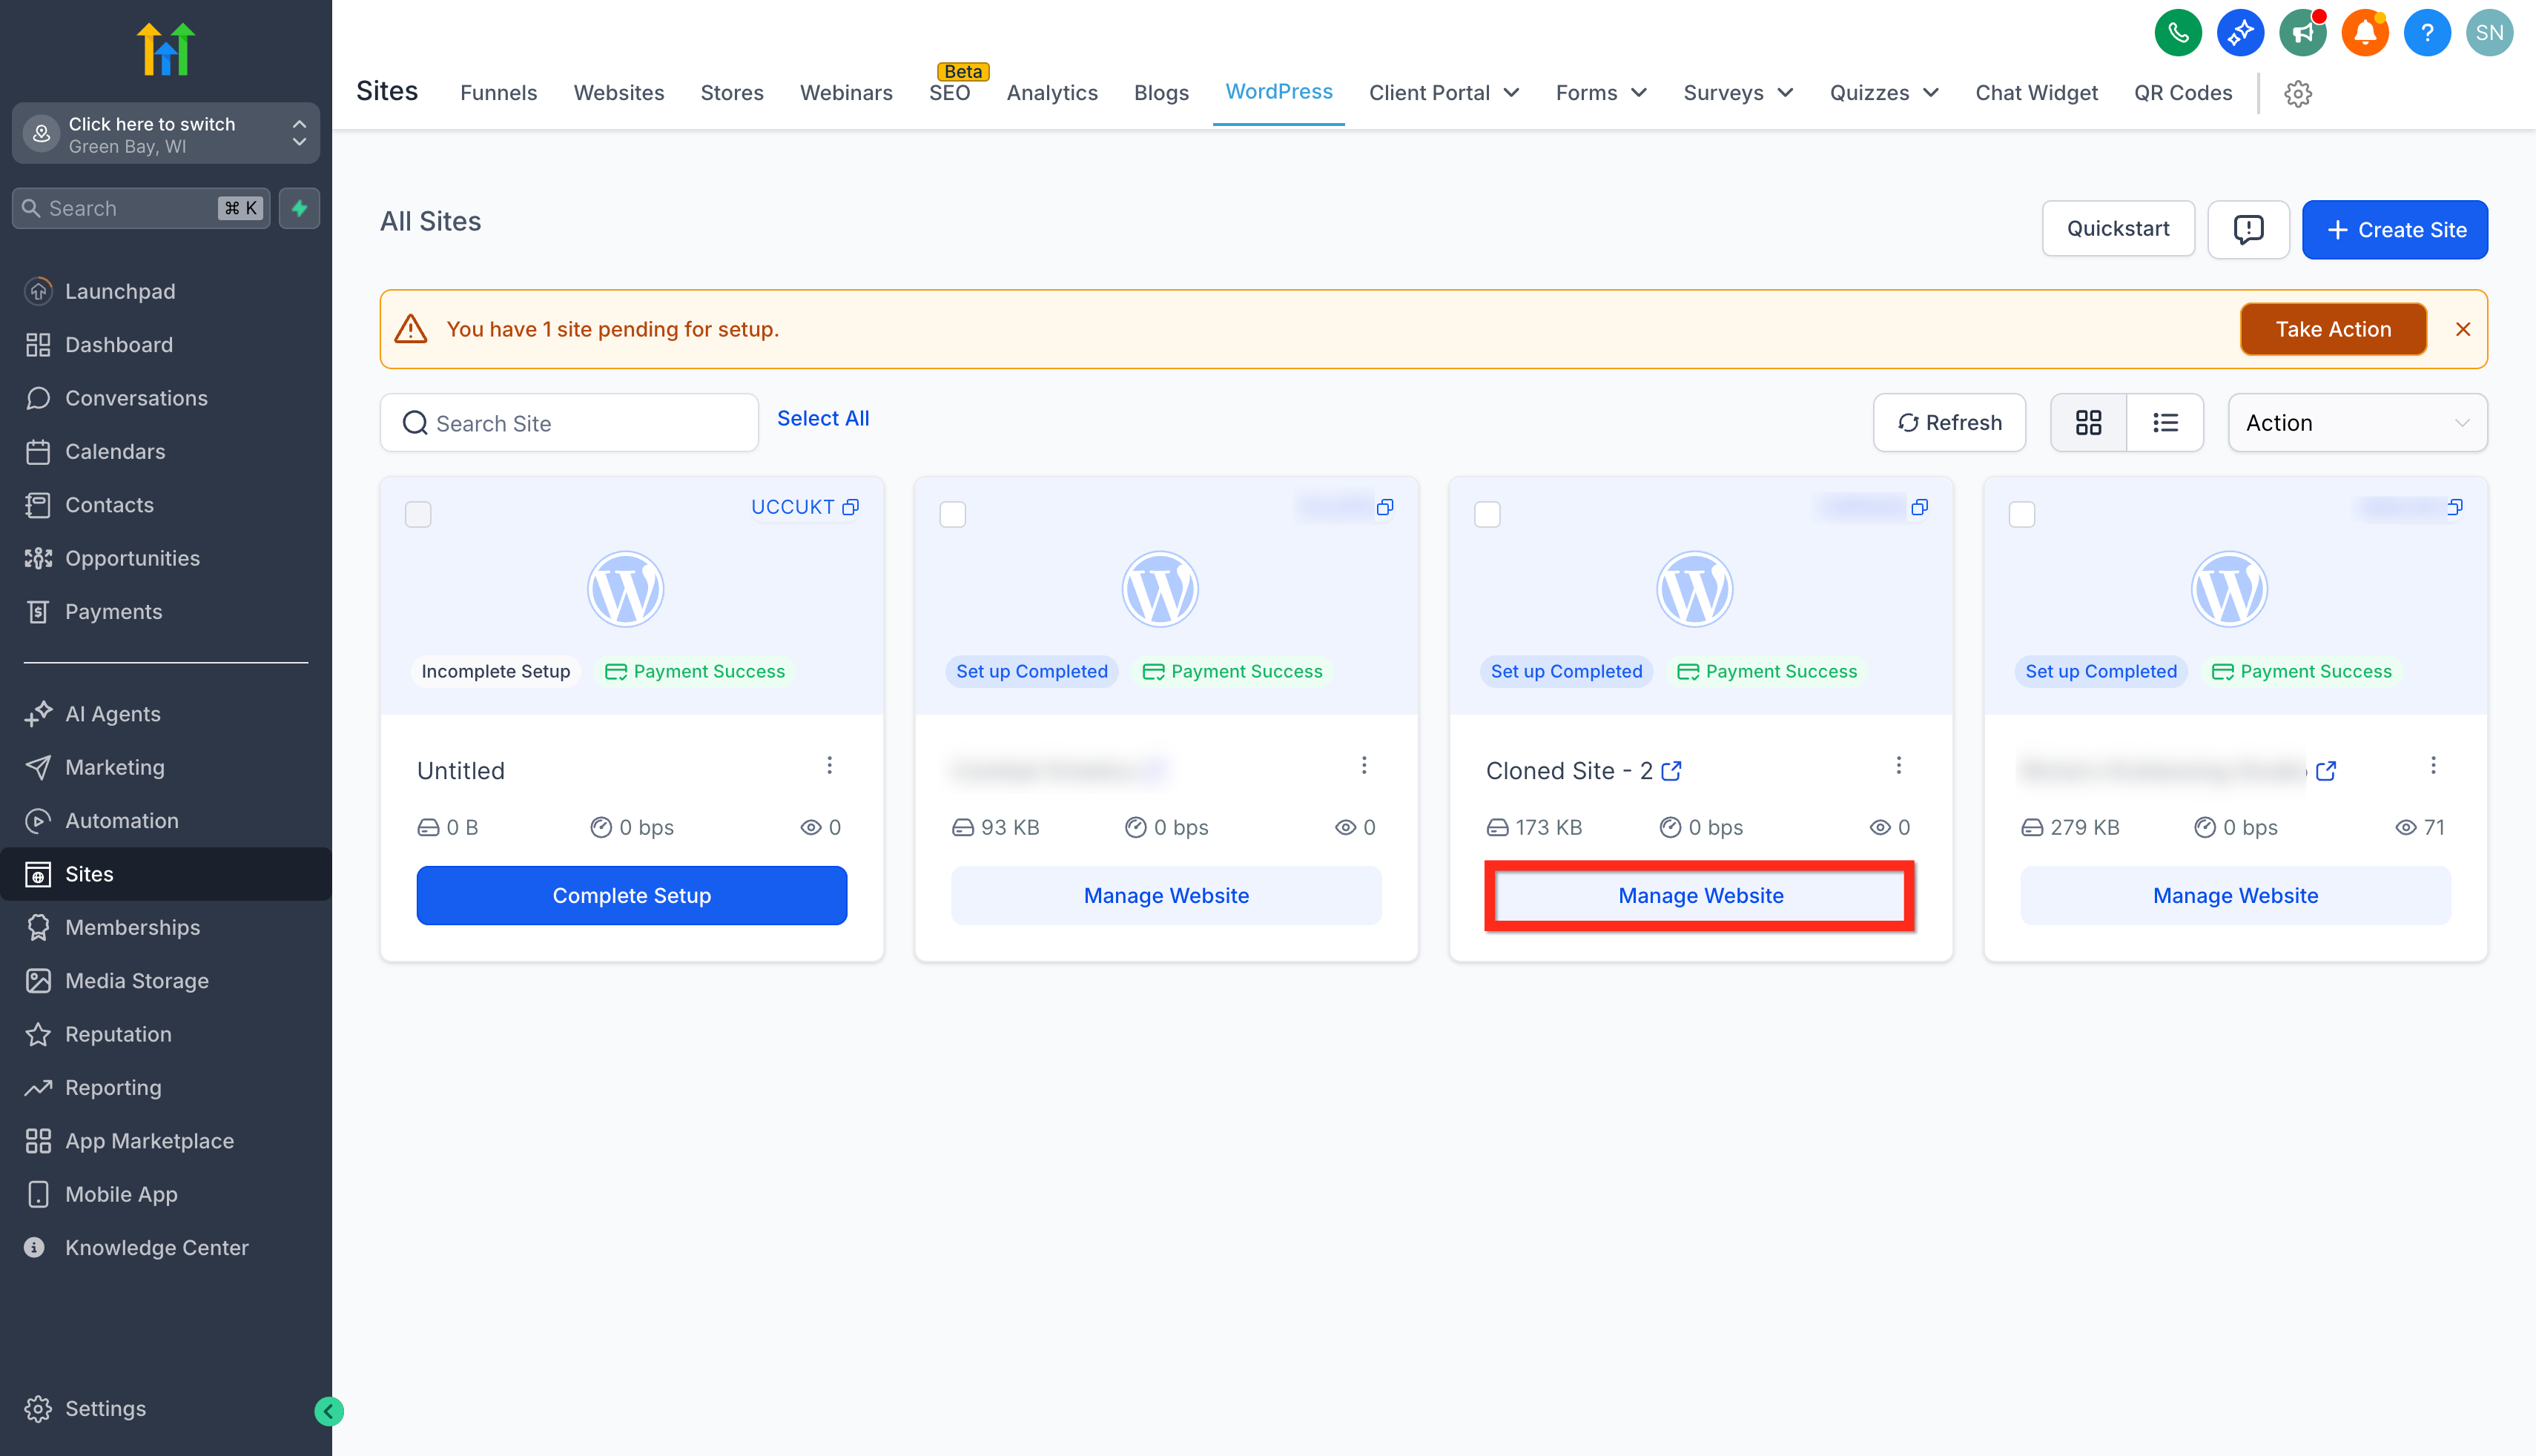
- Select the Manage Website button for the target WordPress site.
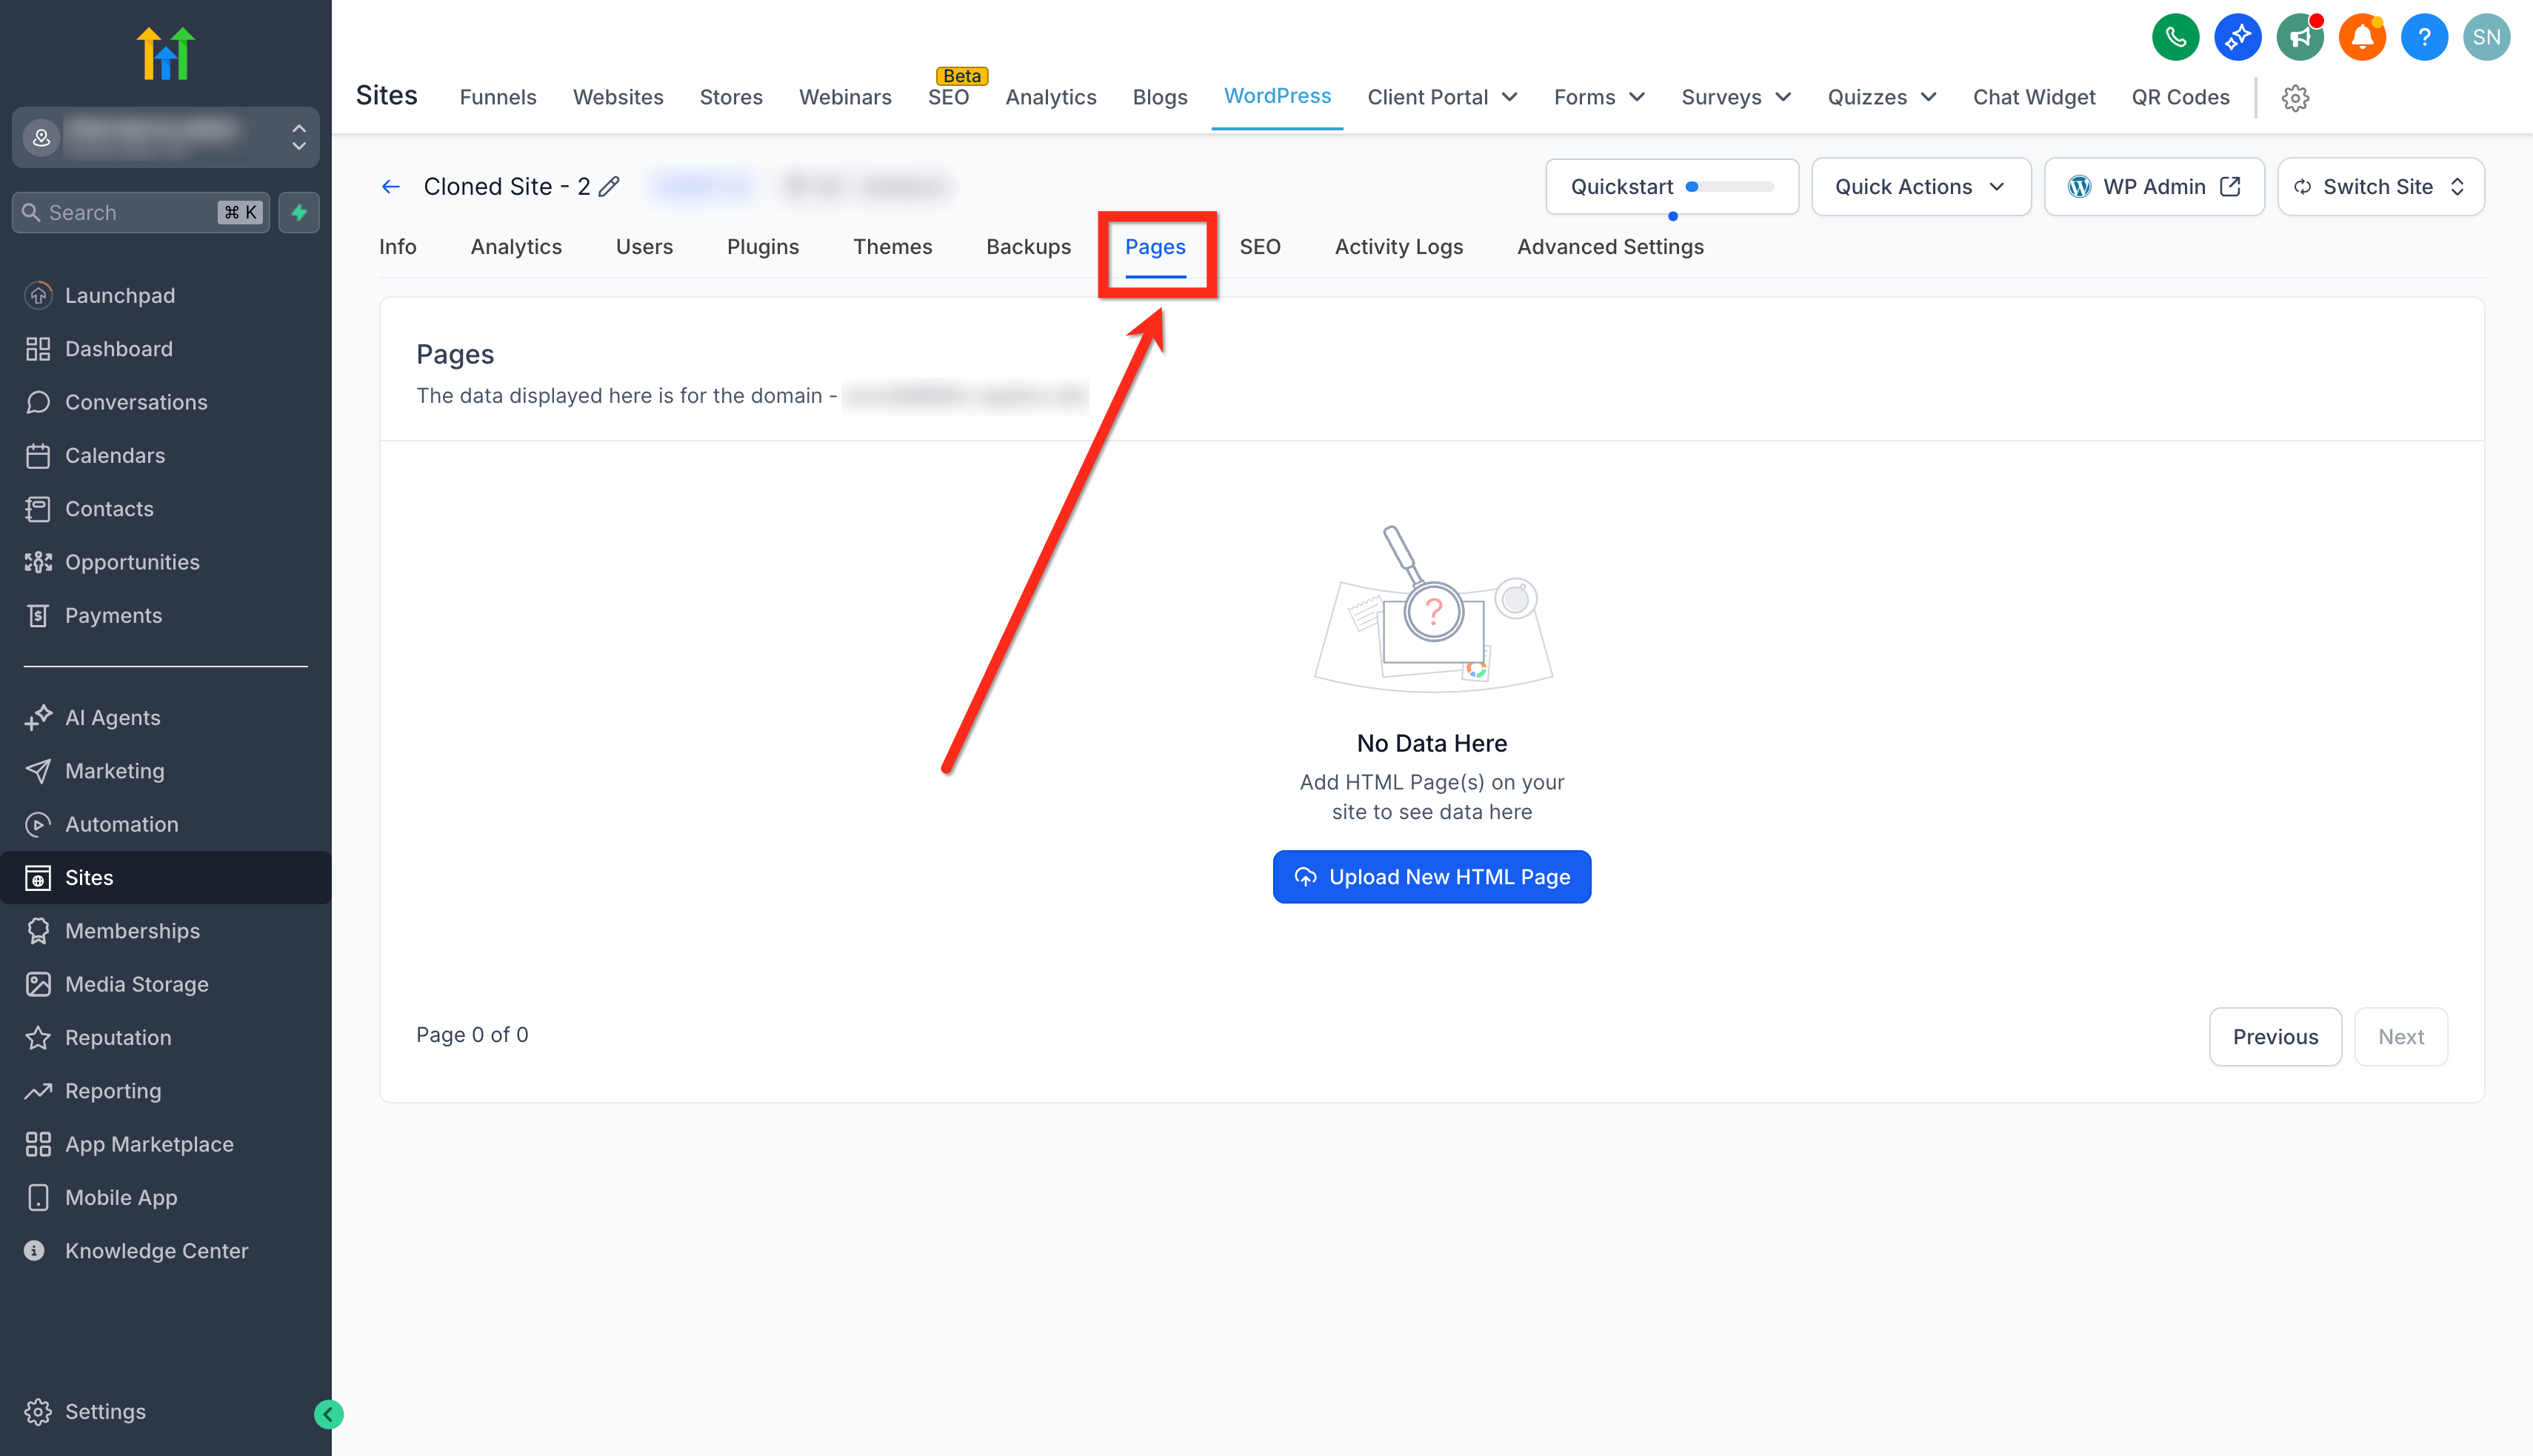
- Click the Pages tab at the top of the screen.
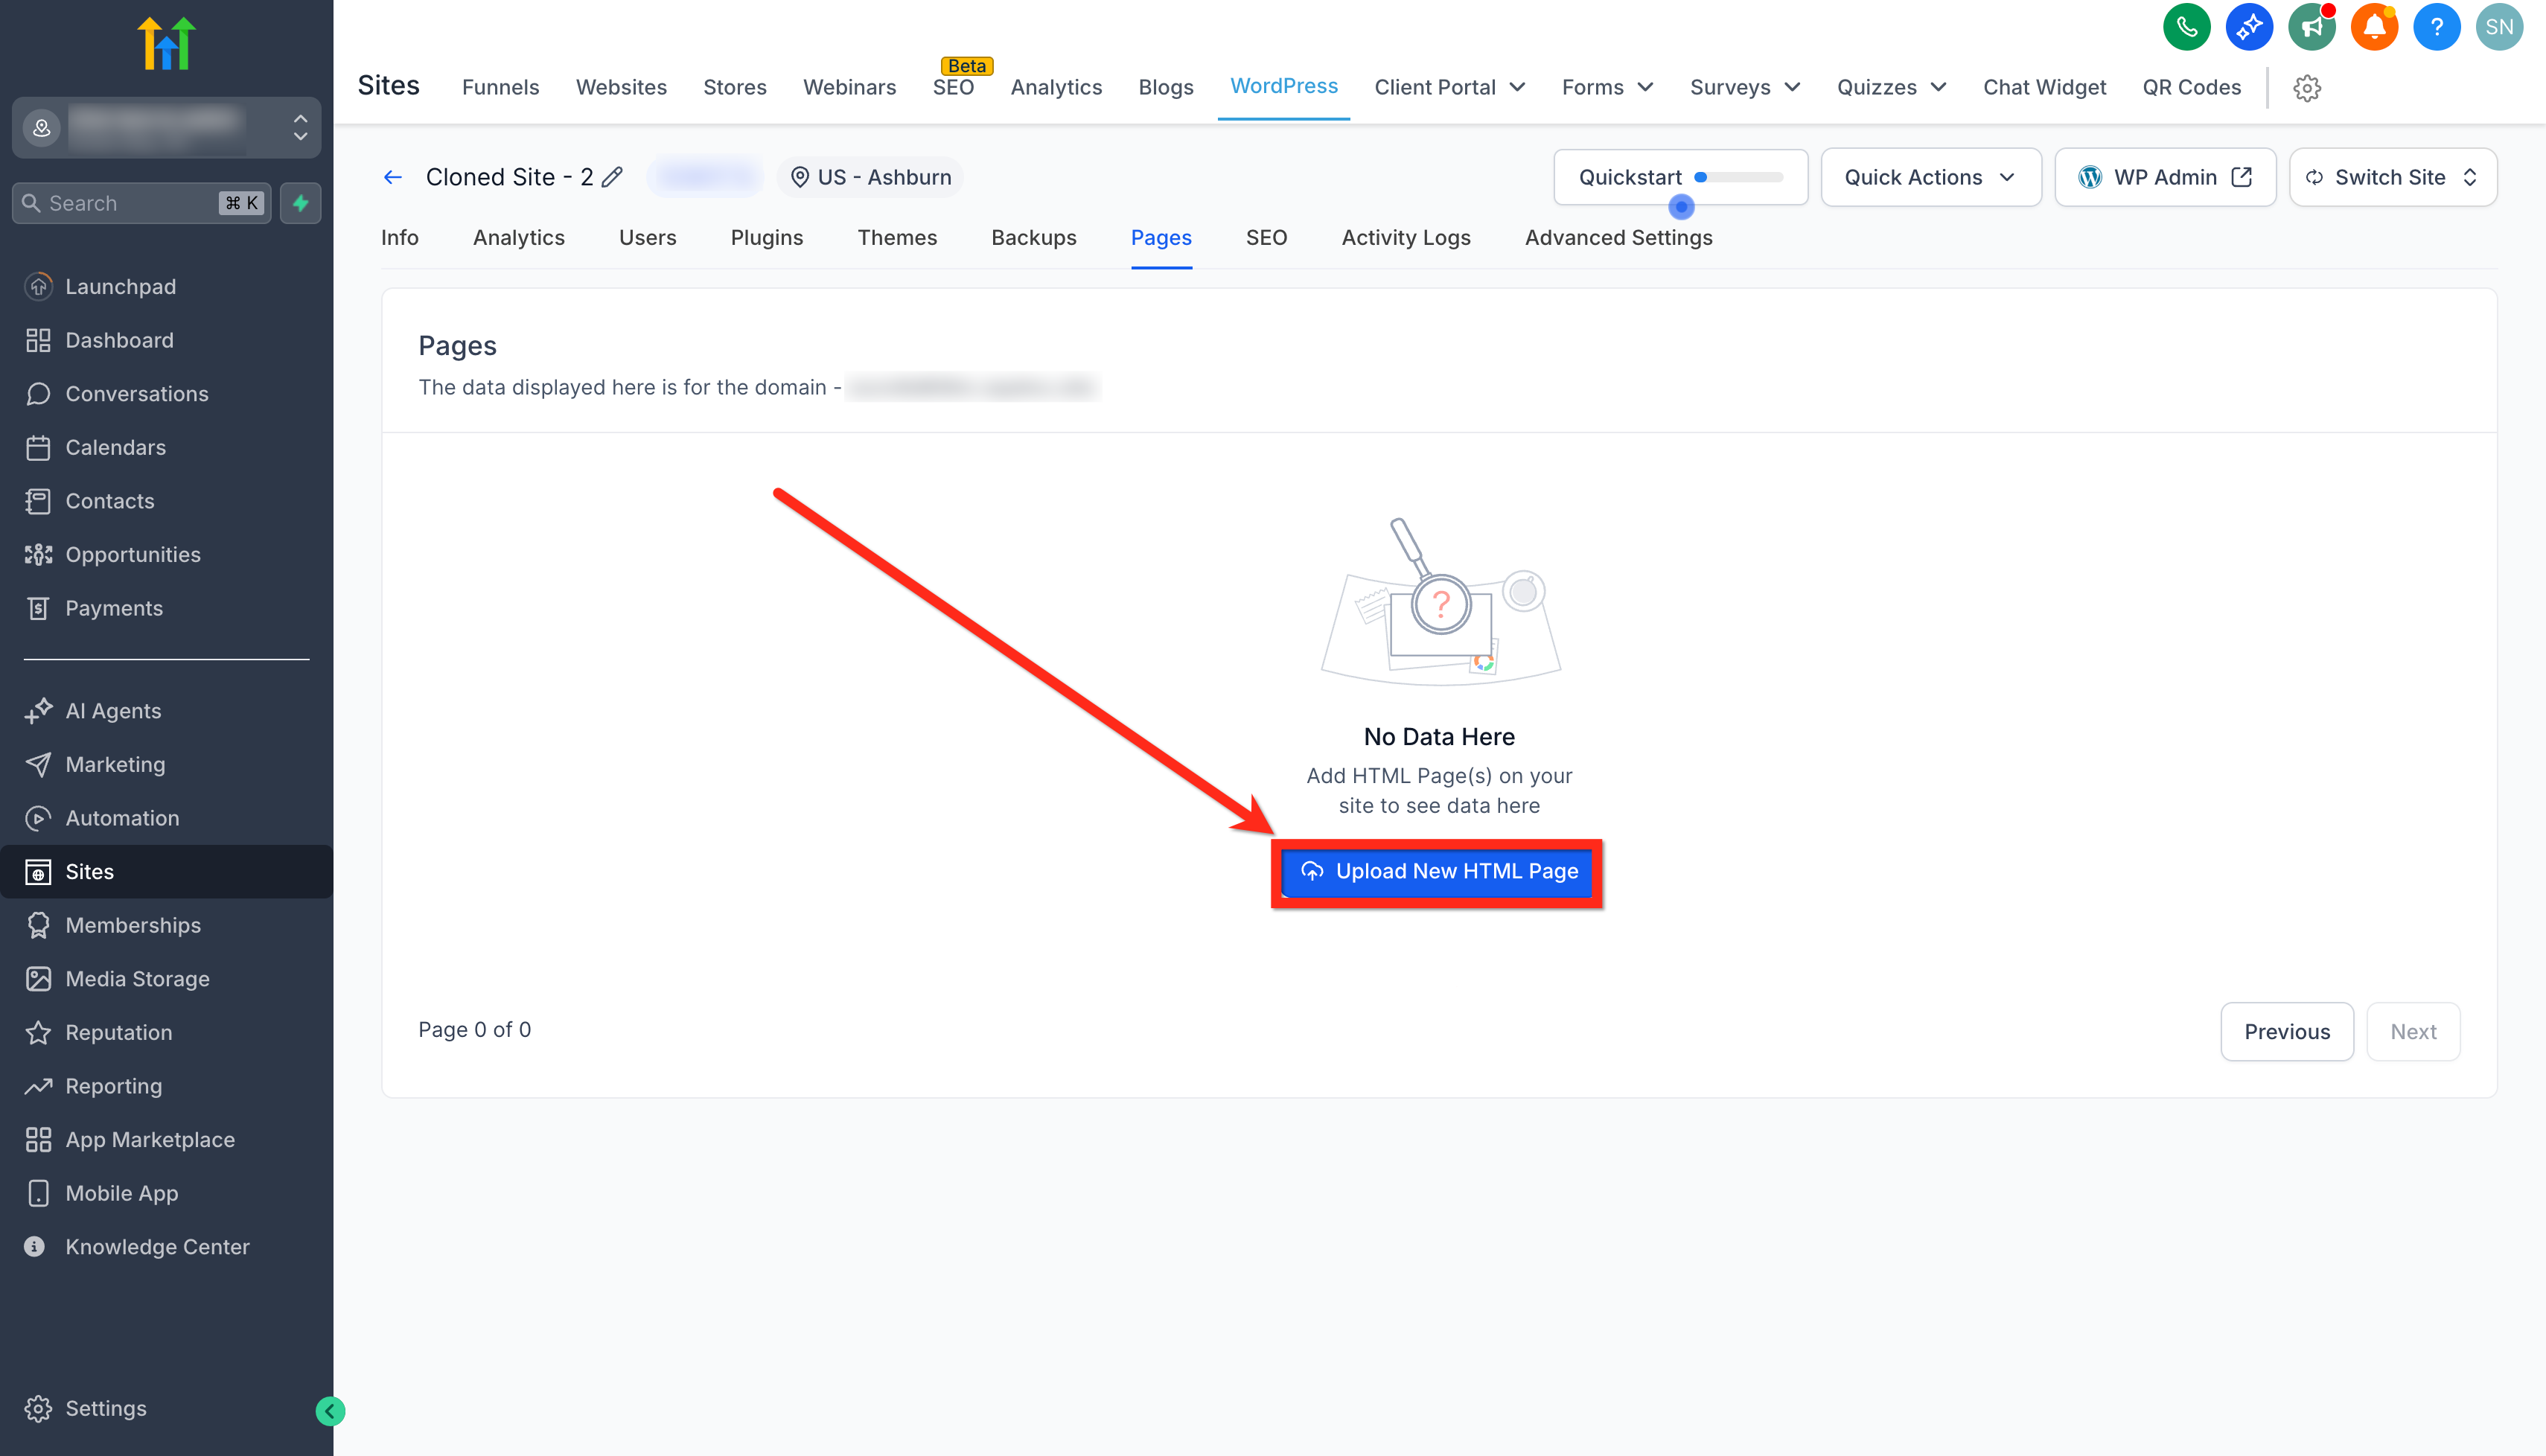
- Press the Upload New HTML Page button.
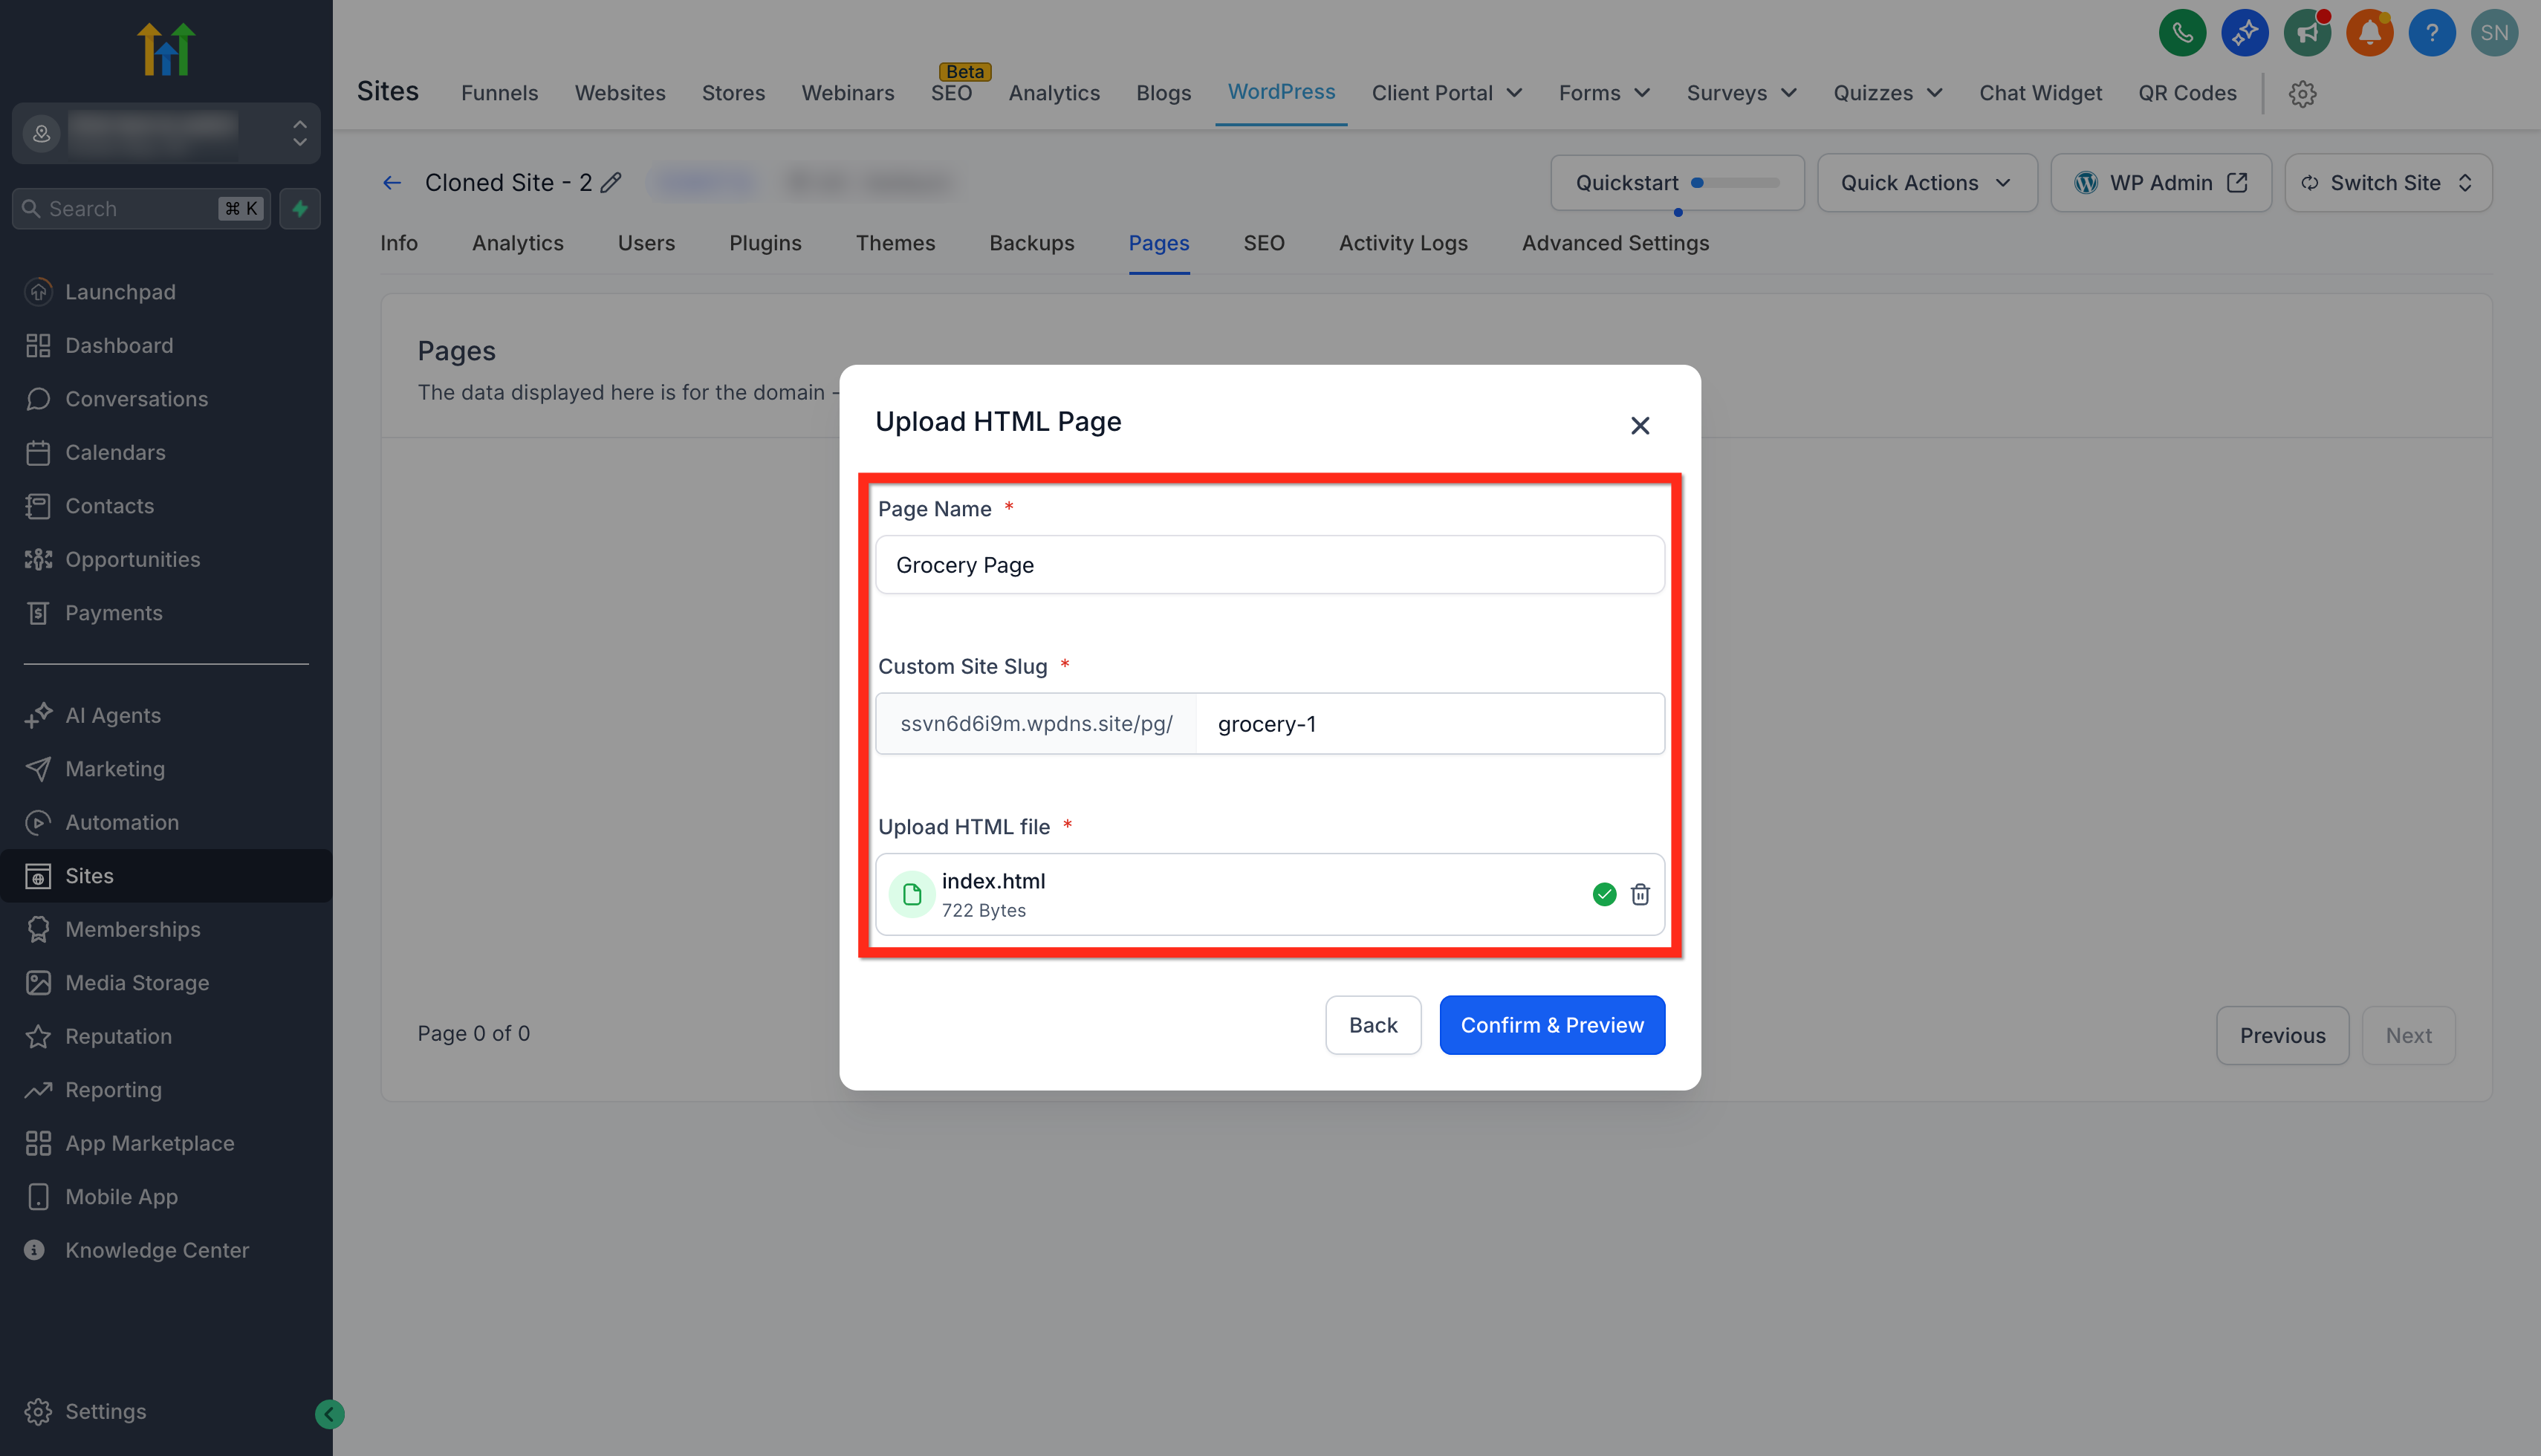
- Enter a Page Name and a Custom Site Slug for the new page.
- Click the upload area and choose the .html file to upload.
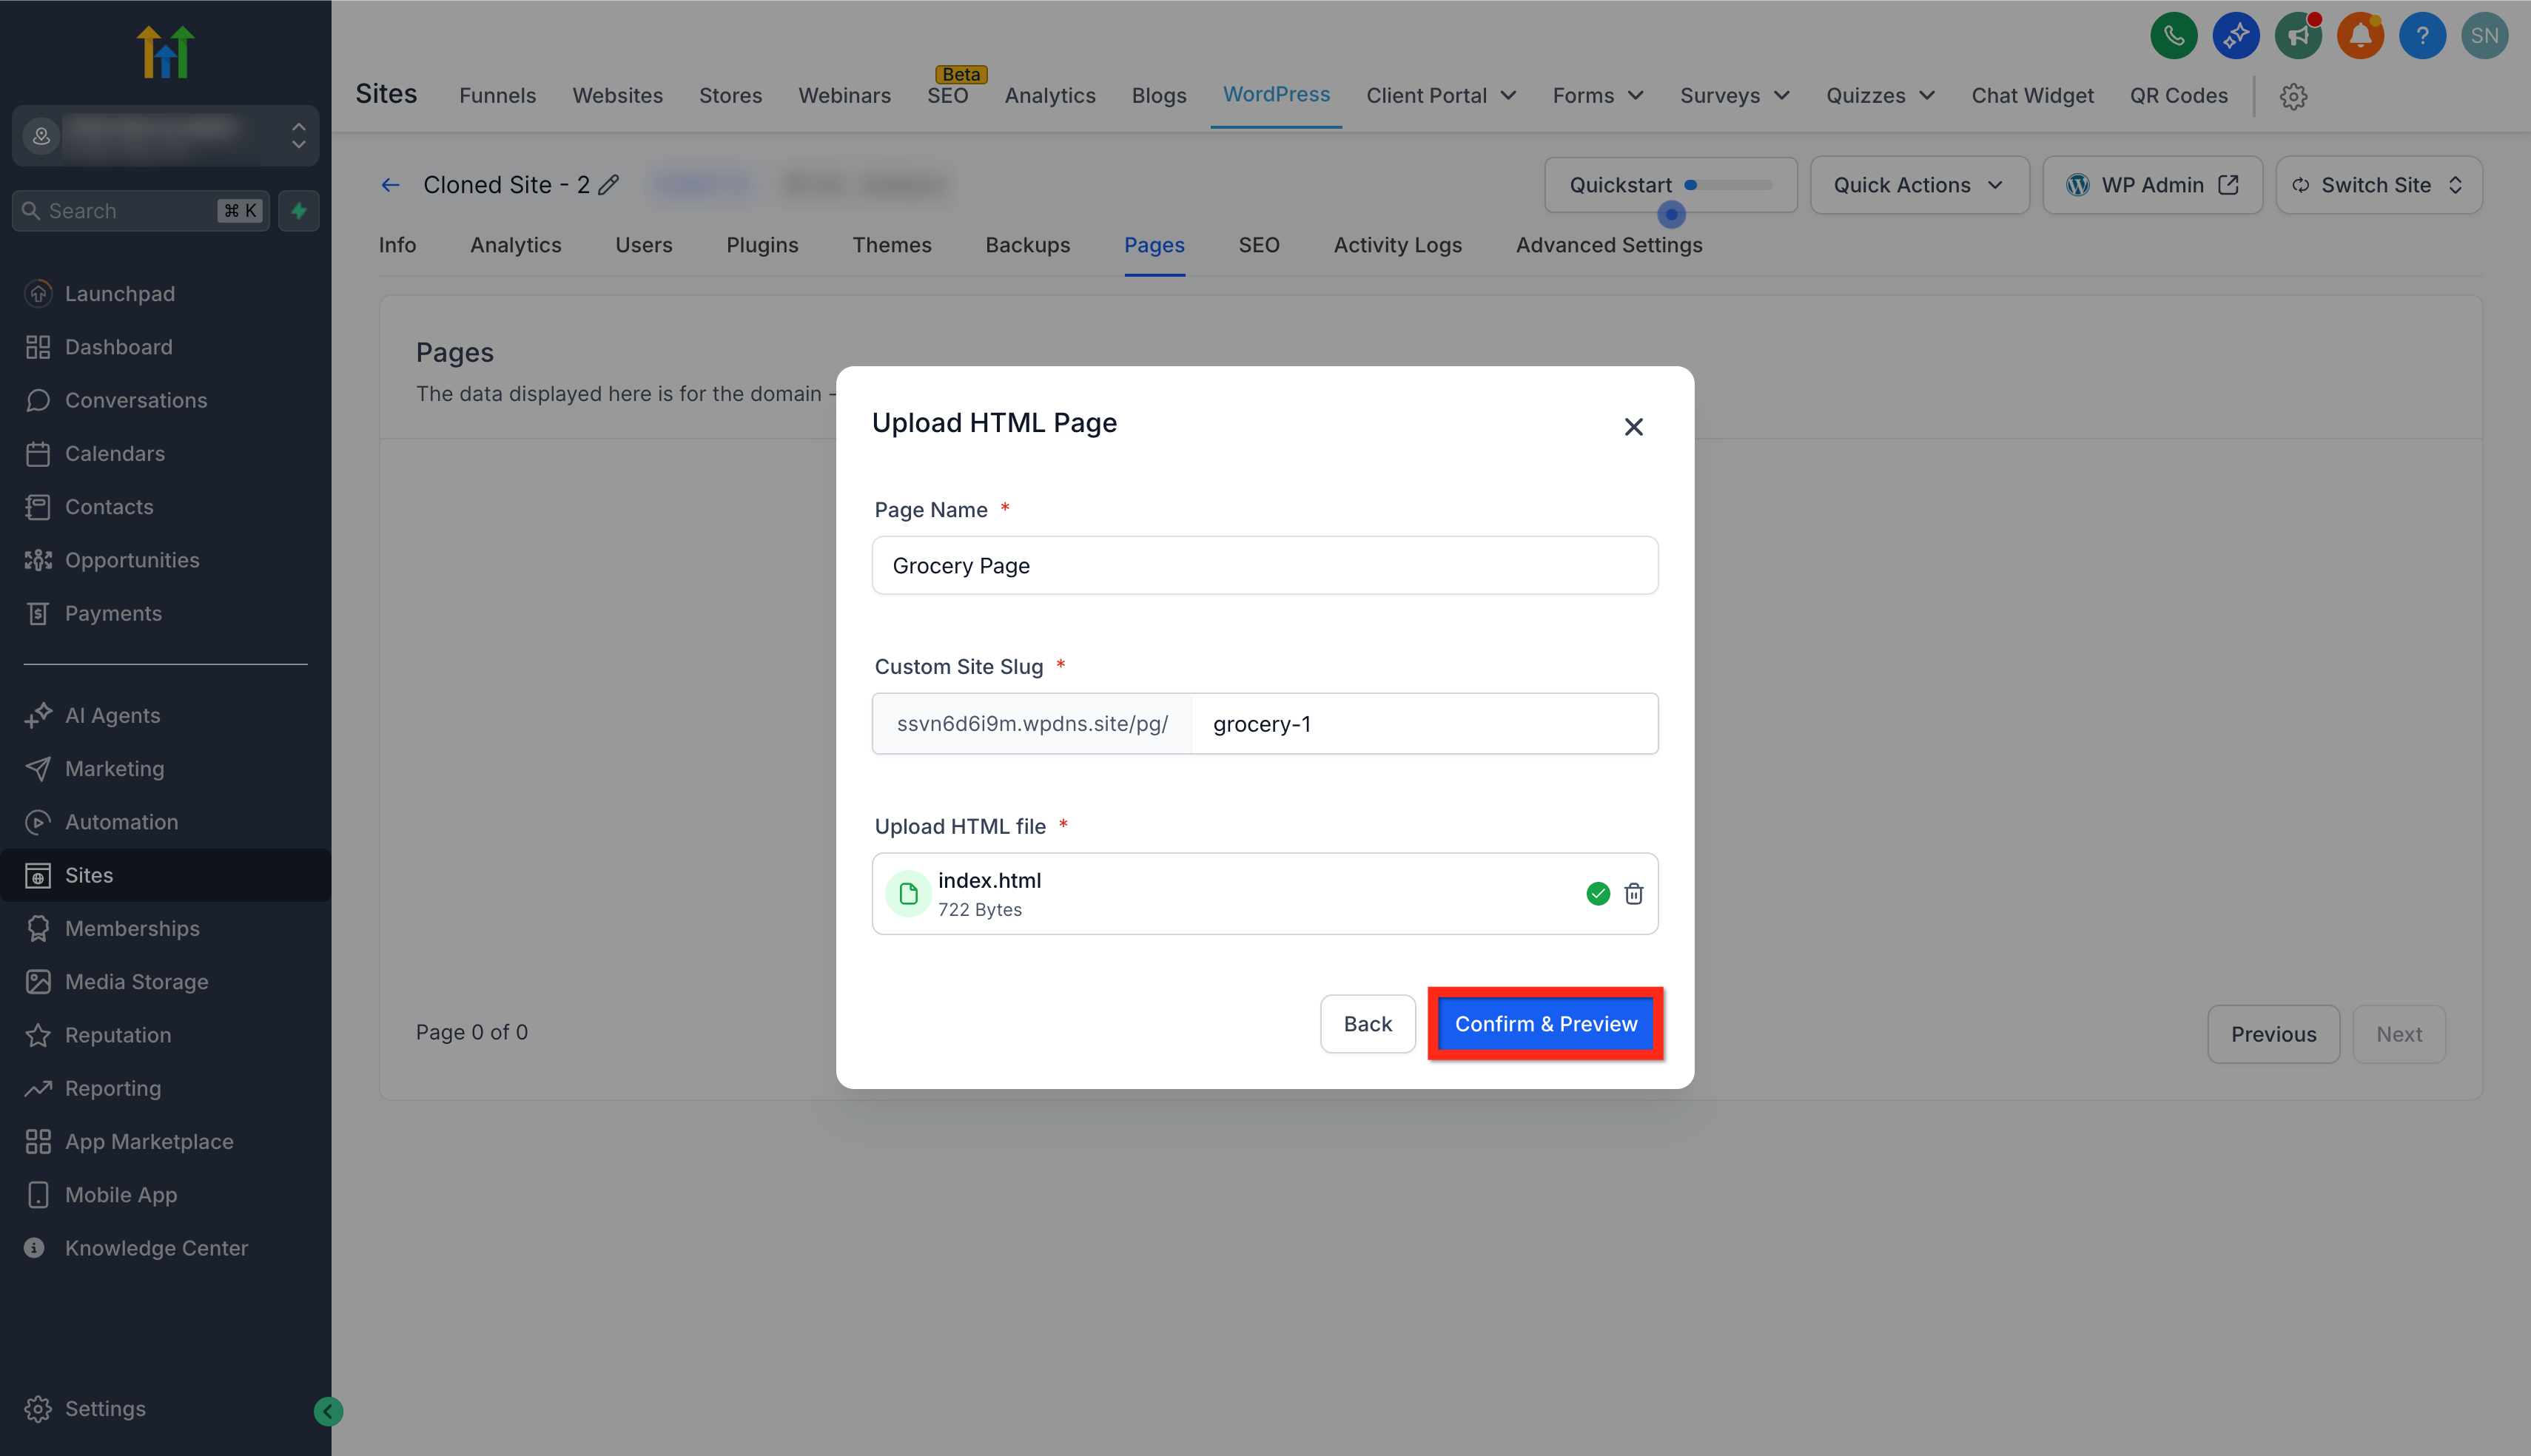
- Click Confirm & Preview to check the page layout and content.
- Click Publish to make the HTML page live on the mapped domain.
07What it looks like in HighLevel
08Settings that matter
- Page Name. Sets the title used to identify the uploaded page within the HighLevel WordPress interface.
- Custom Site Slug. Defines the URL path segment where the uploaded HTML page will be accessible.
09Things to know before you rely on it
- Only one .html file can be uploaded per operation.
- Maximum file size is 5 MB.
- All images, CSS, and JavaScript must be referenced with absolute URLs; relative paths are not supported.
- Multi folder uploads and ZIP packages are not available at this time.
- Each uploaded file creates a single page; additional pages require separate uploads.
10If something goes wrong
- Need to change the content of an uploaded page. Edit the HTML file locally, then upload the new version using the Upload New Version option to replace the existing page.
- Images or styles do not appear on the published page. Confirm that all asset URLs are absolute and point to a CDN or the HighLevel media library.
- Upload fails because the file is too large. Reduce the HTML file size to 5 MB or smaller before attempting the upload.
11How it connects to the rest of HighLevel
- Guide to creating and managing WordPress sites in HighLevel WordPress site setup
- HighLevel pricing and plans Pricing page
Michael's take

When you have a single, high impact page that needs to load at lightning speed. Like a product launch or a campaign microsite, Custom HTML Pages give you static performance without extra hosting costs, and they stay within the same SSL and domain setup you already trust.
If you need a full site with many interconnected pages, or you rely on relative asset paths, this feature isn’t the right fit because relative paths are not yet supported and each page requires a separate upload.