
01Who this is for
- Marketing agencies can deliver client sites that automatically pull HighLevel data and host funnels without extra code.
- Small business owners can add live chat that routes to their HighLevel conversations, turning site visitors into leads.
- Ecommerce stores can keep phone numbers, addresses and promotions up to date across the site via CRM custom values.
02LeadConnector WordPress plugin, explained
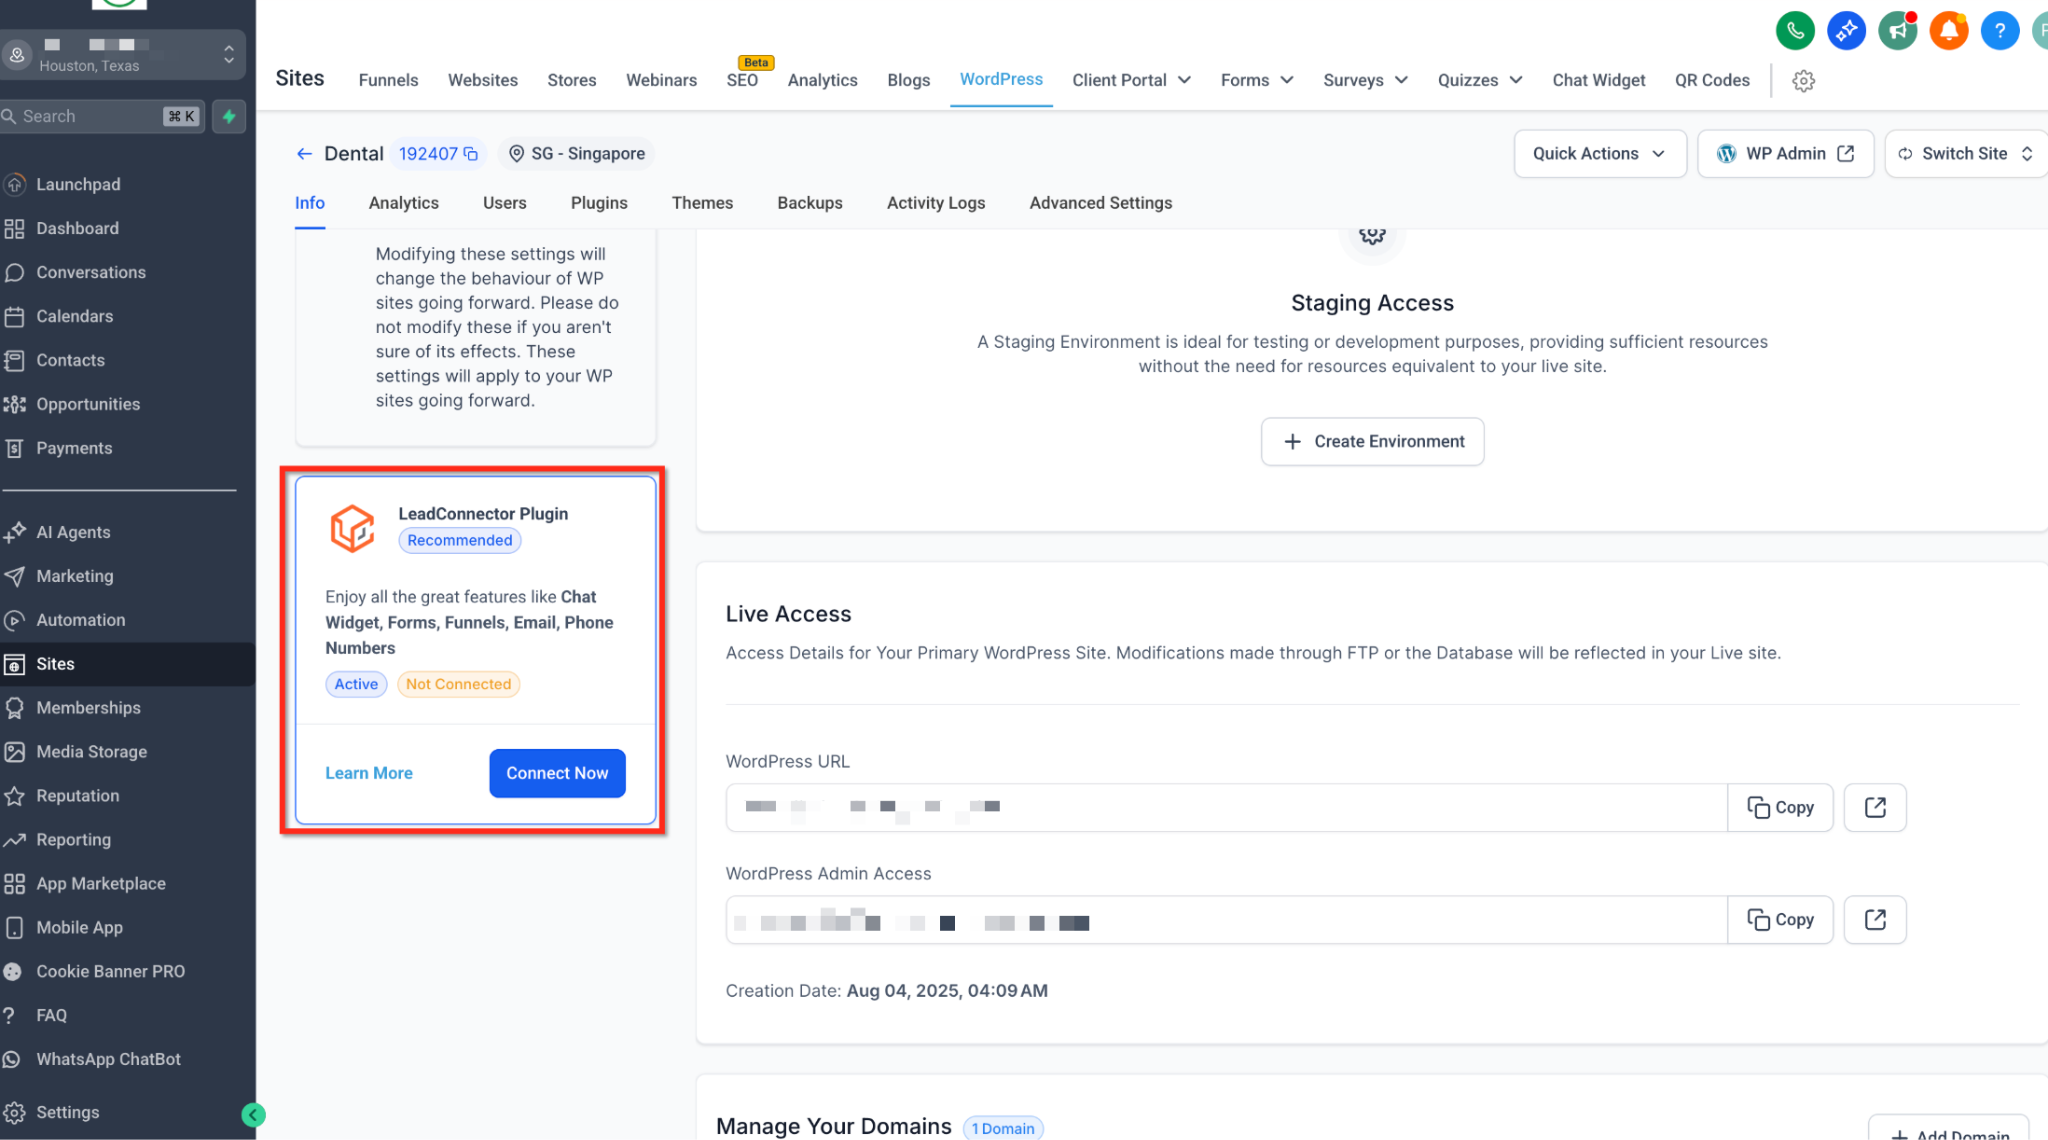
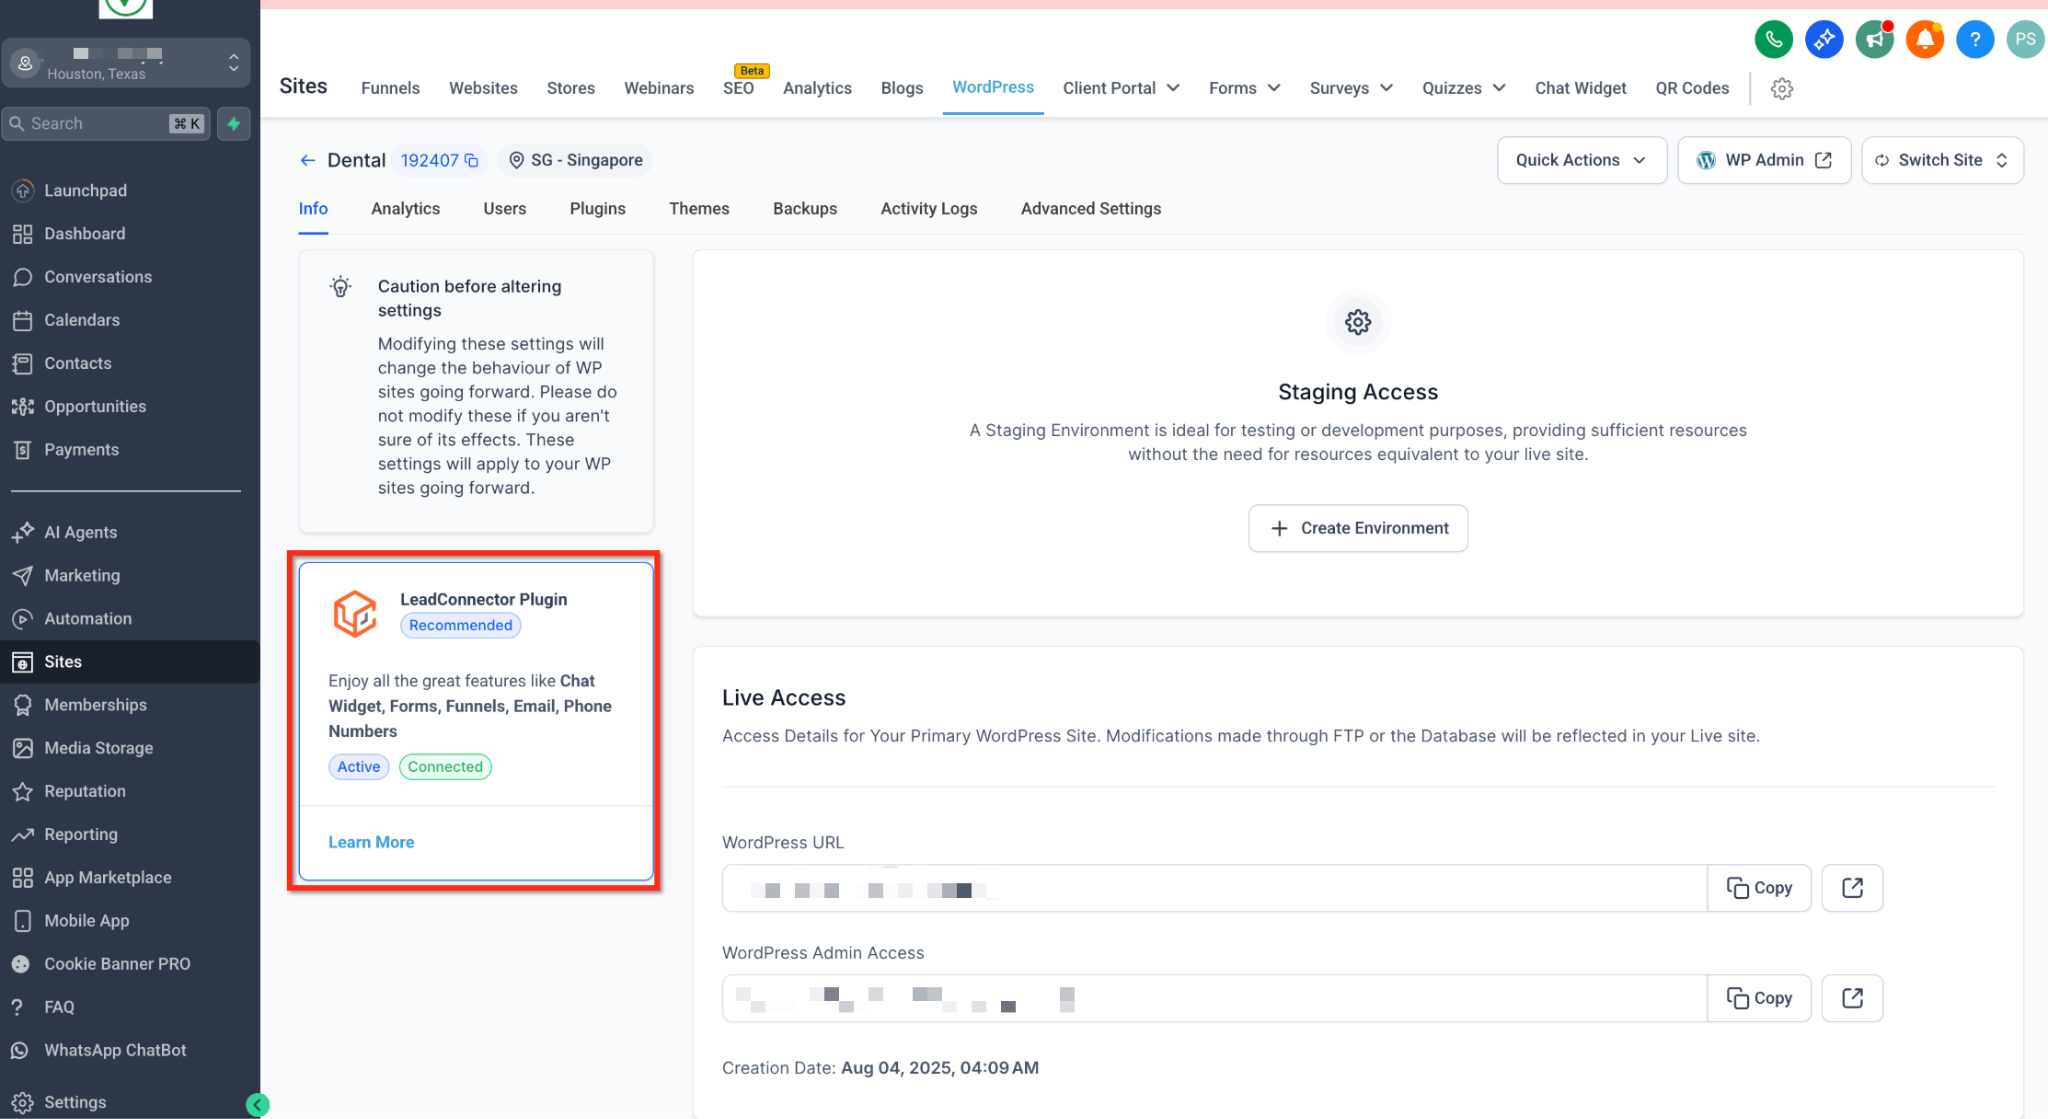
The LeadConnector plugin connects a WordPress installation to the HighLevel platform. Once signed in, the plugin makes CRM features, chat, funnels and custom values, available directly from the WordPress dashboard.
Settings for the plugin appear under a LeadConnector menu in WordPress. From there you can enable the chat widget, choose which CRM funnel to publish as a WordPress page, and insert shortcodes that pull dynamic values from HighLevel. All changes made in HighLevel are reflected on the website without editing code.
03How businesses use LeadConnector WordPress plugin
- Dental practice. Activate the chat widget through the plugin so any visitor can start a conversation that appears in the HighLevel Conversations tab, allowing staff to respond from HighLevel.
- Real estate agency. Select a property lead funnel inside LeadConnector > Funnels, assign a slug, and publish it as a native WordPress page that matches the agency’s domain structure.
- Online course creator. Place a shortcode like [lc_custom_value key="course_start_date"] in page copy; when the start date is edited in HighLevel, the displayed date updates automatically across all pages.
04How to set up and use LeadConnector WordPress plugin in HighLevel
Install LeadConnector plugin on external WordPress hosting
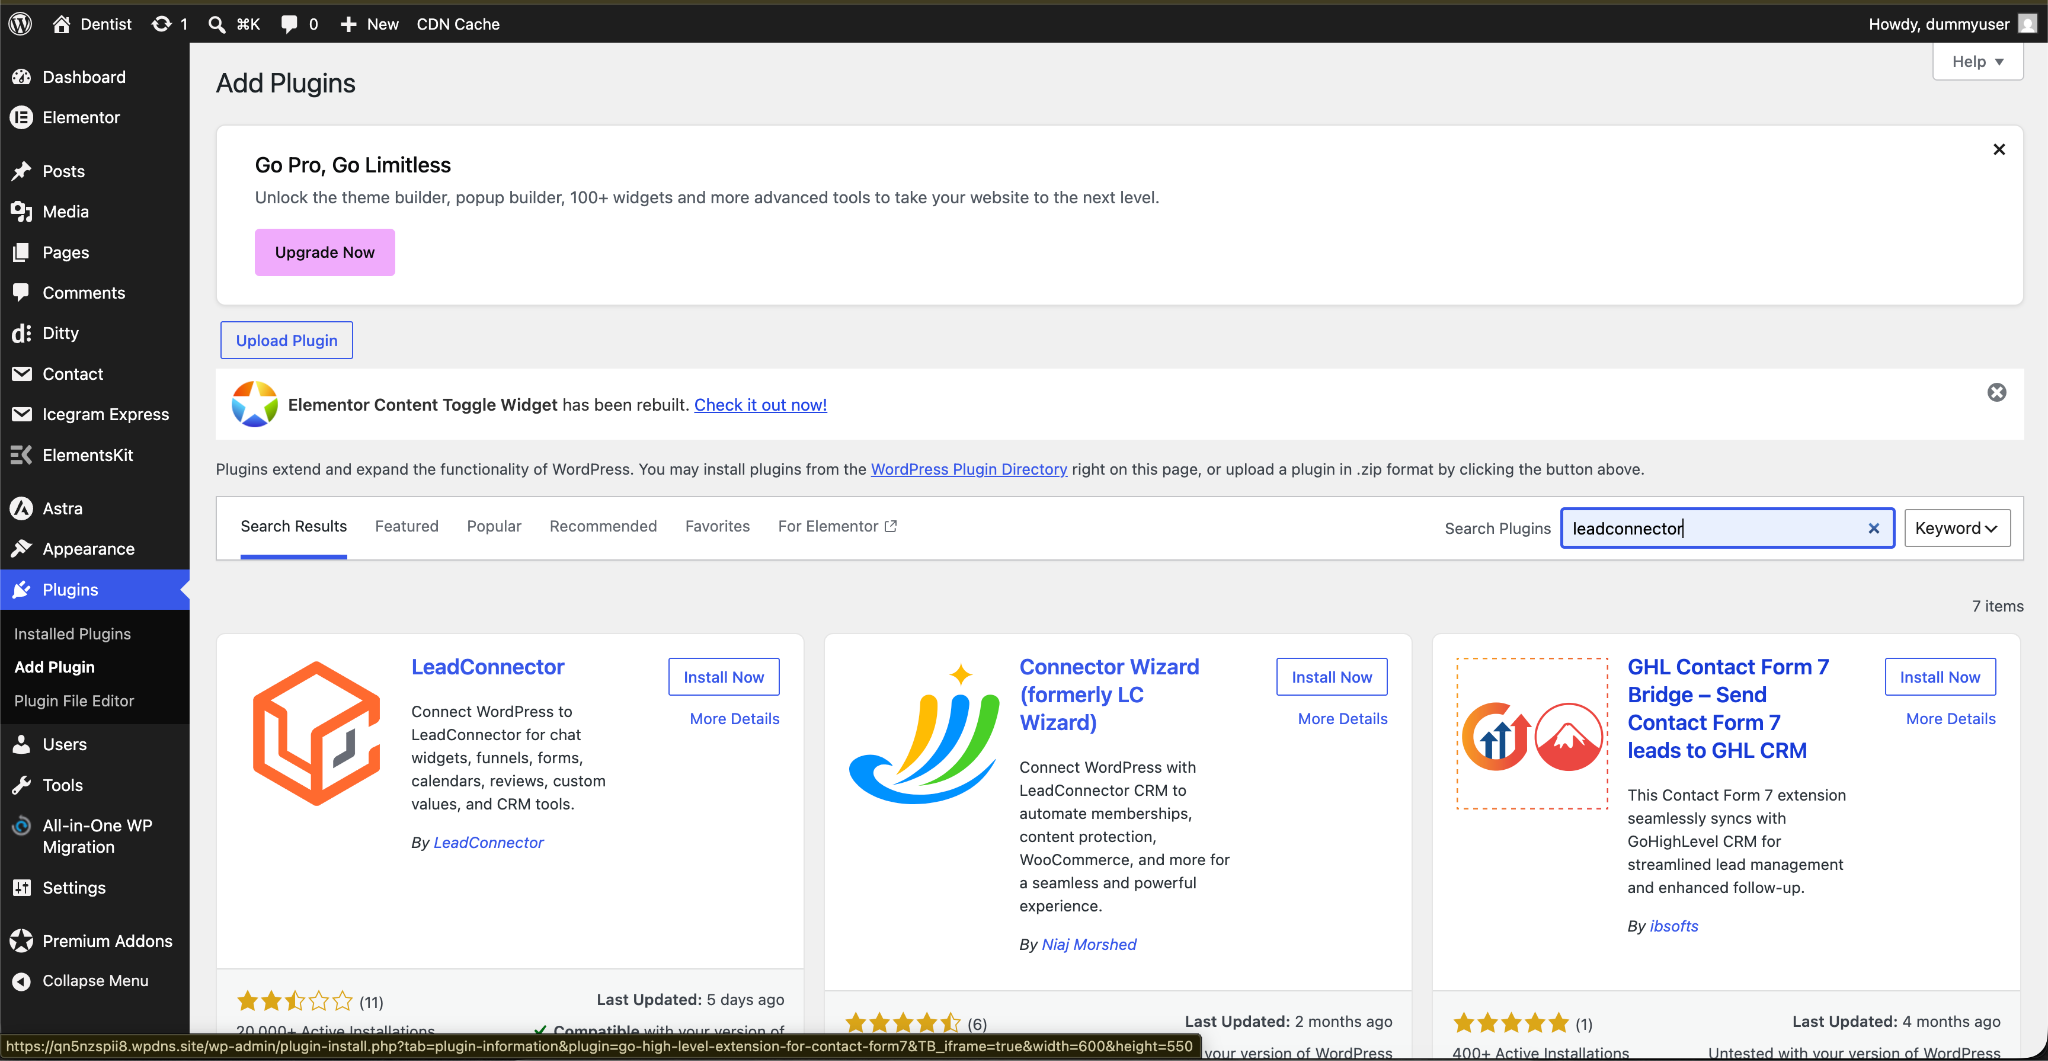
- Open the WordPress admin area and select Plugins > Add New.
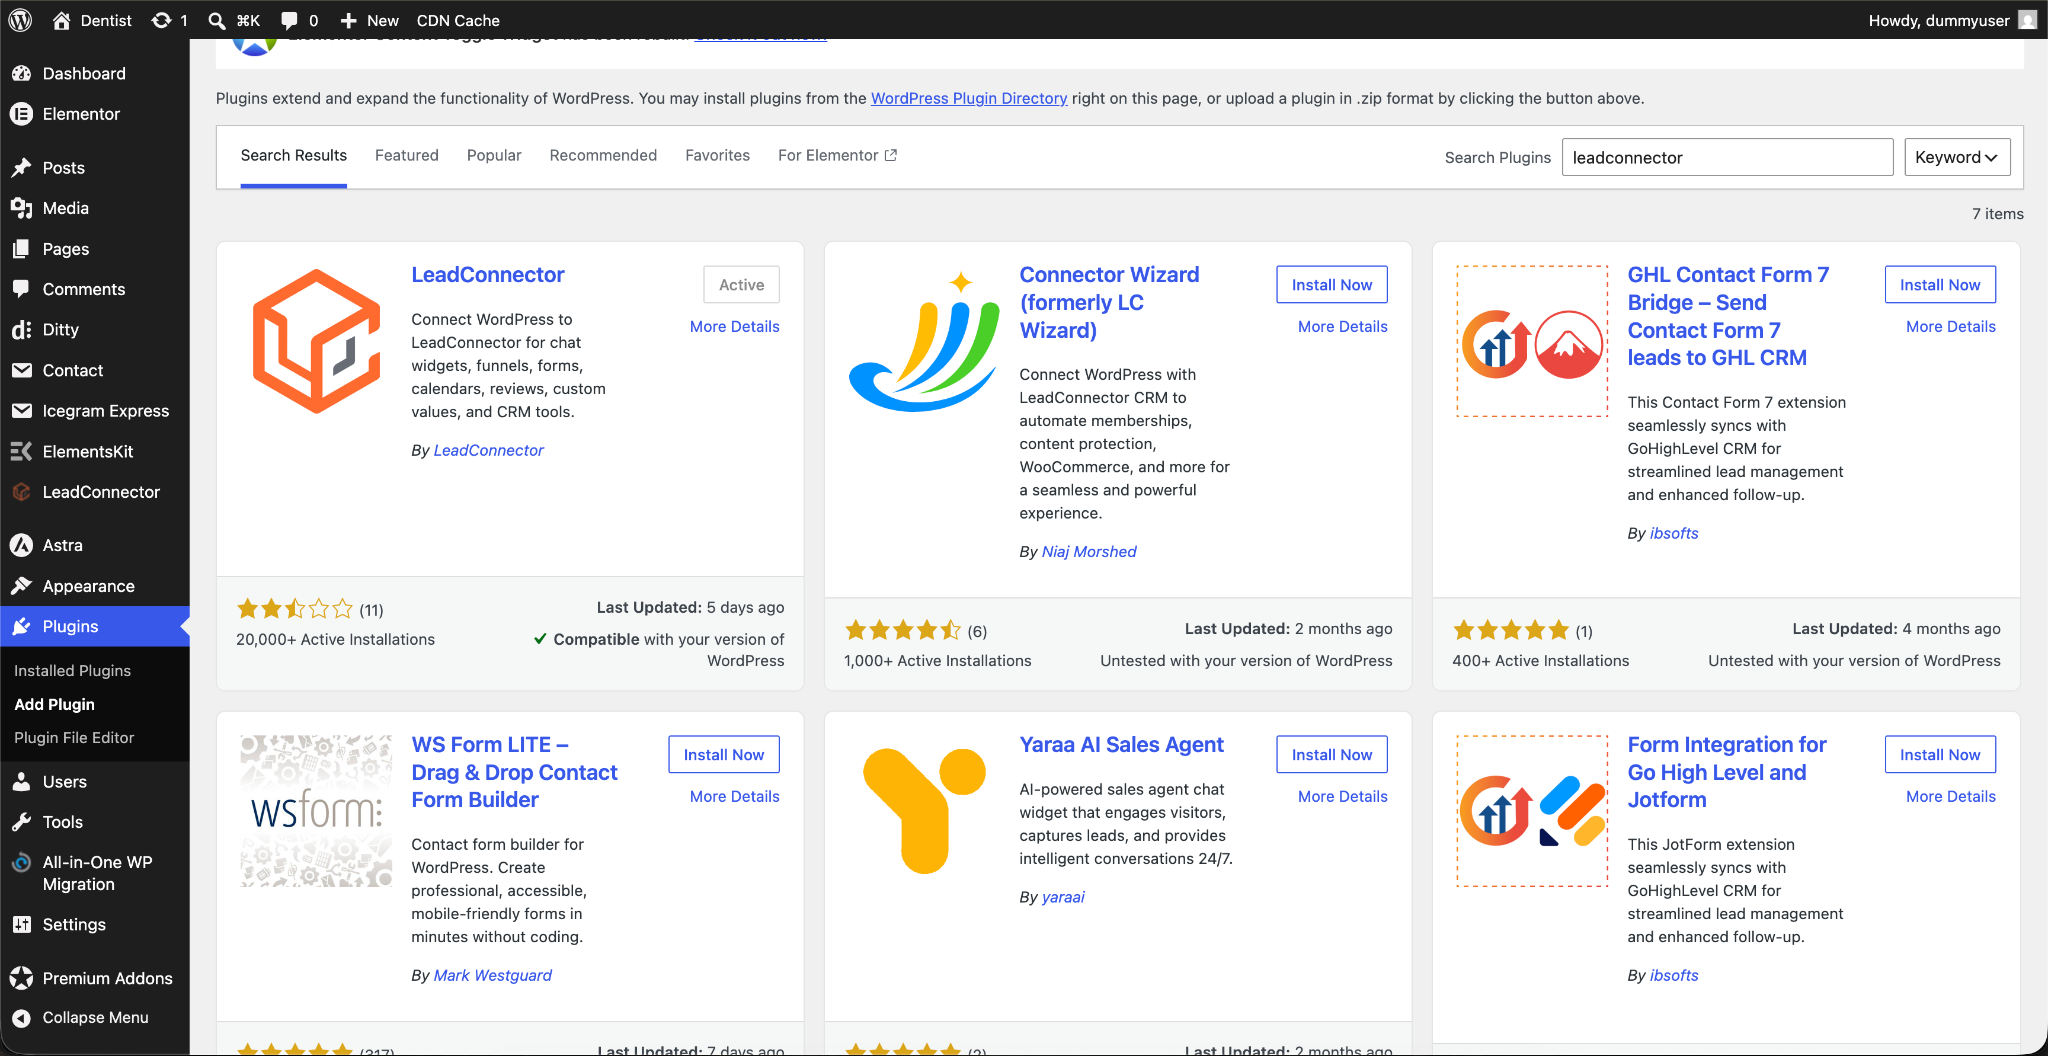
- Search the repository for “LeadConnector”.
- Choose Install Now and then Activate the plugin.
- Inside the LeadConnector section, click Sign In and log into your HighLevel account.
Enable the chat widget
- Open the LeadConnector plugin settings within WordPress.
- Find the Chat Widget options.
- Tick the box labeled Enable Chat Widget.
- Press Save to apply the change.
Embed a funnel into a WordPress page
- Go to LeadConnector > Funnels in the WordPress side menu.
- Click the Add New button.
- Pick the desired funnel and its step from HighLevel dropdown lists.
- Enter a slug for the WordPress page, such as /special offer.
- Save the configuration to publish the funnel page.
Insert a custom value via shortcode
- Write the shortcode [lc_custom_value key="your_key"] in the WordPress editor where the value should appear.
- Replace your_key with the exact custom value key defined in HighLevel, without curly brackets.
- Publish or update the page; the displayed text will reflect the current CRM value.
05What it looks like in HighLevel
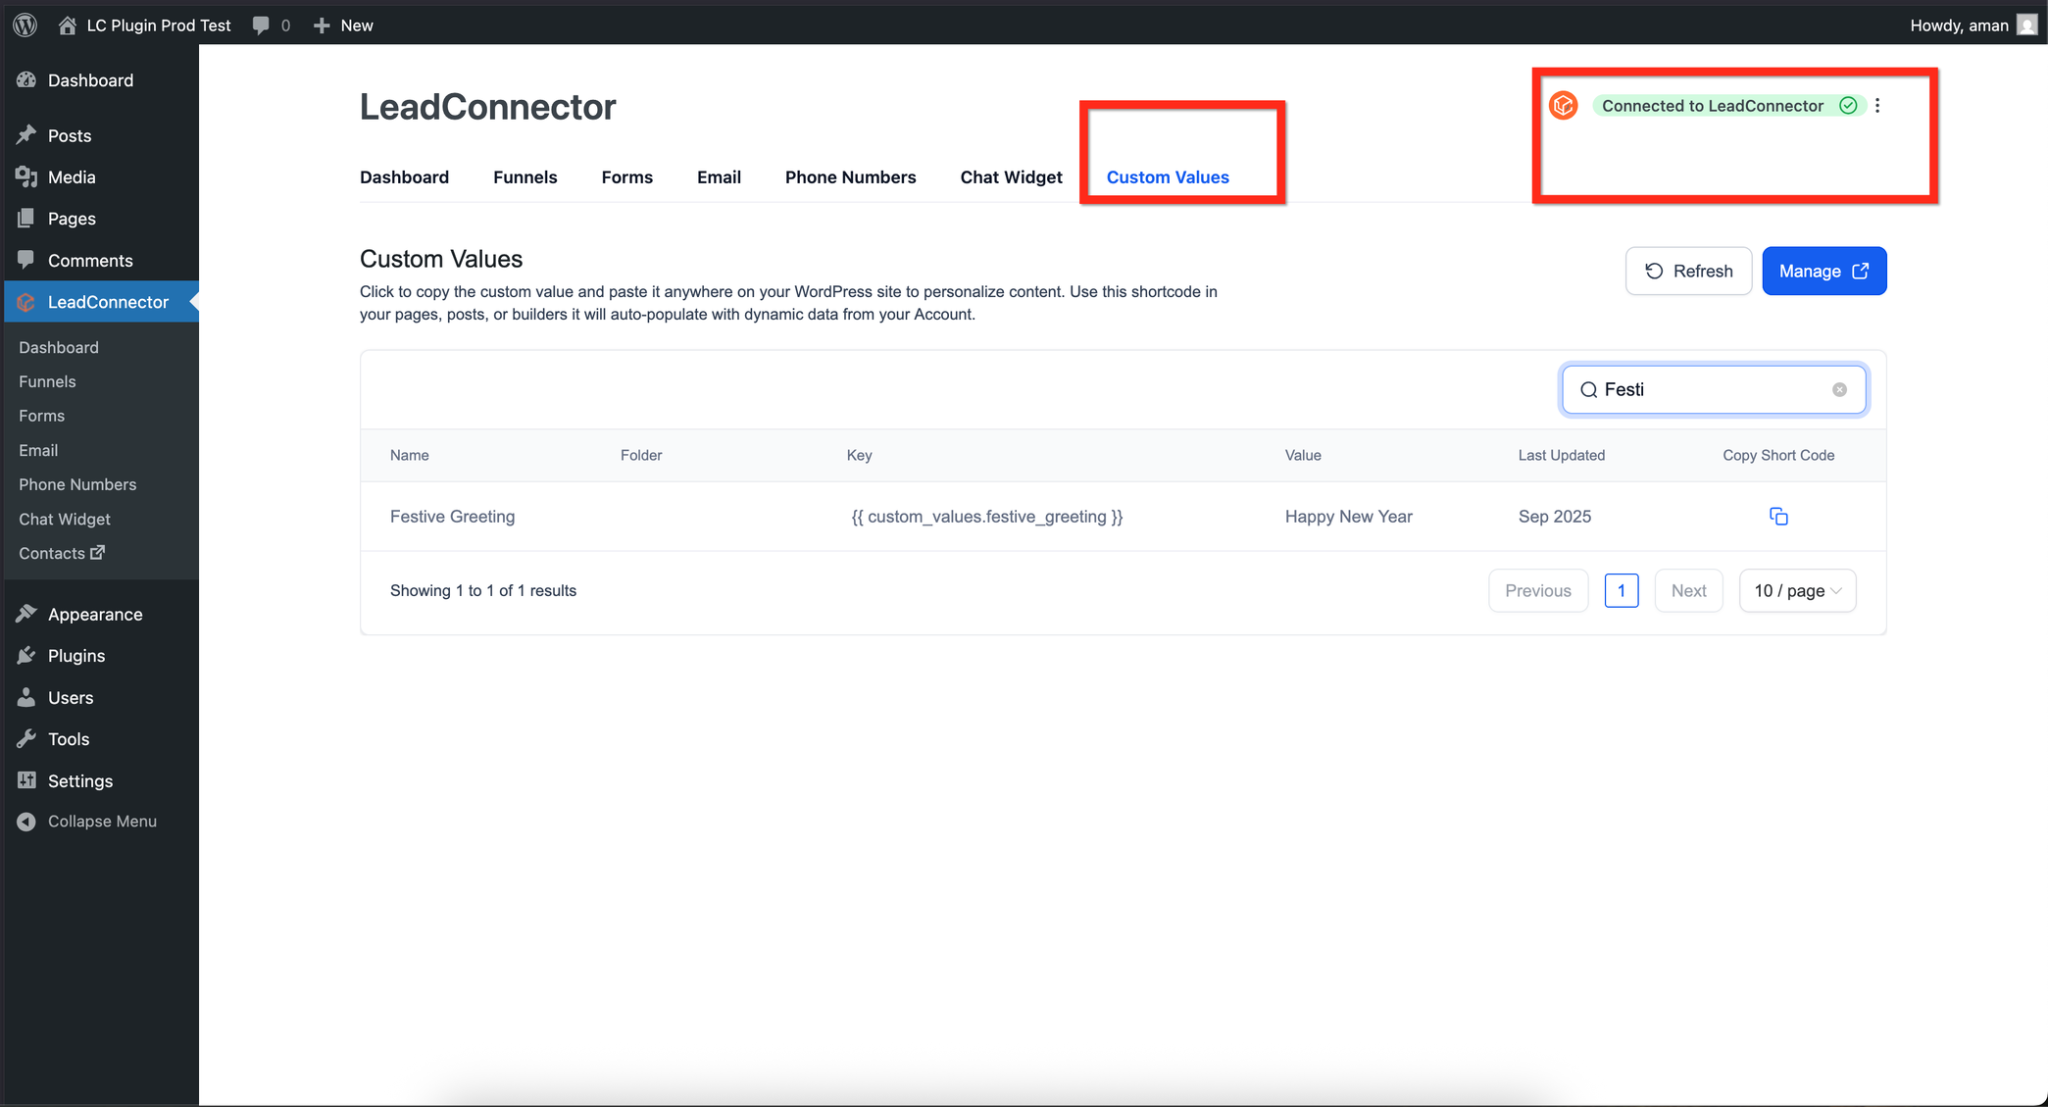
06Settings that matter
- Enable Chat Widget. Controls whether the HighLevel chat widget appears on the WordPress site.
07If something goes wrong
- Chat widget does not appear after enabling it. Clear any WordPress caching plugin, purge server cache, and perform a hard browser refresh.
- Custom value shortcode displays blank text. Confirm the custom value contains data in HighLevel and that the shortcode uses the exact key name without curly brackets.
- Plugin shows as “Disconnected”. Replace the old API key in the LeadConnector tab with the newly generated key and save.
08How it connects to the rest of HighLevel
- Manage plugin and theme updates within HighLevel WordPress plugin and theme management
- Set up WordPress hosting for clients in HighLevel WordPress hosting guide
- Activate a WordPress hosting plan in HighLevel WordPress hosting activation
Michael's take

The LeadConnector plugin is a quick win for any small business that wants its HighLevel to show up on a WordPress site without fiddling with code. It lets you add chat, funnels and live data updates in a few clicks, turning a static site into a lead generation engine.
Don’t forget to clear your site cache if the widget or shortcodes don’t appear right away.