
01Who this is for
- Founders of digital agencies need a single pane to manage plugins, backups and analytics for many client sites.
- Coaching business owners benefit from quickly checking site status, uptime and performance without leaving the platform.
02WordPress site menu, explained
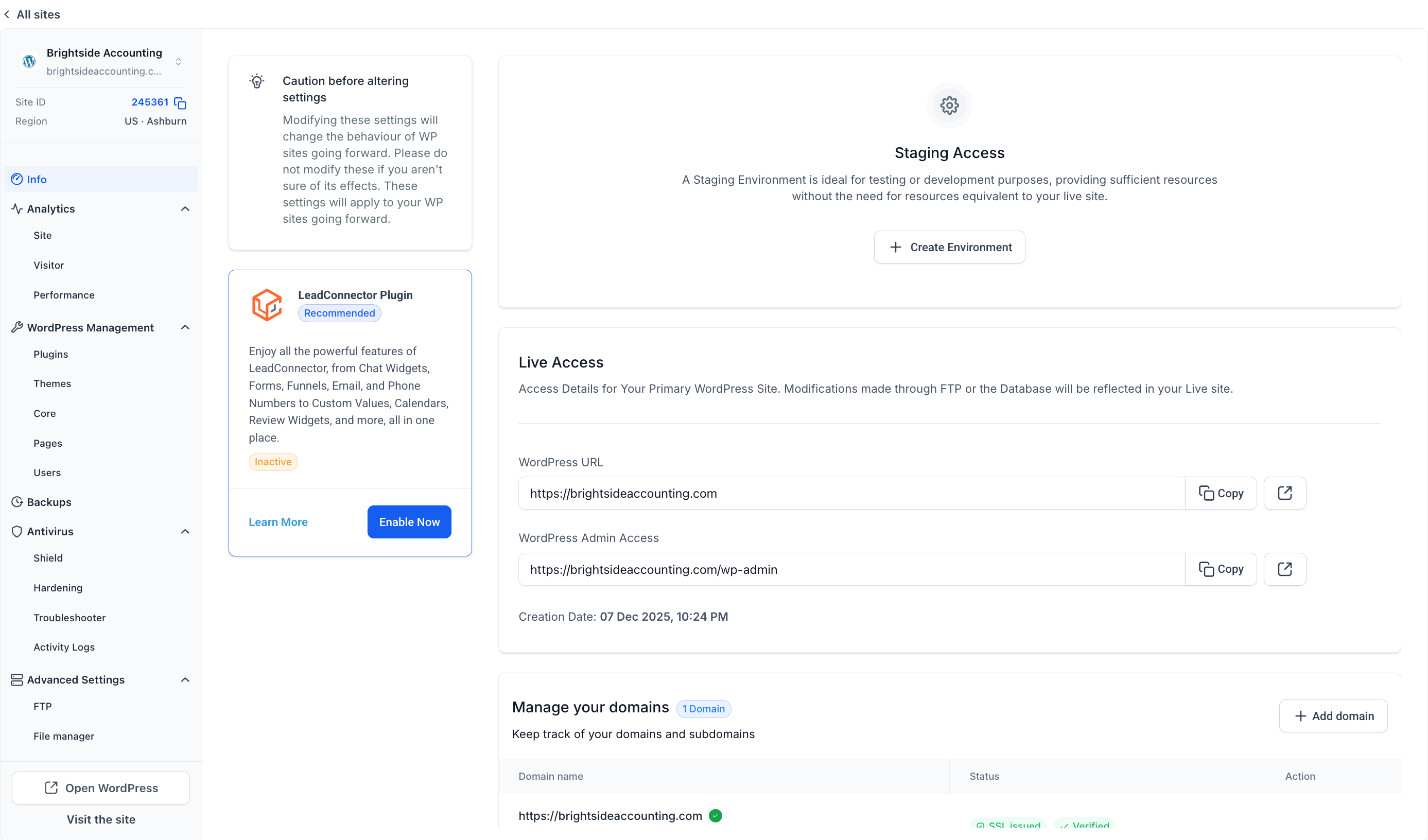
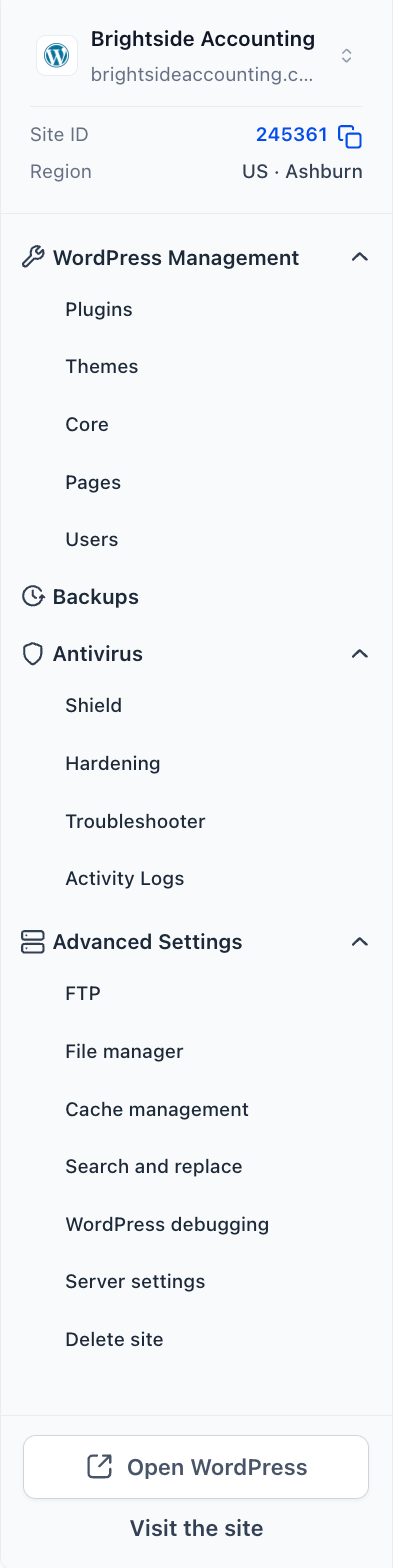
The menu appears on the left side of every WordPress site page. At the top it displays basic identifiers such as the site name, URL, Site ID and the region where the server resides. Below that, tools are organized into collapsible groups: Info, Analytics, WordPress Management, Backups, Antivirus and Advanced Settings. At the bottom, two buttons give direct access to the WordPress dashboard and the live site.
Each group can be expanded or collapsed with a small arrow. The Antivirus group now includes the Troubleshooter and Activity Logs alongside Shield and Hardening. The Advanced Settings group hosts FTP, file manager, cache controls, search and replace, debugging, server options and a Delete site action. The layout lets users reach any function with a single click from the same page.
03How businesses use New WordPress Site Menu
- Digital marketing agency. The agency opens a client’s site, expands the WordPress Management group, and updates plugins or themes directly. It then checks the Backups group to confirm a recent backup before publishing changes.
- Ecommerce store owner. The store owner visits the Analytics group to view visitor and performance data, then uses the Advanced Settings cache management to clear cache after a product update.
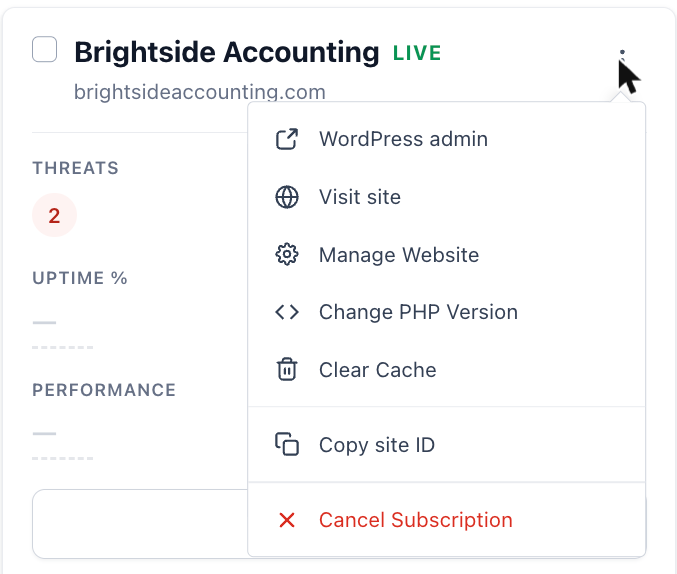
- Coaching business. The coach switches between multiple site entries using the top menu arrow, reviews the Status and Uptime columns in the sites list, and clicks Visit site to confirm the landing page is live.
04The numbers and rules that matter
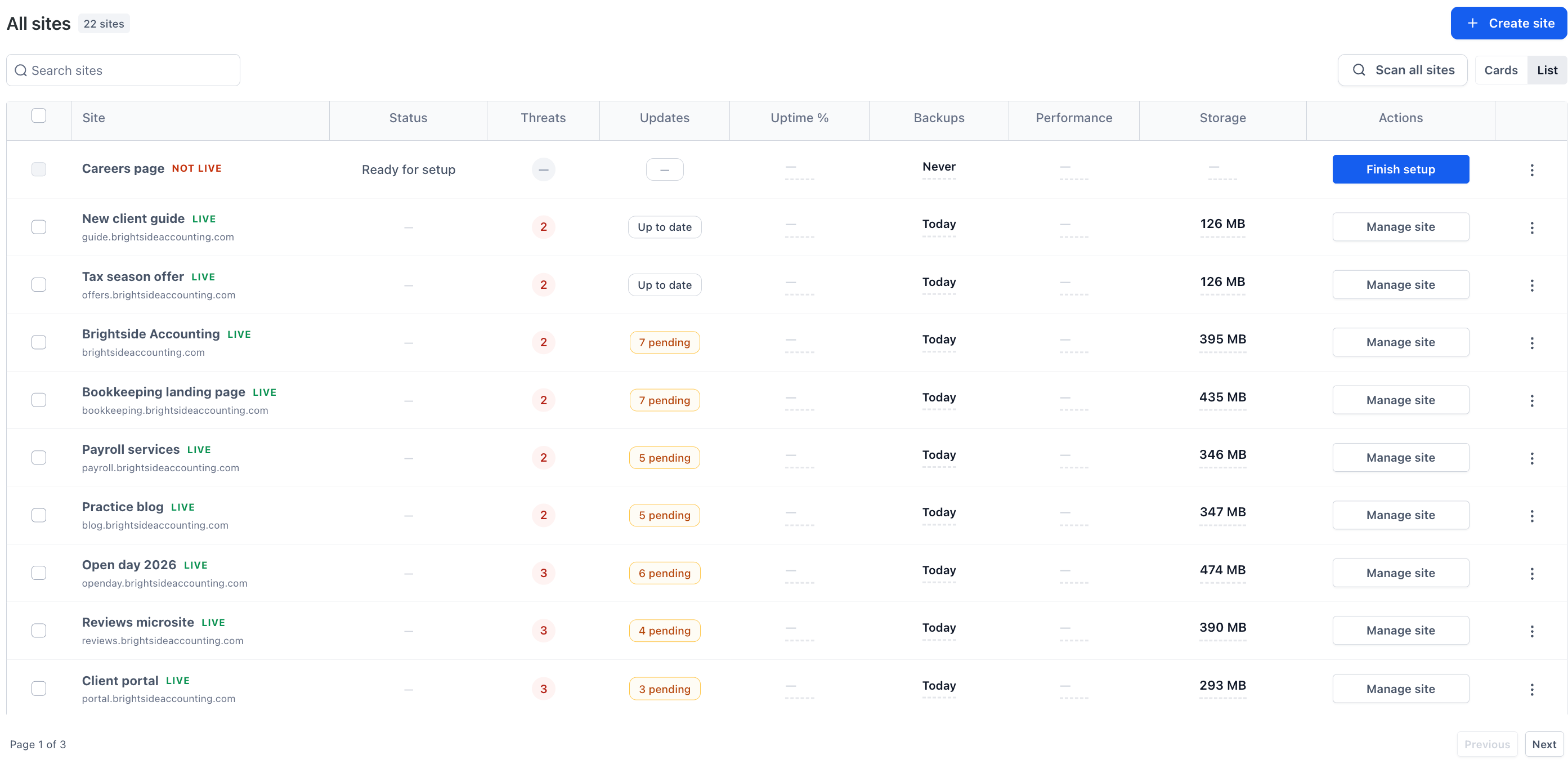
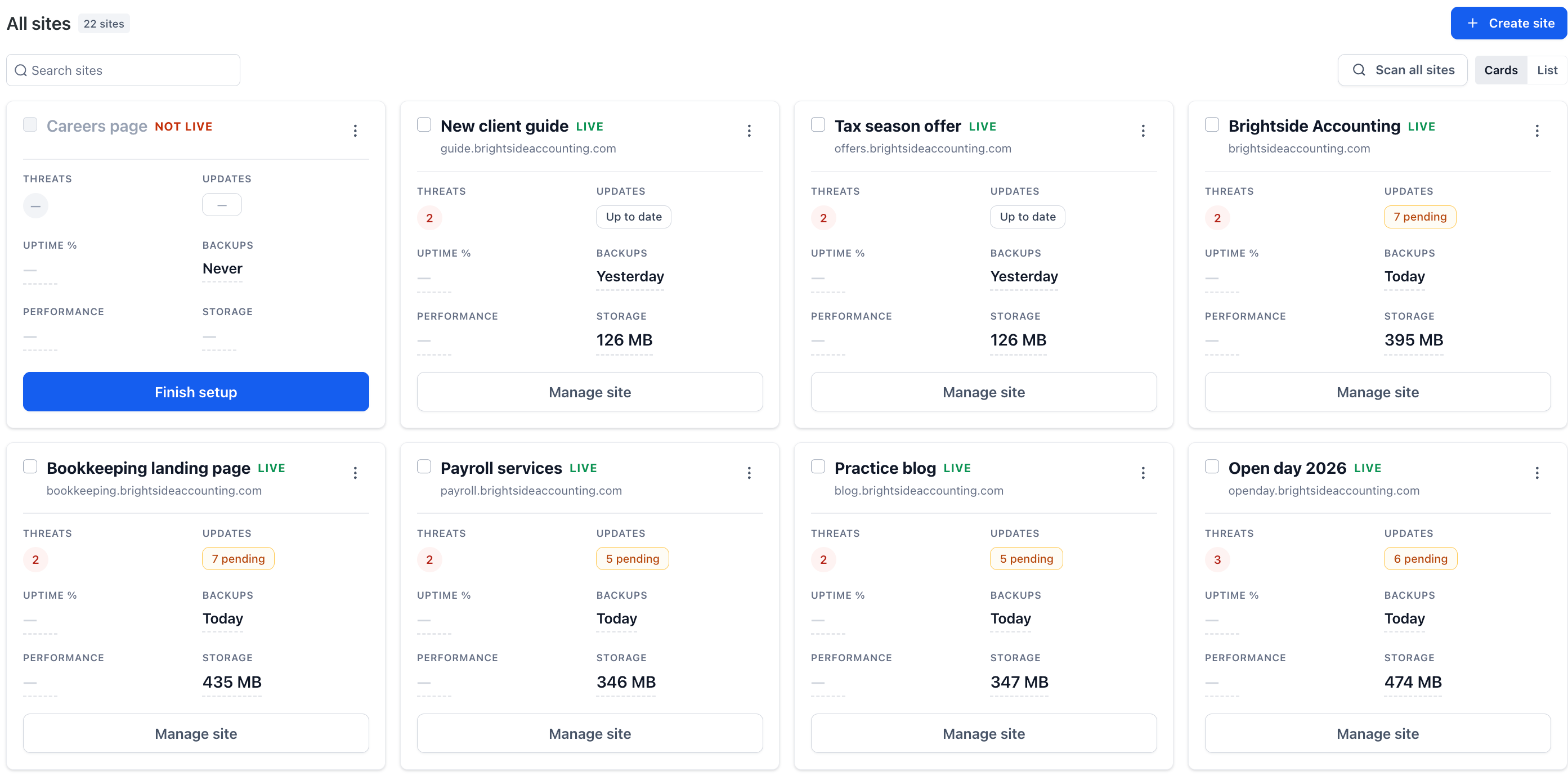
- Sites list columns: Status, Threats, Updates, Uptime %, Backups, Performance, Storage.
05How to set up and use New WordPress Site Menu in HighLevel
Open a site
- Select Sites from the main navigation.
- Click the WordPress submenu.
- Find the desired entry in the table.
- Press Manage site (or Finish setup for unfinished sites) to load the Info view.
Switch between sites
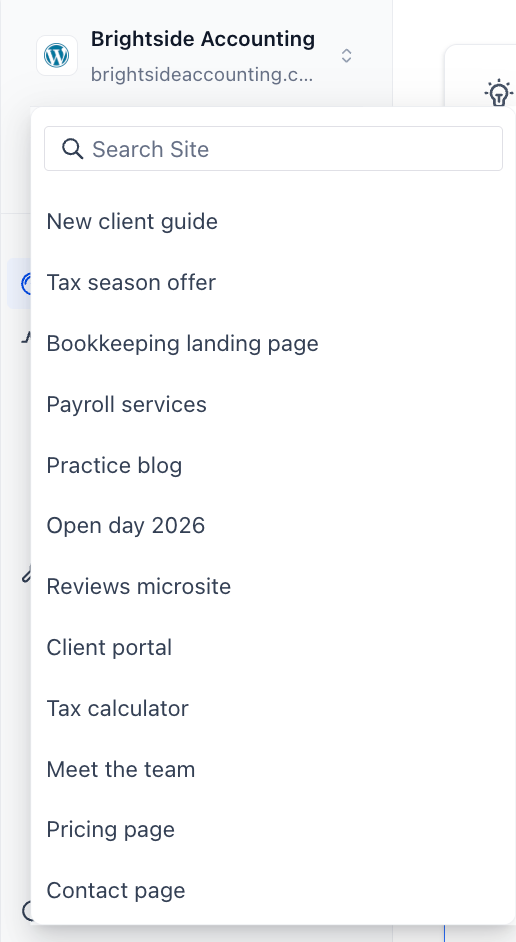
- In the left hand menu, click the arrow next to the site name at the top.
- Search for the target site or pick it from the dropdown list.
- The chosen site opens on the same page layout.
- To return to the full sites list, click All sites at the top of the page.
Use the sites list
- Navigate to Sites > WordPress.
- Enter a name in the Search sites box to filter results.
- Toggle between List and Cards view using the provided buttons.
- Check the columns for each entry: Status, Threats, Updates, Uptime %, Backups, Performance, Storage.
- Click the row’s action button, such as Manage site or Finish setup.
- Advance through pages with the Previous and Next controls.
06What it looks like in HighLevel
07Settings that matter
- PHP Version. Controls which version of PHP the selected WordPress site runs on.
08How it connects to the rest of HighLevel
- Manage plugins and themes for each WordPress site Plugin & Theme Management
- Clone an existing WordPress site for agency projects Clone WordPress Sites
- Review HighLevel pricing and plans for WordPress hosting Pricing
Michael's take

The new WordPress site menu is a tidy way to keep every tool and metric in one place.