
01Who this is for
- Ecommerce owners who want quicker load times for shoppers in a specific country.
- Marketing agencies that manage client sites across multiple continents and need regional data residency.
- SaaS Founders serving a regional user base and requiring consistent hosting location for compliance.
02Country server selection, explained
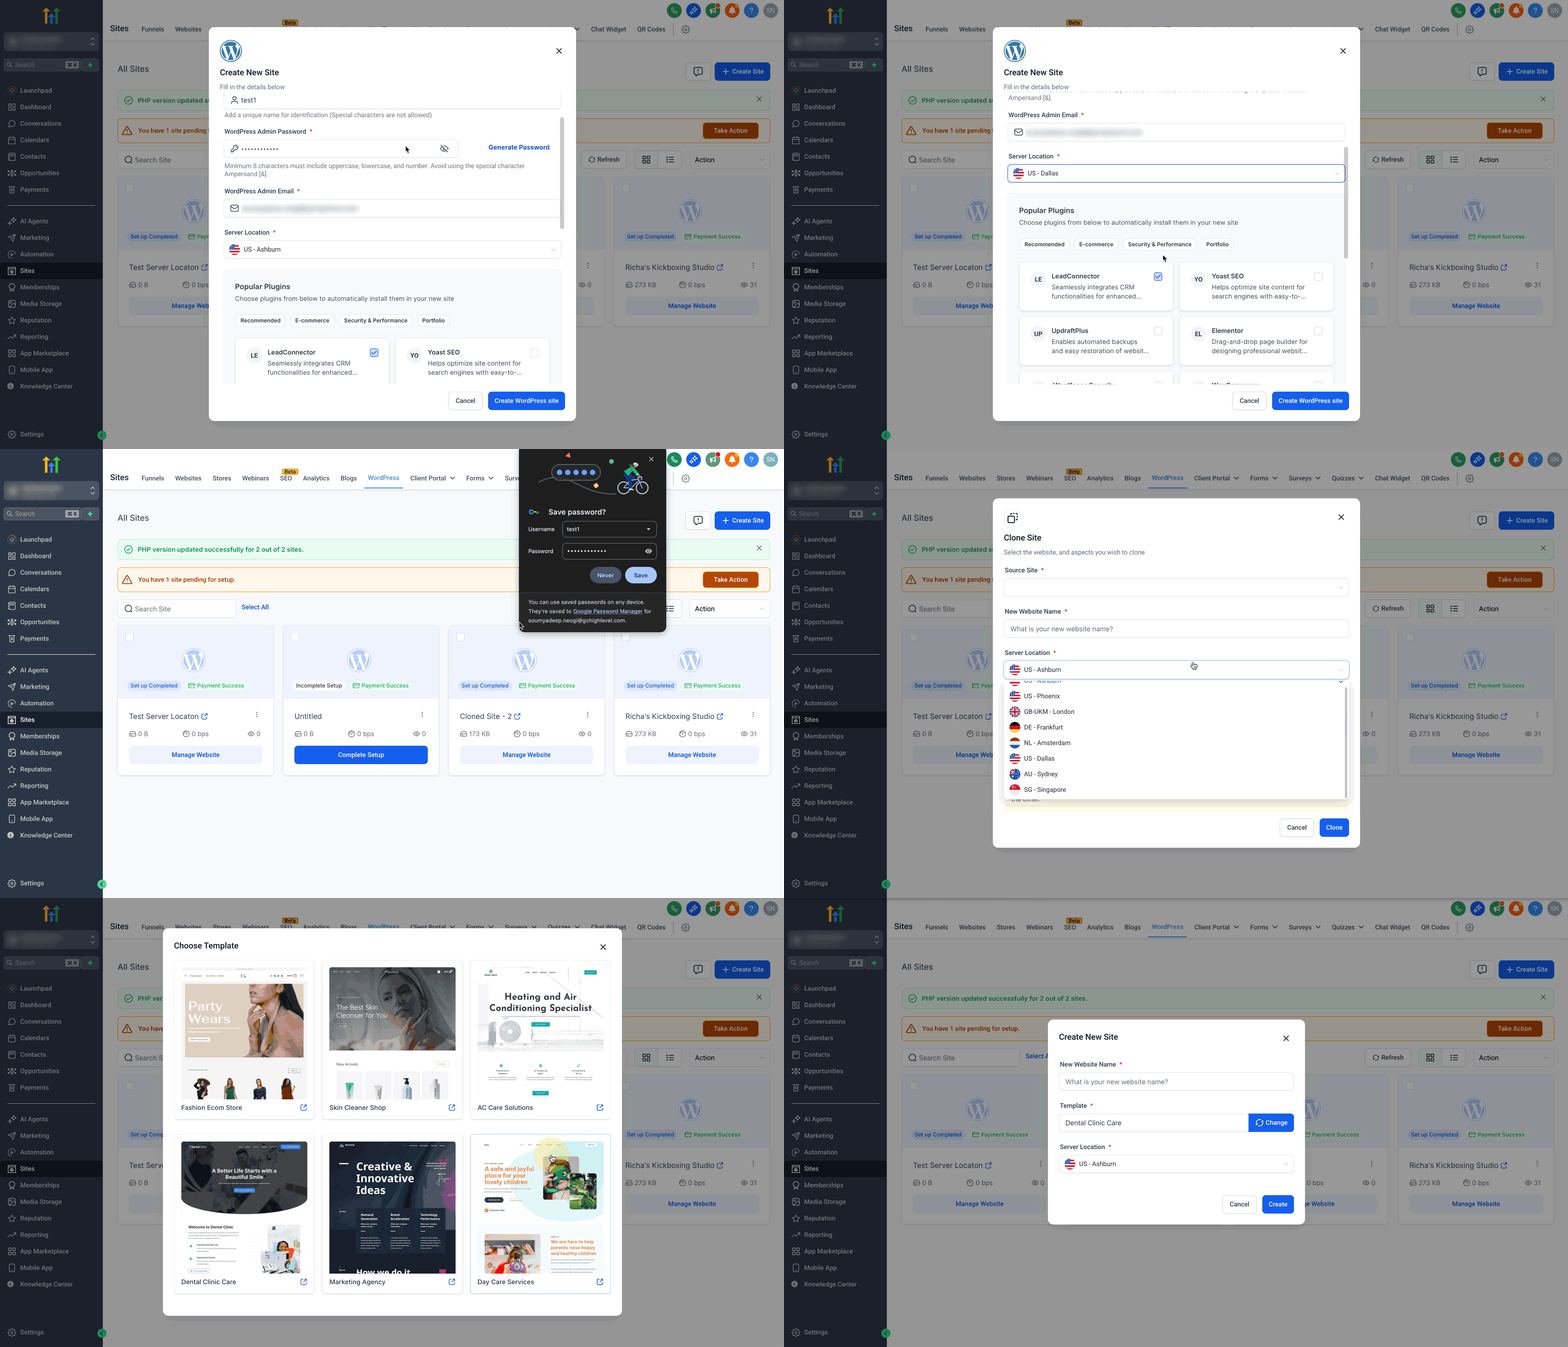
The feature adds a server region picker to the standard WordPress site creation flow. When you start a new site you can select a data center such as Ashburn, London, or Sydney before the server is provisioned. The selection is saved in the site’s metadata and appears on the site card in the dashboard.
Once the server spins up, the region becomes immutable. Changing the location later requires cloning the site to a new region or deleting and recreating it, which can result in data loss. The option is available for blank, cloned, and templated site setups and does not affect the hosting price.
03How businesses use country server selection
- Local retailer. The retailer creates a new WordPress site, chooses the US, Ashburn data center because most customers are on the East Coast, and launches the site. The region stays locked, ensuring consistent load times for nearby shoppers.
- International consulting firm. The firm selects the EU, Frankfurt location when building a client portal, keeping EU traffic on EU servers for compliance. The chosen region cannot be altered after the site is live.
- Online education platform. The platform picks the AU, Sydney data center for an Australian audience during site creation. The server location remains fixed, providing faster access for students in that region.
04The numbers and rules that matter
- Available locations: US, Ashburn, US, Phoenix, US, Dallas, GB, London, DE, Frankfurt, NL, Amsterdam, AU, Sydney, SG, Singapore.
05Before you start
- A subaccount with access to the Sites section must exist.
06How to set up and use country server selection in HighLevel
Start creating a site
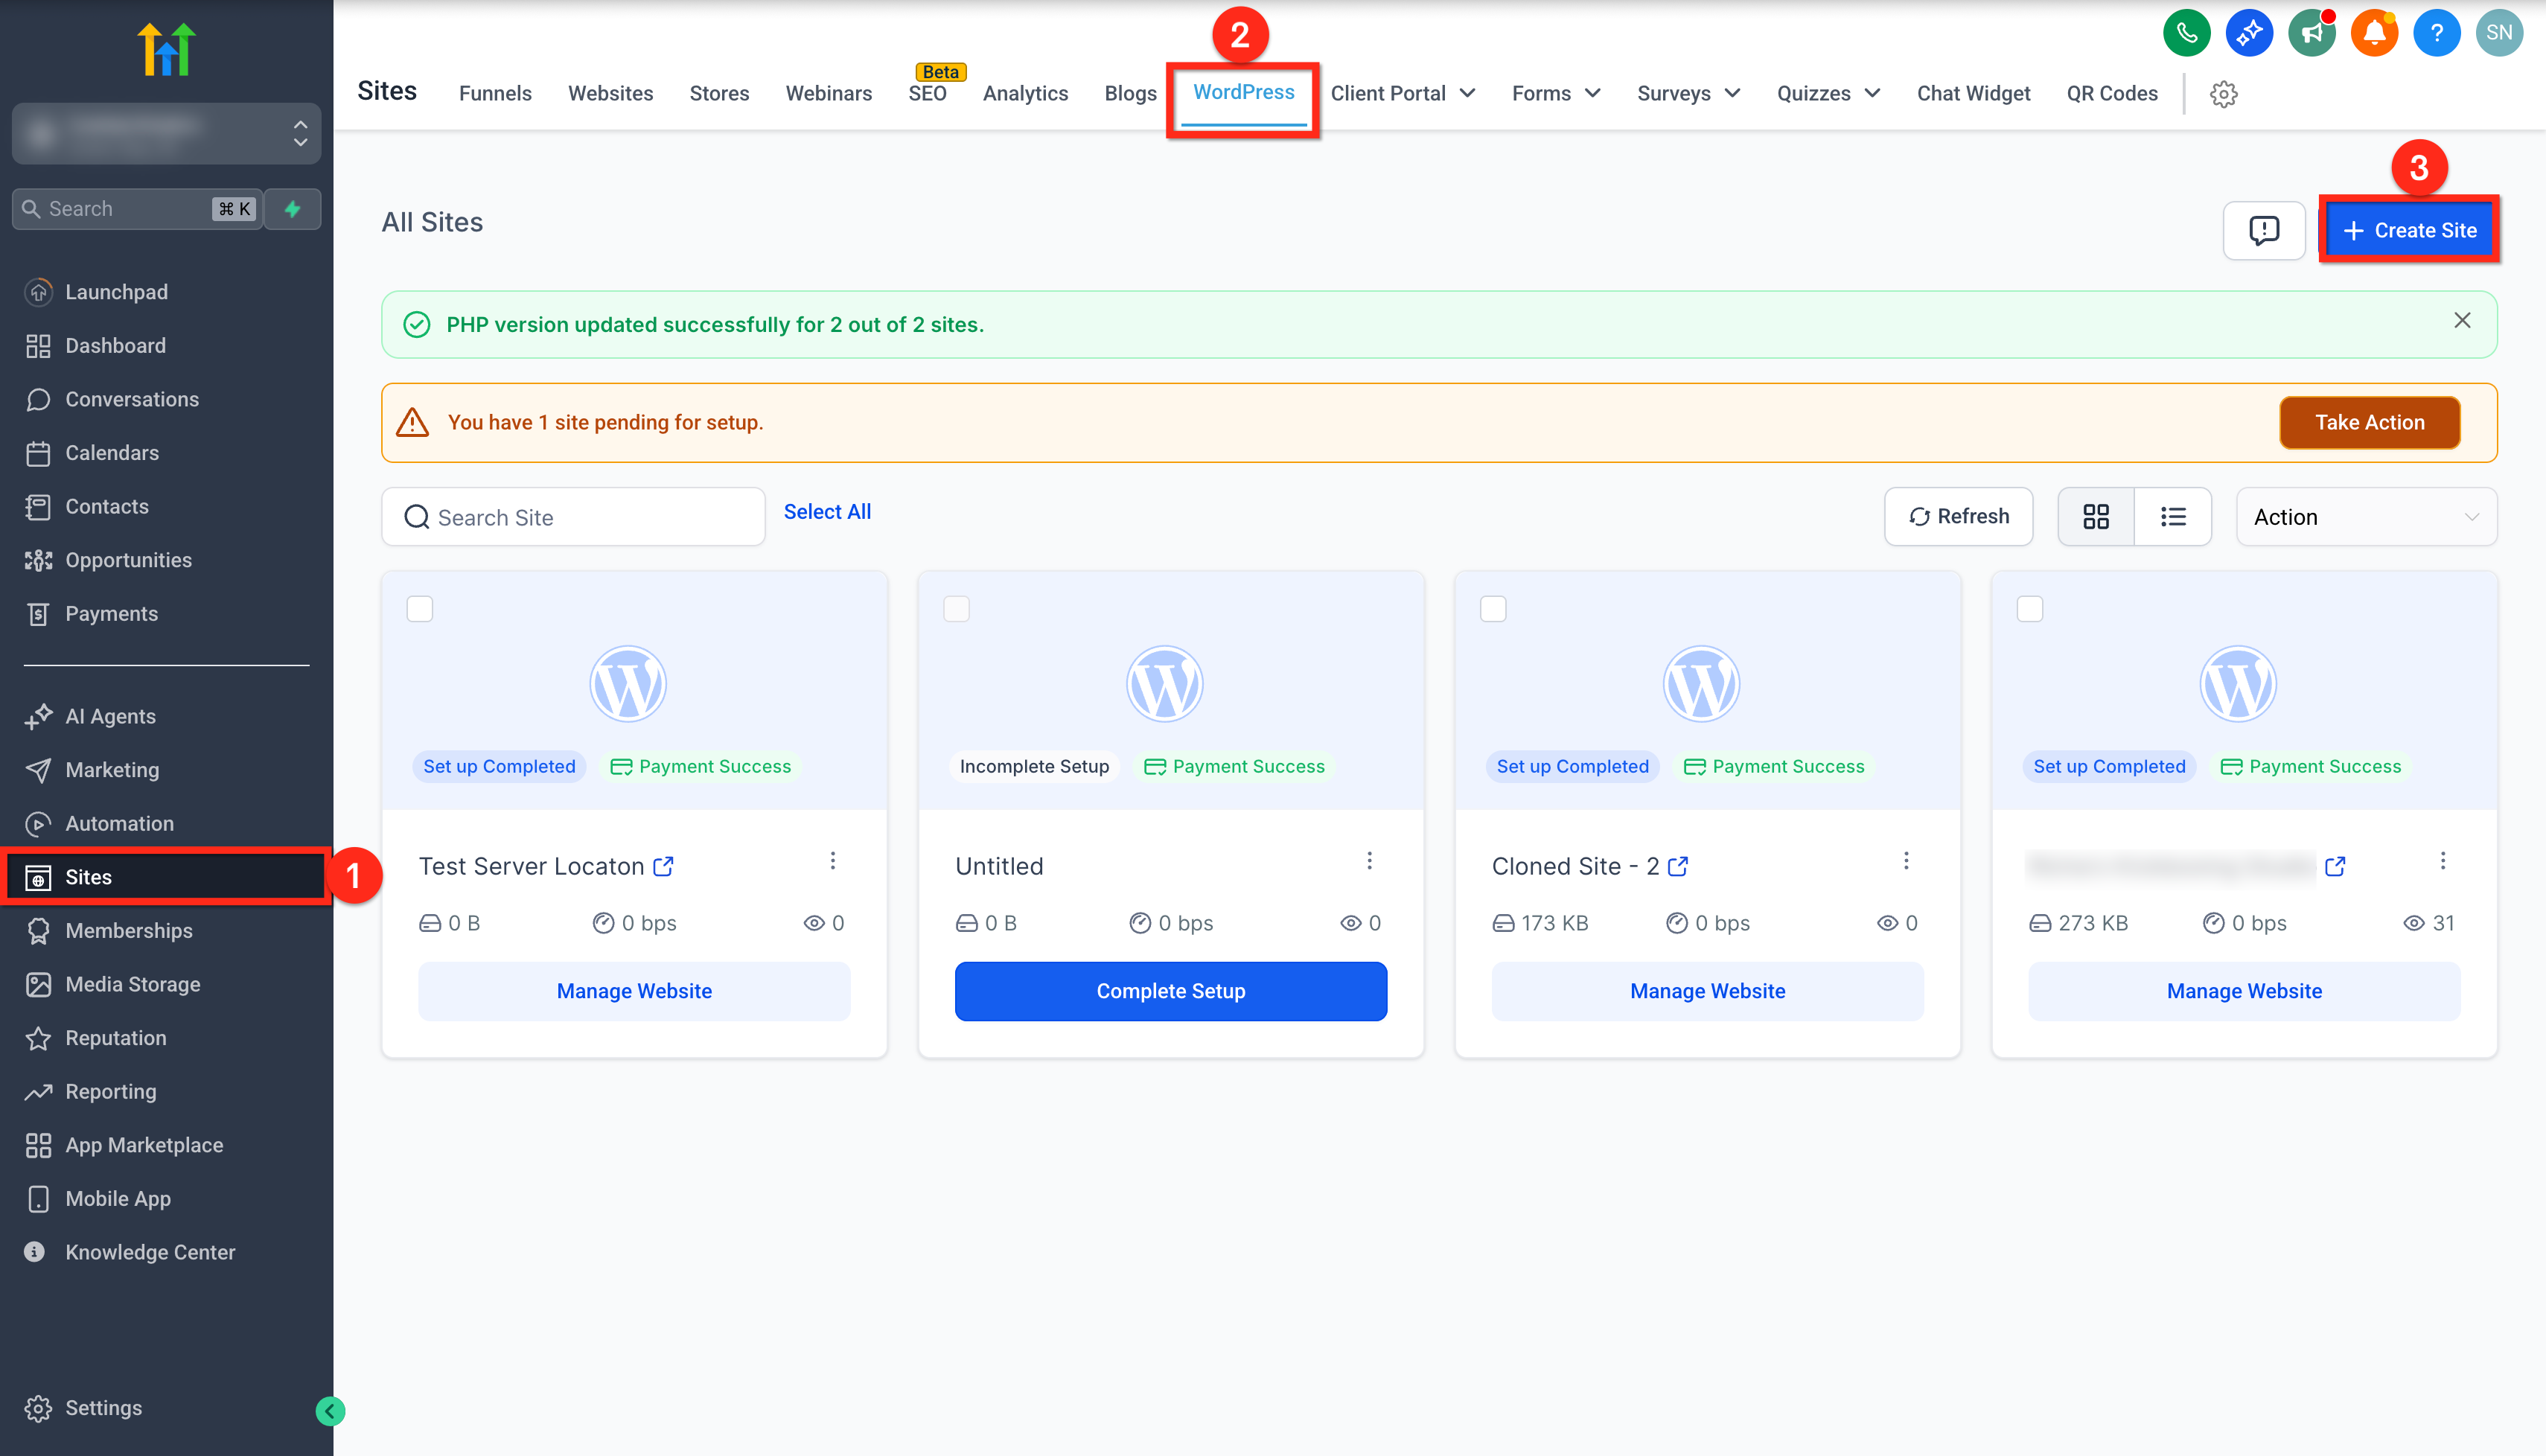
- Log in to your subaccount and select Sites from the left navigation.
- Click the WordPress tab.
- Press the + Create Site button.
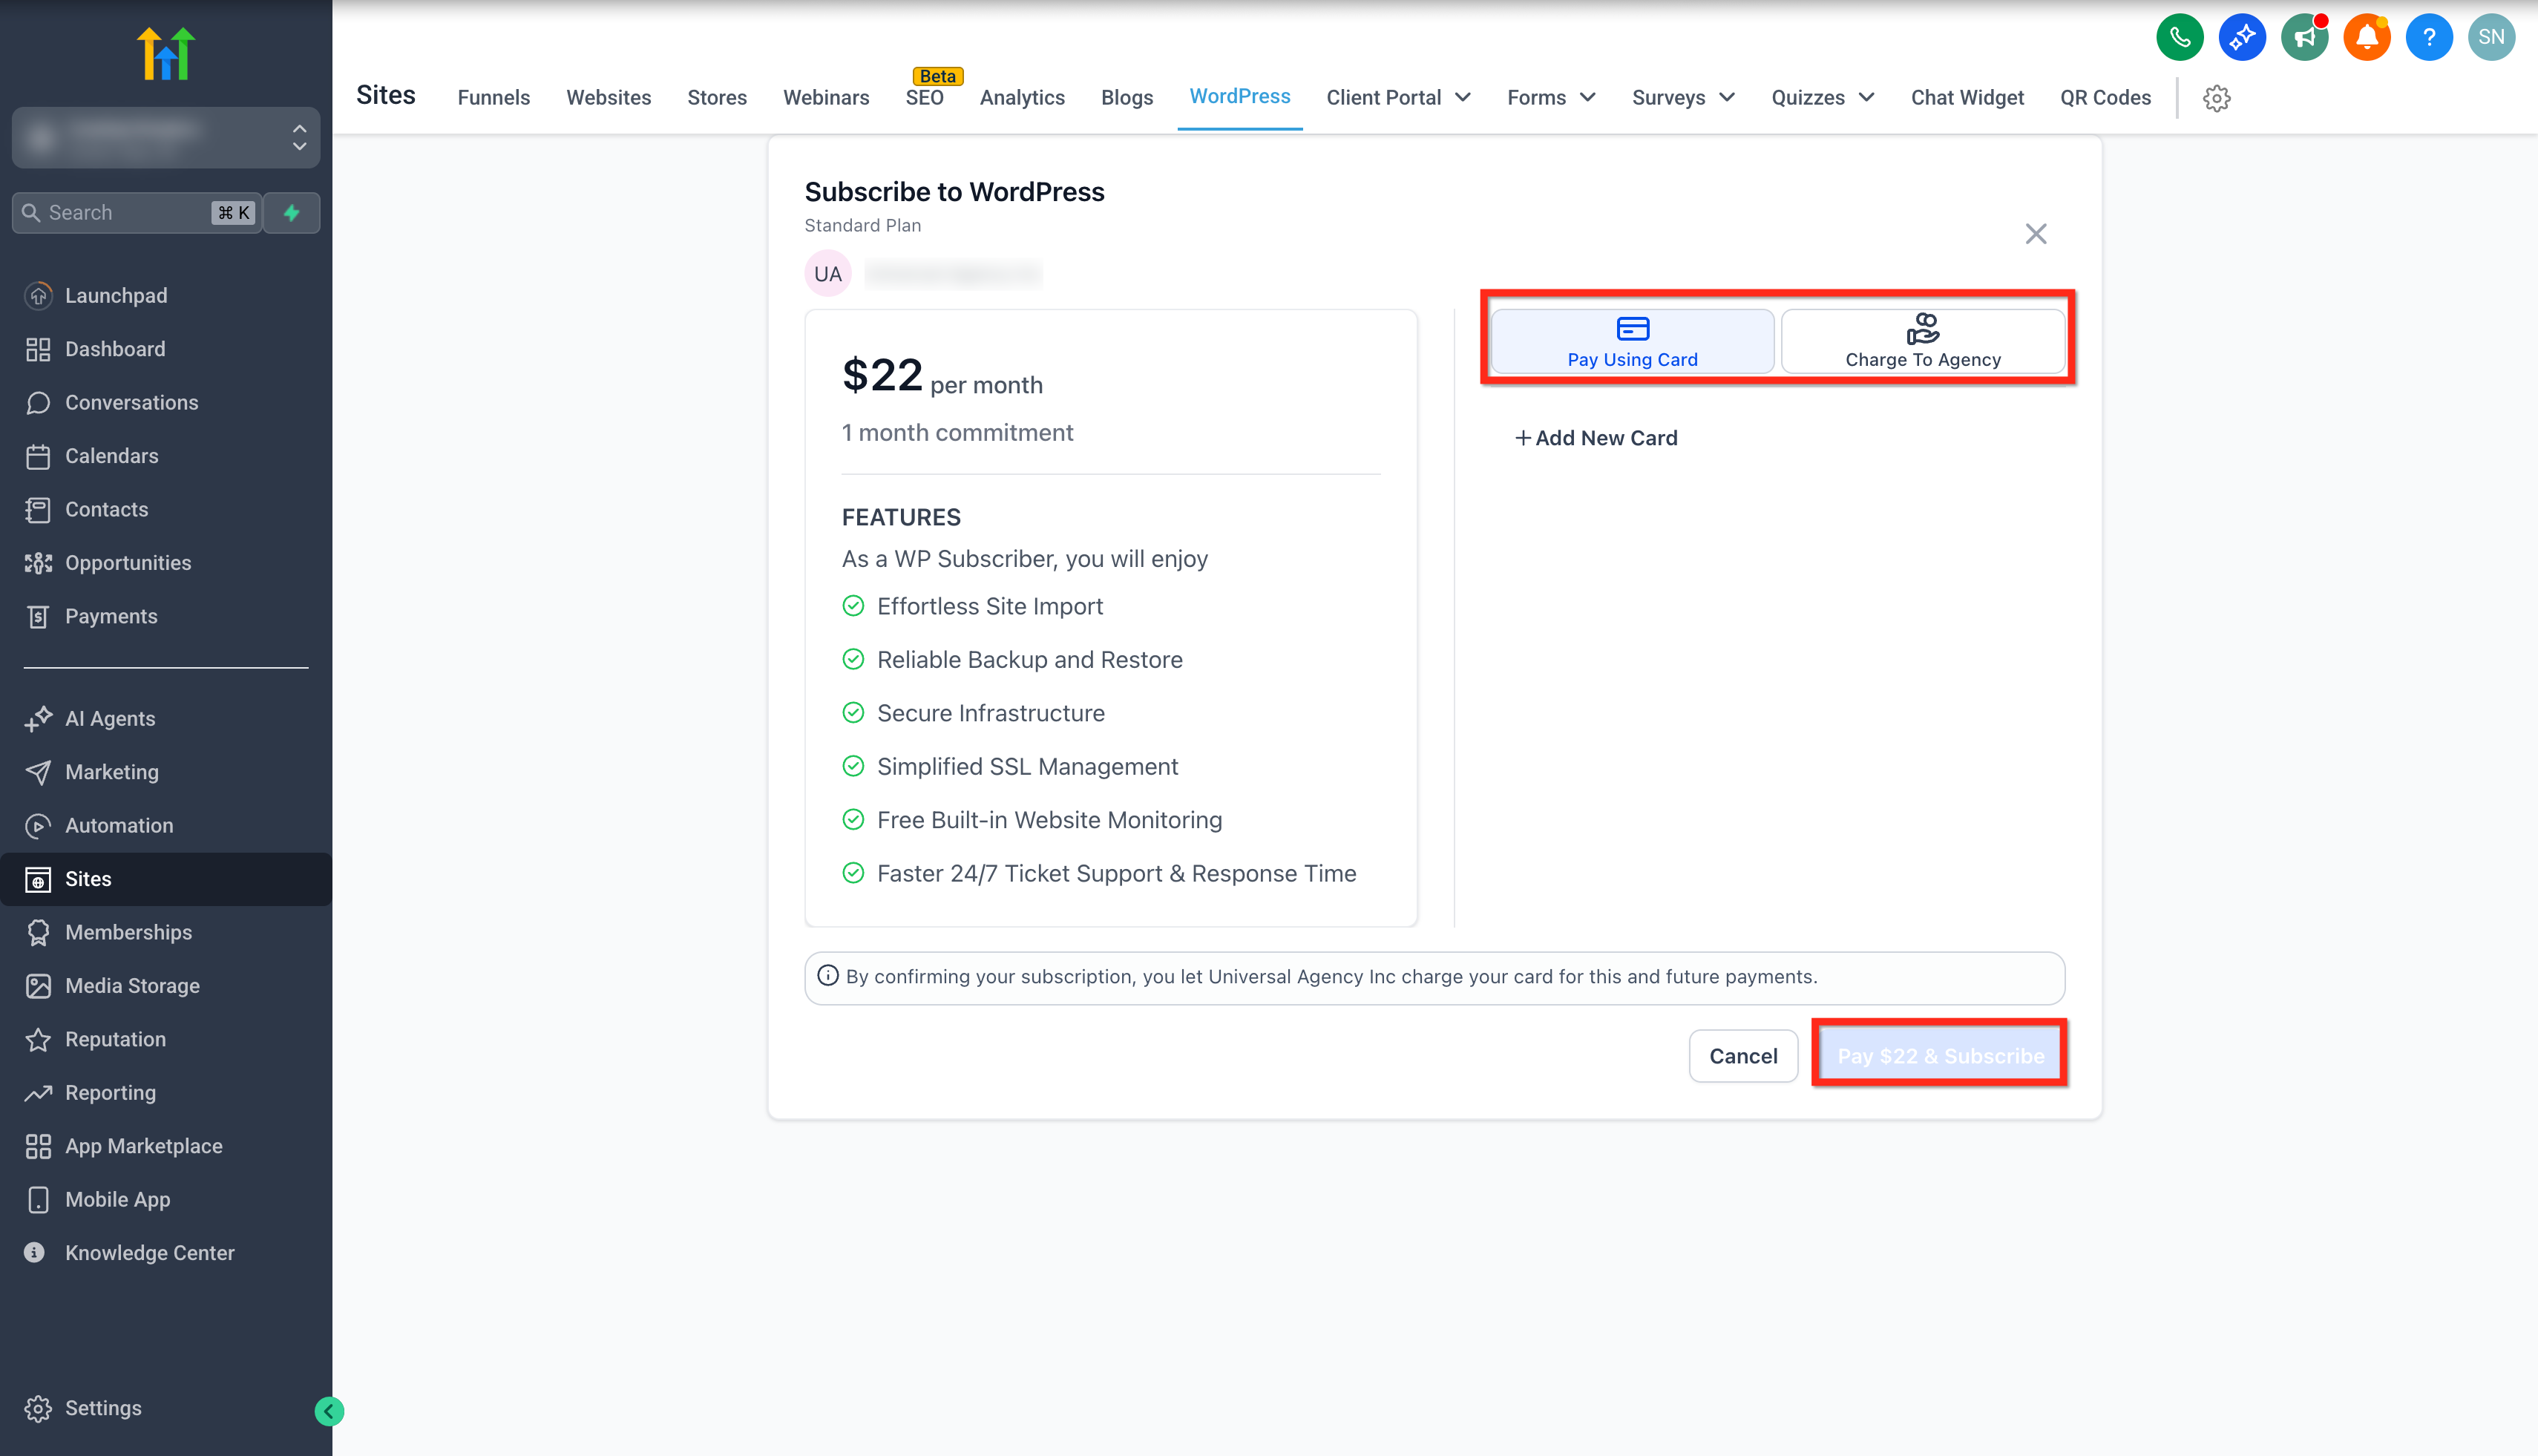
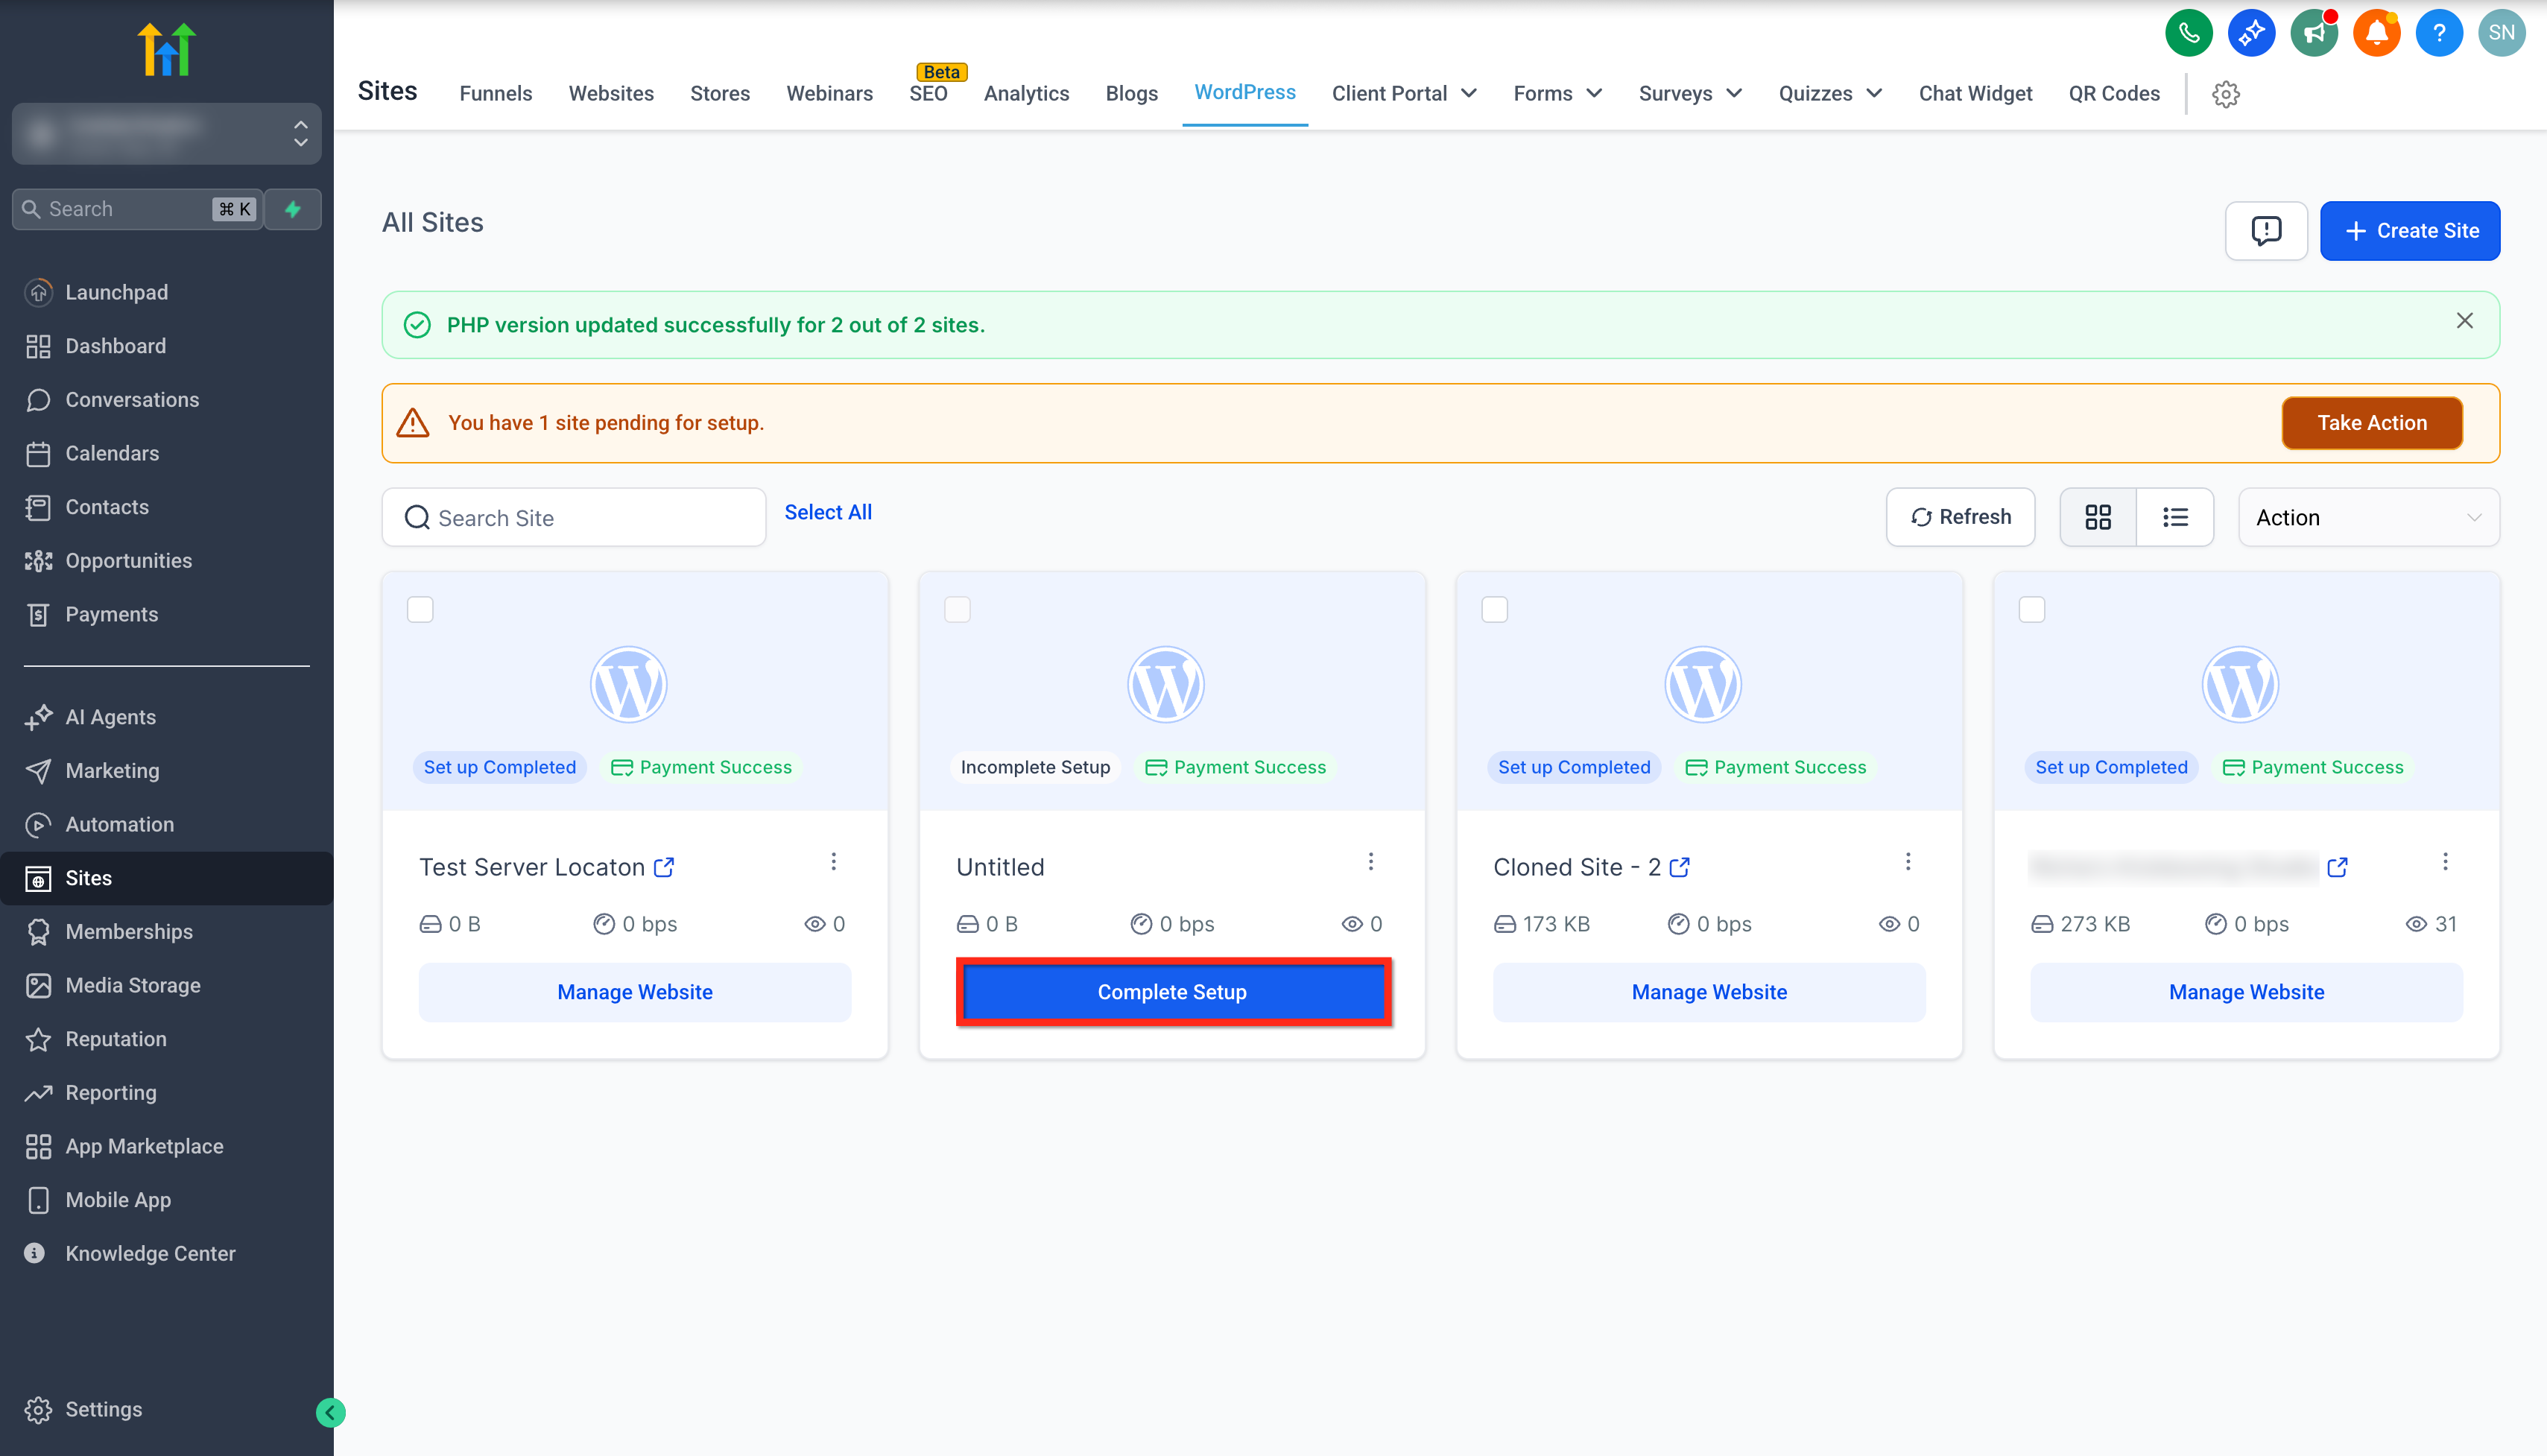
- Subscribe to a WordPress plan or click Complete Setup on an existing subscription.
Choose a setup method
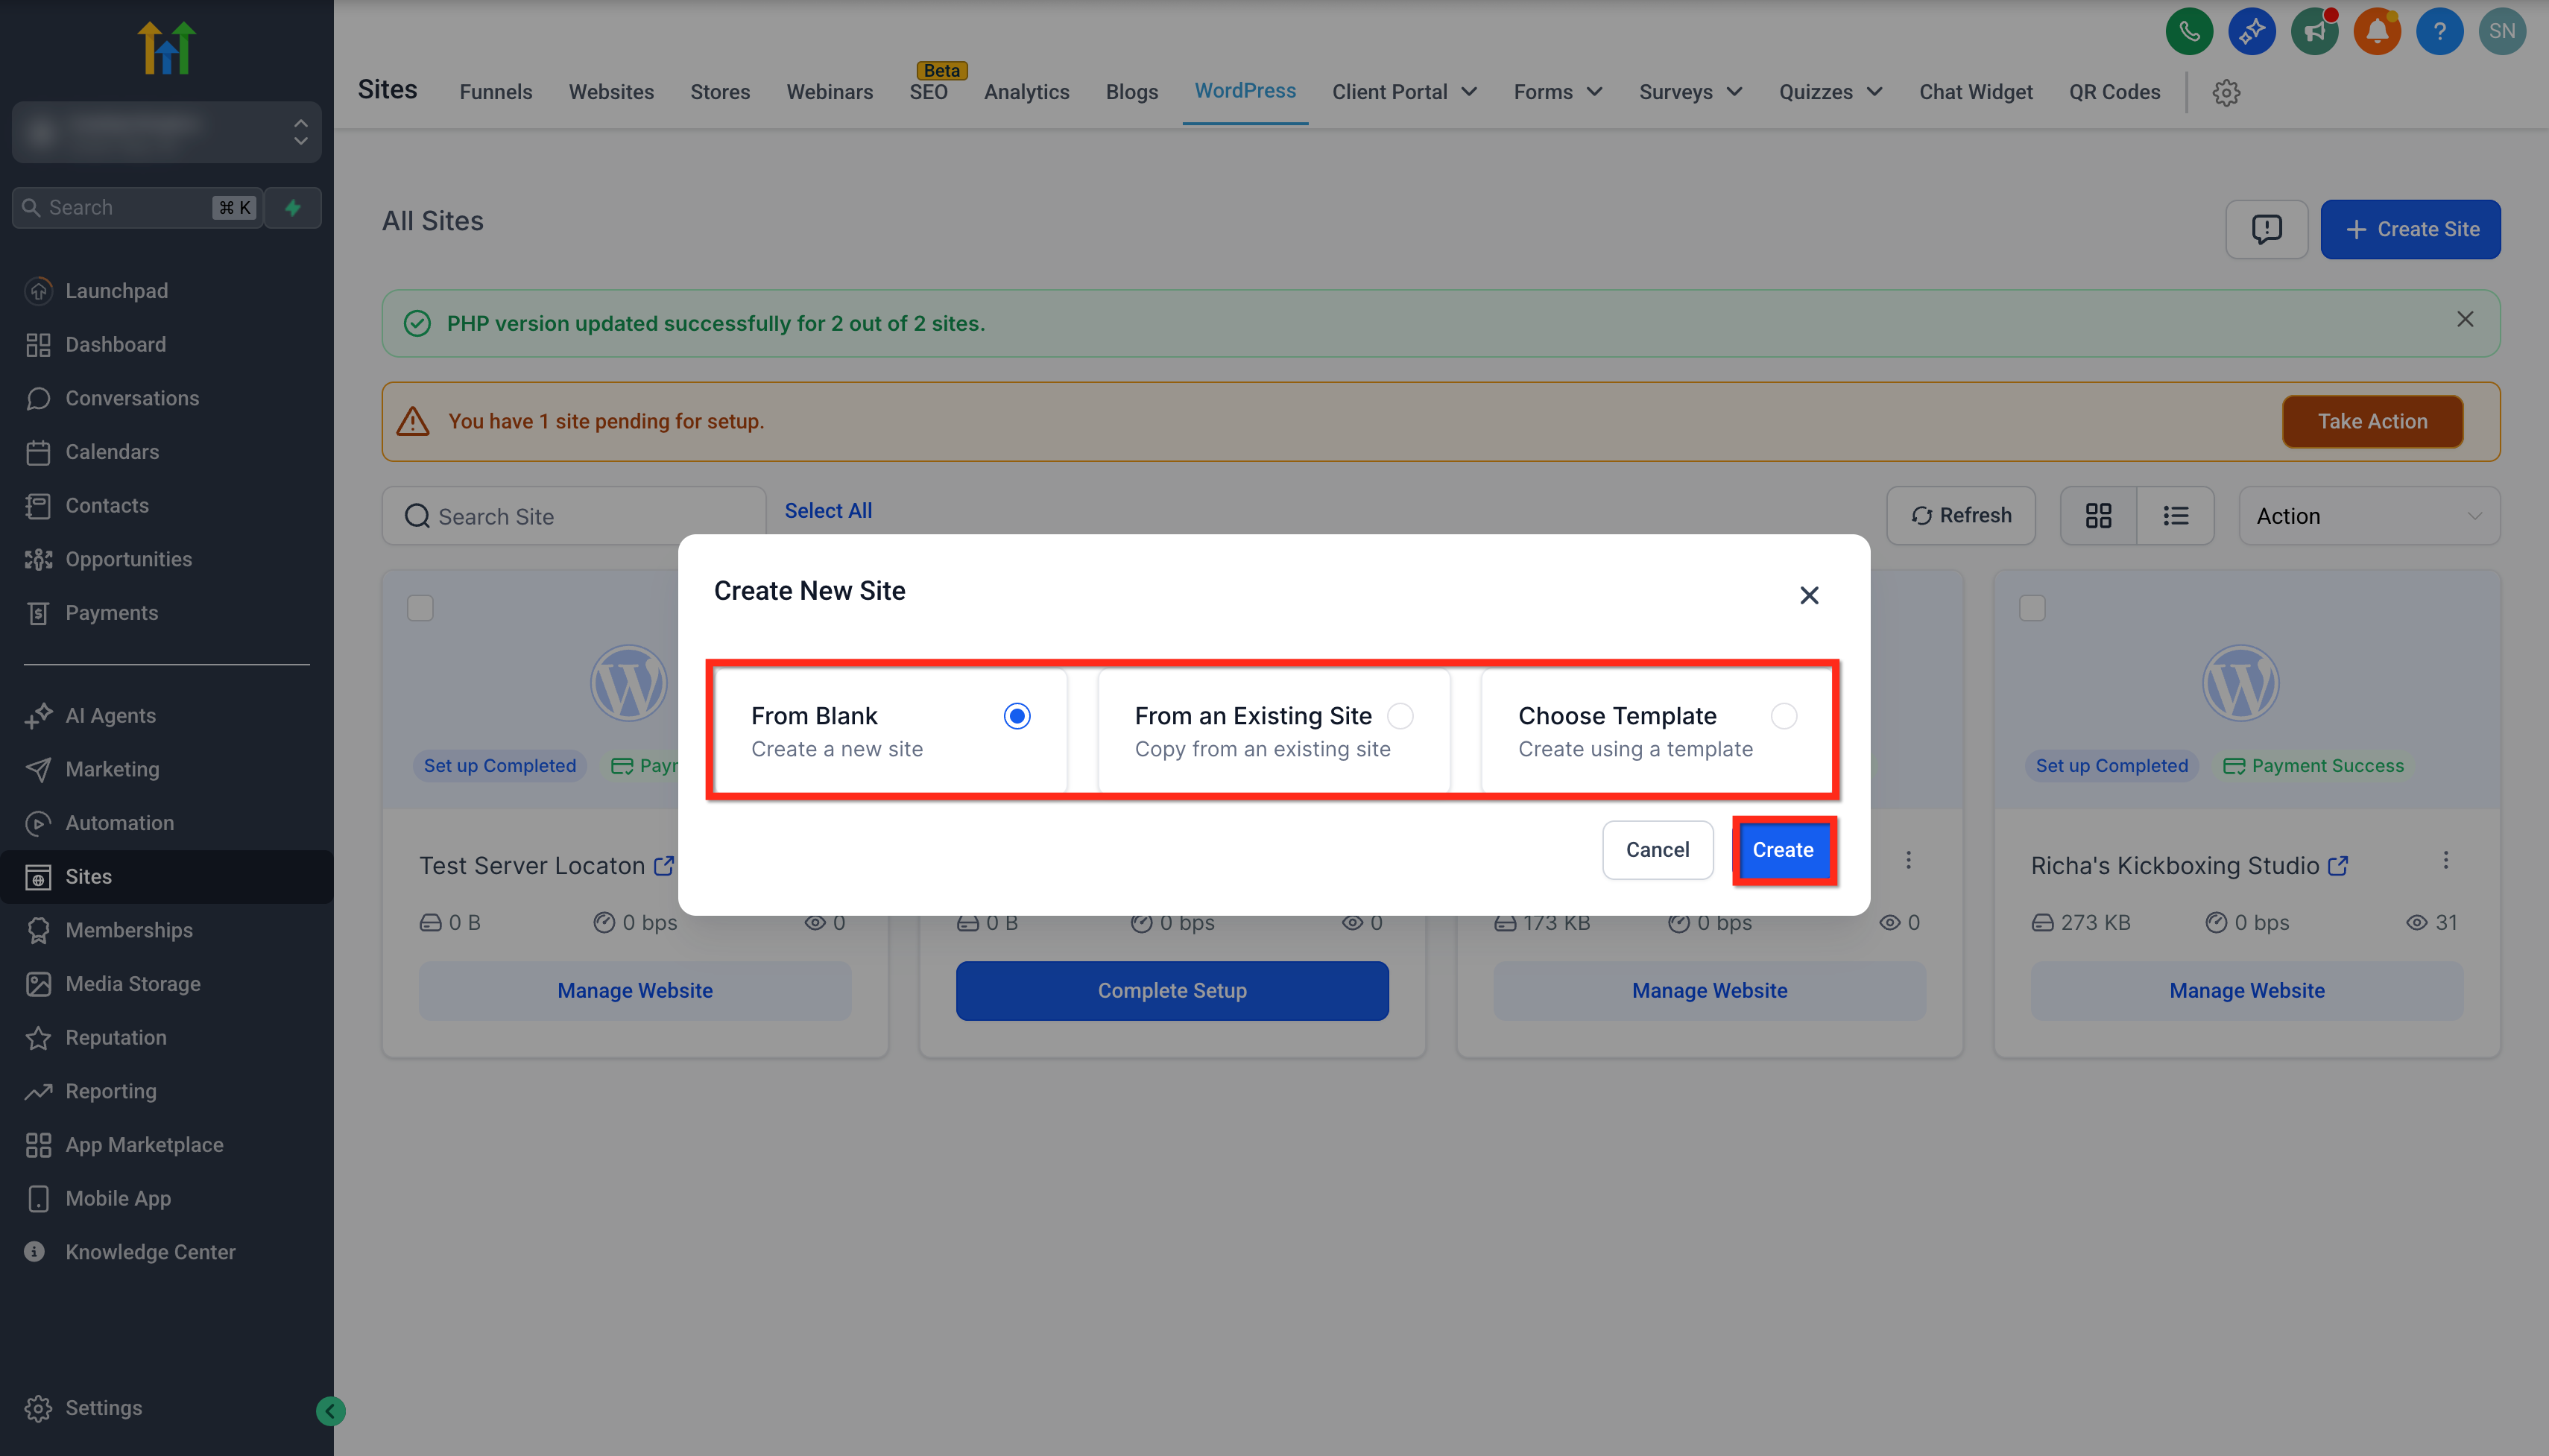
- Select one of the creation options: Blank, Existing Site, or Template.
- Click Create after selecting your option.
Select your server location
- Open the Server Location dropdown.
- Choose the data center closest to your target audience.
- Click Create WordPress Site (or Create) to finish.
07What it looks like in HighLevel
08Settings that matter
- Server Location dropdown. Controls which data center will host the new WordPress site; the choice is saved as part of the site’s metadata.
09Things to know before you rely on it
- The chosen location becomes immutable the moment the server starts; you cannot change it later without cloning or recreating the site.
- All available locations have identical pricing; selecting a region does not affect the hosting bill.
10How it connects to the rest of HighLevel
- Creating and managing WordPress sites in HighLevel WordPress site setup
- Cloning WordPress sites for agencies Site cloning
- Managing plugins and themes in HighLevel Plugin management
Michael's take

Country server selection is a tidy way to lock your WordPress site into the optimal data center right from the start.
For a globally distributed audience you might still want to add a CDN even though the feature helps with local performance.