
01Who this is for
- Agency Owners, can replicate client sites quickly for new projects.
- Agency Users, can create clones to test changes without risking the original site.
- Account Users within a subaccount, can produce independent copies for internal use.
02Site cloning, explained
The cloning tool creates a full copy of a WordPress site that lives inside HighLevel. It copies pages, posts, plugins, themes and configuration settings. After cloning, the new site appears as a separate entry in the WordPress dashboard.
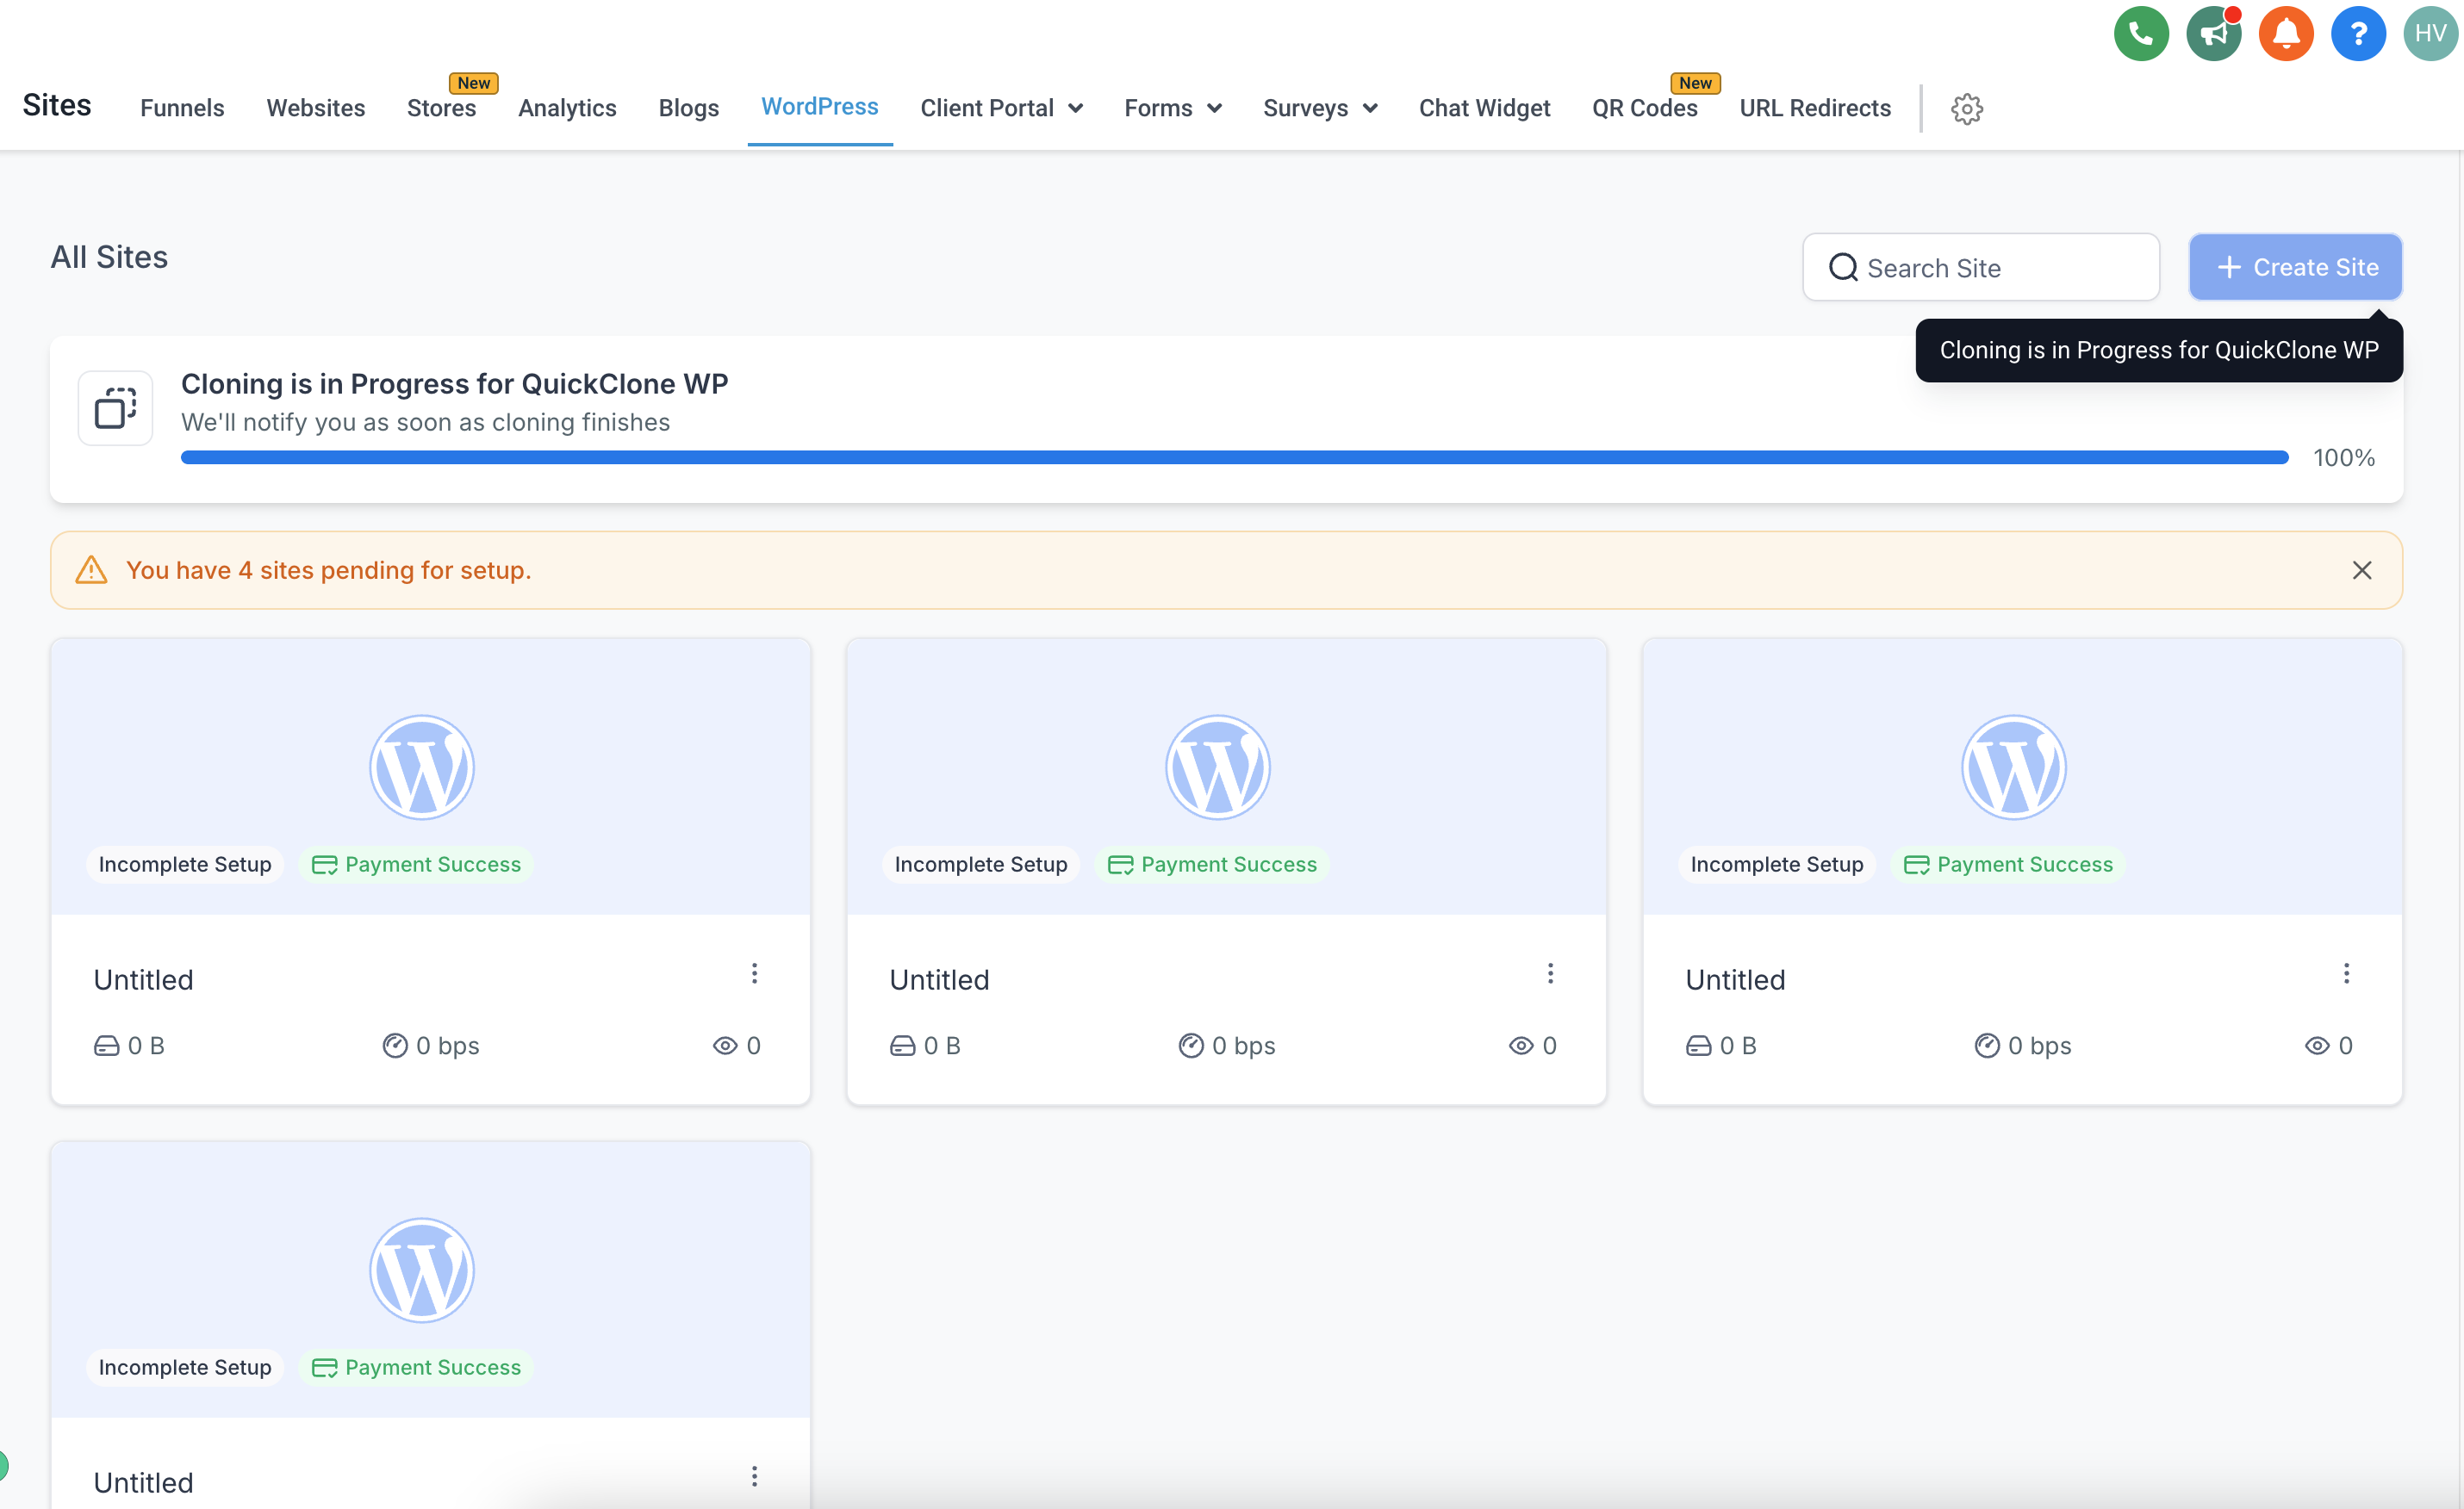
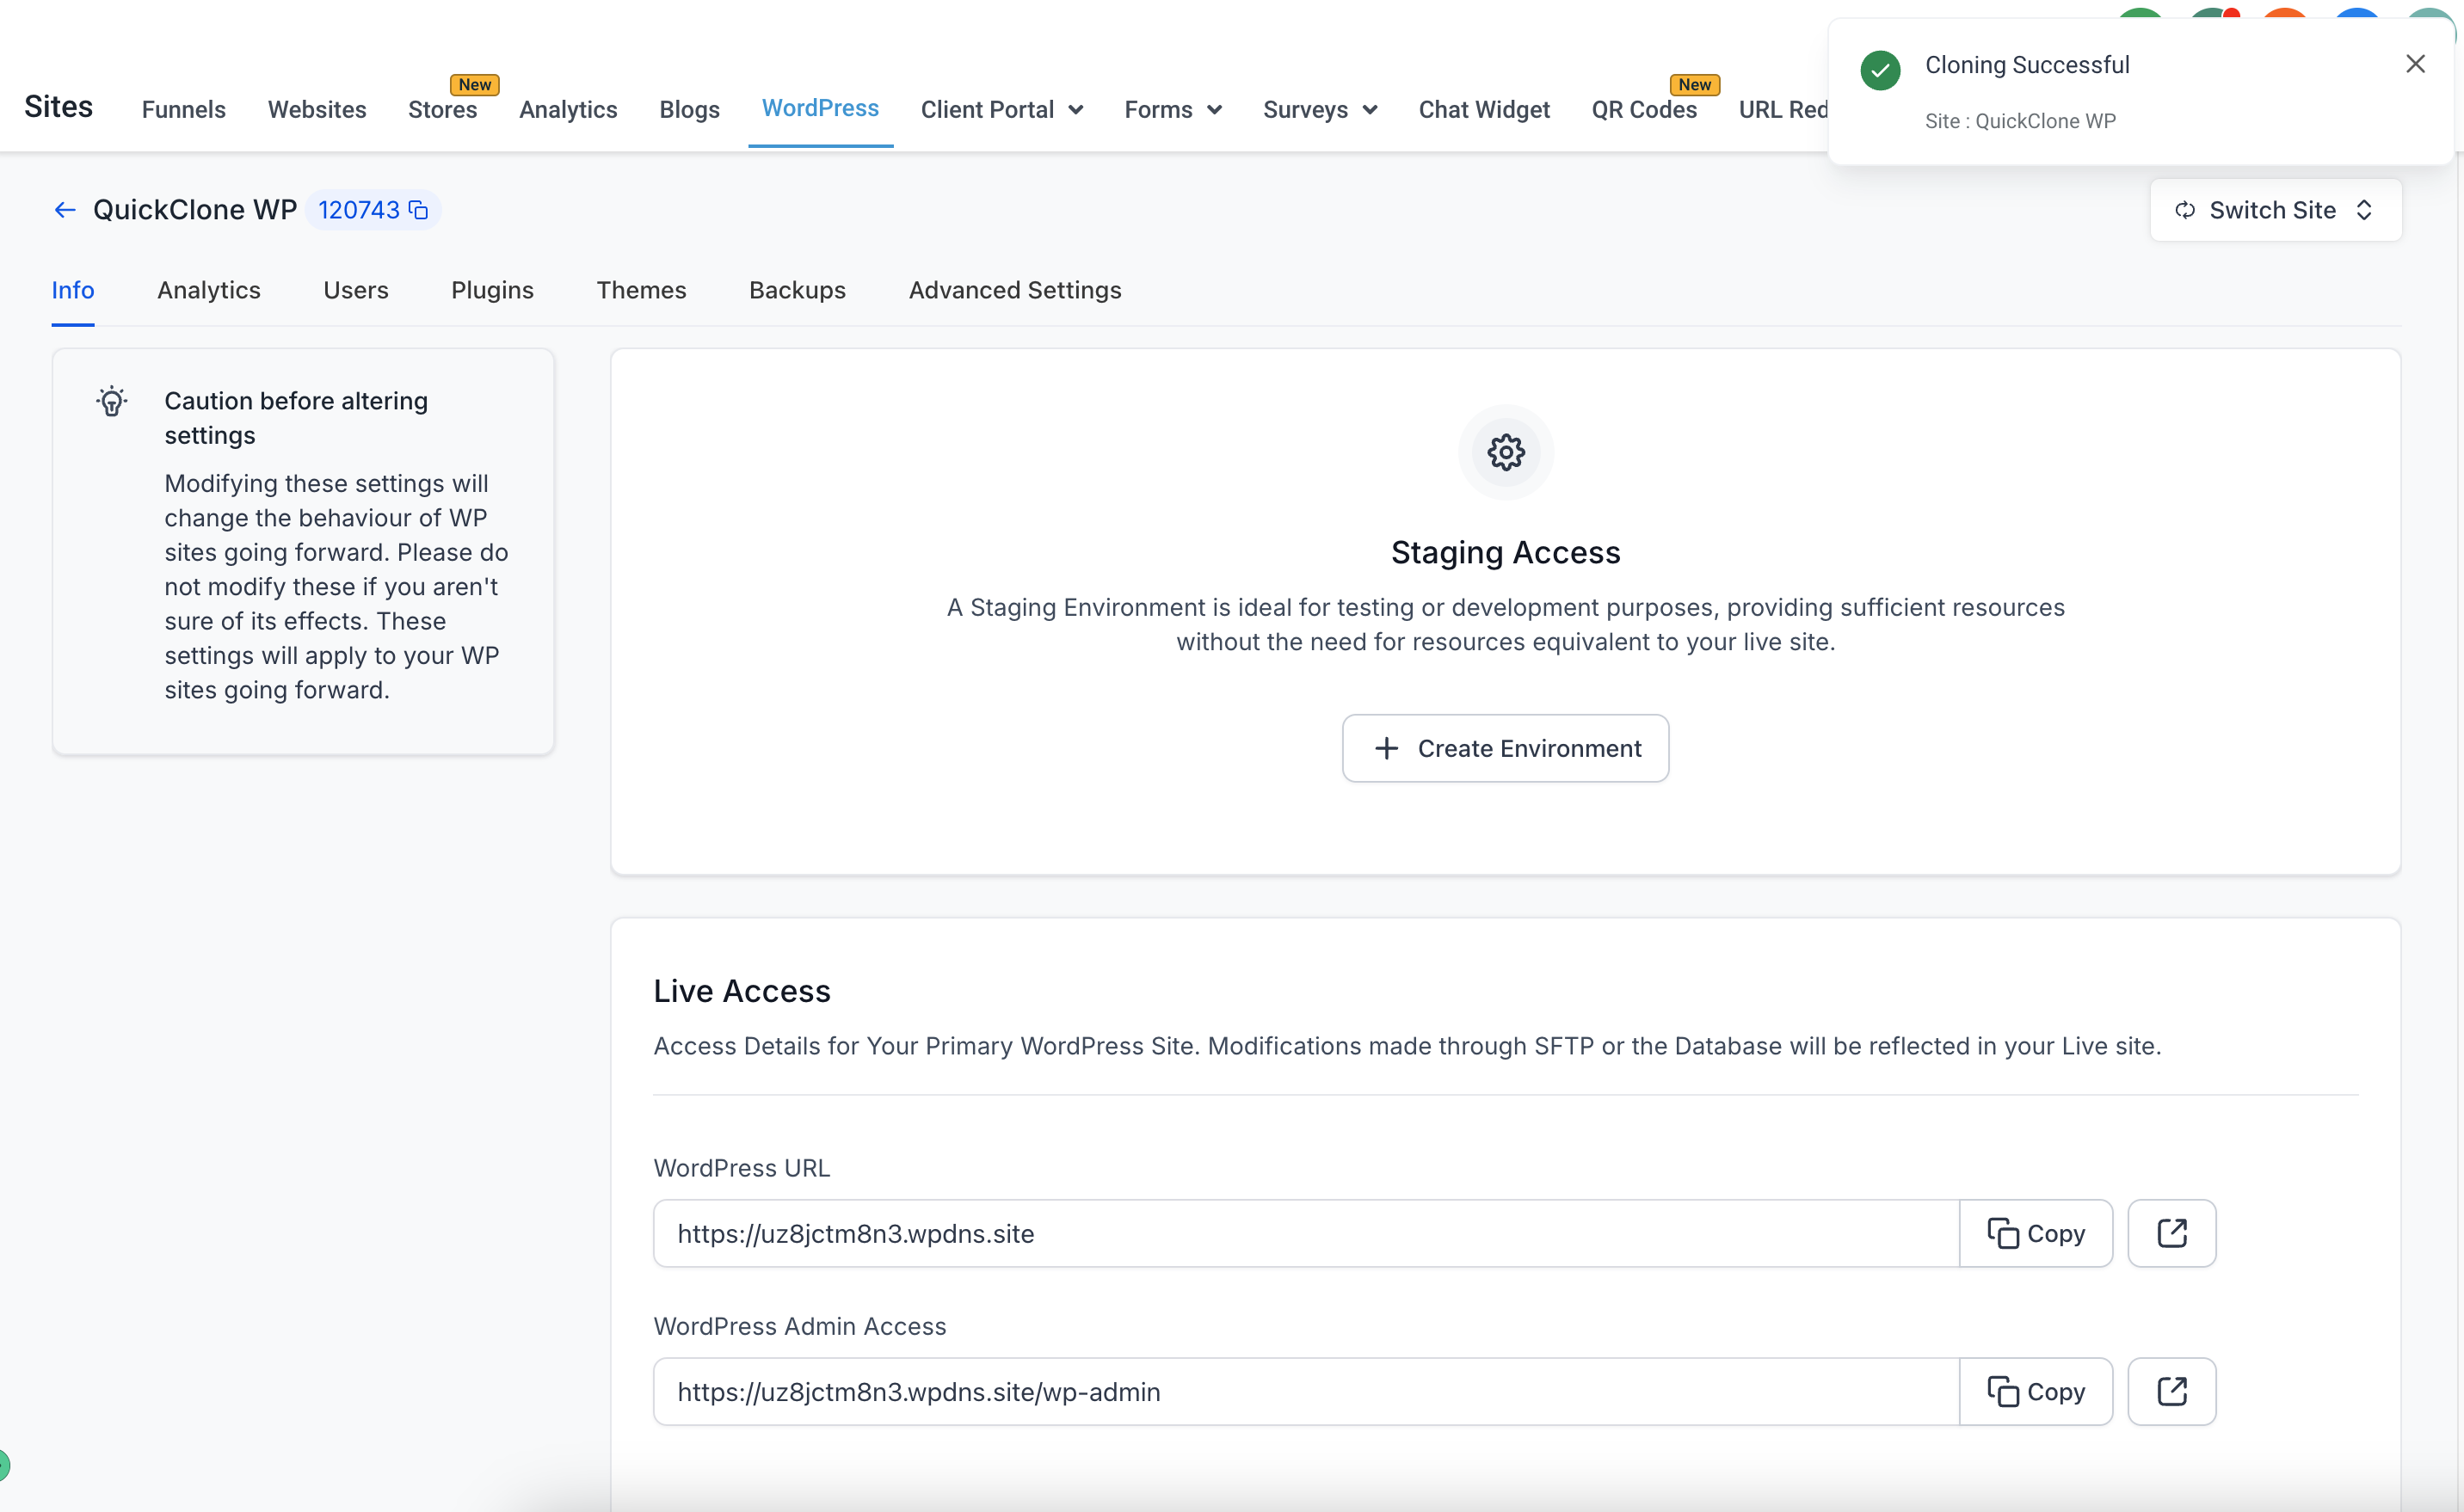
Cloning is accessed from the WordPress section of the HighLevel interface. Users choose a source site, give the copy a new name, and start the process. Real time indicators show progress. When the operation finishes, the cloned site can be managed like any other site.
The feature is only visible to users with the appropriate role based permissions and only when the source and destination belong to the same subaccount. If permissions are insufficient, the cloning option does not appear and the standard site creation flow is used instead.
03How businesses use site cloning
- Digital marketing agency. The agency selects a successful client WordPress site, clones it, and then customizes the copy for a new client. All original plugins and theme settings are retained, saving setup time.
- SaaS product team. Team members clone a staging WordPress site inside HighLevel to run functional tests. Because each clone is independent, test changes never impact the live environment.
- Consulting firm. Consultants duplicate a WordPress site to create a sandbox for workshops. Participants can experiment with content and design without altering the production site.
04Before you start
- User must hold an Agency Owner, Agency User, or Account User role.
- User must be operating within the same subaccount as the source site.
05How to set up and use site cloning in HighLevel
Clone a WordPress site
- Open your HighLevel account and navigate to the WordPress section.
- Click the Create New button or select Blank WordPress.
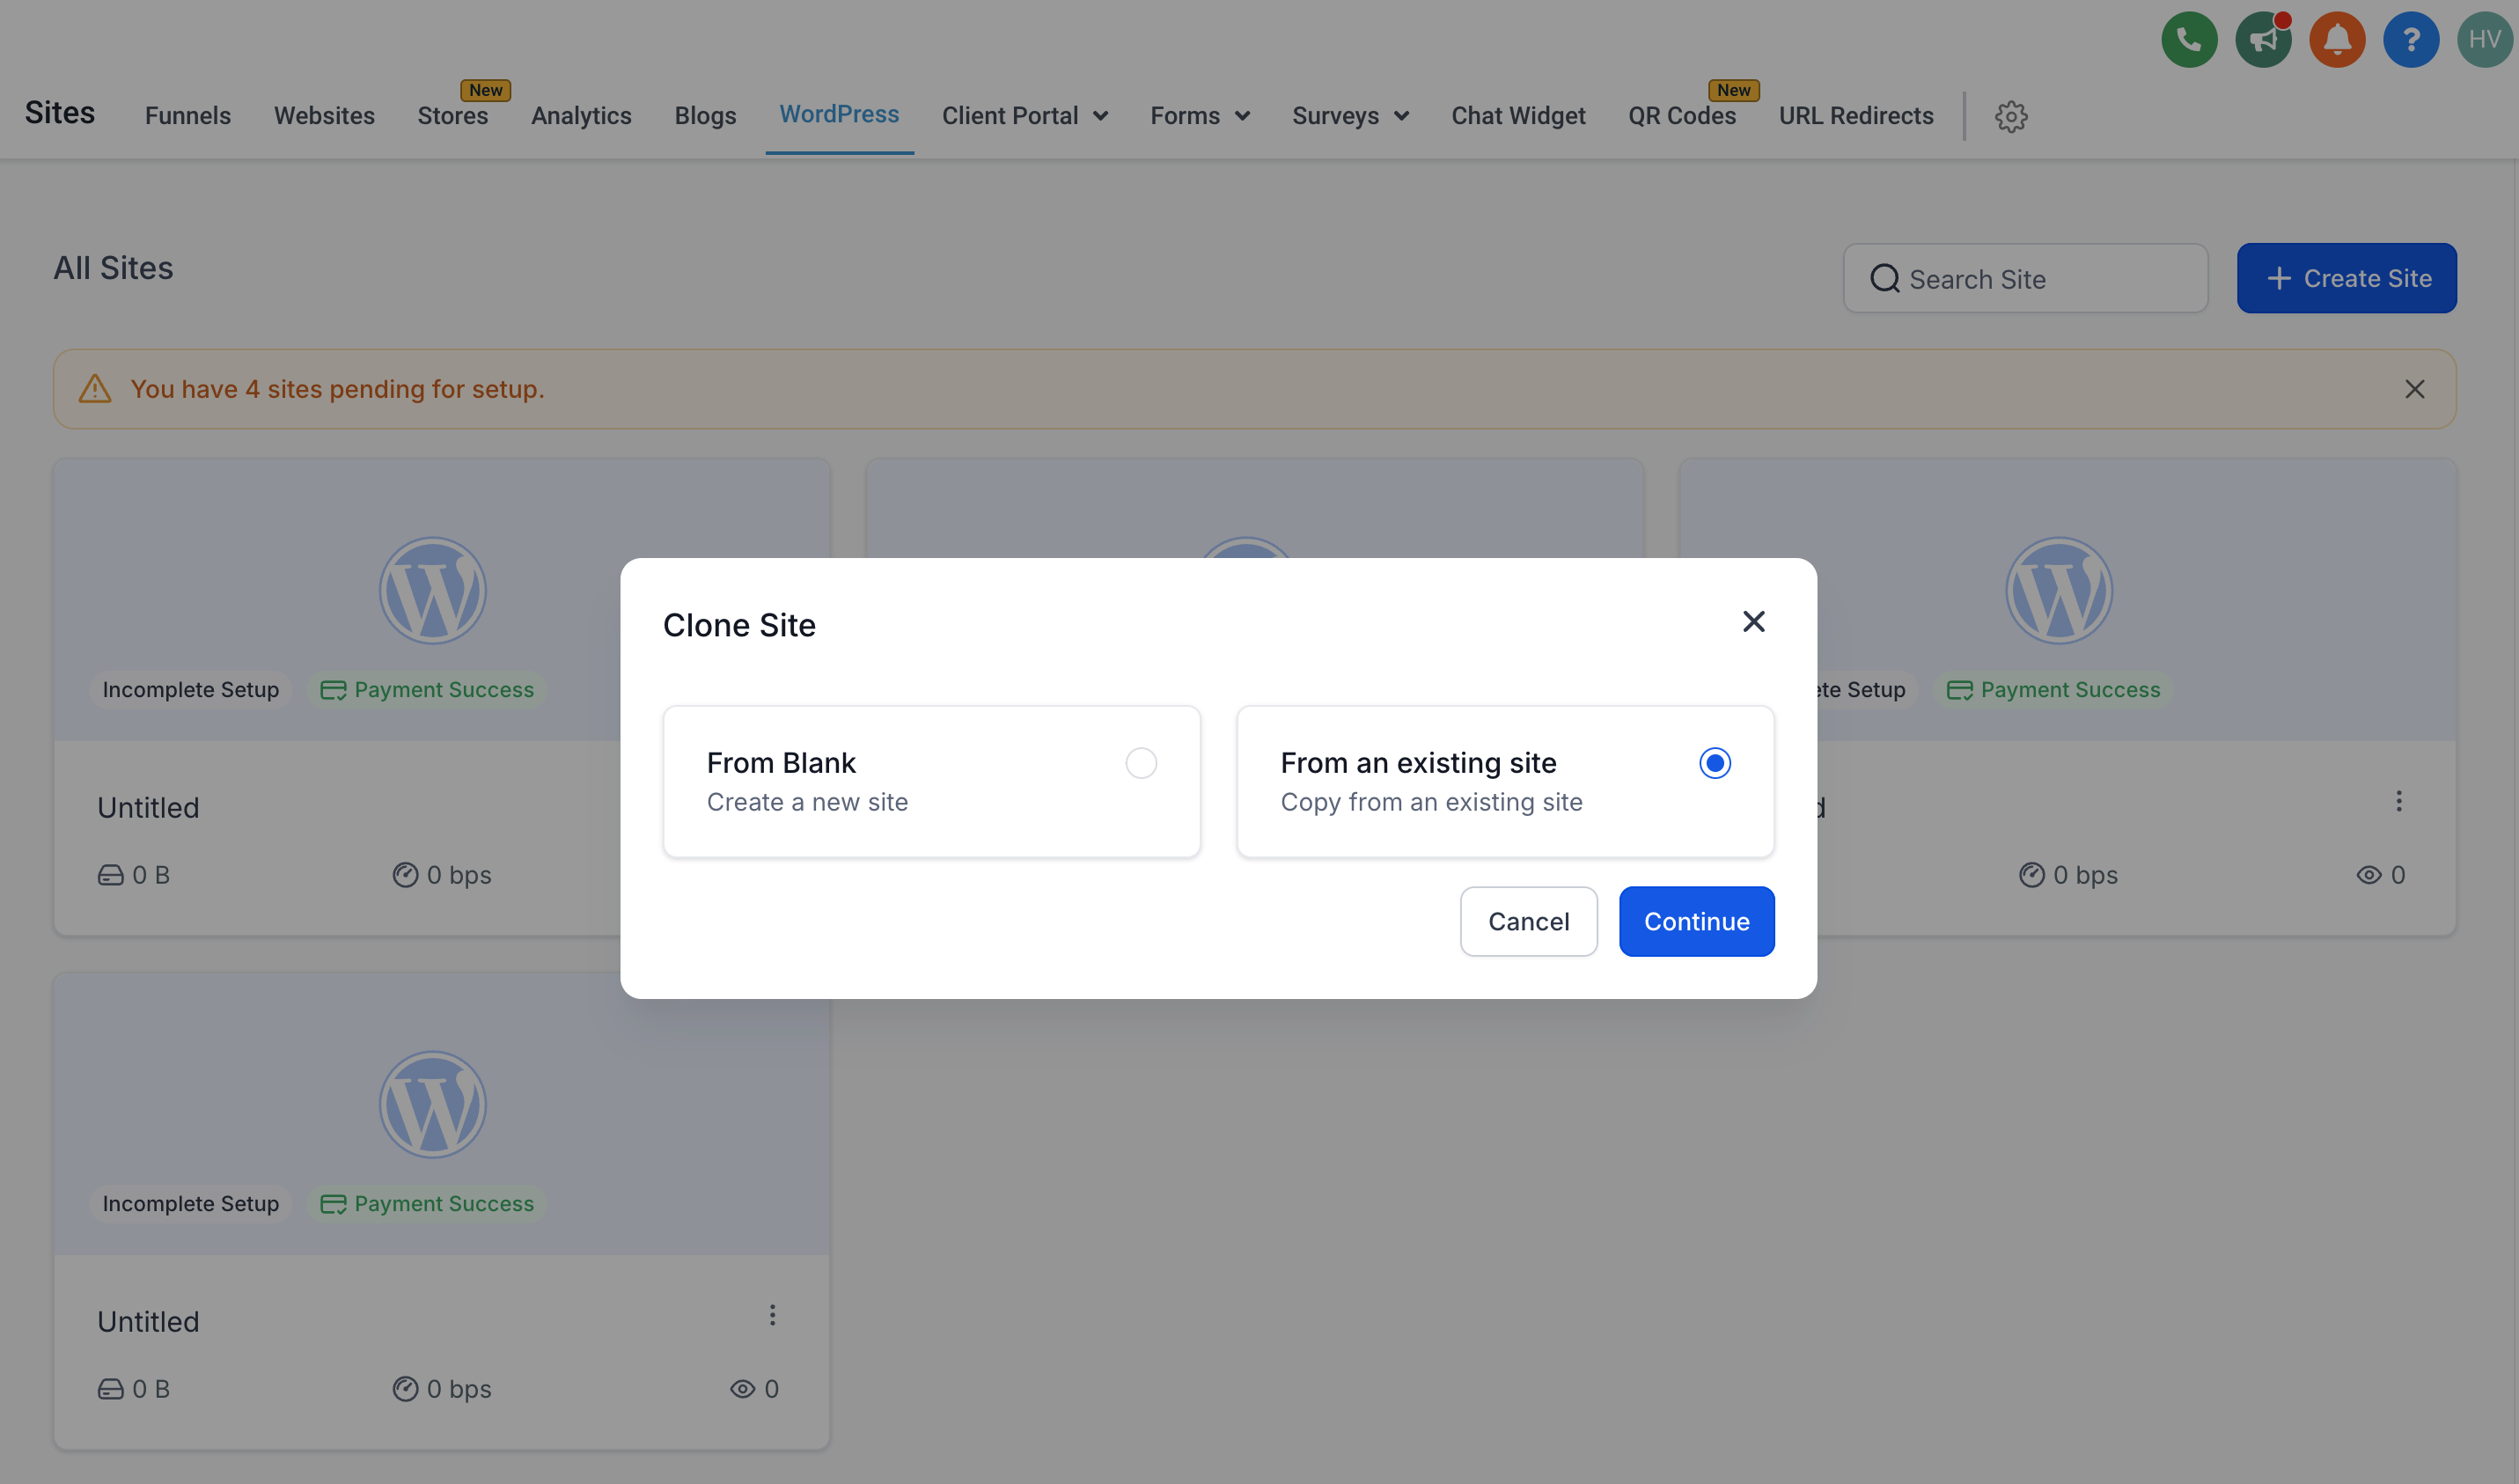
- Click the Incomplete Setup Card on the dashboard.
- Choose “Choose From Existing Site” to start cloning.
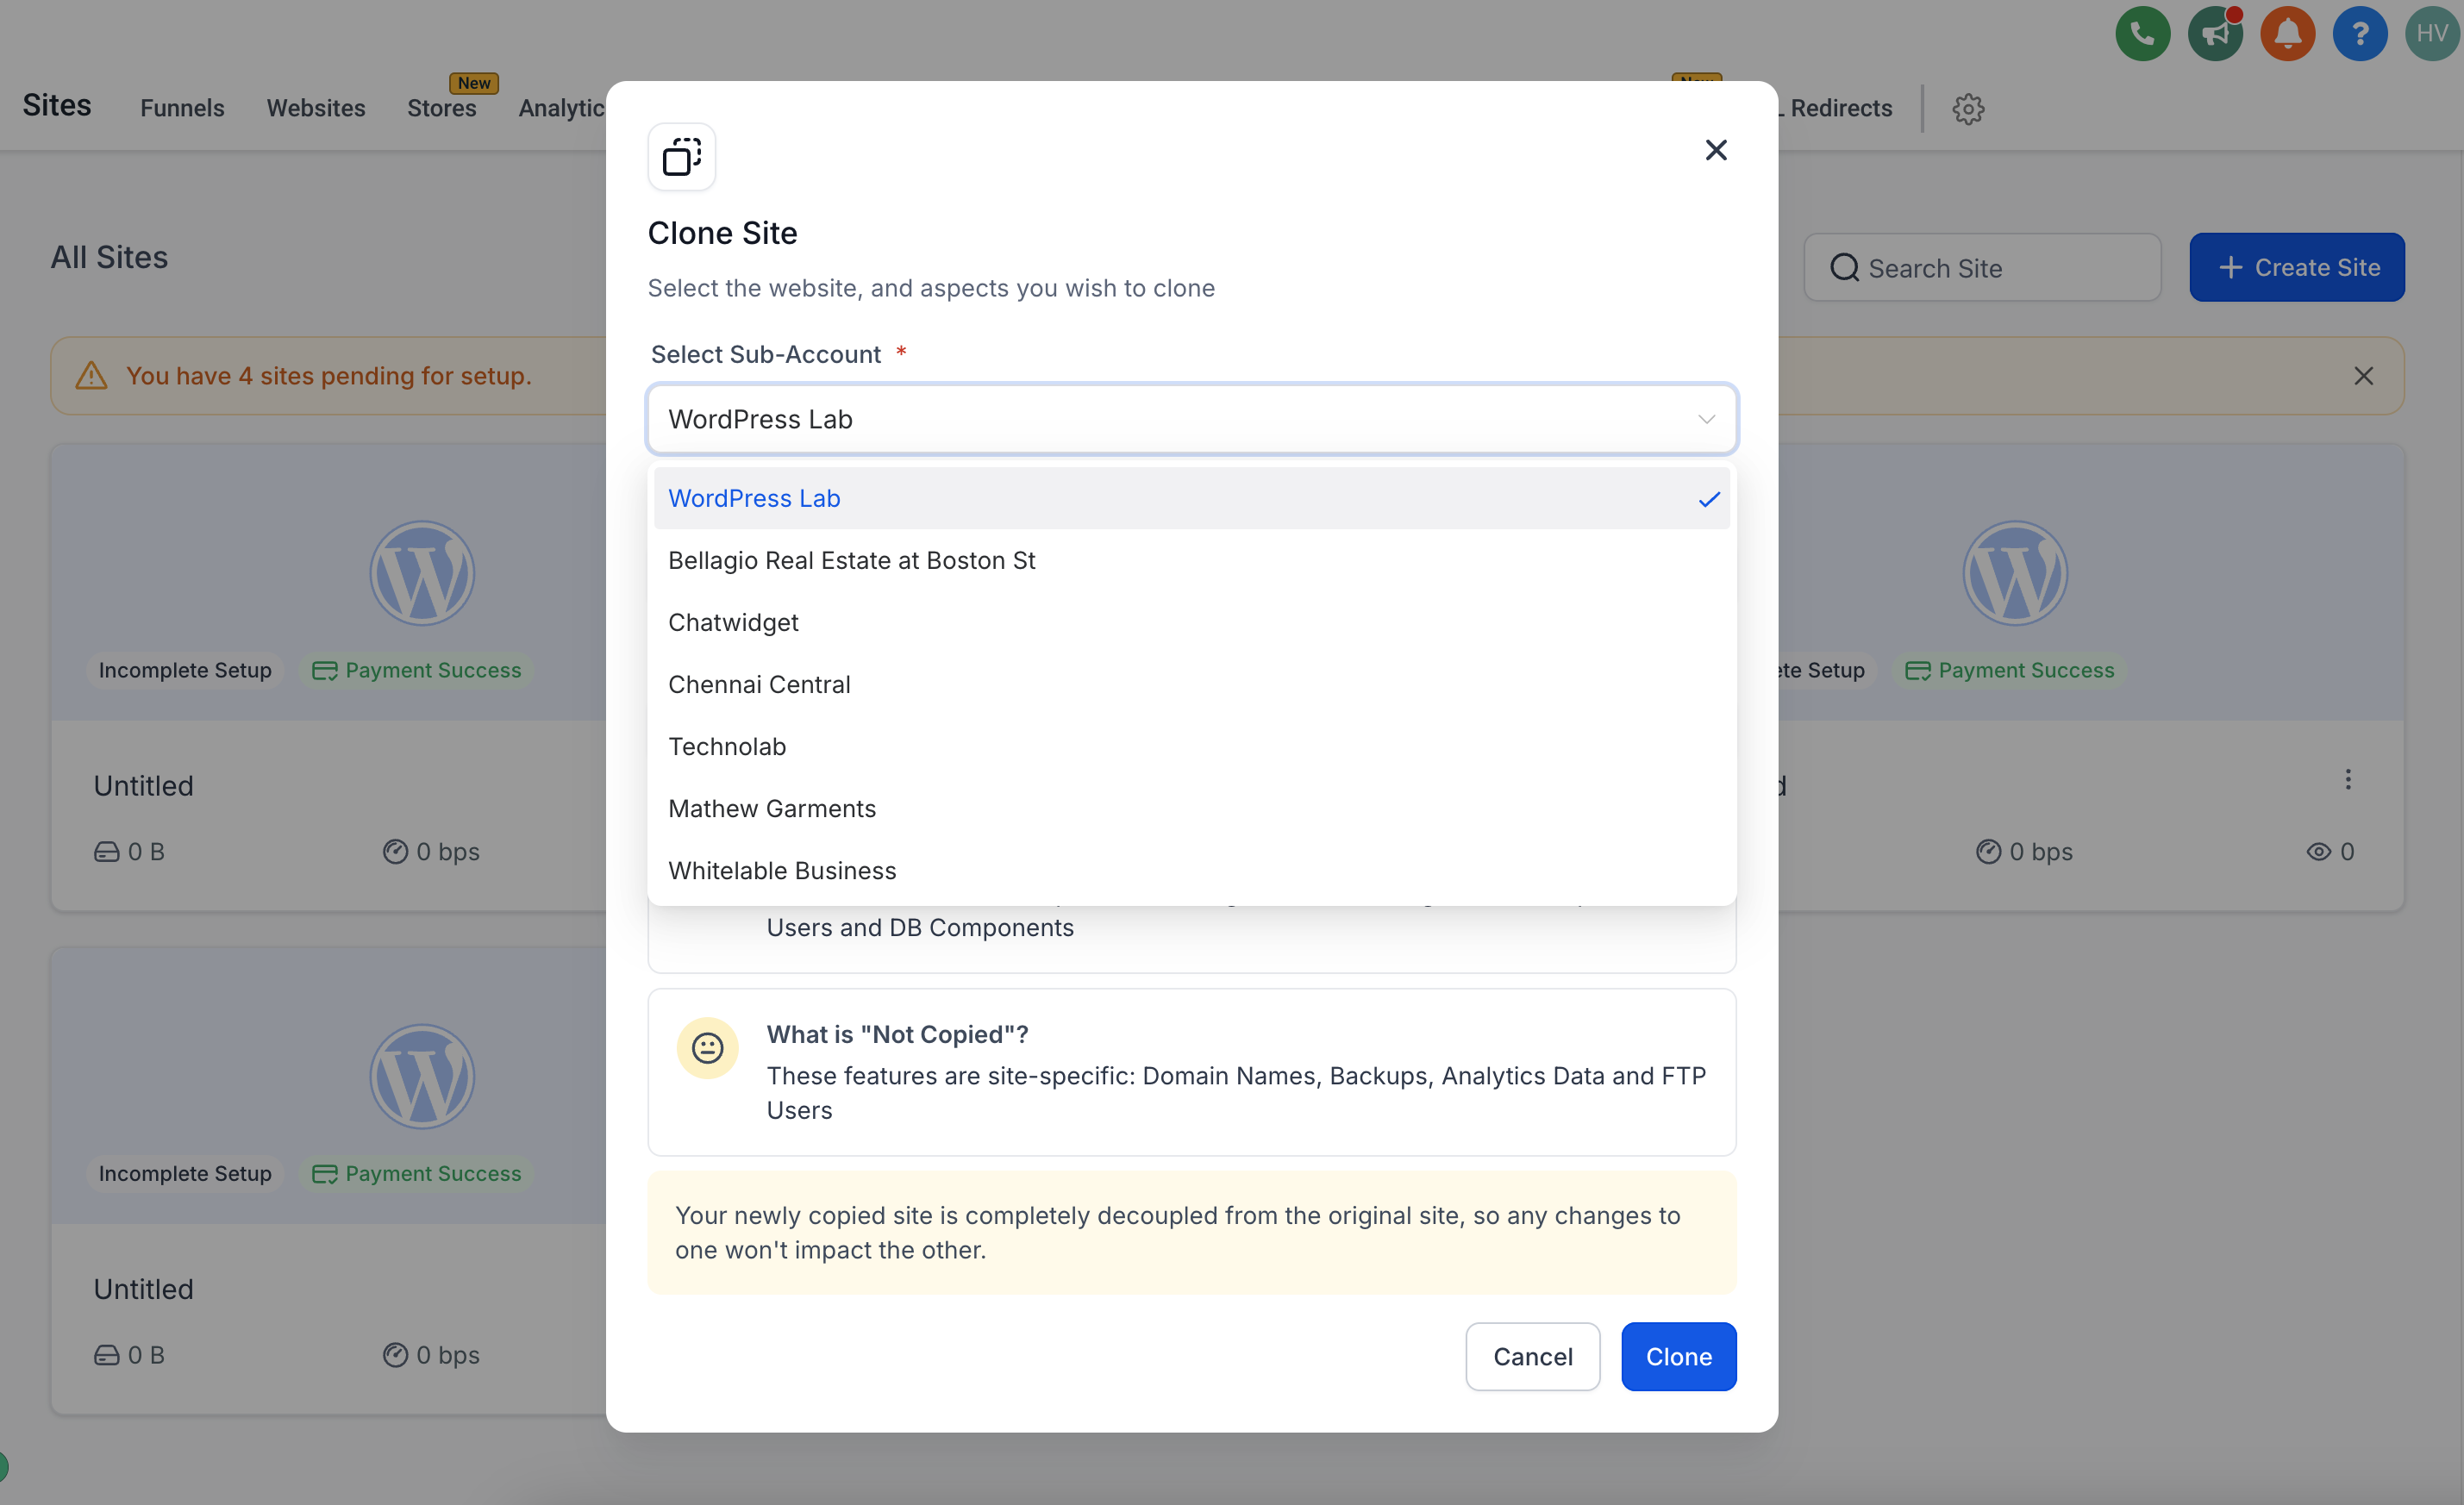
- Select the appropriate Subaccount from the dropdown menu.
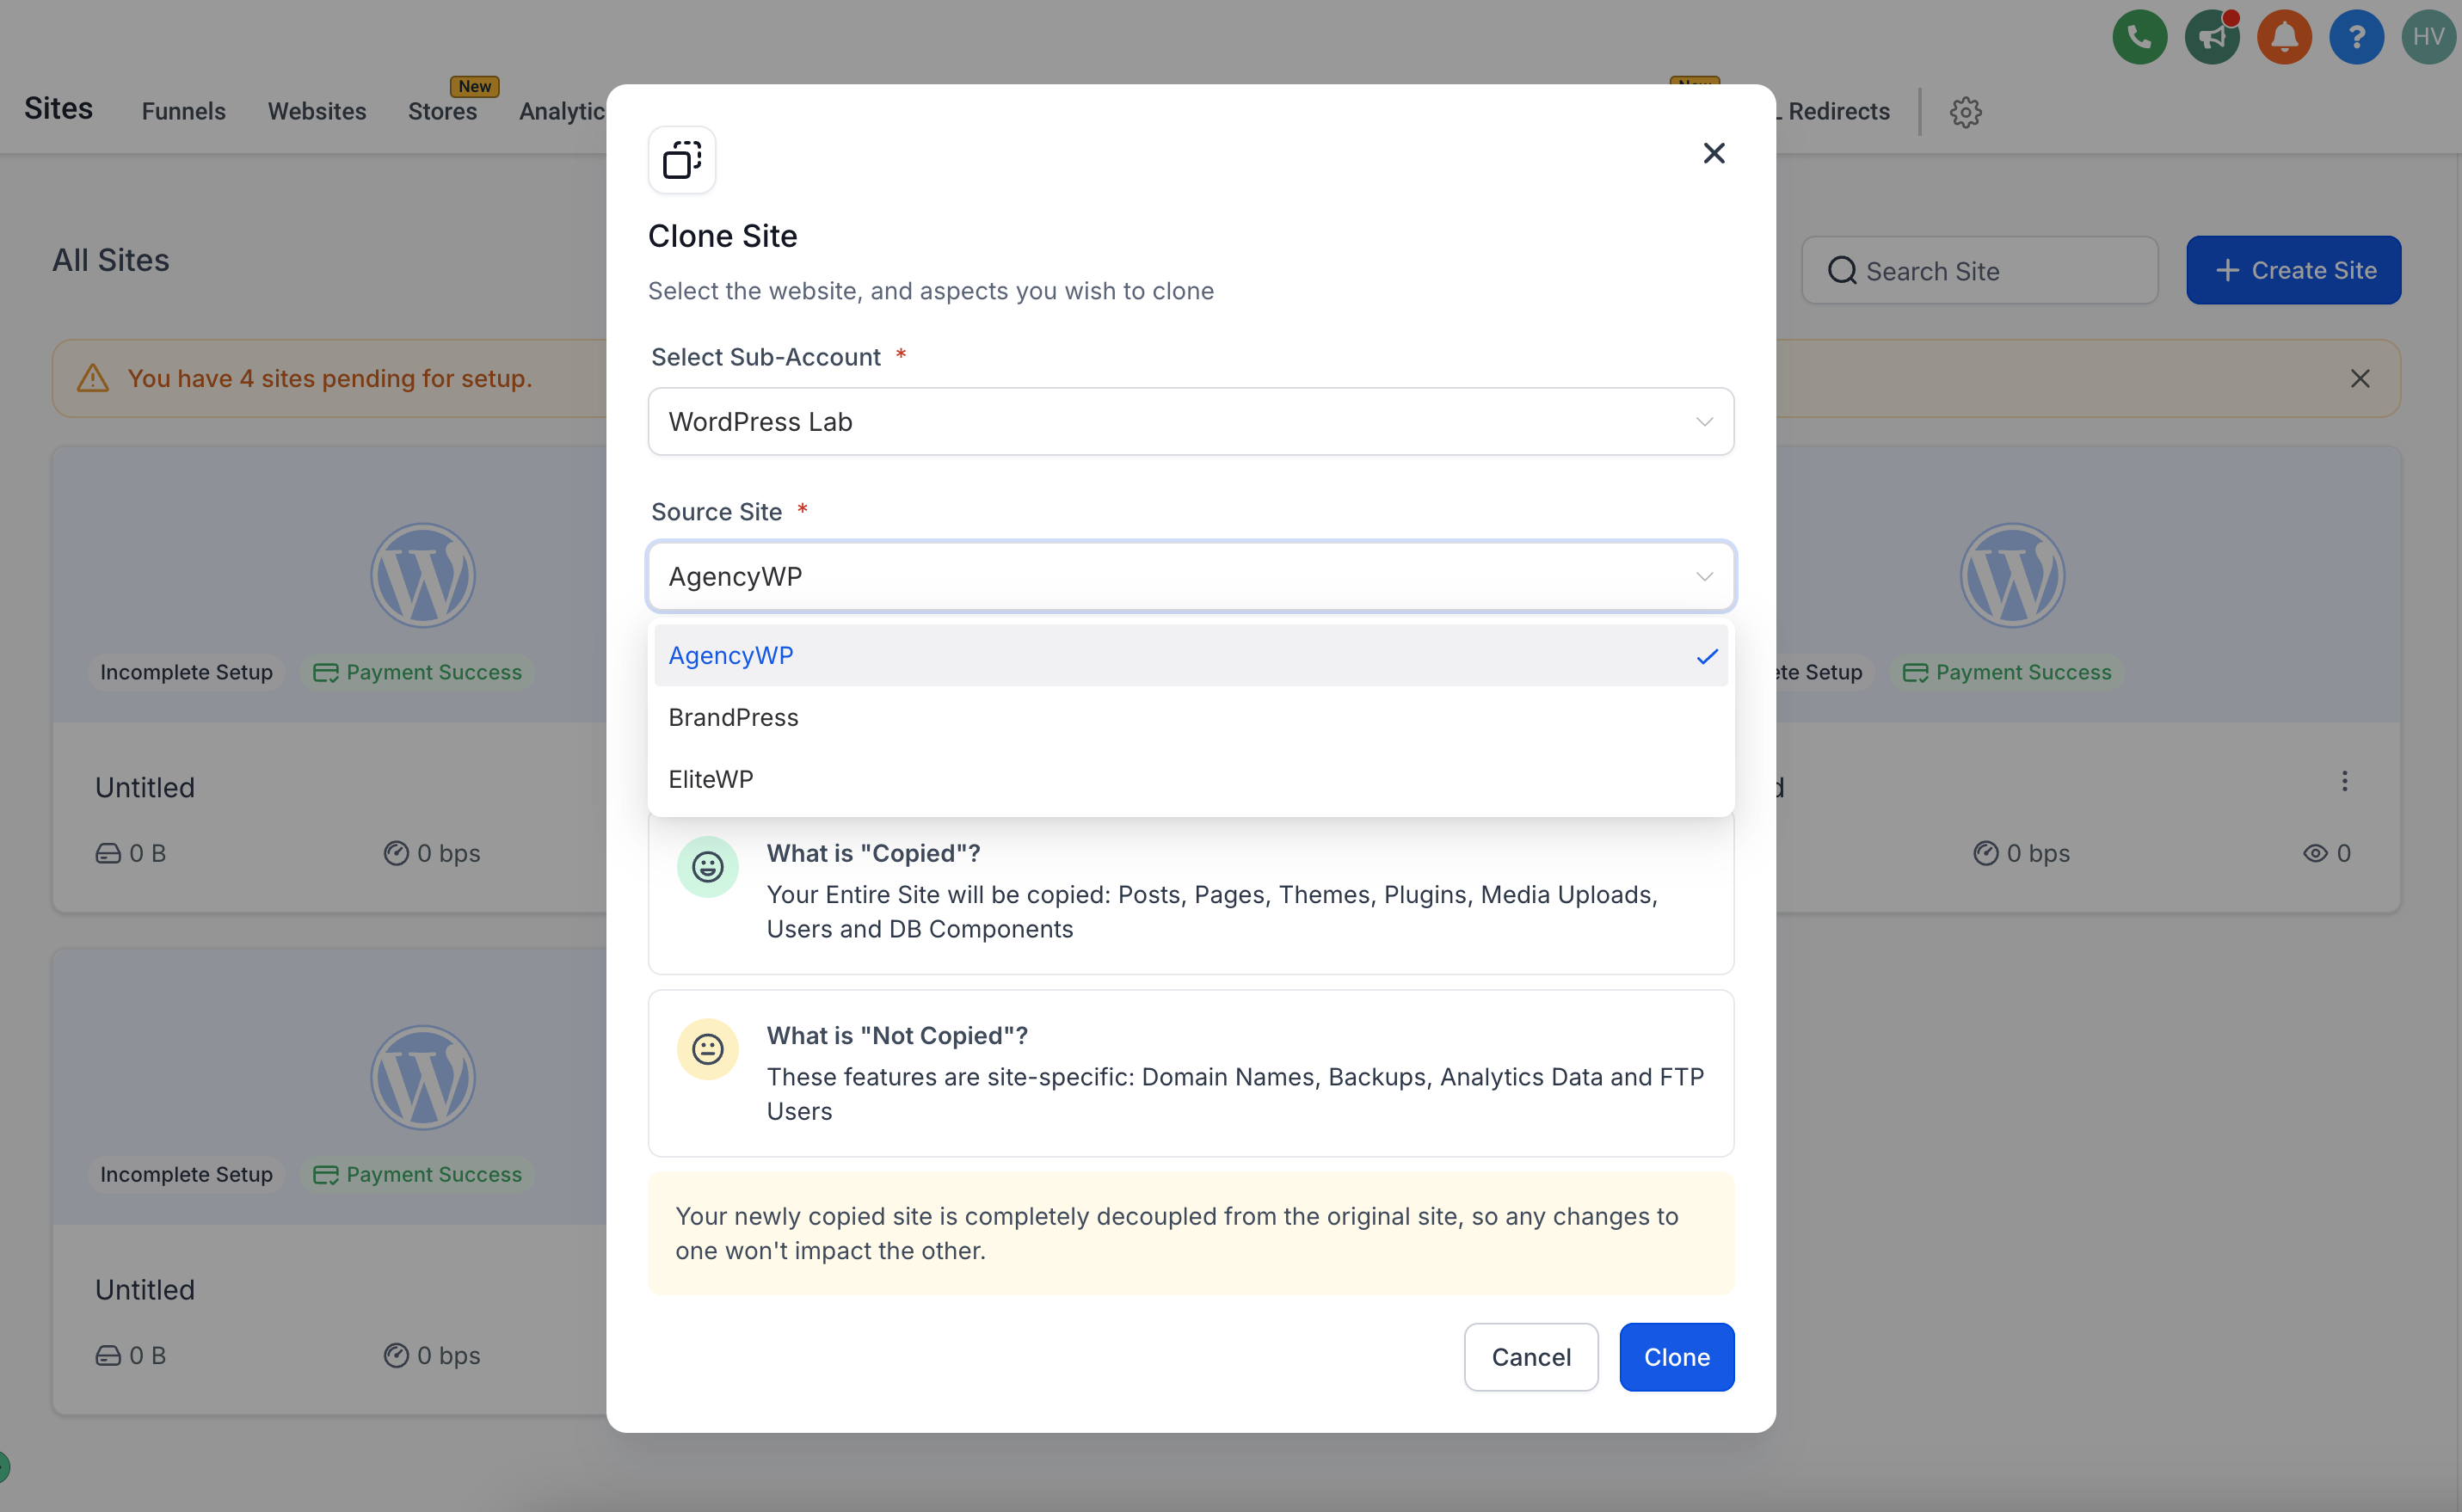
- Pick the source site you want to duplicate.
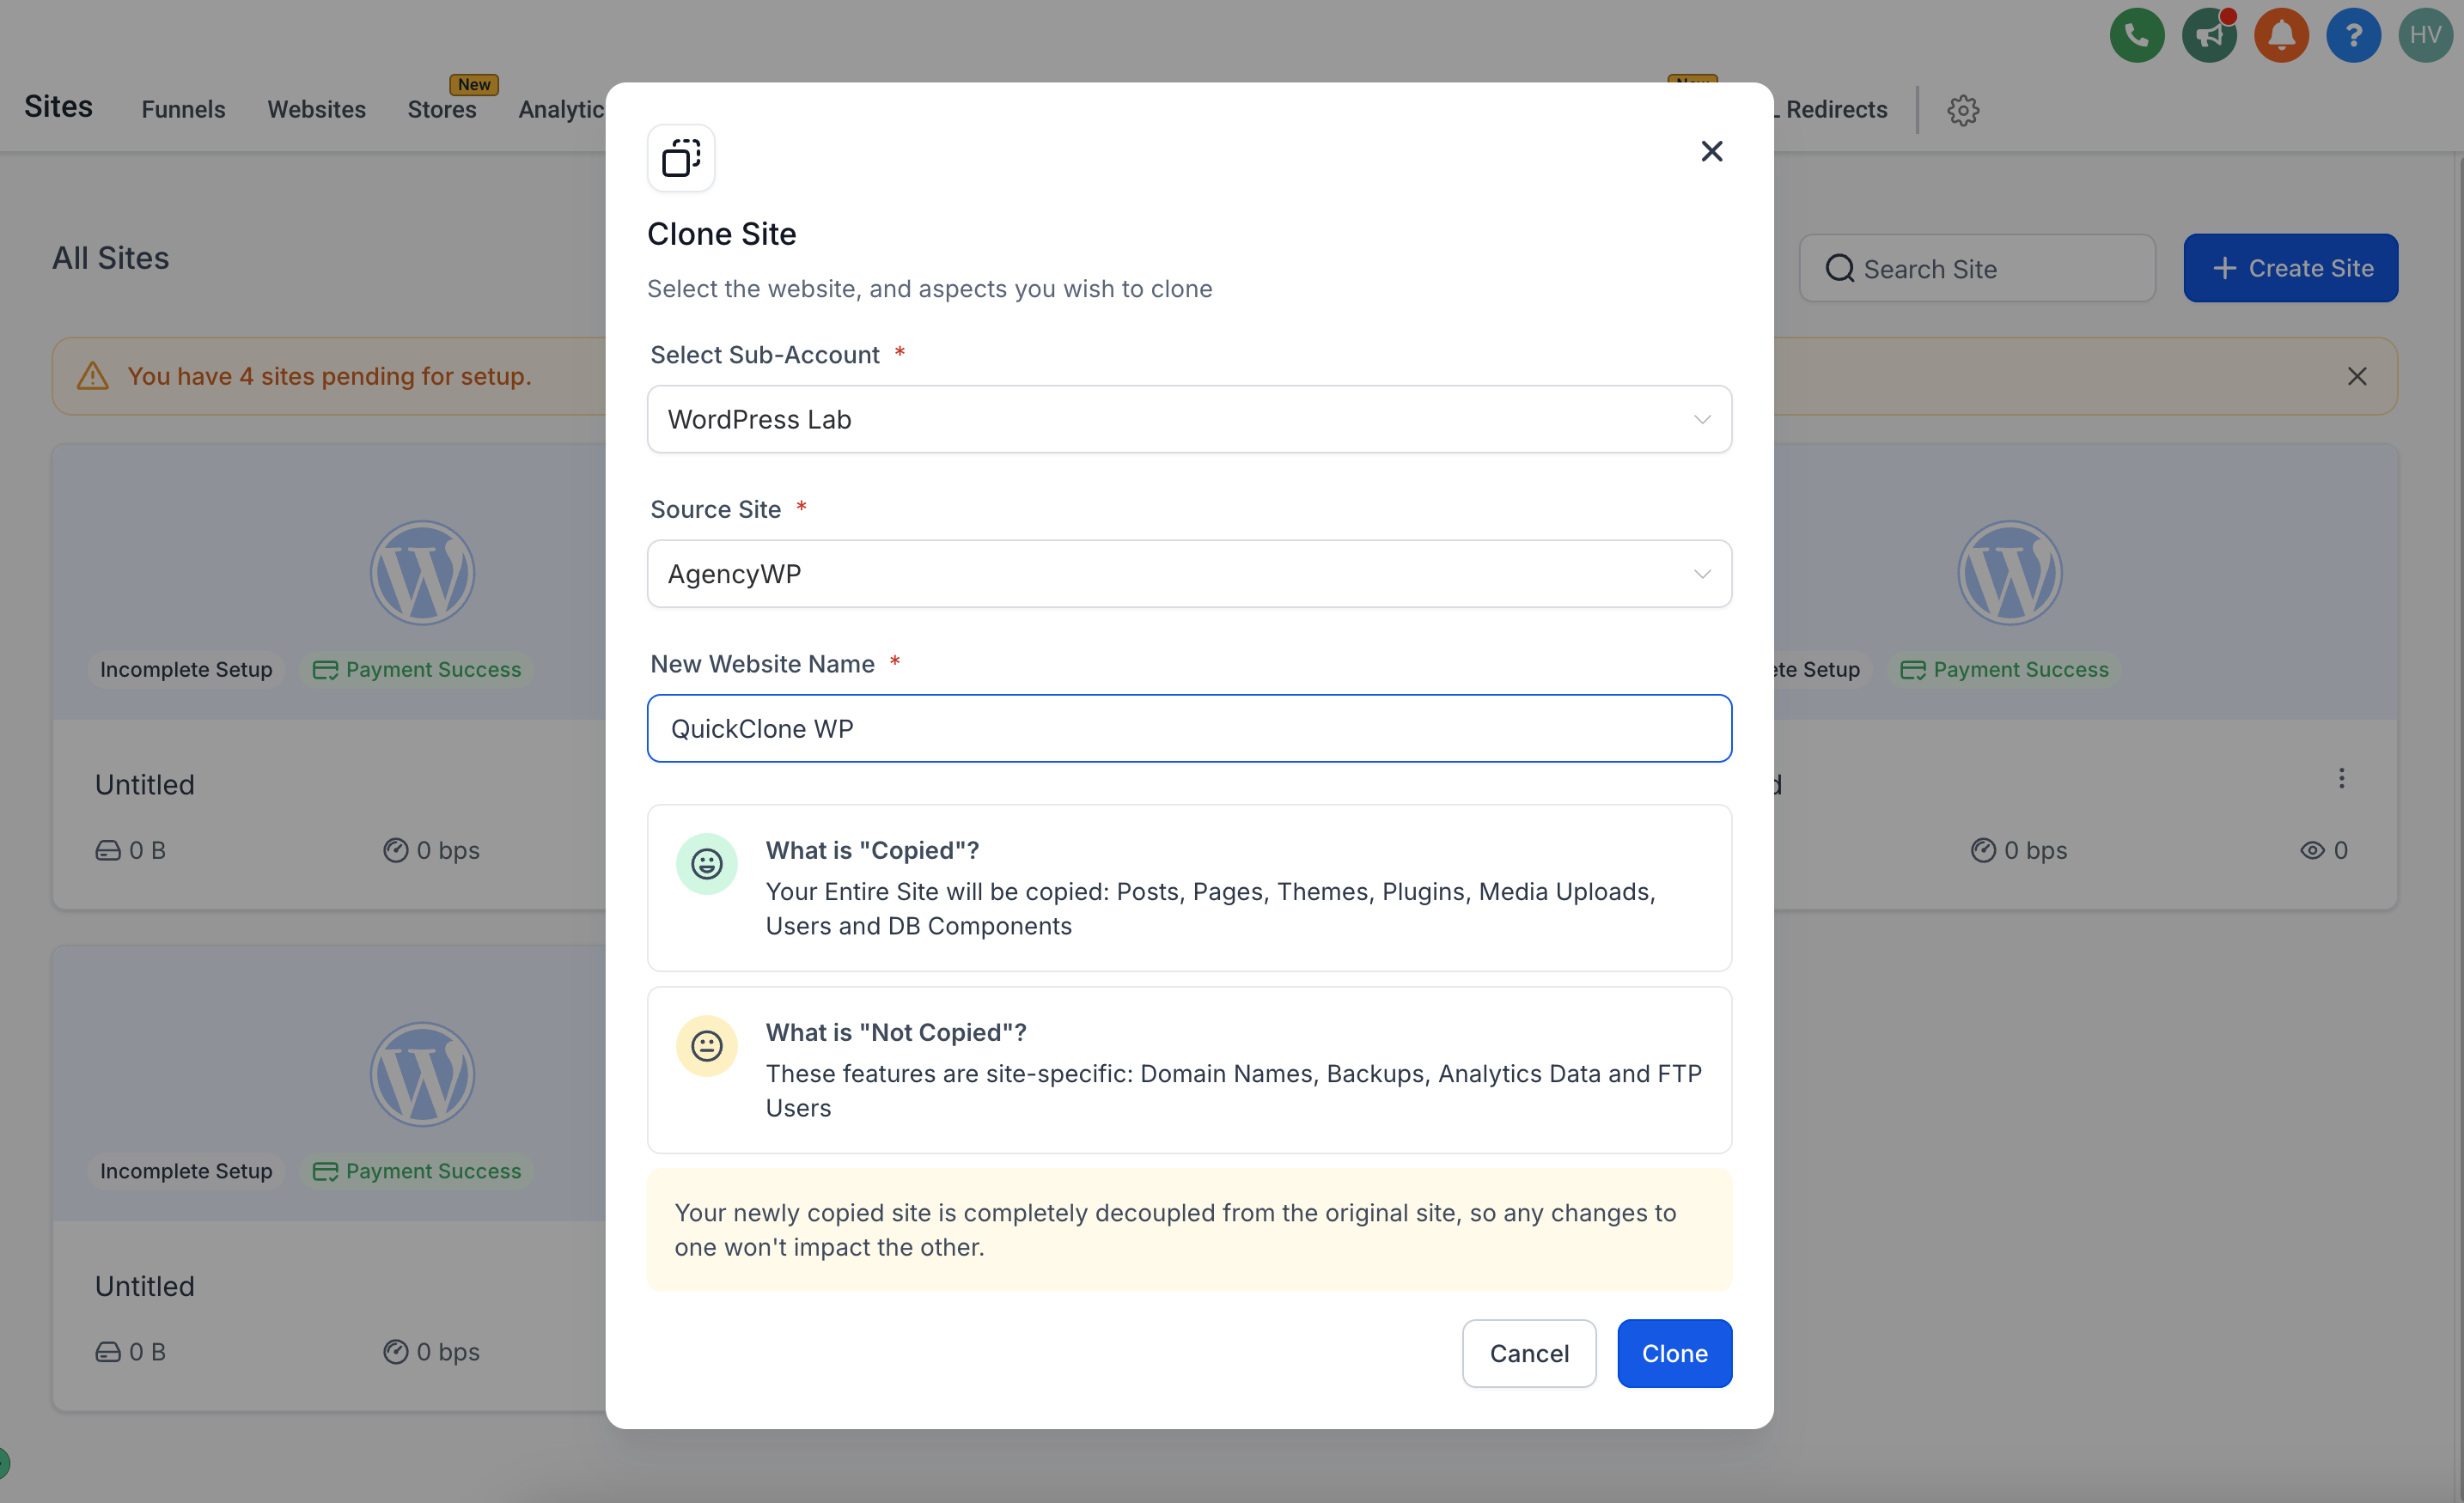
- Enter a name for the new site in the New Website Name field.
- Press the Clone button to begin the duplication process.
- Watch the real time progress indicator until cloning finishes.
- Confirm that the newly cloned site runs independently from the original.
- Manage the cloned site using the standard WordPress dashboard in HighLevel.
06What it looks like in HighLevel
07Settings that matter
- New Website Name. Specifies the title for the duplicated site and creates a unique identifier for the new WordPress instance.
08Things to know before you rely on it
- Only users with Agency Owner, Agency User, or Account User roles can see and use the cloning option.
- The cloning option will not appear for users lacking the required permissions.
- If permissions do not match the cloning requirements, the system defaults to the regular new site creation flow.
- Each cloned site is independent; changes to one site do not affect the other.
09If something goes wrong
- Cloning option not visible. Verify that your user role is Agency Owner, Agency User, or Account User and that you are logged in to the correct subaccount.
- Cloning process stuck. Refresh the dashboard and check the progress indicator. If the issue persists, follow the support guidance.
10How it connects to the rest of HighLevel
- Managing WordPress sites in HighLevel WordPress site management
- WordPress plugin and theme management Plugin and theme control
- HighLevel WordPress hosting activation Activate hosting plan
Michael's take

Site cloning is great when you need exact copies of a WordPress setup fast.
Skip it if you don’t have Agency or Account level roles, because the feature won’t be available.