
01Who this is for
- Sales managers who need a consistent view of high value deals for daily stand ups.
- Customer success teams that review stale opportunities and want a quick filtered list.
- Operations staff that build standard pipeline views to train new users and maintain reporting consistency.
02Opportunity Smart Lists, explained
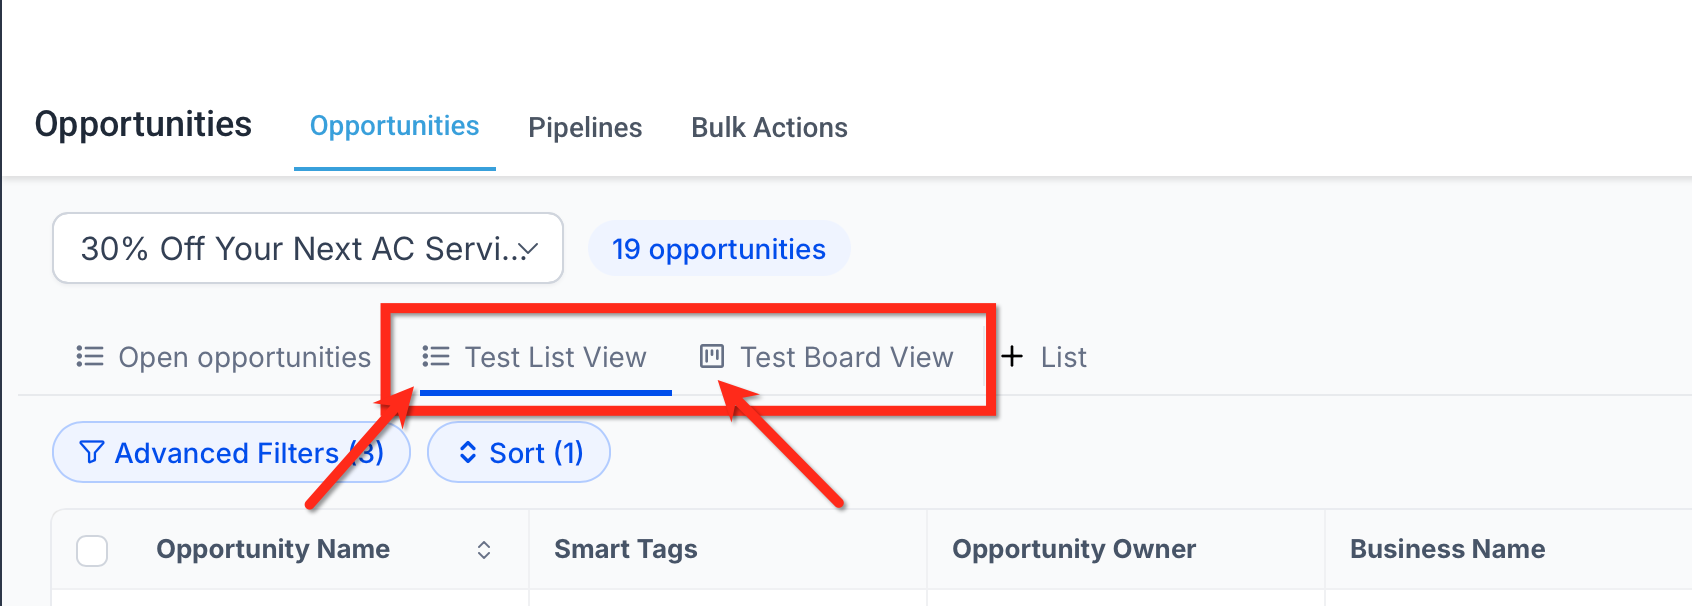
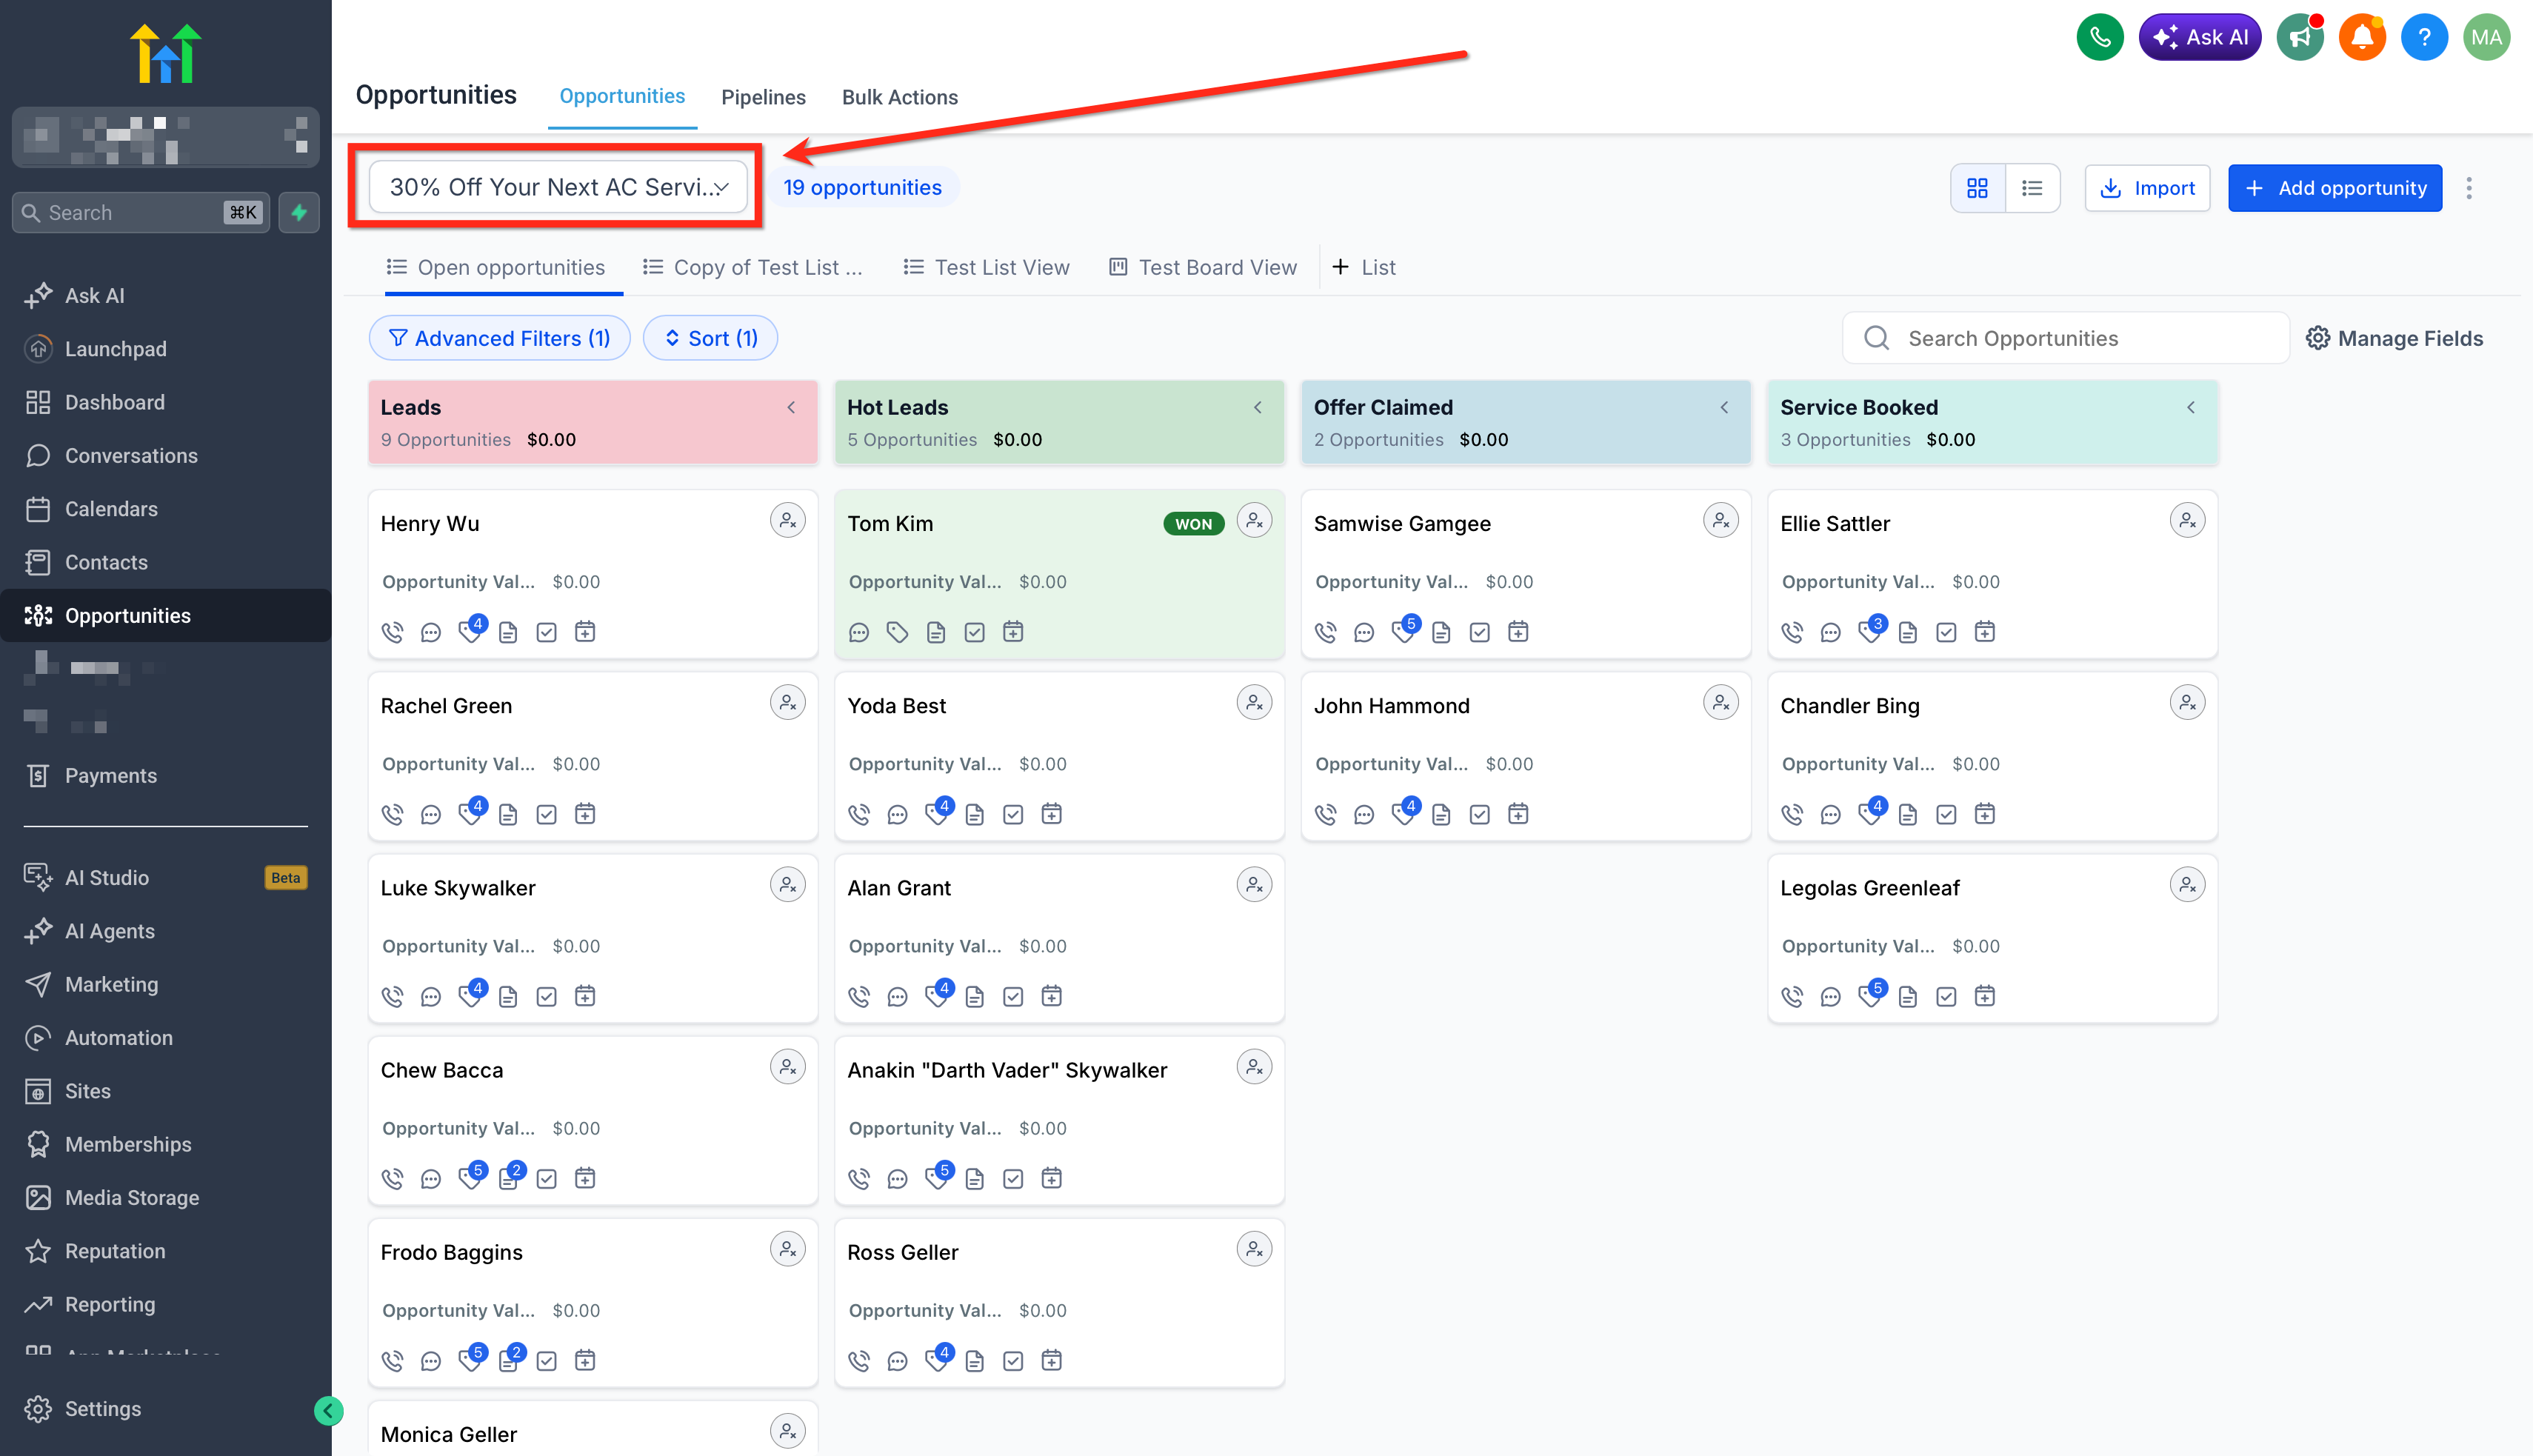
Smart Lists capture the current filter set, sort order and column visibility of an Opportunities view. The saved view can be a table style List or a Kanban style Board, and it lives alongside other Smart Lists in the Smart List panel. Users may choose to make a Smart List visible for all pipelines or restrict it to selected pipelines, and can designate it as the default view for those pipelines.
When a Smart List is opened, the platform right away applies the stored filters, sorting and field selections, so the data appears exactly as it was saved. Permissions can be assigned, allowing some users only to view the list while others can edit its configuration. The feature also supports exporting the filtered records to CSV and sharing a direct link with colleagues.
All Smart Lists are managed from a central Manage Smart Lists screen, where admins can see name, type, visibility, default status, creator and last update. From there they can edit, duplicate, delete or adjust sharing for any saved view.
03How businesses use Opportunity Smart Lists
- Real estate brokerage. The broker creates a Smart List that filters deals by property type and recent activity. The list is set as the default Board view for the sales pipeline, so agents always see current listings in the correct stages.
- Dental practice. The office manager sets up a List type Smart List that shows only opportunities that need billing attention. The list is shared with the billing team, who open it to process accounts without redefining filters each day.
- IT consulting firm. A project lead builds a Smart List that includes opportunities with a specific status and assigns it to particular pipelines. The list is exported to CSV for a quarterly forecast report.
04How to set up and use Opportunity Smart Lists in HighLevel
Create a new Opportunity Smart List
- Navigate to Opportunities and open the pipeline where the view will be saved.
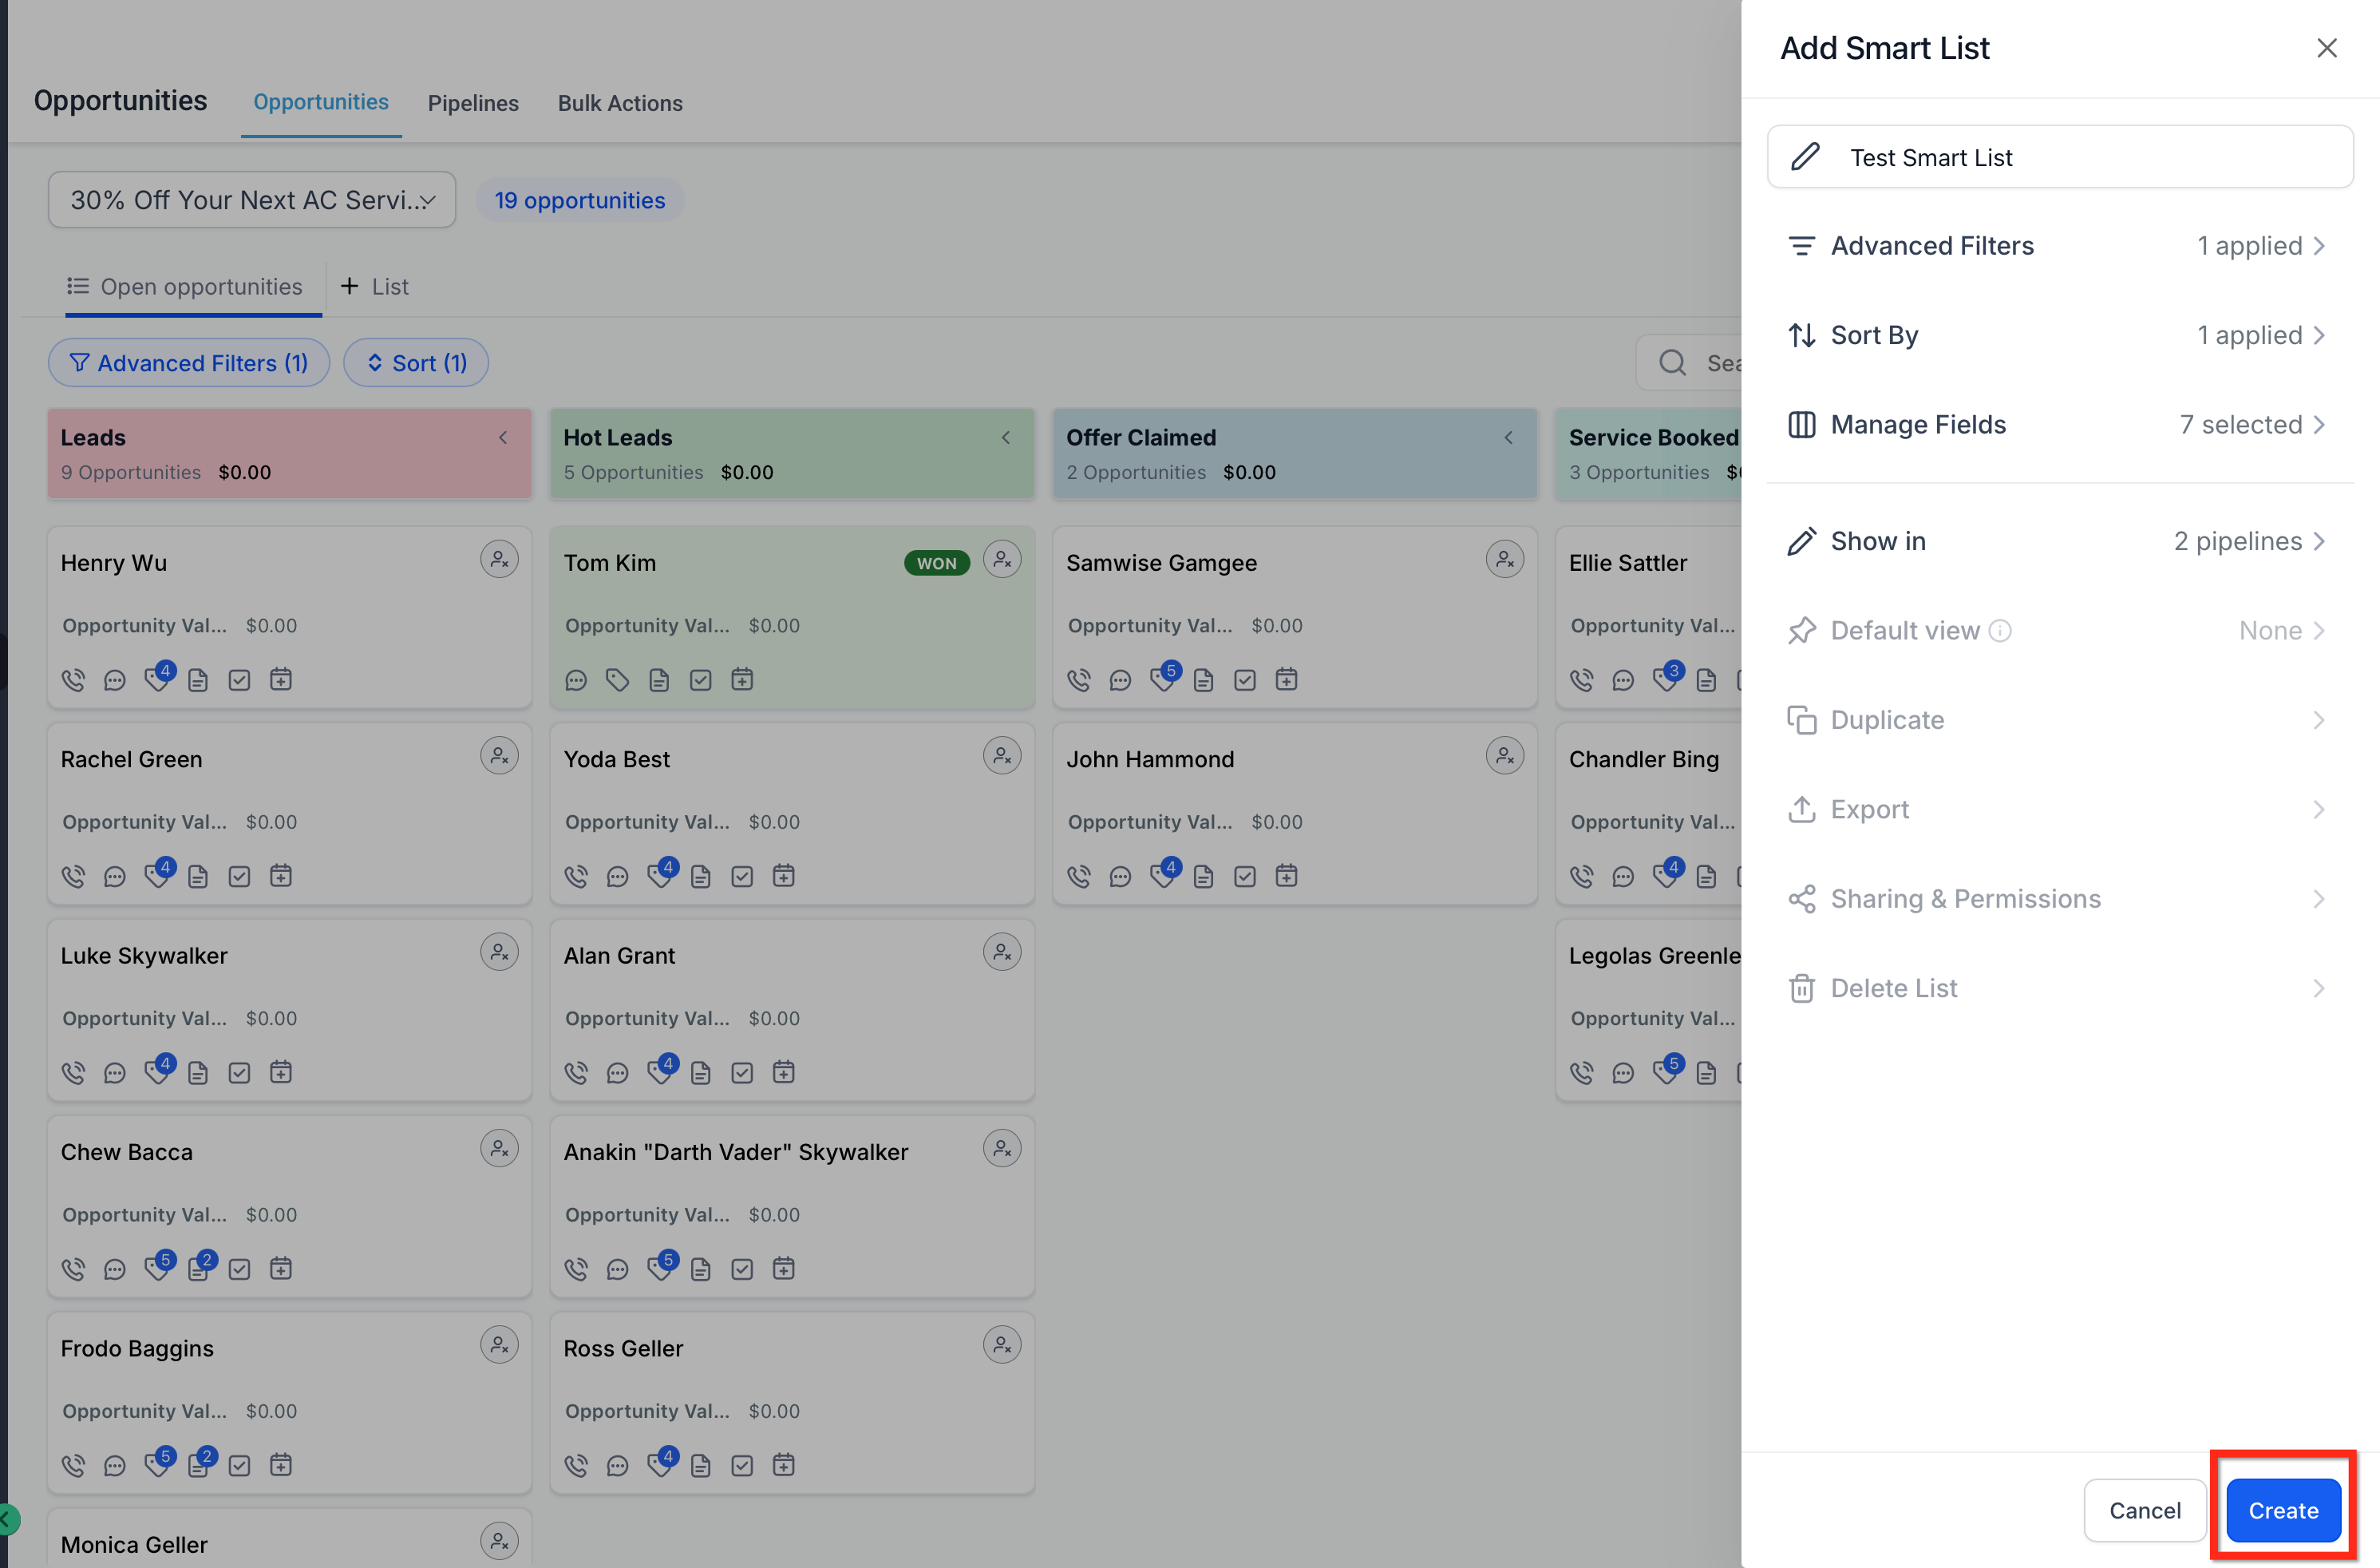
- Click the + List button and select either List view or Board view for the new Smart List.
- Apply desired filters using Advanced Filters to narrow the opportunities displayed.
- Choose a sort order to define how records appear when the Smart List opens.
- Use Manage Fields to pick which columns or board elements are visible in the saved view.
- Select Show In and decide whether the Smart List appears in all pipelines or only selected ones.
- Enter a descriptive name for the Smart List and click Save.
- Open the Customize list menu to access additional options for the Smart List.
- If the list should be the default view, select Default view and set it for all pipelines or the chosen pipelines.
Edit an existing Opportunity Smart List
- Open the Smart List you want to change.
- Click the Customize list option.
- Modify filters, sort order, visible fields or any other settings.
- When the Unsaved Changes prompt appears, decide whether to save the changes or cancel.
Duplicate a Smart List
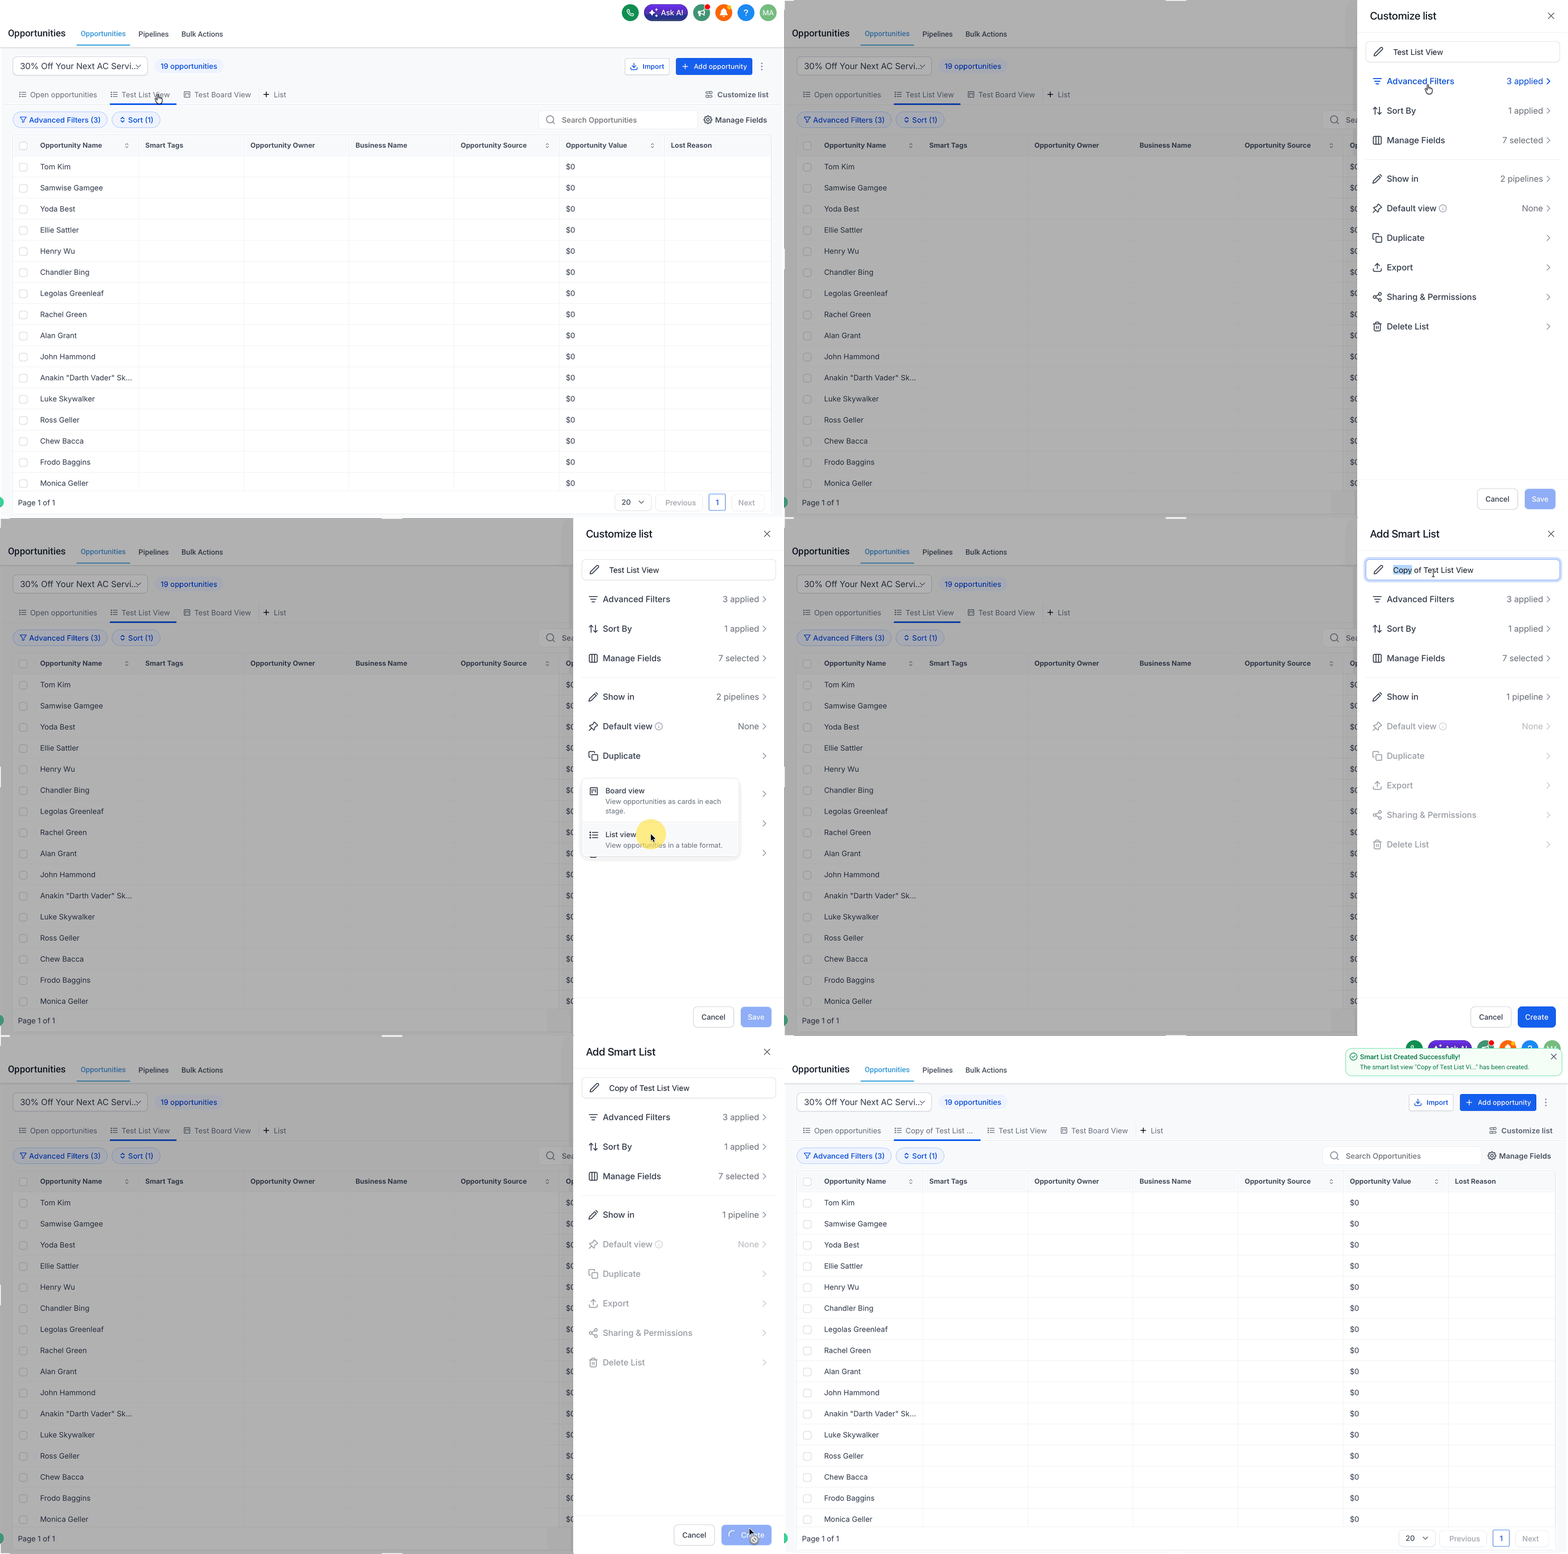
- Open the Smart List you wish to copy.
- Choose Customize list.
- Select the Duplicate action.
- Provide a new name for the duplicated Smart List.
- Click Save to create the copy.
Export the results of a Smart List
- Open the Smart List whose records you need.
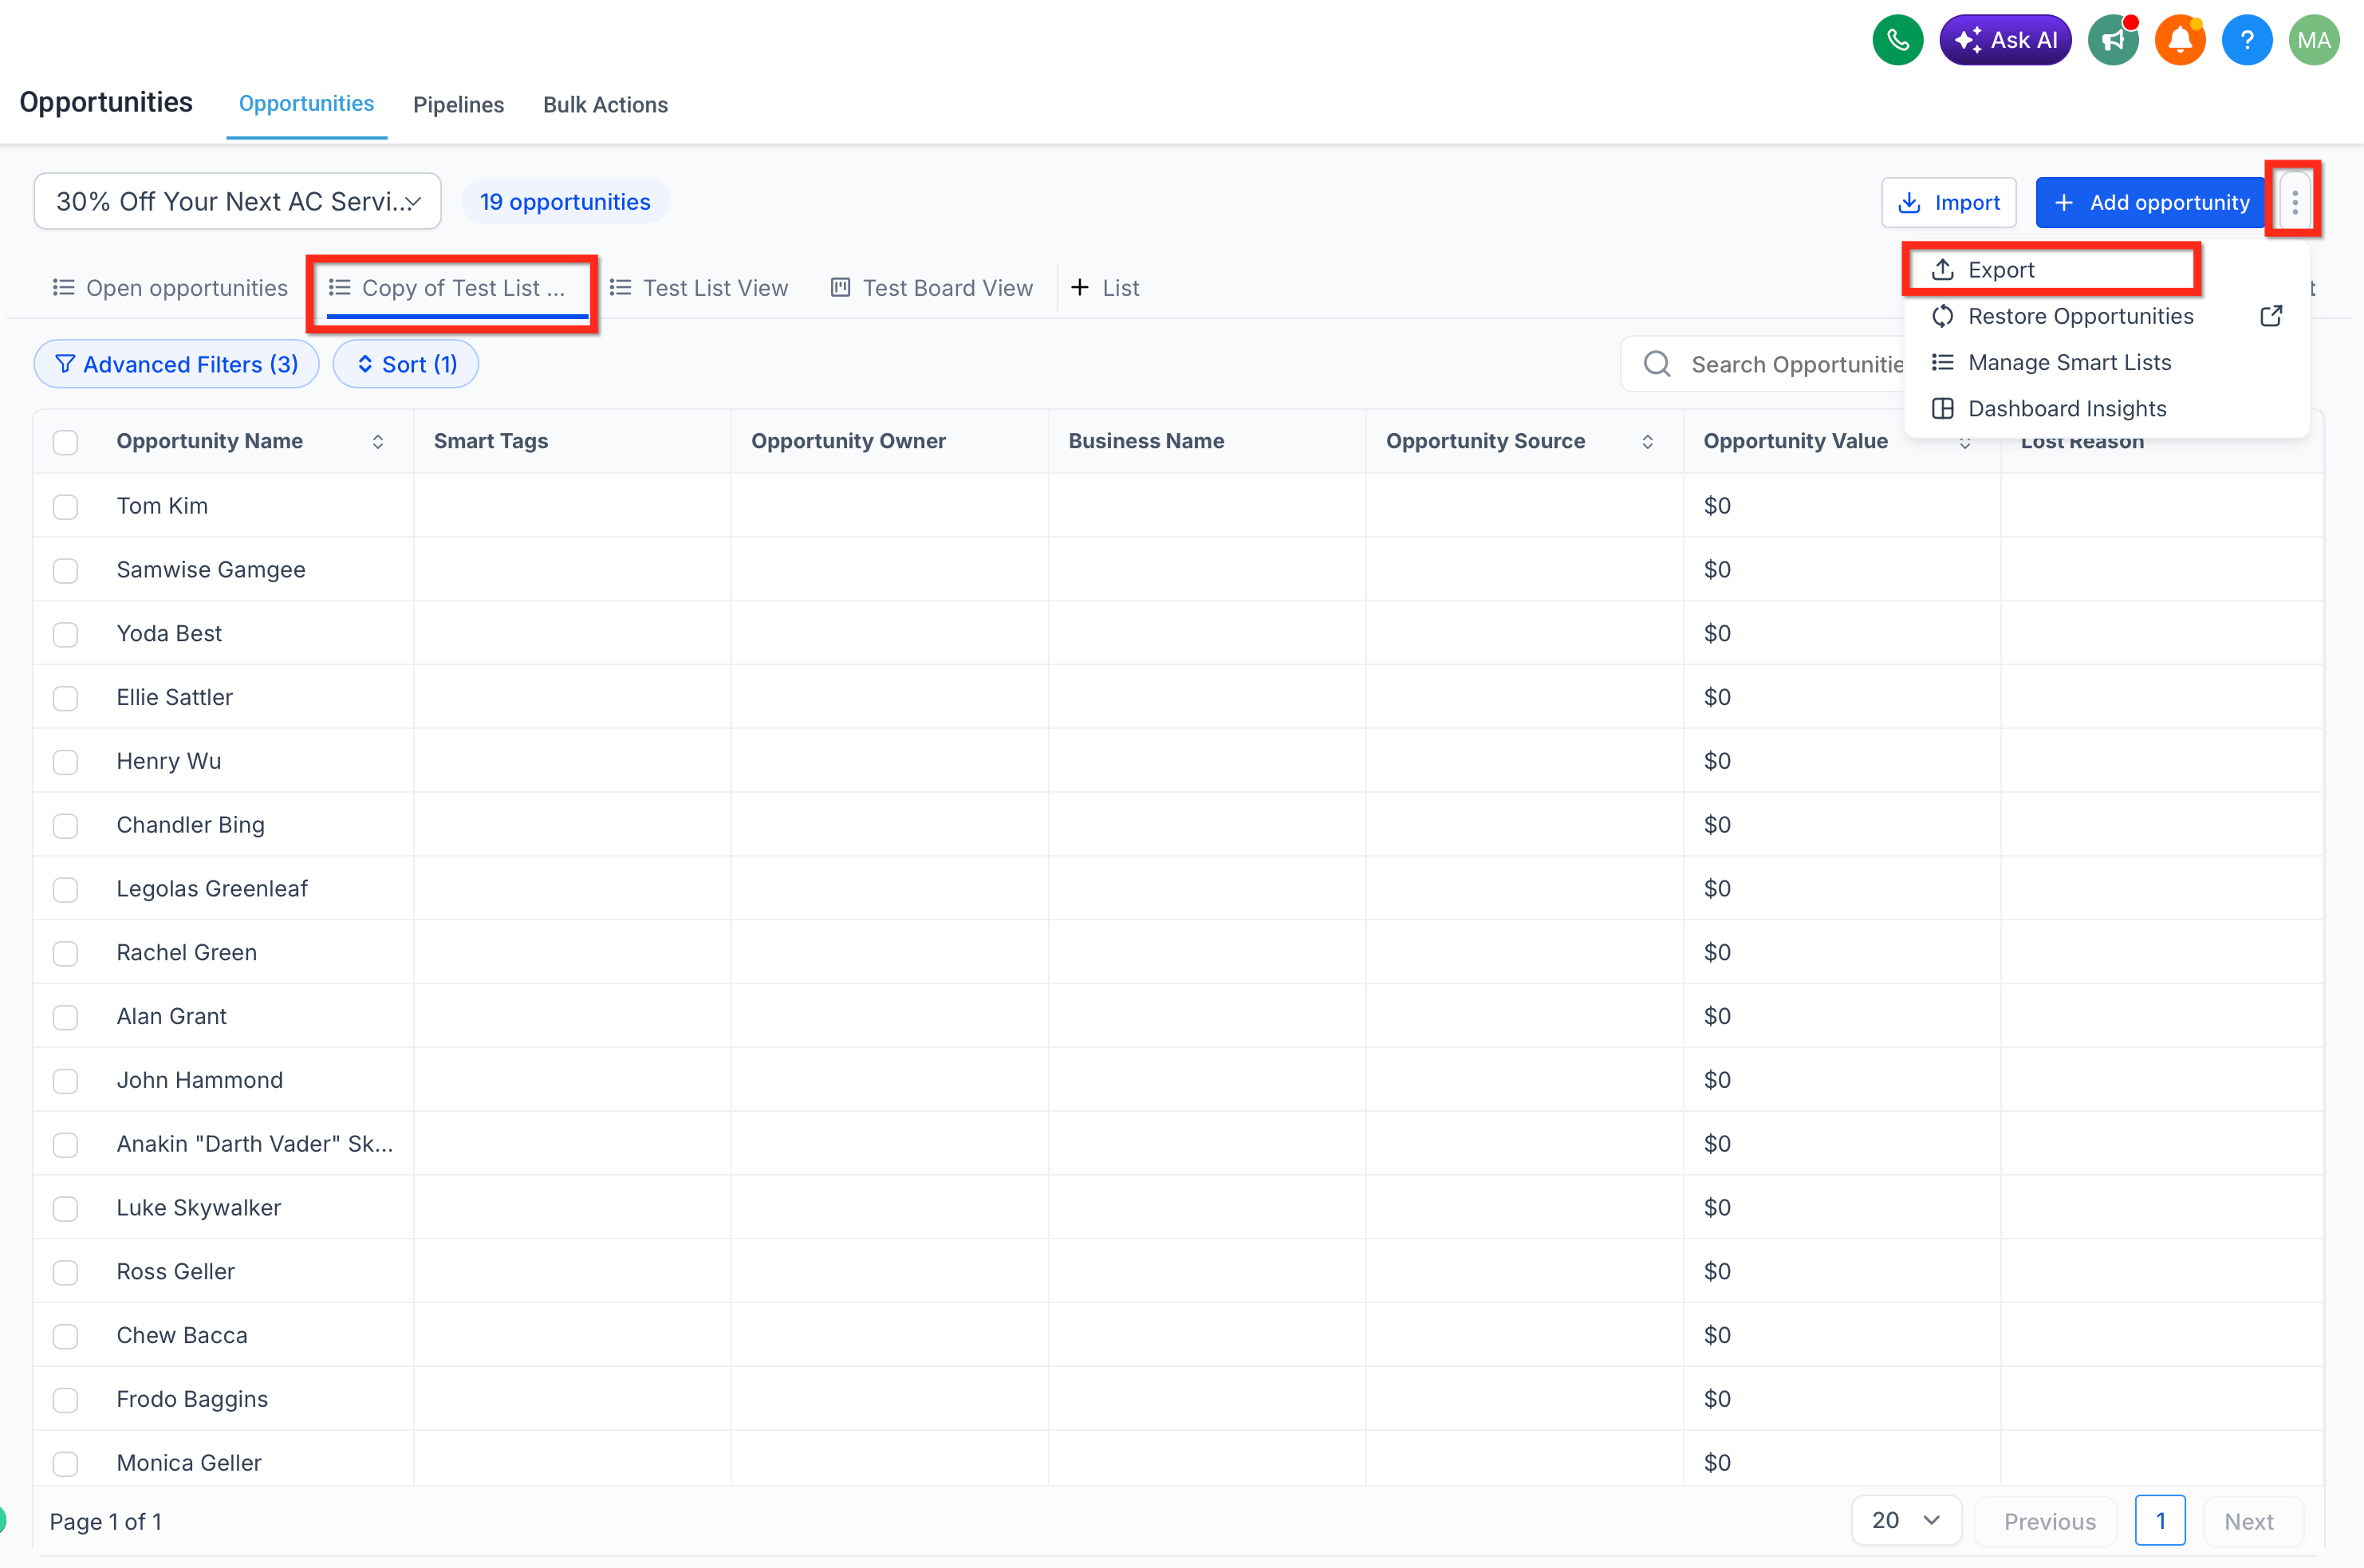
- Click the Menu icon (three dots) located at the top right near the + Add Opportunity button.
- Choose Export to download the current list of opportunities as a CSV file.
Share a Smart List or copy its direct link
- Open the Smart List you want to share.
- Select Customize list.
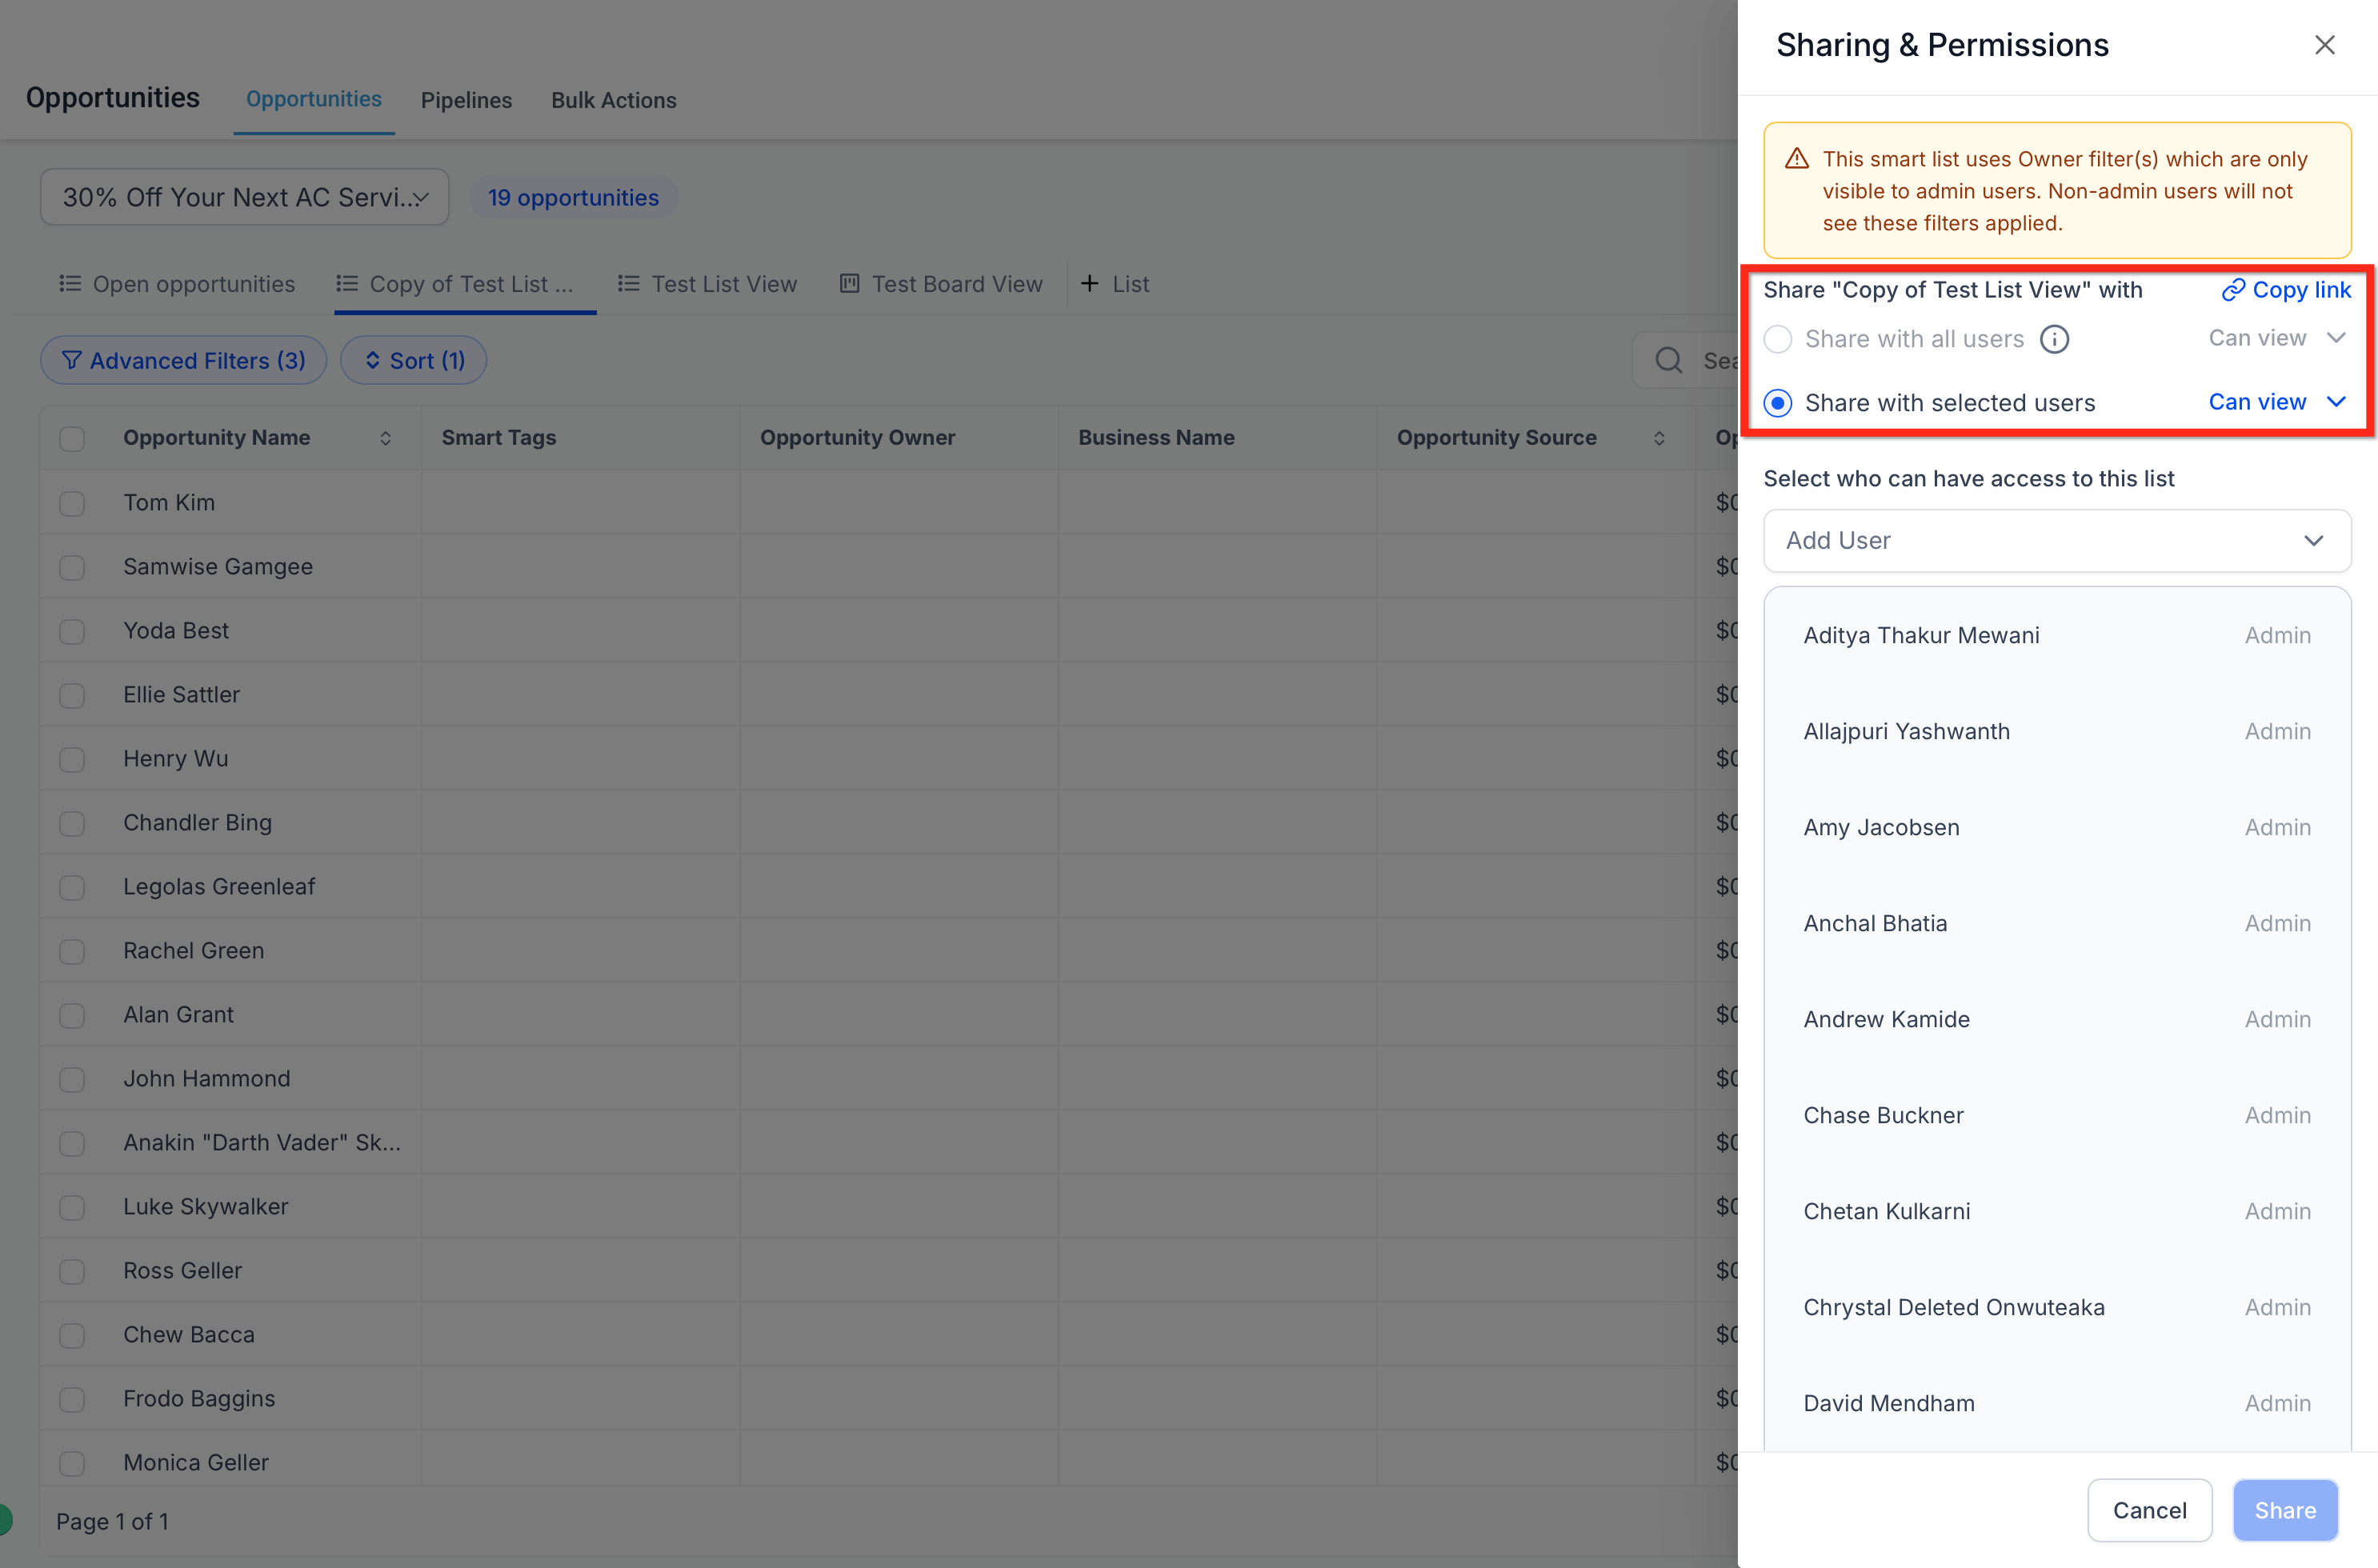
- Open the Sharing & Permissions menu.
- Pick a sharing method: copy link, share with all users, or share with selected users.
- If sharing with specific users, assign each user either Can view or Can edit permission.
- Save the sharing configuration.
Access the central Manage Smart Lists page
- Go to the Opportunities section.
- Click the Menu icon (three dots) at the top right next to the + Add Opportunity button.
- Select Manage Smart Lists to view and organize all saved Smart Lists.
05What it looks like in HighLevel
06Settings that matter
- Show In. Determines whether the Smart List is visible in every pipeline or limited to selected pipelines.
- Default view. Sets the Smart List as the initial view when users open the chosen pipeline(s).
- Sharing & Permissions. Controls which users can view or edit the Smart List and whether it is shared with the entire subaccount or specific individuals.
07Things to know before you rely on it
- Smart Lists can be created for both List view and Board view, but each saved view belongs to only one type.
- Editing permissions are limited by the broader subaccount role and data settings of each user.
- Deleting a Smart List removes only the saved view; the underlying opportunity records remain intact.
08How it connects to the rest of HighLevel
- Learn how to filter opportunities for Smart List creation Opportunity filters
- Add visual cues to pipelines with Smart tags Smart tags
- Review pricing and plan options for accessing Smart Lists Pricing
Michael's take

The first setting to configure is the default view. Choose the most frequently used Smart List and set it as the default for the relevant pipelines so users land on that view first.
When sharing, assign the appropriate Can view or Can edit permissions to control who can modify the Smart List.