
01Who this is for
- Users who need to stay informed about conversations, tasks and appointments within a subaccount.
- Admins who assign users to subaccounts and oversee notification preference changes.
02Notification settings, explained
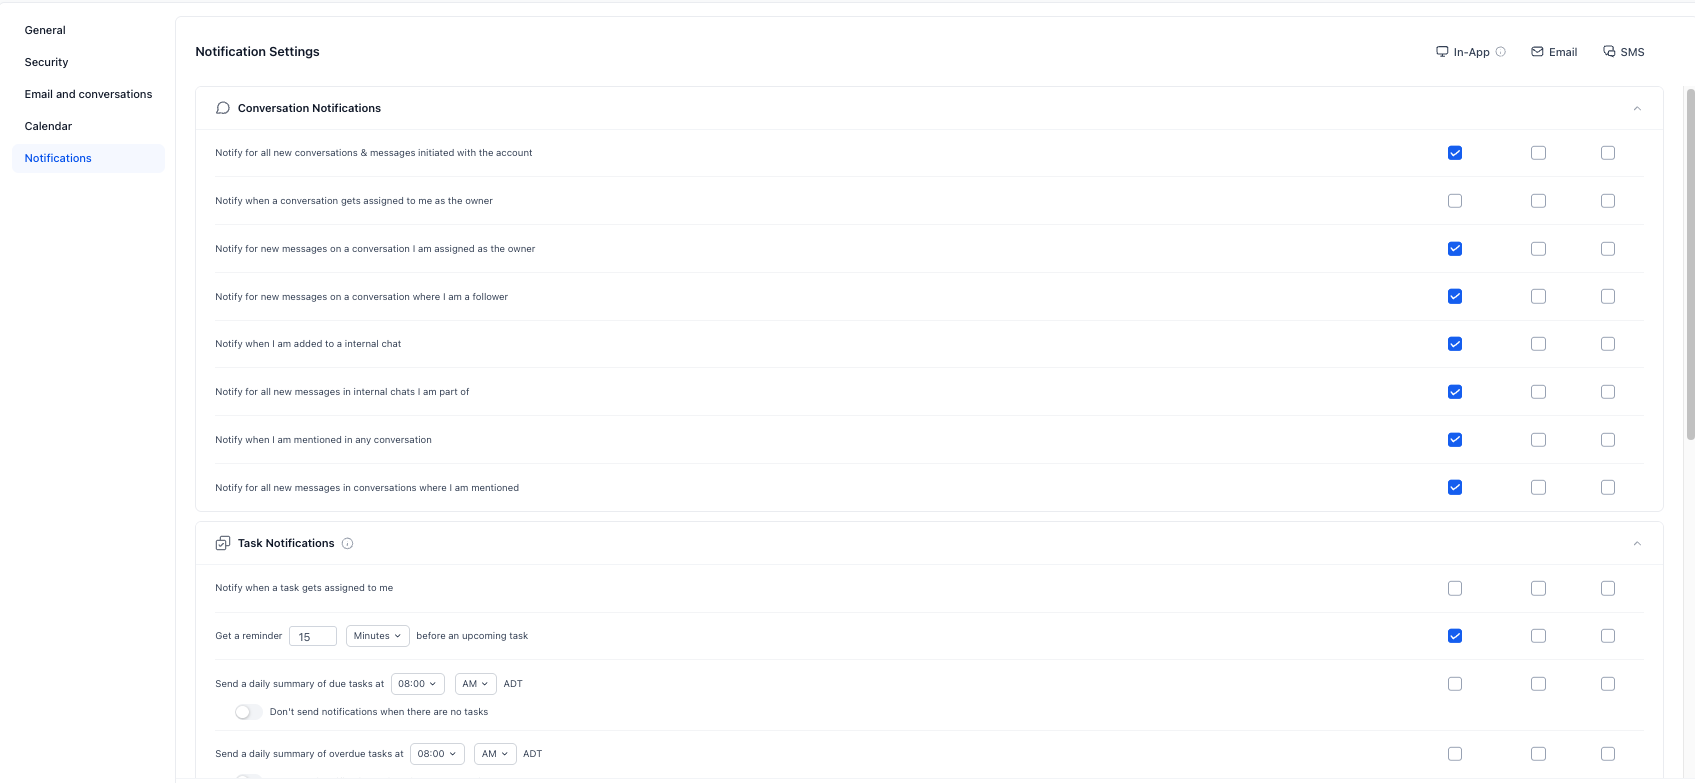
Notification Settings define the events that trigger alerts and the delivery channels for those alerts. Supported events include conversations, tasks, daily task summaries, appointments, reviews and other activity the platform tracks. Channels can be In App/Web, Desktop, Email, Mobile or SMS depending on the event type.
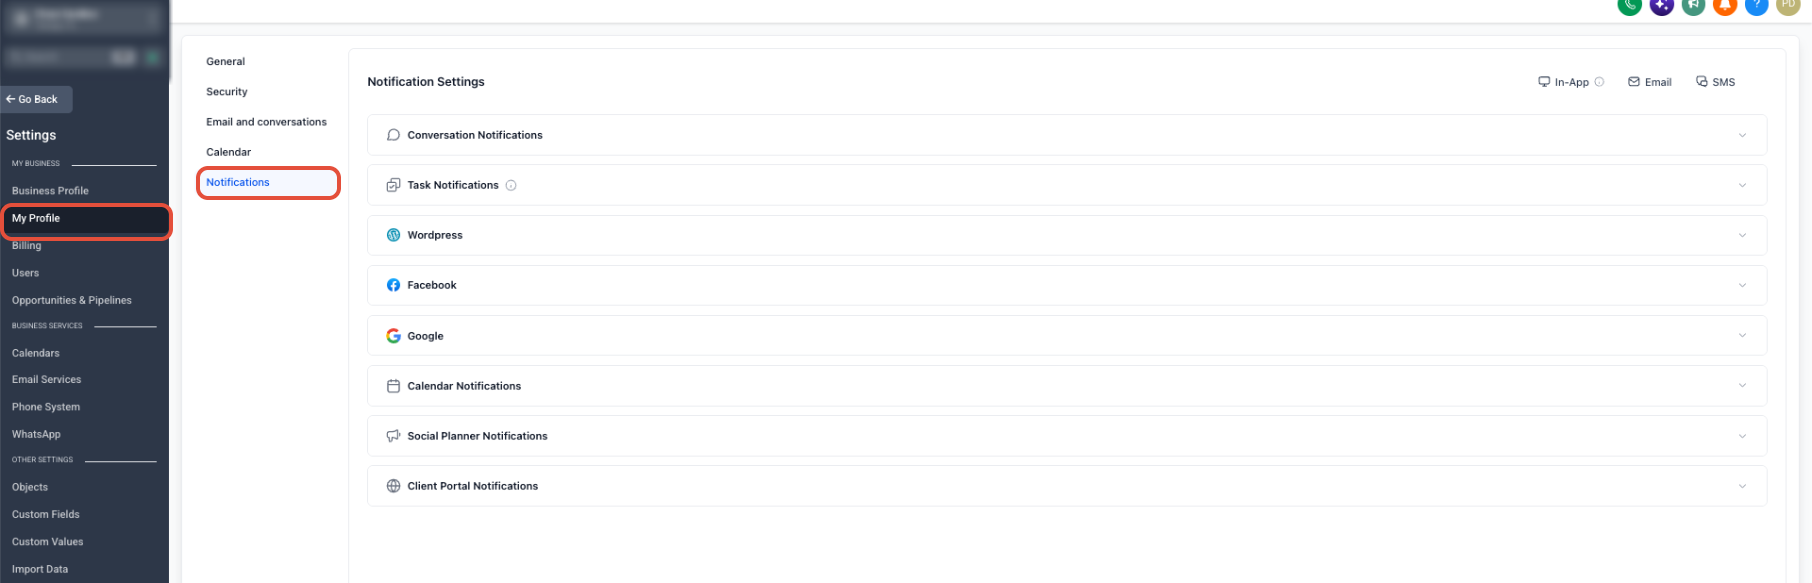
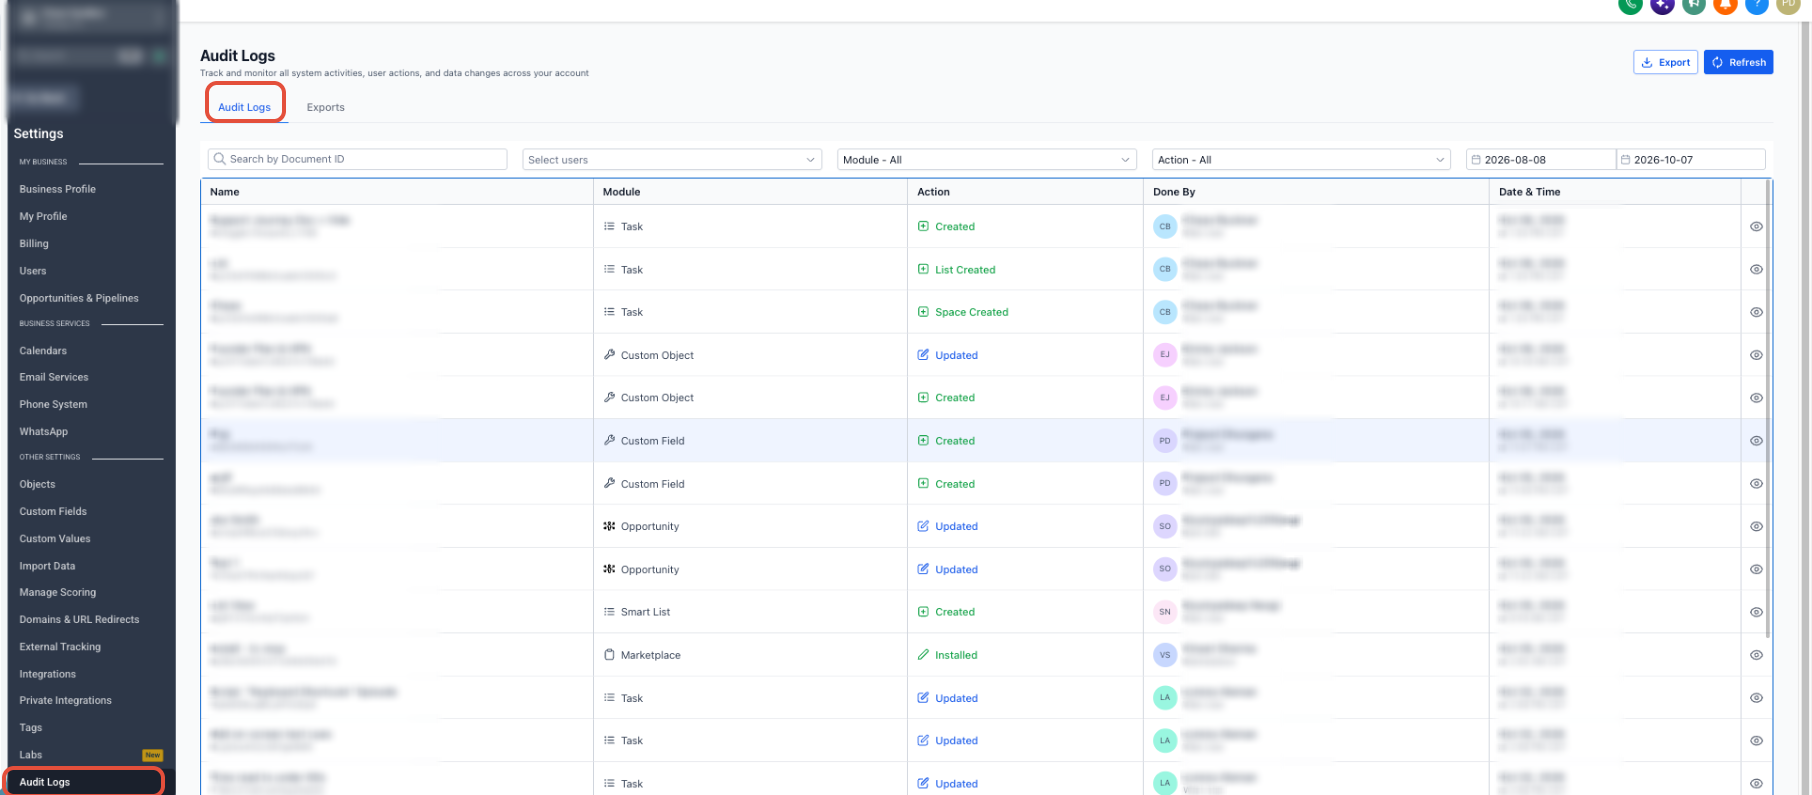
The settings live inside each user’s profile at Subaccount > Settings > My Profile > Notifications. Administrators can view changes in the subaccount audit log by filtering for Notification Preferences. In App alerts can be clicked to open the related record, such as a conversation, task or calendar entry.
03How businesses use notification settings
- Task management. Team members enable Desktop and Email notifications for task reminders and daily task summaries, ensuring they see upcoming and overdue items on time.
- Appointment scheduling. Staff configure In App and Mobile alerts for appointment reminders, allowing them to receive timely prompts before meetings.
- Review monitoring. Agents turn on Email notifications for new reviews so each alert links directly to the review record for quick response.
04The numbers and rules that matter
- Channels can include In App/Web, Desktop, Email, Mobile and SMS.
05Before you start
- The user must already have access to the target Subaccount.
- If Only Assigned Data is enabled, the user will not receive notifications for unassigned leads.
06How to set up and use notification settings in HighLevel
Manage your notification settings
- Open the Subaccount and go to Settings > My Profile > Notifications.
- Select Notifications from the left hand menu.
- For each notification category, choose the channels you want to receive.
- Click the Save button to apply the changes.
Add users to a Subaccount
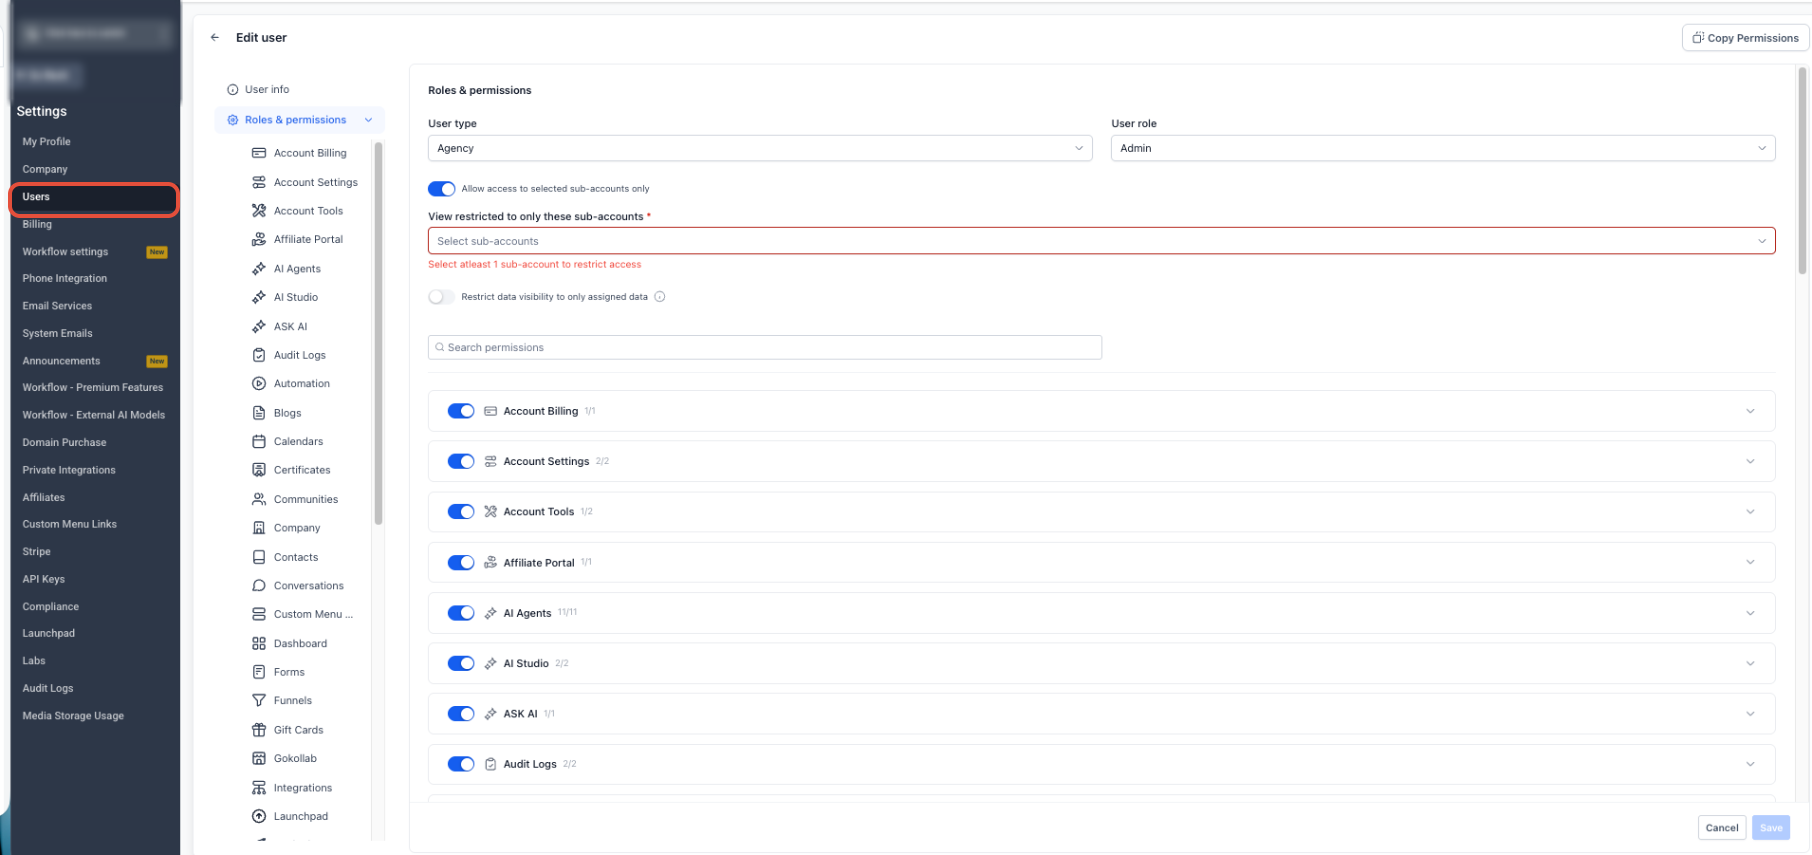
- From Agency View, navigate to Settings > Users.
- Click the user you wish to modify.
- Open the Roles & Permissions tab.
- Assign the desired Subaccount or Subaccounts to the user.
- If needed, enable the restriction to only the selected Subaccounts.
- Save the user's access settings.
07What it looks like in HighLevel
08Settings that matter
- Only Assigned Data. When enabled, the user receives notifications only for leads that are assigned to them.
- Notification Preferences. Controls which events generate alerts and which delivery channels are used for each event.
09Things to know before you rely on it
- Follower message notifications are enabled by default only for In App alerts; other channels must be added manually when available.
- Supported notification channels vary by event type; not every channel is offered for every notification.
10If something goes wrong
- Receiving duplicate notifications for the same message. Review your notification preferences and turn off overlapping alerts that may trigger multiple notifications.
11How it connects to the rest of HighLevel
- All Notifications features overview Notifications overview
- HighLevel pricing and plans Pricing
- Start a 30 day HighLevel trial Free trial
Michael's take

Skipping notification settings can make it harder to manage alerts.
When you set up the right channels, you get the right information at the right time, which can help keep your day flowing and your clients happy.